
Ask AI
— answers from the official manualAnswers from the official manual.
Common questions
Common Questions
9 totalHow do I avoid covering the air intake or outlet when using my HALO AIR?
To ensure safety and proper functioning, never cover the air inlet or the air outlet openings when the HALO AIR is in operation. Covering these can lead to hazards such as fires (Page 2).
What should I do if dark smoke comes out of my HALO AIR?
If you see dark smoke coming from the appliance, immediately unplug it and wait for the smoke emission to stop before removing any pan or ingredients. This is a critical safety precaution (Page 3).
How do I safely handle my HALO AIR after cooking?
After using, carefully take out the fry basket and lay it flat on a table to avoid being burned by steam or hot food. Do not hold the pan vertically as this can cause spills (Page 14).
What kind of cleaning agents should I use for my HALO AIR?
Only clean the exterior with a damp cloth and mild detergent. Do not immerse or spray water directly onto the appliance, as it can cause short circuits or damage (Page 18).
Can I use my HALO AIR outdoors?
No, do not use your Brabantia Halo Air outside. It is designed for indoor household usage only and should never be placed near flammable materials or in adverse weather conditions (Page 2).
What steps should I follow before first using my HALO AIR?
Before the first use, remove all packaging material, clean the fry basket and pan with warm soapy water then rinse thoroughly. Clean both the inside and outside of the appliance and place it on a stable horizontal surface (Page 6).
Full Manual
77 pages

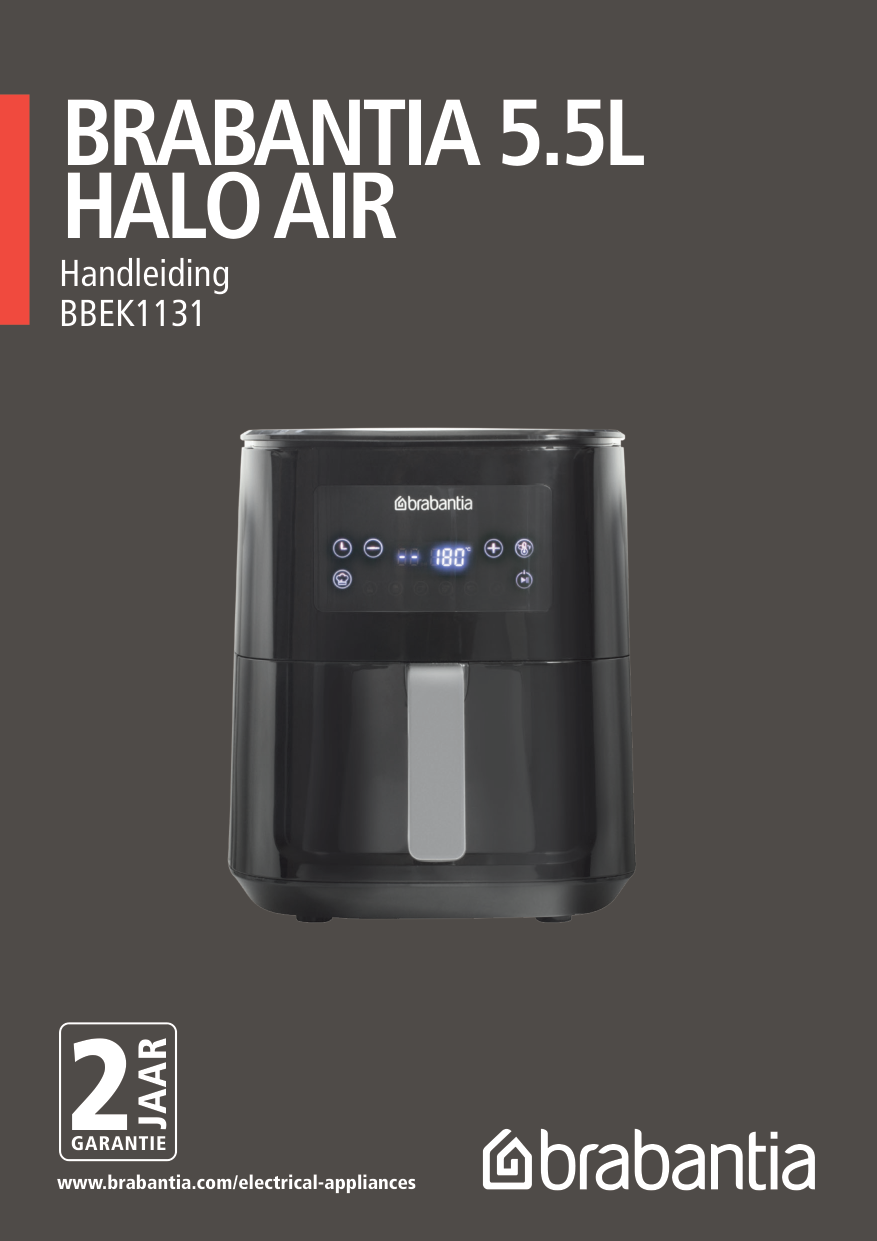
BRABANTIA 5.5L HALO AIR Instruction Manual p. 02 Handleiding p. 21 Manuel d’utilisation p. 40 Bedienungsanleitung p. 59 BBEK1131

2
www.brabantia.com/electrical-
www.brabantia.com/electrical-appliances

#### THANK YOU FOR PURCHASING OUR 5.5L HALO AIR
We hope it will delight you and that it will get a special place in your home. Enjoy!
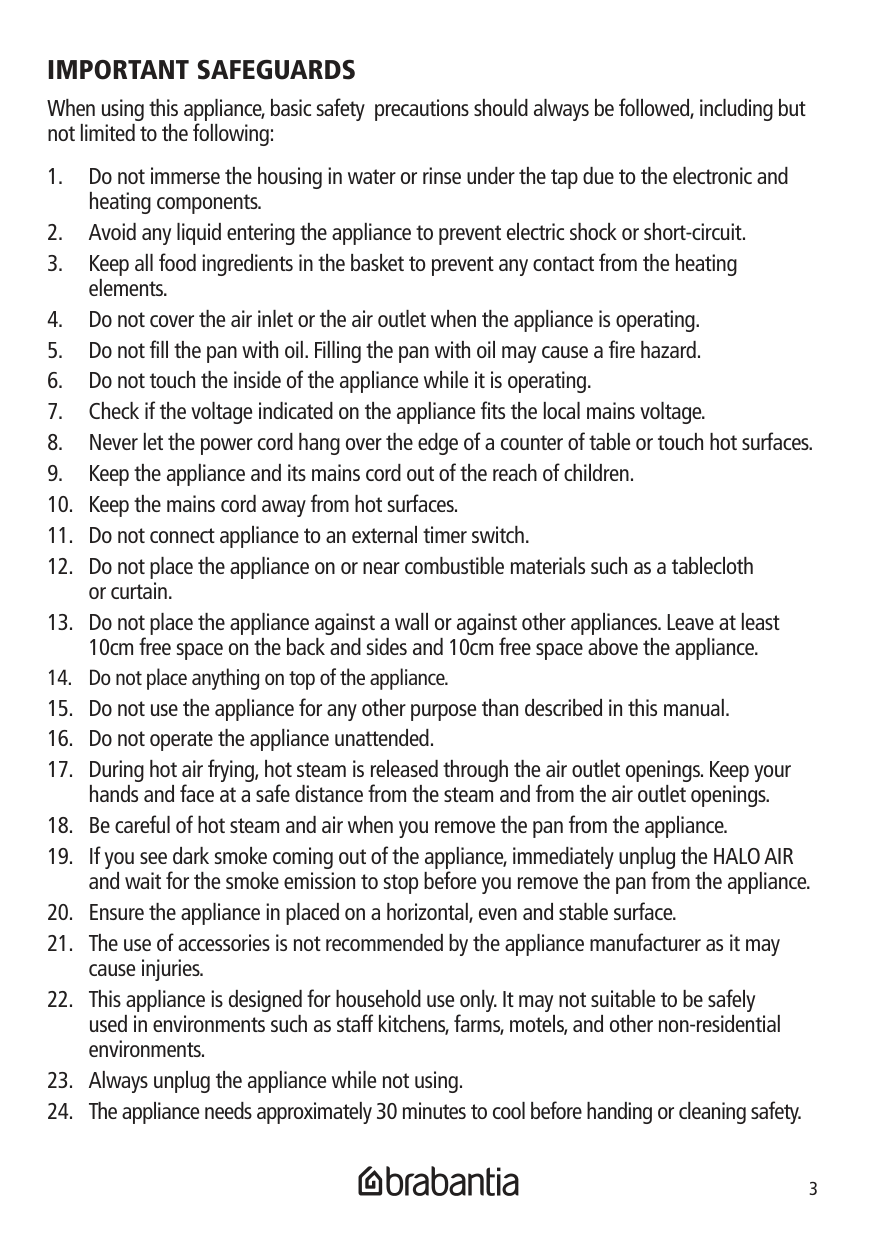
####### IMPORTANT SAFEGUARDS
When using this appliance, basic safety precautions should always be followed, including but not limited to the following:
CAUTION: Do not leave HALO AIR unattended when in operation. To reduce the risk of fire, keep oven interior completely clean and free of food residue, oil, grease and any other combustible materials.
CAUTION: A fire may occur if the HALO AIR is covered or touching flammable materials including curtains, draperies, walls and the like when in operation or after, when still hot. Do not place any of the following materials in the HALO AIR, on top of the HALO AIR, or in contact with the HALO AIR sides or bottom surfaces: paper, cardboard, plastic or the like.
####### SAVE THESE INSTRUCTIONS
THIS APPLIANCE IS INTENDED TO BE USED IN HOUSEHOLD AND SIMILAR APPLICATIONS SUCH AS: STAFF KITCHEN AREAS IN SHOPS, OFFICES AND OTHER WORKING ENVIRONMENTS.
FARMHOUSES. BY CLIENTS IN HOTELS, MOTELS, AND OTHER RESIDENTIAL TYPE ENVIRONMENTS; BED & BREAKFAST TYPE ENVIRONMENTS
######### FOR HOUSEHOLD USE ONLY NOT INTENDED FOR COMMERCIAL USE
####### KNOW YOUR HALO AIR
Top cover
Control panel House
Fryer basket handle
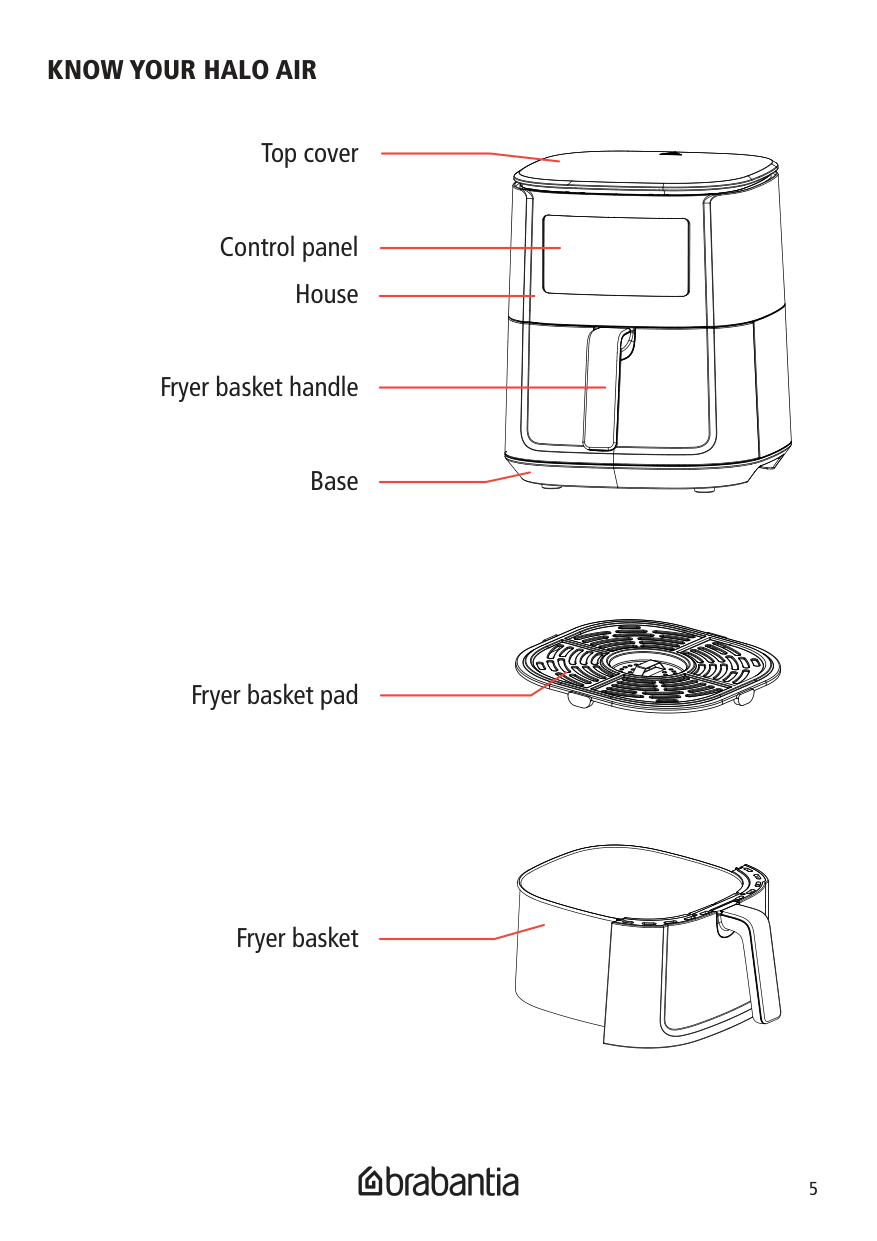
Base
| | | |---|---| | | |
Fryer basket pad
Fryer basket
####### BEFORE FIRST USE
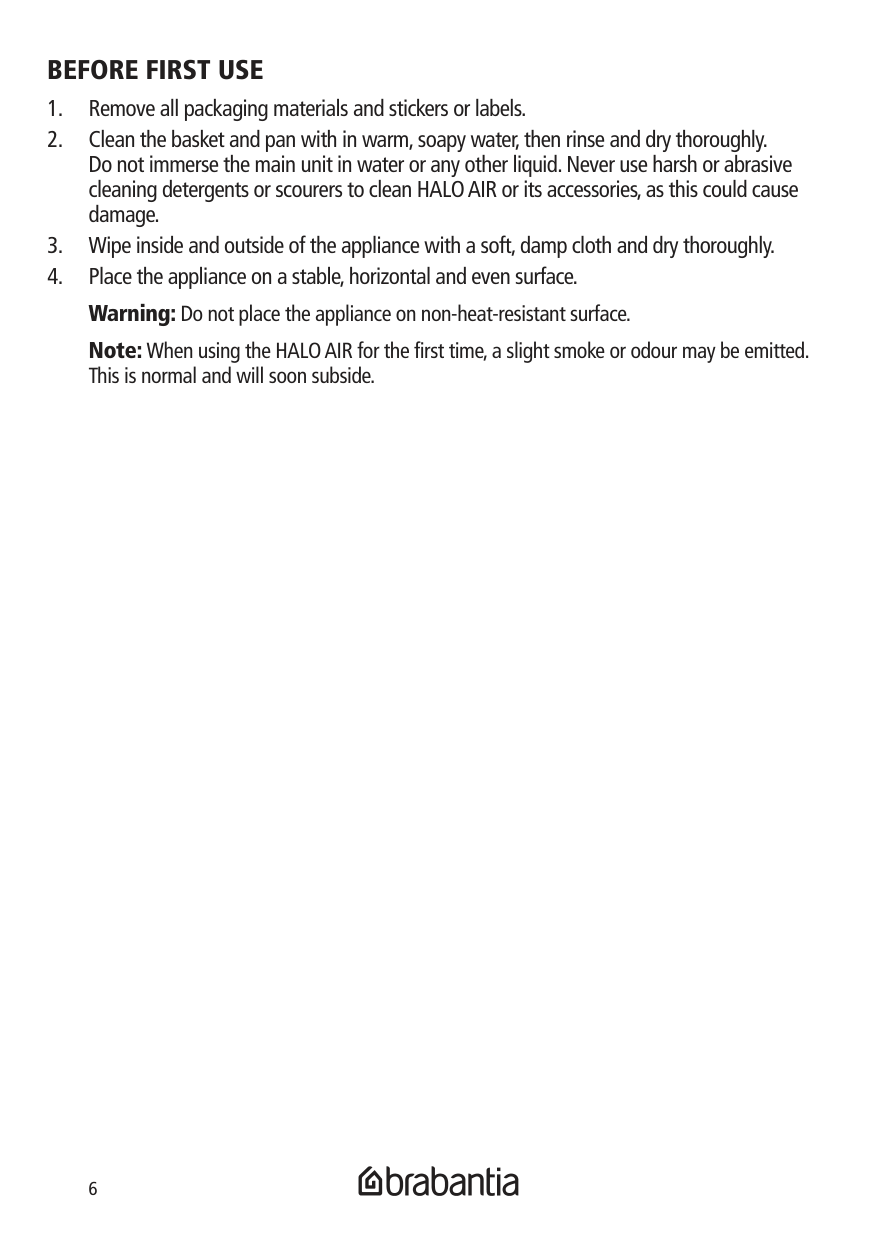
Note: When using the HALO AIR for the first time, a slight smoke or odour may be emitted. This is normal and will soon subside.
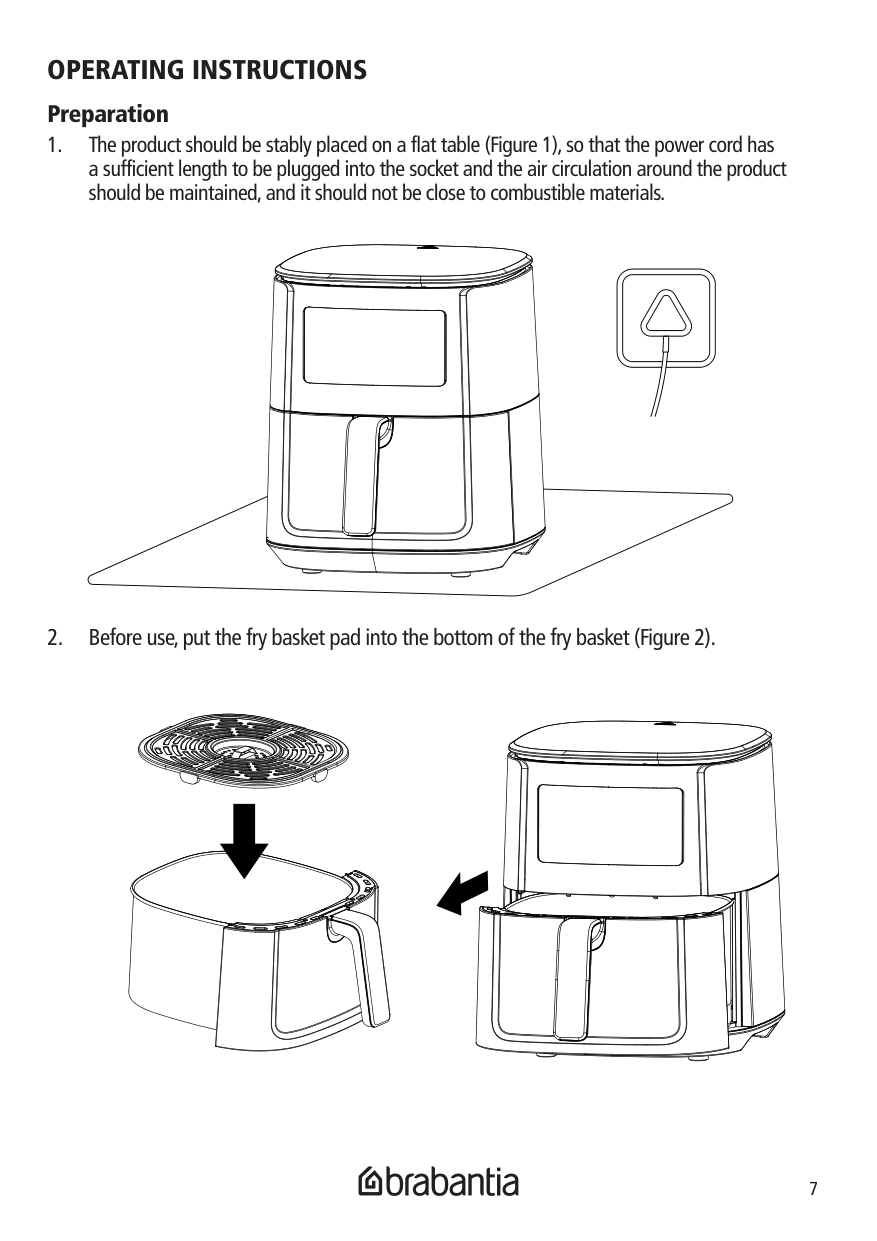
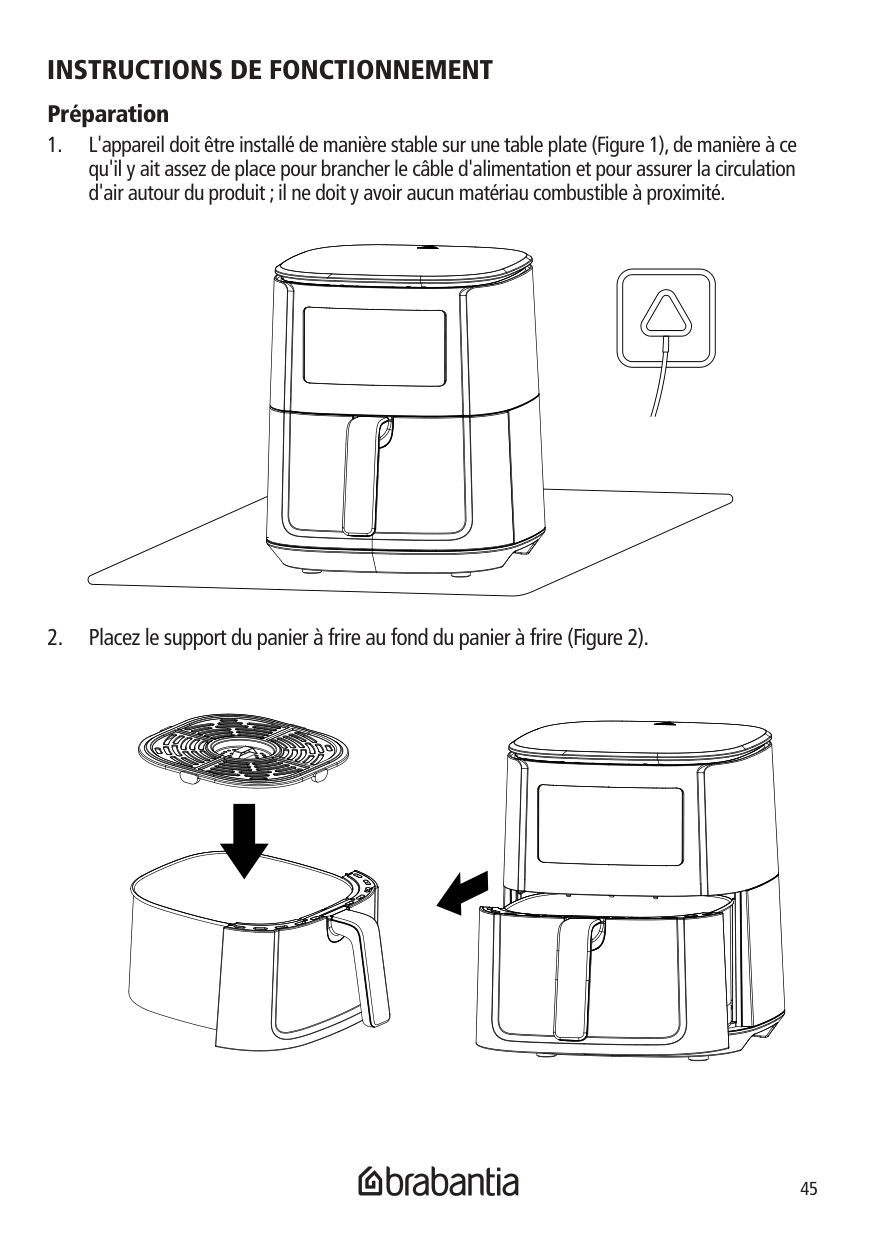
####### OPERATING INSTRUCTIONS Preparation
####### INSTRUCTIONS FOR CONTROL PANEL

Button-Switch After the product is plugged in, the machine emits a beep, the LED light on the product panel is always on for one second, and then goes out, the light is half on, and the product enters the shutdown state. Press the button , the function key LED light is always on, the light flashes, the digital screen displays “- - / 180°C”, the machine enters the standby state. When the product is working, press the button , the machine starts to work, and the light is always on. Press the button again, the machine stops working and the light flashes. When the product is working or in standby mode, long press the button for 1.5 seconds, the machine stops working, and the light is half bright


Button-Menu In the product standby state, press the function selection key , it enters the defrost mode and starts working. Or each time the function selection key is pressed, the working mode is switched cyclically, the corresponding mode light flashes, the 6 menu mode already contains the default temperature and time, after selecting the function mode, press the key again, the original flashing state becomes constant light, the machine starts to work.
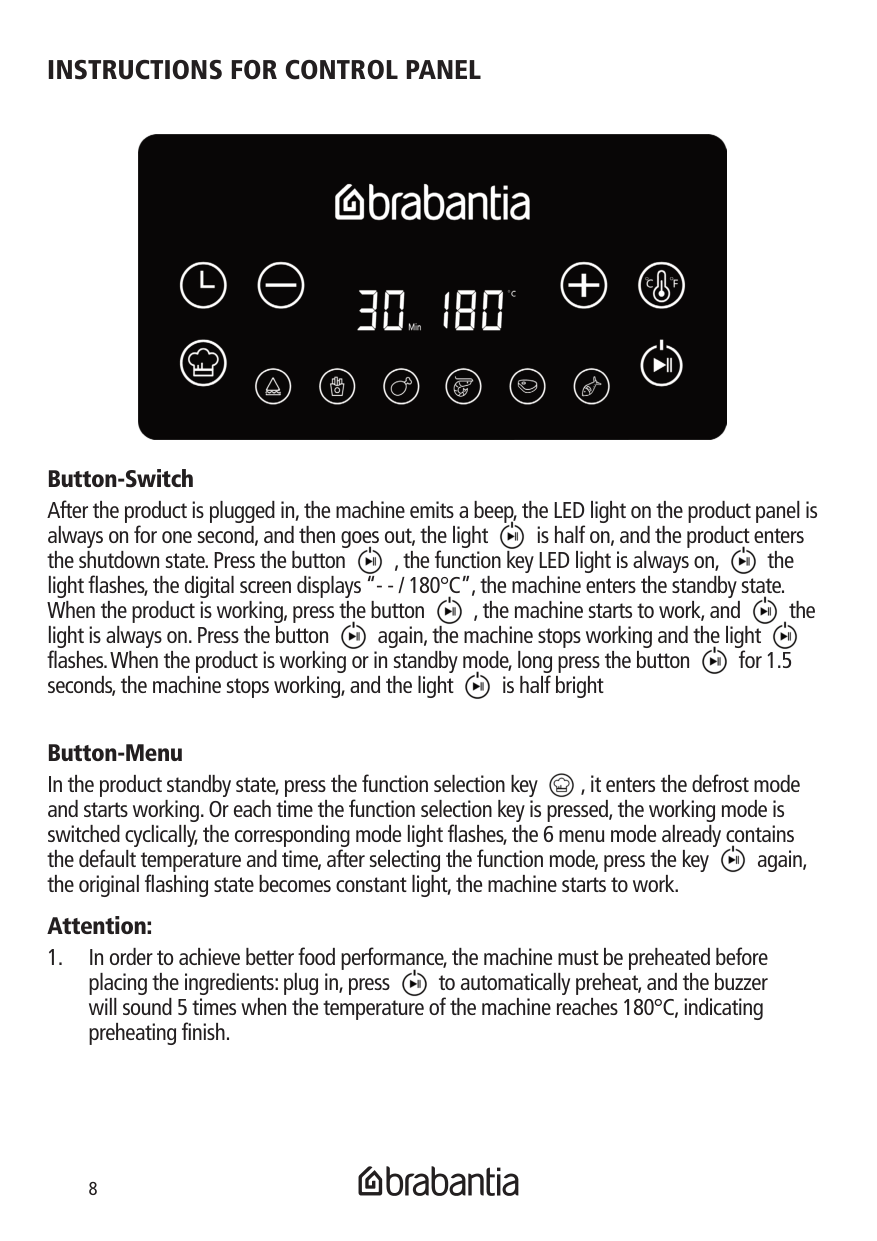


######### Attention:


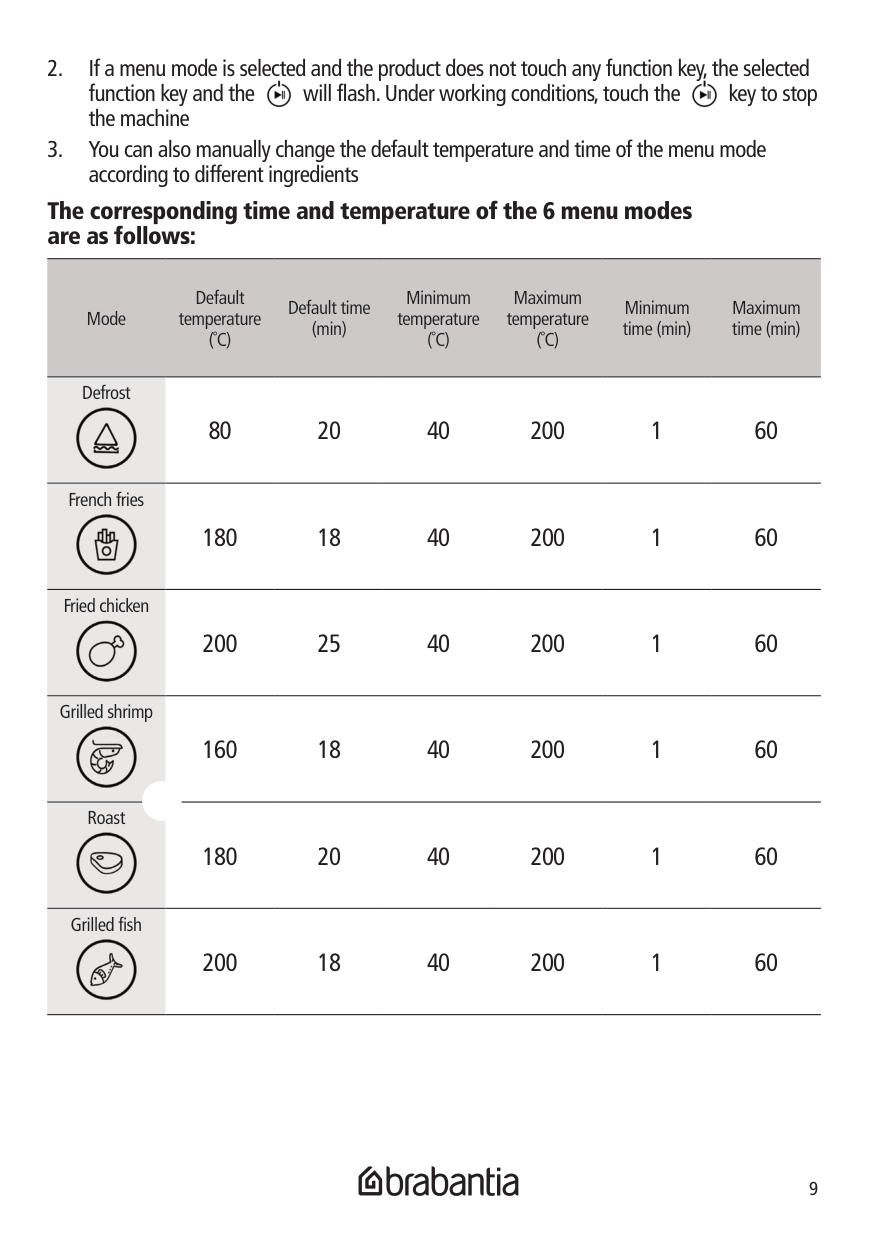
######### The corresponding time and temperature of the 6 menu modes are as follows:
Mode
Default temperature (˚C)
Default time (min)
Minimum temperature (˚C)
Maximum temperature (˚C)
Minimum time (min)
Maximum time (min)
Defrost

French fries

Fried chicken

Grilled shrimp

Roast

Grilled fish

80 20 40 200 1 60
180 18 40 200 1 60
200 25 40 200 1 60
160 18 40 200 1 60
180 20 40 200 1 60
200 18 40 200 1 60
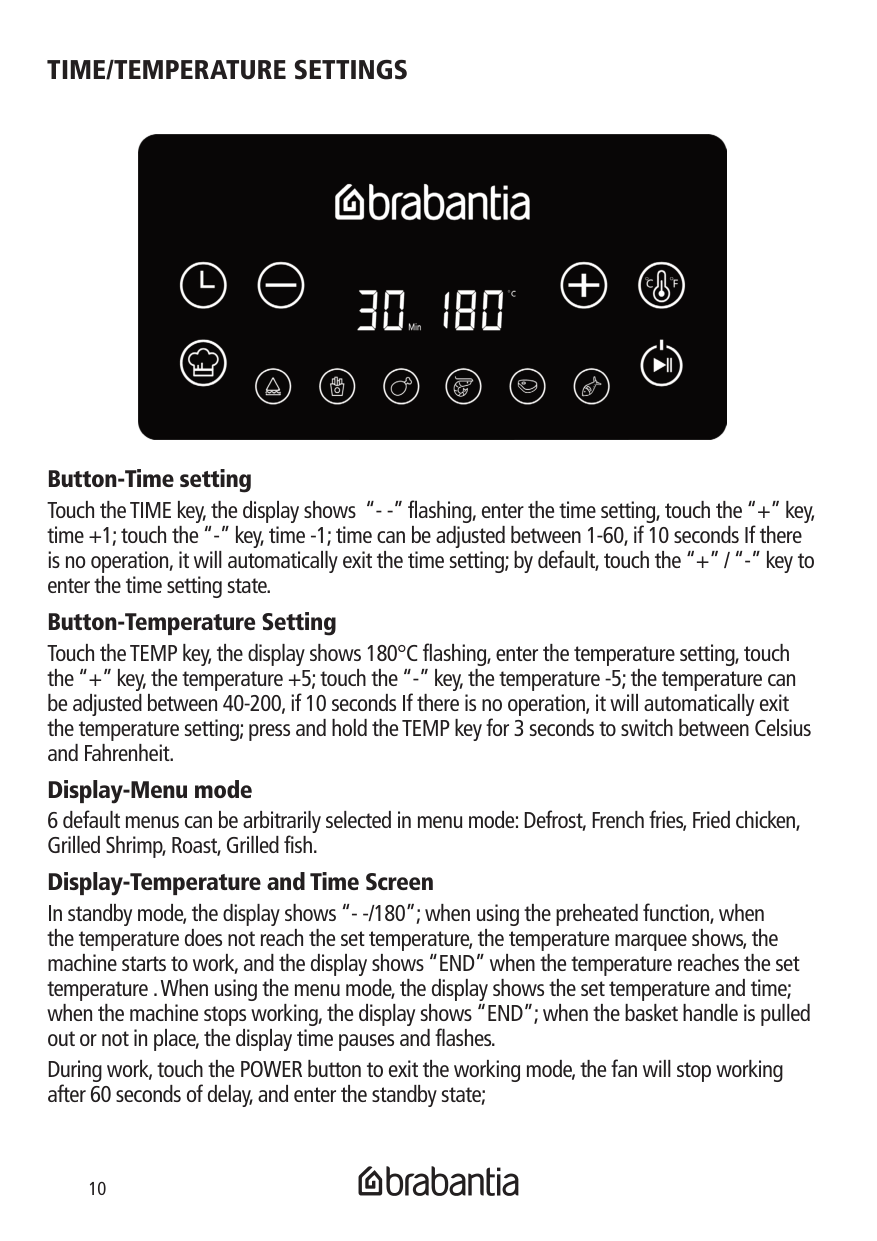
####### TIME/TEMPERATURE SETTINGS

Button-Time setting Touch the TIME key, the display shows “- -” flashing, enter the time setting, touch the “+” key, time +1; touch the “-” key, time -1; time can be adjusted between 1-60, if 10 seconds If there is no operation, it will automatically exit the time setting; by default, touch the “+” / “-” key to enter the time setting state. Button-Temperature Setting
Touch the TEMP key, the display shows 180°C flashing, enter the temperature setting, touch the “+” key, the temperature +5; touch the “-” key, the temperature -5; the temperature can be adjusted between 40-200, if 10 seconds If there is no operation, it will automatically exit the temperature setting; press and hold the TEMP key for 3 seconds to switch between Celsius and Fahrenheit.
Display-Menu mode 6 default menus can be arbitrarily selected in menu mode: Defrost, French fries, Fried chicken, Grilled Shrimp, Roast, Grilled fish. Display-Temperature and Time Screen In standby mode, the display shows “- -/180”; when using the preheated function, when the temperature does not reach the set temperature, the temperature marquee shows, the machine starts to work, and the display shows “END” when the temperature reaches the set temperature . When using the menu mode, the display shows the set temperature and time; when the machine stops working, the display shows “END”; when the basket handle is pulled out or not in place, the display time pauses and flashes. During work, touch the POWER button to exit the working mode, the fan will stop working after 60 seconds of delay, and enter the standby state;
Attention: The following conditions must be met to enter the working mode:
After use, unplug the power plug and wait for the HALO AIR to cool down before moving the product.
####### PRODUCT FEATURES
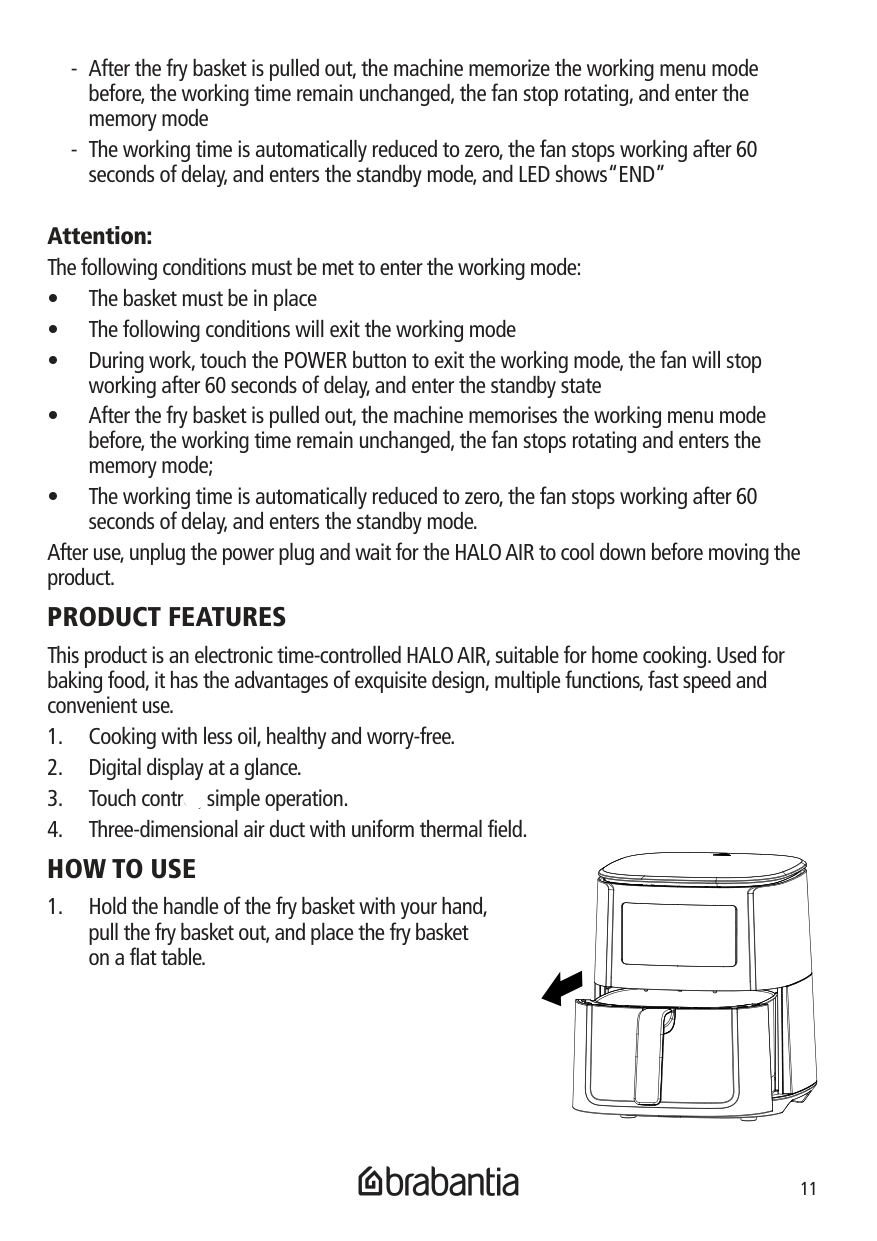
This product is an electronic time-controlled HALO AIR, suitable for home cooking. Used for baking food, it has the advantages of exquisite design, multiple functions, fast speed and convenient use.

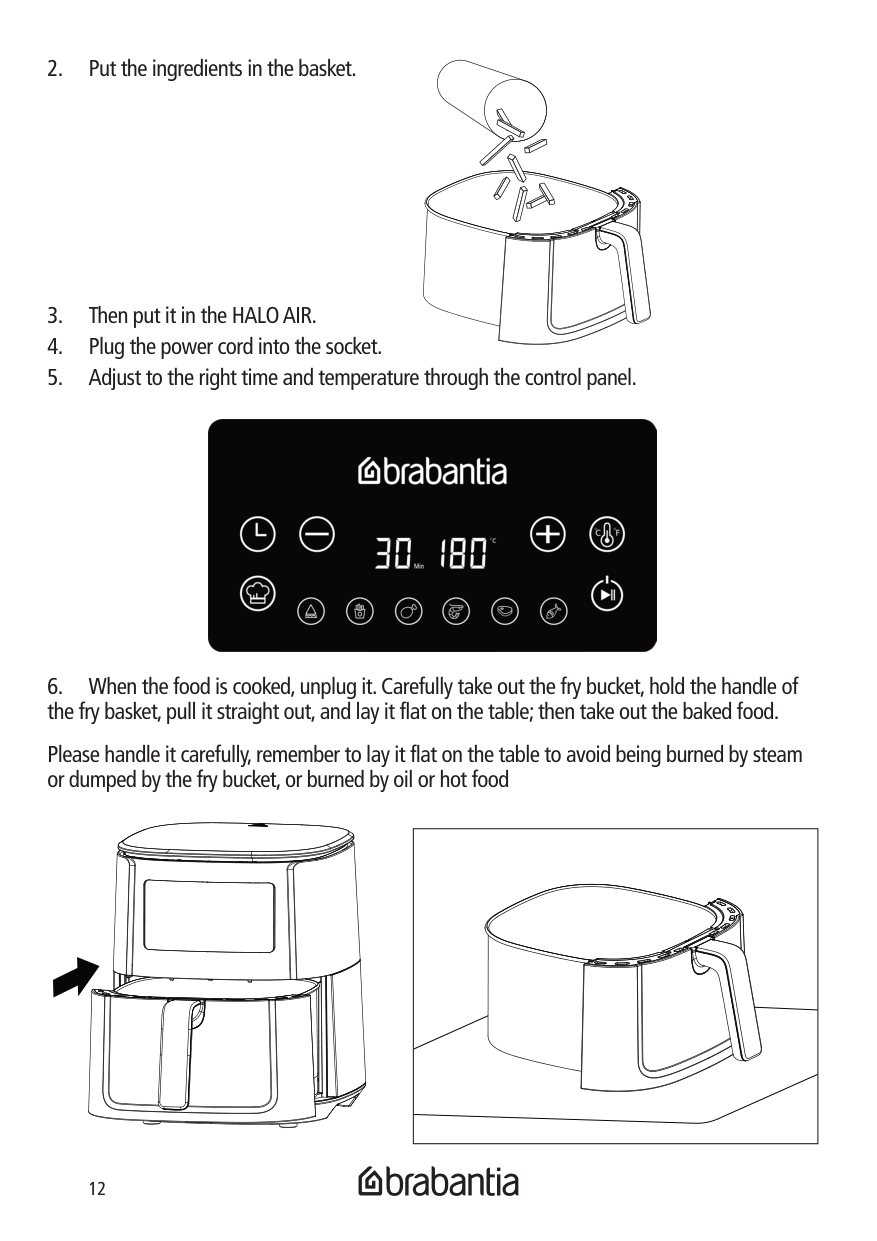
Please handle it carefully, remember to lay it flat on the table to avoid being burned by steam or dumped by the fry bucket, or burned by oil or hot food。
| | |---|
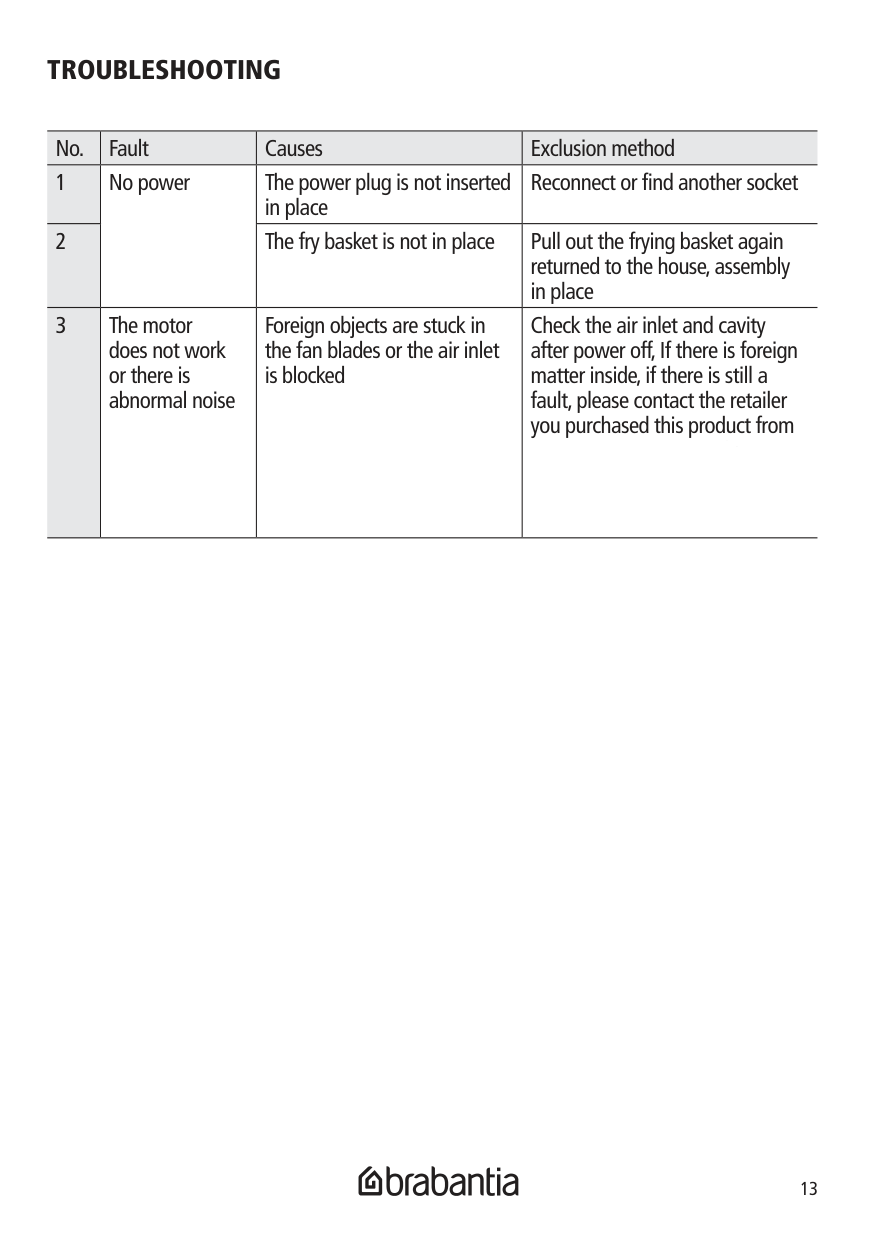
####### TROUBLESHOOTING
|No.|Fault|Causes|Exclusion method| |---|---|---|---| |1|No power|The power plug is not inserted in place|Reconnect or find another socket| |2|No power|The fry basket is not in place|Pull out the frying basket again returned to the house, assembly in place| |3|The motor does not work or there is abnormal noise|Foreign objects are stuck in the fan blades or the air inlet is blocked|Check the air inlet and cavity after power off, If there is foreign matter inside, if there is still a fault, please contact the retailer you purchased this product from
|
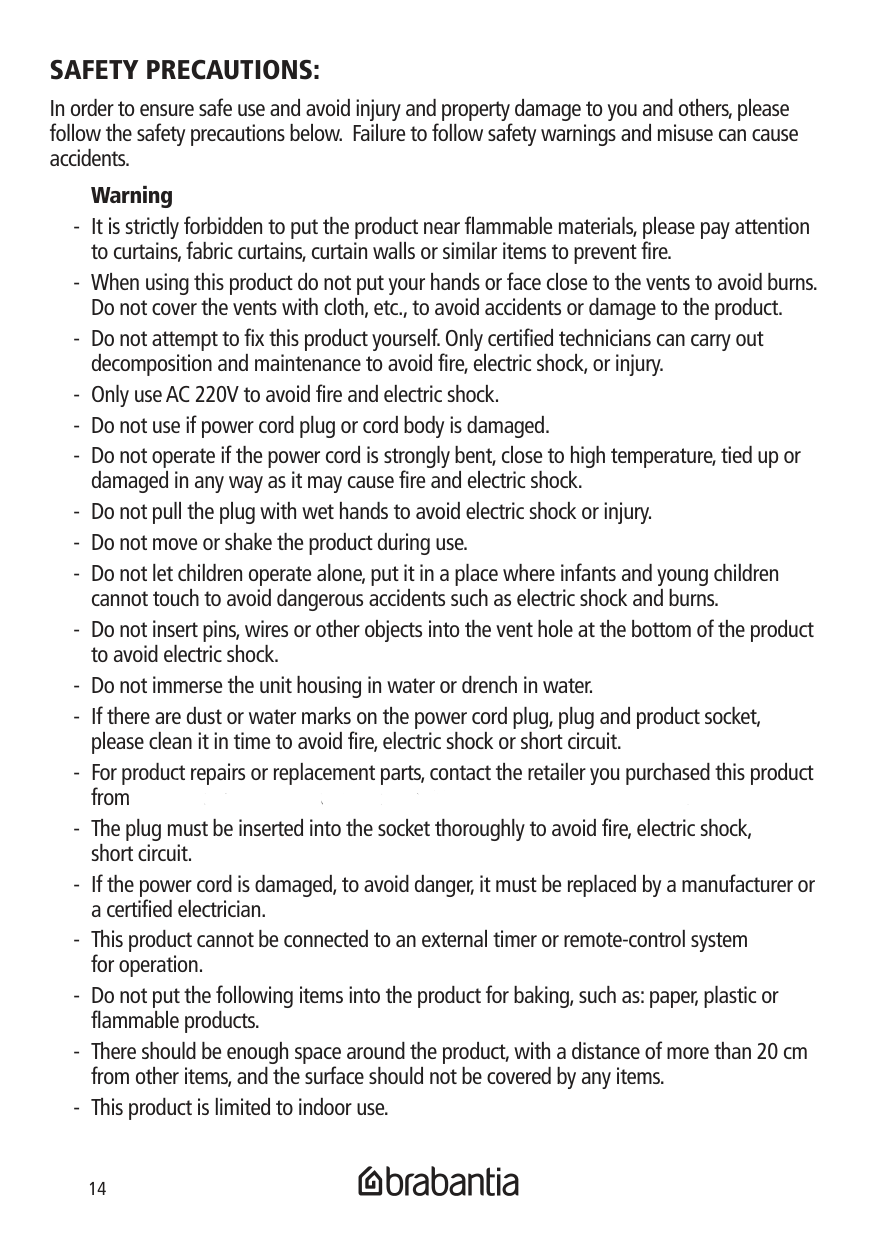
####### SAFETY PRECAUTIONS:
In order to ensure safe use and avoid injury and property damage to you and others, please follow the safety precautions below. Failure to follow safety warnings and misuse can cause accidents.
########## Warning

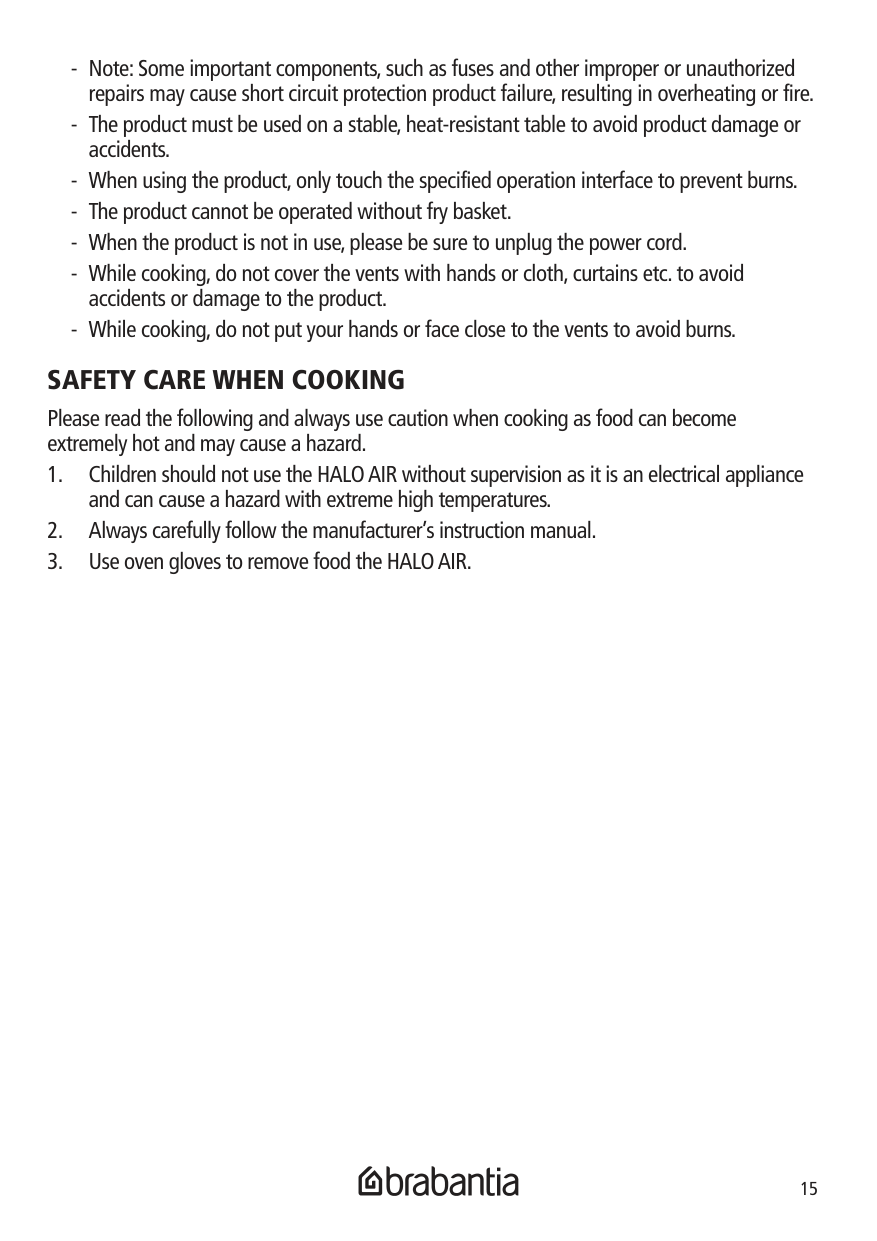
####### SAFETY CARE WHEN COOKING
Please read the following and always use caution when cooking as food can become extremely hot and may cause a hazard.
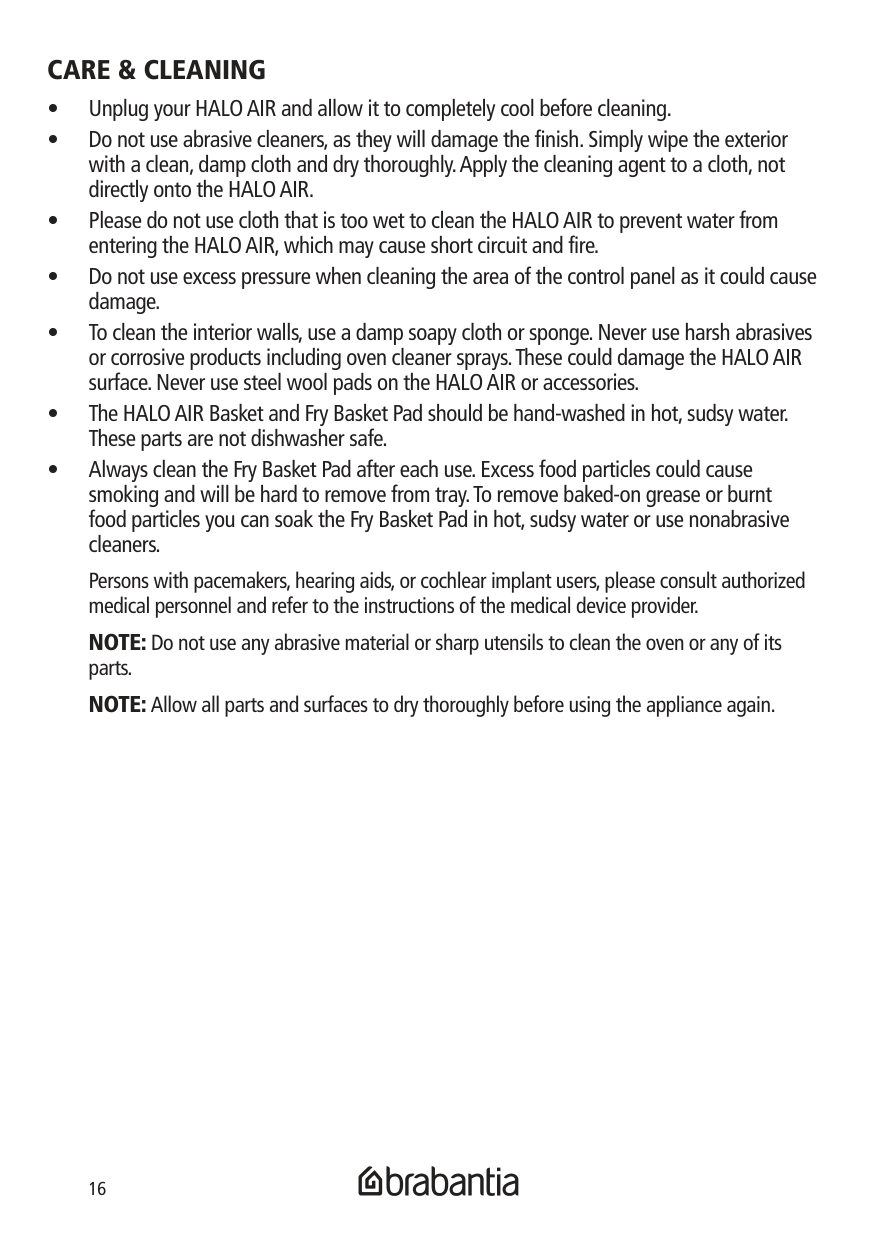
####### CARE & CLEANING
Persons with pacemakers, hearing aids, or cochlear implant users, please consult authorized medical personnel and refer to the instructions of the medical device provider.
NOTE: Do not use any abrasive material or sharp utensils to clean the oven or any of its parts.
NOTE: Allow all parts and surfaces to dry thoroughly before using the appliance again.
######## SPECIFICATIONS Rated voltage/ Frequency: 230-240V~50-60Hz Rated power: 1700W
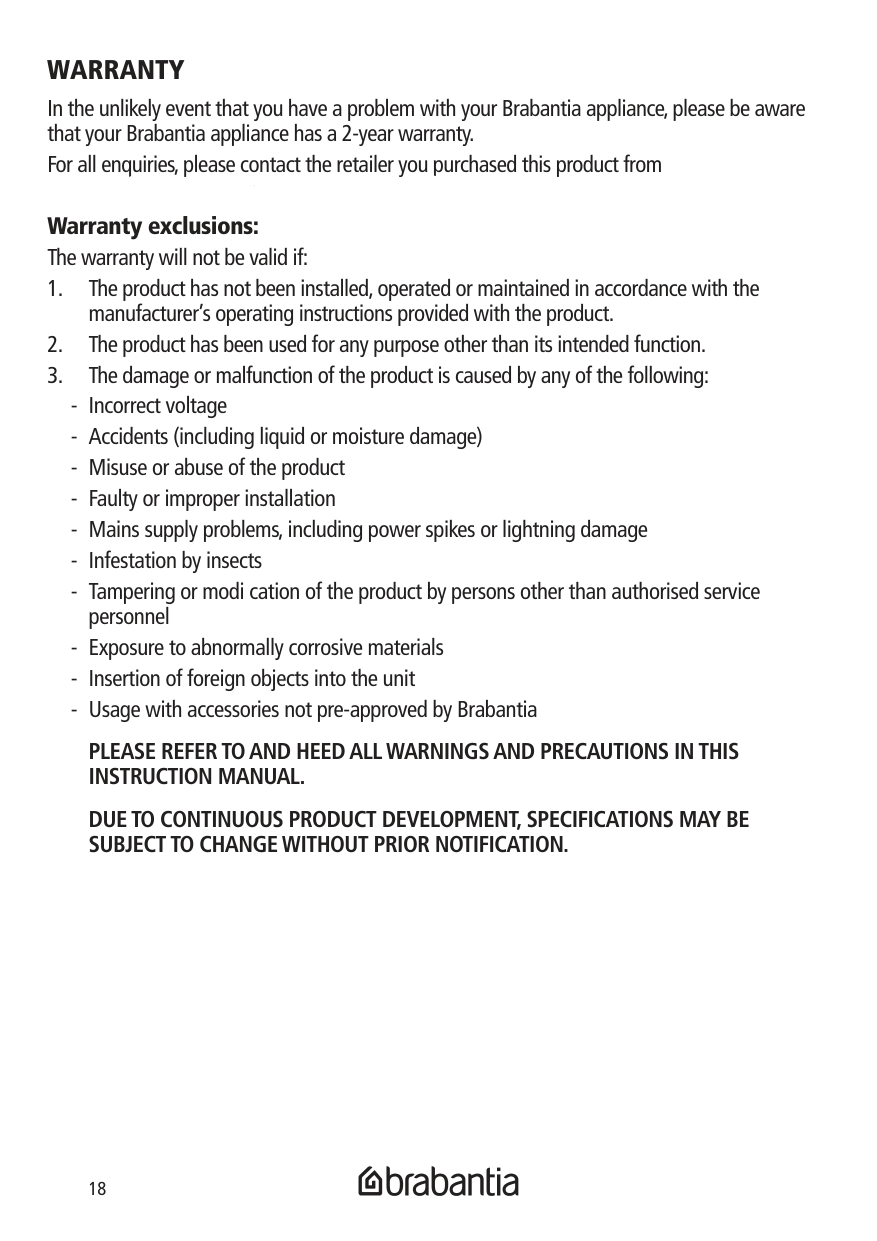
WARRANTY In the unlikely event that you have a problem with your Brabantia appliance, please be aware that your Brabantia appliance has a 2-year warranty. For all enquiries, please contact the retailer you purchased this product from or the New Zealand Brabantia Agent toll free number 0800 127 727. Warranty exclusions: The warranty will not be valid if:
PLEASE REFER TO AND HEED ALL WARNINGS AND PRECAUTIONS IN THIS INSTRUCTION MANUAL.
DUE TO CONTINUOUS PRODUCT DEVELOPMENT, SPECIFICATIONS MAY BE SUBJECT TO CHANGE WITHOUT PRIOR NOTIFICATION.
####### ENVIRONMENT FRIENDLY DISPOSAL
This marking indicates that this product should not be disposed of with other household waste. To prevent possible harm to the environment or human health from uncontrolled waste disposal, recycle it responsibly to promote the sustainable re-use of material resources. To dispose of your appliance correctly, please contact or take it to your local refuse/recycling centre. Alternatively, contact your local council for information on your local re-use centre. Please make this product environmentally safe for recycling.
BRABANTIA 5.5L HALO AIR
Handleiding BBEK1131

2
##### JAAR
########### GARANTIE
www.brabantia.com/electrical-
www.brabantia.com/electrical-appliances
www.brabantia.com/electrical-appliances

#### BEDANKT VOOR UW AANSCHAF VAN ONZE 5.5L HALO AIR We hopen dat u ervan zult genieten en dat hij een speciaal plekje in uw huis krijgt. Geniet ervan!
####### BELANGRIJKE VEILIGHEIDSMAATREGELEN
Bij het gebruik van dit apparaat dienen altijd de standaard veiligheidsmaatregelen te worden getroffen, inclusief maar niet beperkt tot de volgende:
WAARSCHUWING: laat de HALO AIR niet onbeheerd achter wanneer deze in gebruik is. Houd de binnenkant van de oven volledig schoon en vrij van voedselresten, olie, vet en andere brandbare materialen om het risico op brand te beperken.
WAARSCHUWING: er kan brand ontstaan als de HALO AIR wordt afgedekt of tijdens het gebruik of daarna, als deze nog heet is, in aanraking komt met brandbare materialen, zoals gordijnen, muren en dergelijke. Plaats geen van de volgende materialen in de HALO AIR, bovenop de HALO AIR of in contact met de zijkanten of onderkant van de HALO AIR: papier, karton, plastic en dergelijke.
####### BEWAAR DEZE INSTRUCTIES
DIT APPARAAT IS BEDOELD VOOR GEBRUIK IN HUISHOUDELIJKE EN SOORTGELIJKE TOEPASSINGEN, ZOALS: PERSONEELSKEUKEN IN WINKELS, KANTOREN EN ANDERE WERKOMGEVINGEN.
BOERDERIJEN. DOOR GASTEN IN HOTELS, MOTELS EN ANDERE WOONOMGEVINGEN; OMGEVINGEN ZOALS BED & BREAKFASTS
######### UITSLUITEND VOOR HUISHOUDELIJK GEBRUIK NIET BEDOELD VOOR COMMERCIEEL GEBRUIK
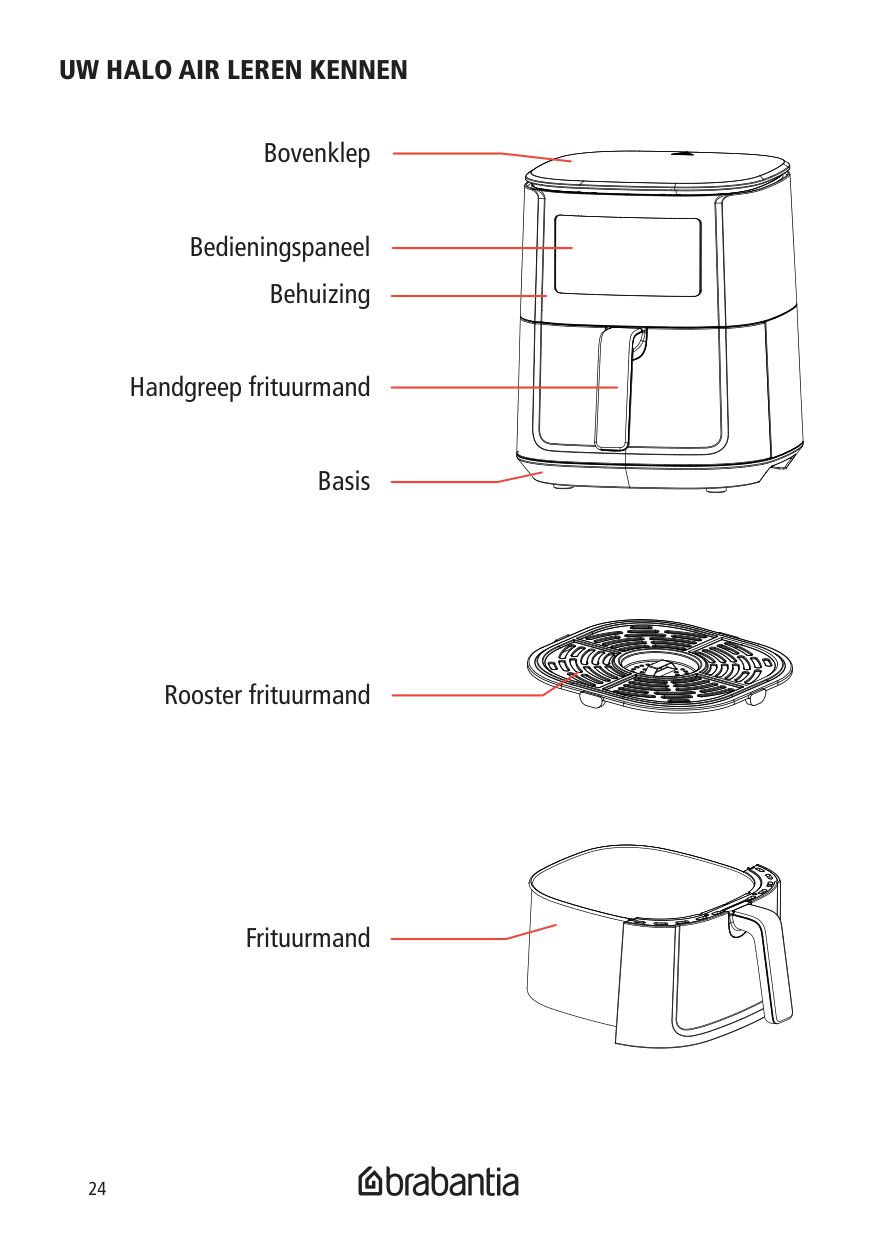
####### UW HALO AIR LEREN KENNEN
Bovenklep
Bedieningspaneel Behuizing
Handgreep frituurmand
Basis
| | | |---|---| | | |
Rooster frituurmand
Frituurmand
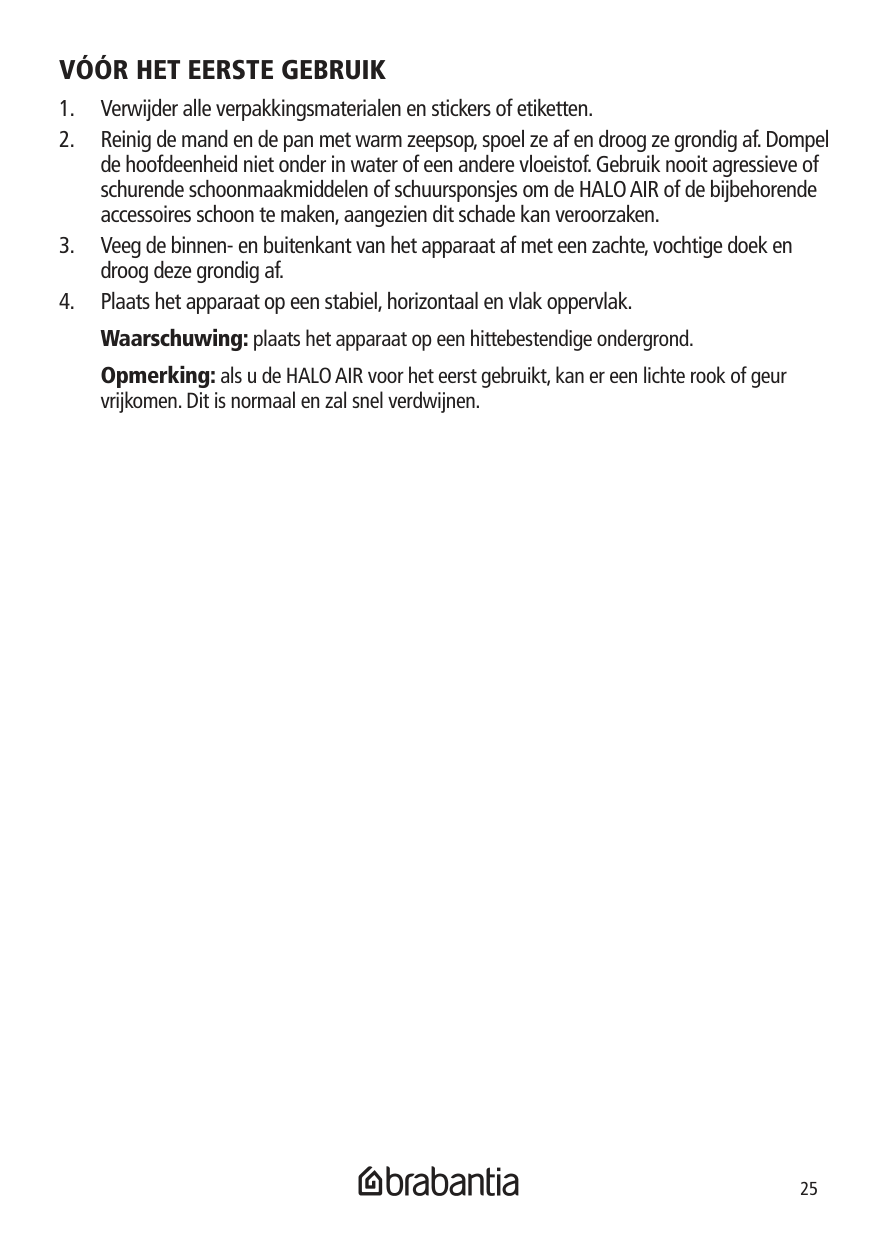
####### VÓÓR HET EERSTE GEBRUIK
Opmerking: als u de HALO AIR voor het eerst gebruikt, kan er een lichte rook of geur vrijkomen. Dit is normaal en zal snel verdwijnen.
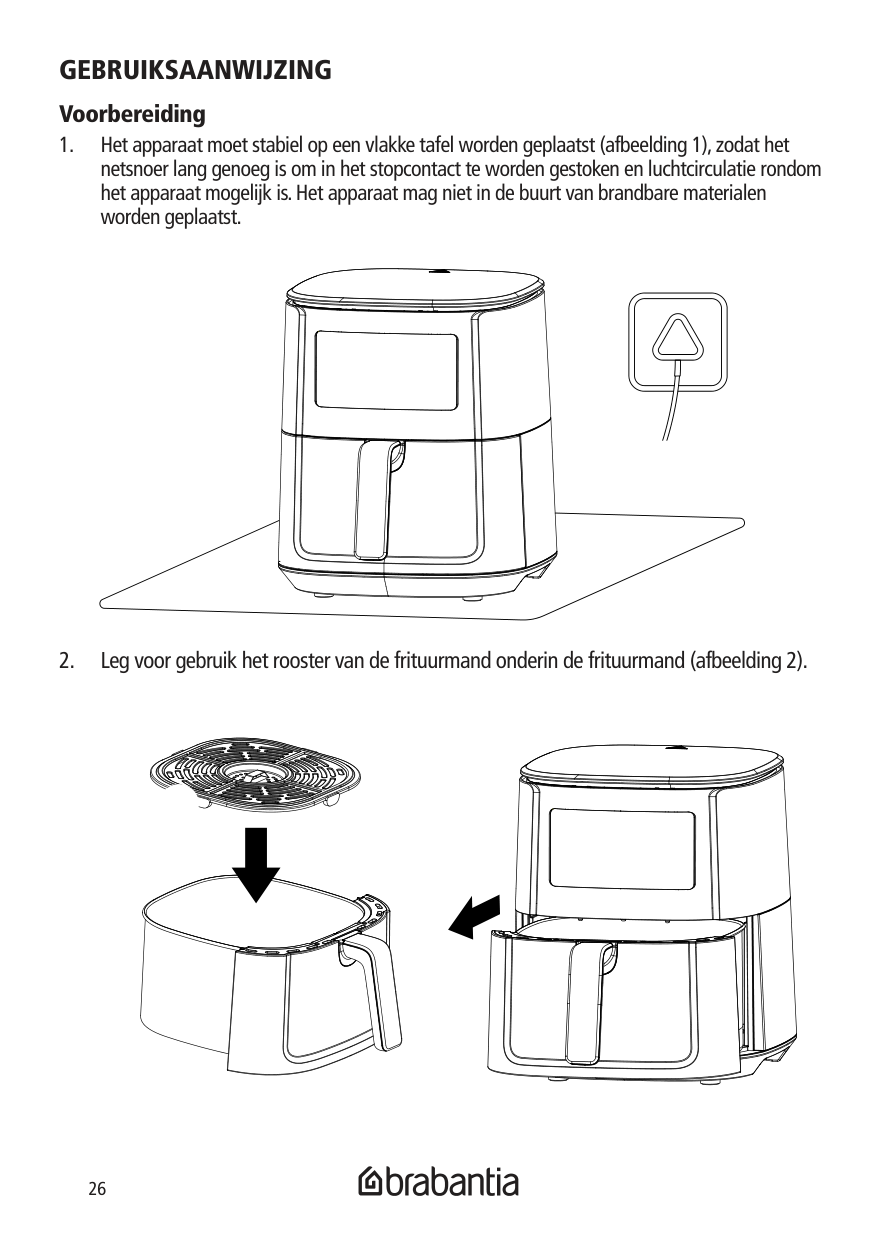
####### GEBRUIKSAANWIJZING Voorbereiding
####### INSTRUCTIES VOOR HET BEDIENINGSPANEEL

Knop: schakelaar Nadat het product is aangesloten, laat het apparaat een pieptoon horen, licht het ledlampje op het productpaneel gedurende één seconde op en gaat vervolgens weer uit. Het lampje is half aan en het product gaat naar de uitschakelstand. Druk op de knop . Het ledlampje van de functietoets is altijd aan, het lampje gaat knipperen en het digitale scherm geeft "- - / 180°C" weer. Het apparaat gaat naar de stand-bystand. Wanneer het product in bedrijf is, drukt u op de knop , waarna het apparaat begint te werken en het lampje altijd aan is. Druk opnieuw op de knop , waarna het apparaat stopt met werken en het lampje begint te knipperen. Wanneer het product in gebruik is of in de stand-bymodus staat, houdt u de knop 1,5 seconden lang ingedrukt, waarna het apparaat stopt met werken en het lampje half helder is


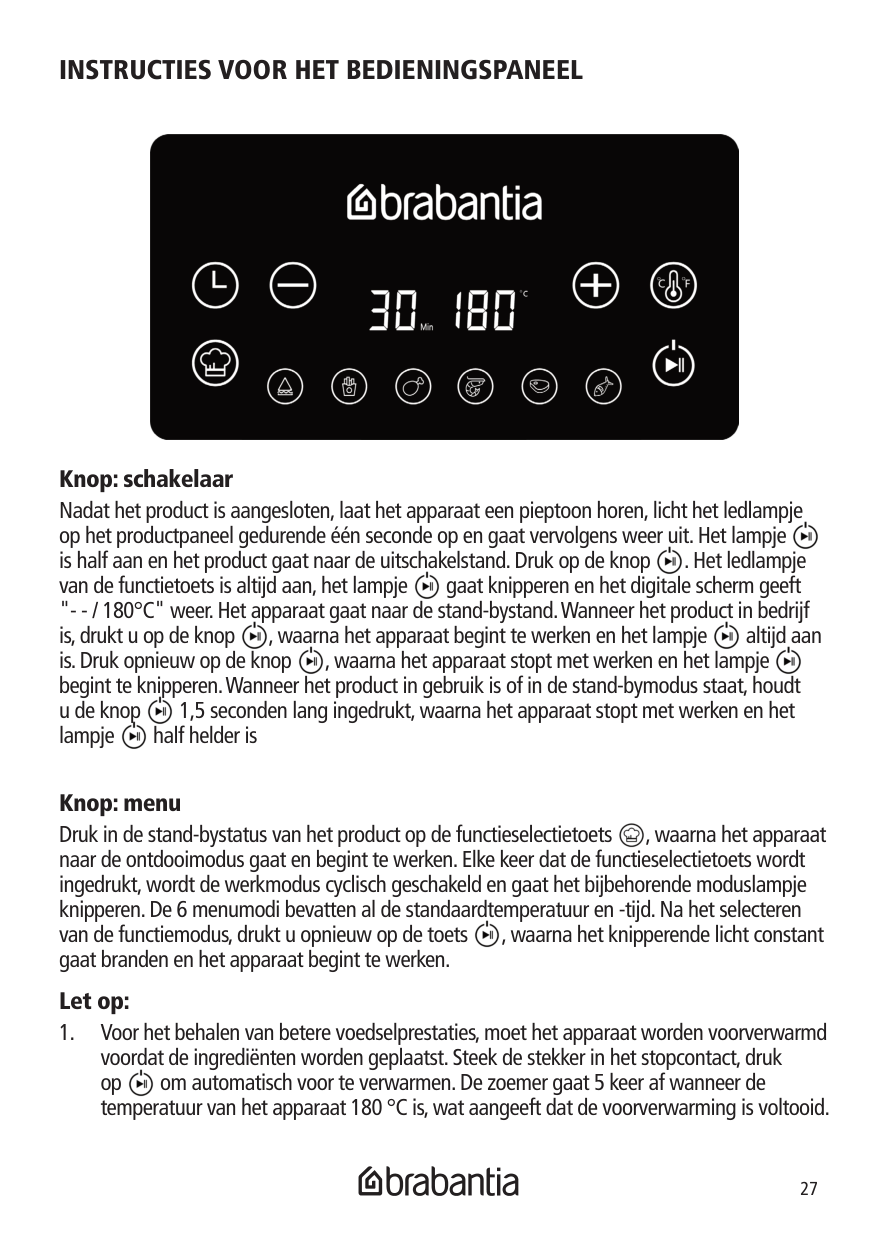


Knop: menu Druk in de stand-bystatus van het product op de functieselectietoets , waarna het apparaat naar de ontdooimodus gaat en begint te werken. Elke keer dat de functieselectietoets wordt ingedrukt, wordt de werkmodus cyclisch geschakeld en gaat het bijbehorende moduslampje knipperen. De 6 menumodi bevatten al de standaardtemperatuur en -tijd. Na het selecteren van de functiemodus, drukt u opnieuw op de toets , waarna het knipperende licht constant gaat branden en het apparaat begint te werken.


######### Let op:


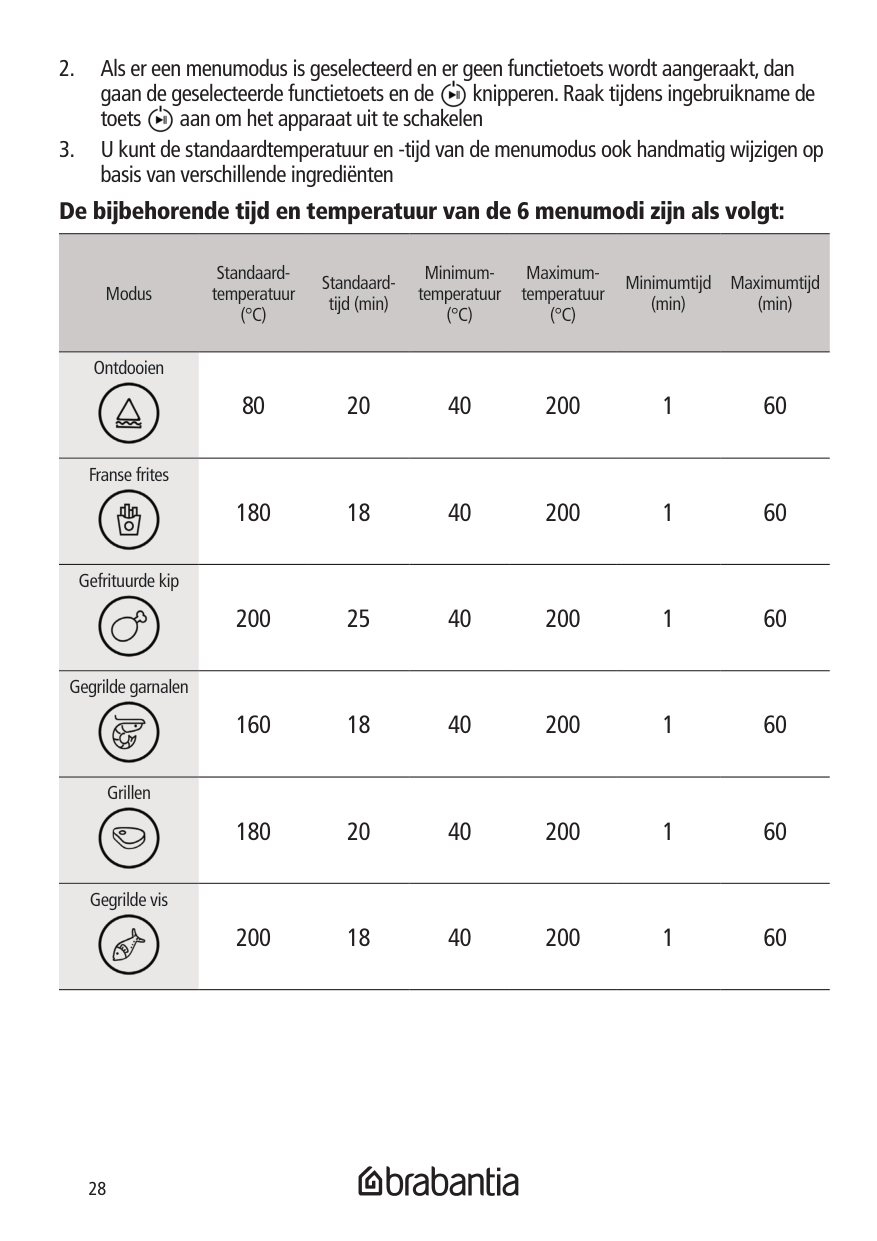
######### De bijbehorende tijd en temperatuur van de 6 menumodi zijn als volgt:

Modus
Standaardtemperatuur (°C)
Standaardtijd (min)
Minimumtemperatuur (°C)
Maximumtemperatuur (°C)
Minimumtijd (min)
Maximumtijd (min)
Ontdooien

Franse frites

Gefrituurde kip

Gegrilde garnalen

Grillen

Gegrilde vis

80 20 40 200 1 60
180 18 40 200 1 60
200 25 40 200 1 60
160 18 40 200 1 60
180 20 40 200 1 60
200 18 40 200 1 60
####### TIJD-/TEMPERATUURINSTELLINGEN

Knop: tijdinstelling Raak de toets TIJD aan. Op het scherm knippert "- -", voer de tijdinstelling in, raak de "+"-toets aan voor tijd +1; raak de "-"-toets aan voor tijd -1; de tijd kan worden ingesteld tussen de 1-60. Als u gedurende 10 seconden niets doet, wordt de tijdinstelling automatisch verlaten; raak standaard de toetsen "+"/"-" aan om de tijdinstelling te betreden. Knop: temperatuurinstelling
Raak de toets TEMP aan. Op het scherm knippert 180°C, voer de temperatuurinstelling in, raak de "+"-toets aan voor temperatuur +5; raak de "-"-toets aan voor temperatuur -5; de temperatuur kan worden ingesteld tussen de 40-200. Als u gedurende 10 seconden niets doet, wordt de temperatuurinstelling automatisch verlaten; houd de TEMP-toets 3 seconden lang ingedrukt om te wisselen tussen Celsius en Fahrenheit.
Scherm: menumodus Er kunnen in de menumodus 6 standaardmenu's worden geselecteerd: ontdooien, Franse frites, gefrituurde kip, gegrilde garnalen, grillen, gegrilde vis. Scherm: temperatuur- en tijdaanduiding In de stand-bymodus geeft het scherm "- -/180" weer; bij gebruik van de voorverwarmingsfunctie, wordt het temperatuursymbool getoond zolang de temperatuur de ingestelde temperatuur niet heeft bereikt. Het apparaat begint te werken en op het scherm wordt "EIND" weergegevens zodra de ingestelde temperatuur is bereikt. Bij gebruik van de menumodus toont het scherm de ingestelde temperatuur en tijd; wanneer het apparaat stopt met werken, wordt er op het scherm "EIND" weergegeven. Wanneer de handgreep van de mand is uitgetrokken of niet op zijn plaats zit, pauzeert de weergegeven tijd en gaat deze knipperen. Raak tijdens de ingebruikname de aan-uitknop aan om de werkmodus te verlaten, waarna de ventilator na 60 seconden stopt met werken en het apparaat naar de stand-bystand gaat;
Let op: Voor het betreden van de werkmodus, moet aan de volgende voorwaarden worden voldaan:
Trek na gebruik de stekker uit het stopcontact en wacht tot de HALO AIR is afgekoeld voordat u het product verplaatst.
####### PRODUCTEIGENSCHAPPEN
Dit product is een elektronische tijdgestuurde HALO AIR die geschikt is om thuis mee te koken. Het wordt gebruikt voor het bereiden van voedsel en biedt een uitmuntend ontwerp, meerdere functies, hoge snelheid en gebruikersgemak.

Wees voorzichtig, vergeet niet om de mand plat op tafel te leggen om te voorkomen dat u zich brandt aan de stoom, de frituurmand, de olie of heet voedsel.
| | |---|
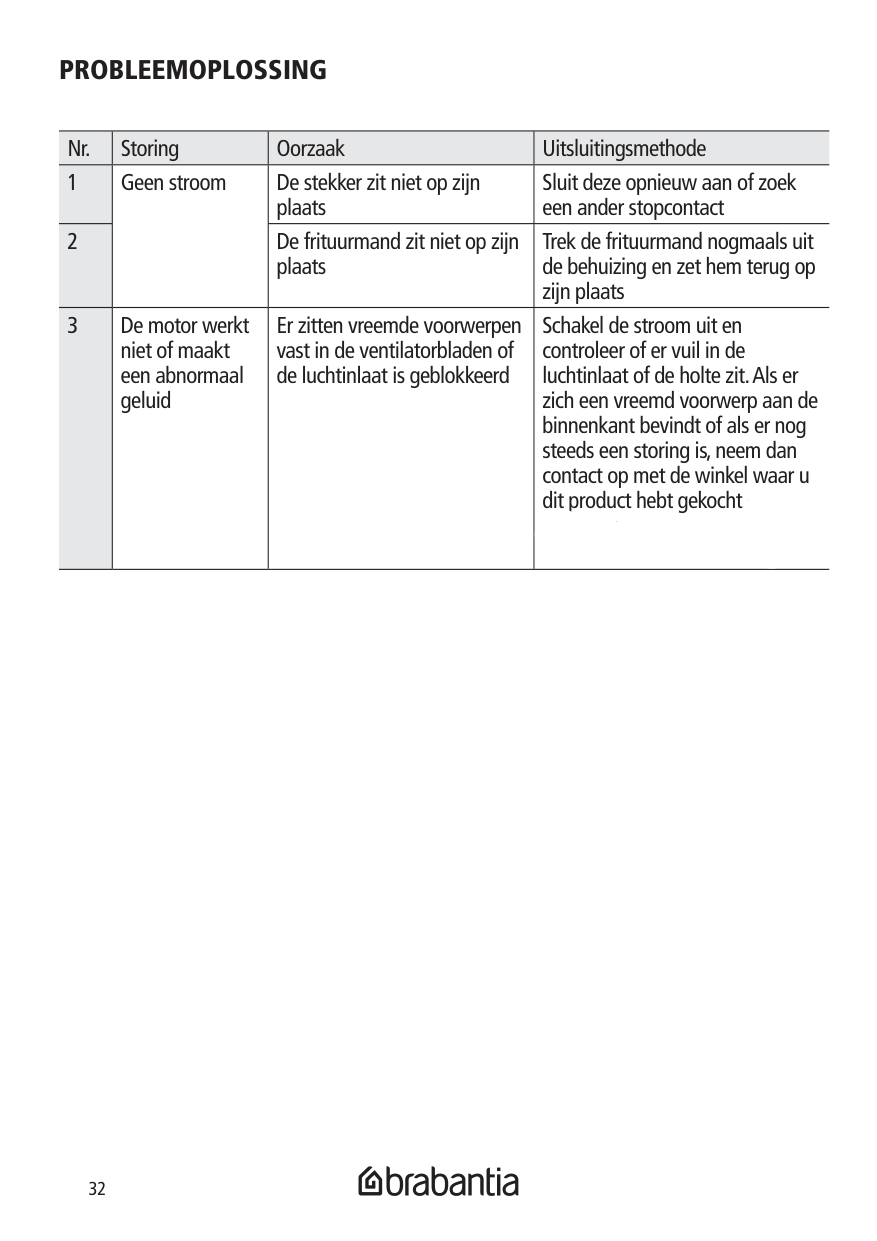
####### PROBLEEMOPLOSSING
|Nr.|Storing|Oorzaak|Uitsluitingsmethode| |---|---|---|---|
|1|Geen stroom
|De stekker zit niet op zijn plaats|Sluit deze opnieuw aan of zoek een ander stopcontact| |2|Geen stroom
|De frituurmand zit niet op zijn plaats|Trek de frituurmand nogmaals uit de behuizing en zet hem terug op zijn plaats| |3|De motor werkt niet of maakt een abnormaal geluid|Er zitten vreemde voorwerpen vast in de ventilatorbladen of de luchtinlaat is geblokkeerd|Schakel de stroom uit en controleer of er vuil in de luchtinlaat of de holte zit. Als er zich een vreemd voorwerp aan de binnenkant bevindt of als er nog steeds een storing is, neem dan contact op met de winkel waar u dit product hebt gekocht of met
|
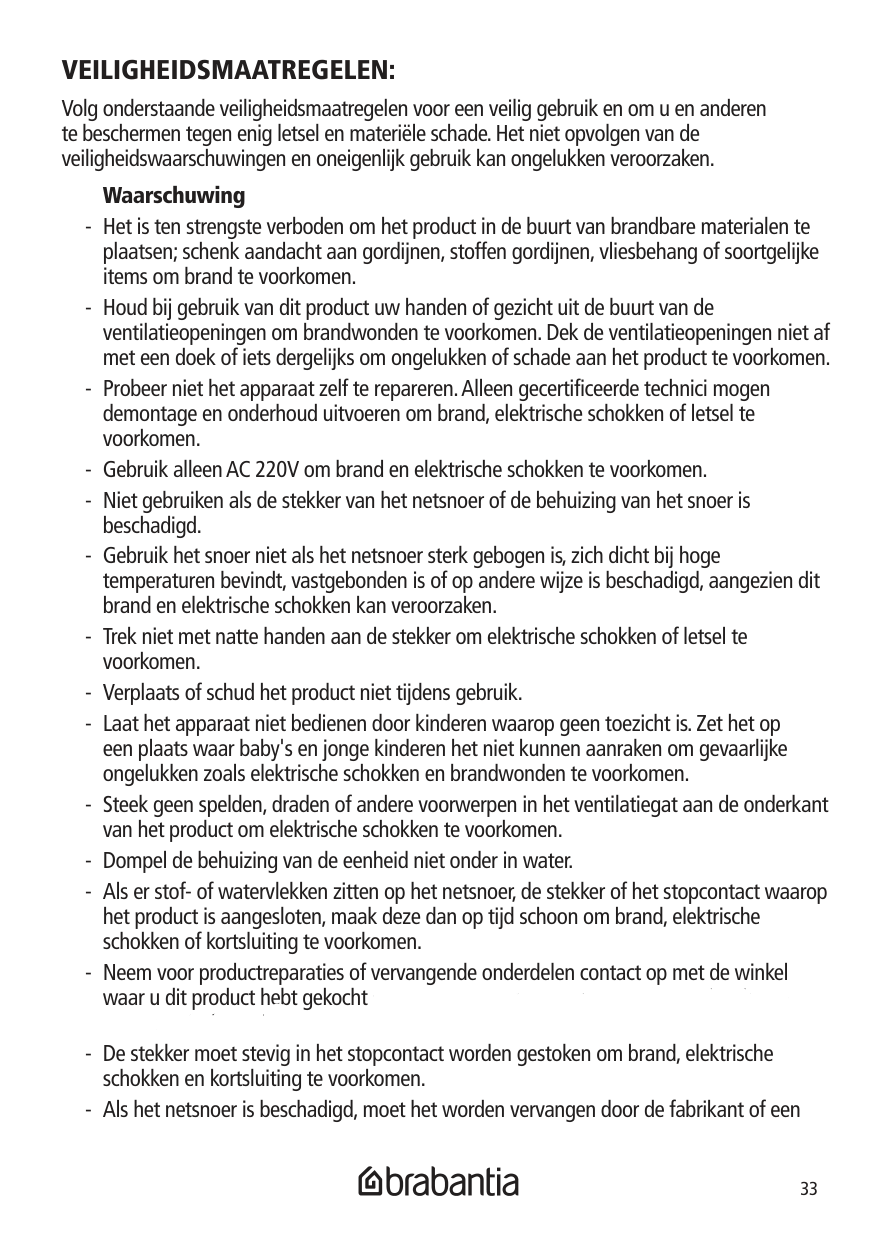
####### VEILIGHEIDSMAATREGELEN:
Volg onderstaande veiligheidsmaatregelen voor een veilig gebruik en om u en anderen te beschermen tegen enig letsel en materiële schade. Het niet opvolgen van de veiligheidswaarschuwingen en oneigenlijk gebruik kan ongelukken veroorzaken.
########## Waarschuwing

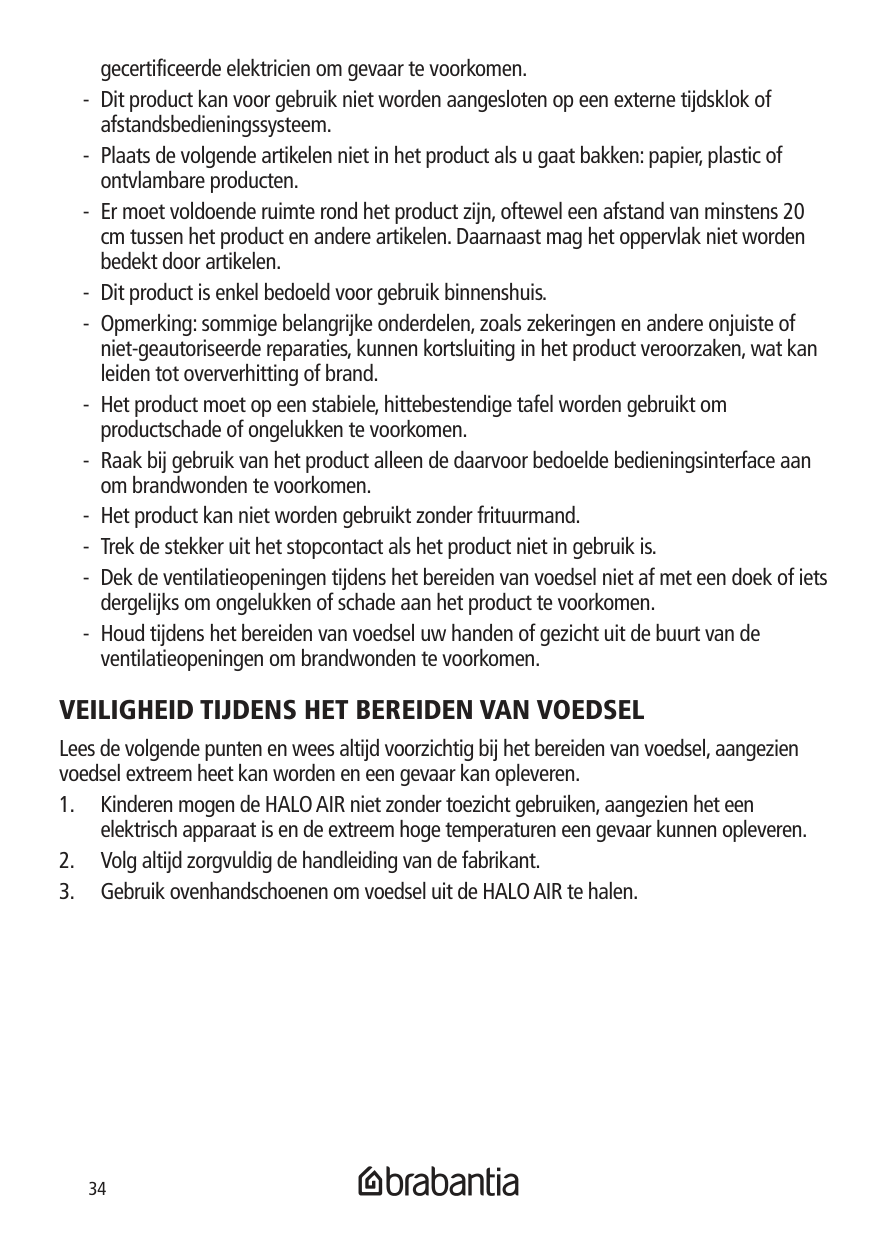
####### VEILIGHEID TIJDENS HET BEREIDEN VAN VOEDSEL
Lees de volgende punten en wees altijd voorzichtig bij het bereiden van voedsel, aangezien voedsel extreem heet kan worden en een gevaar kan opleveren.
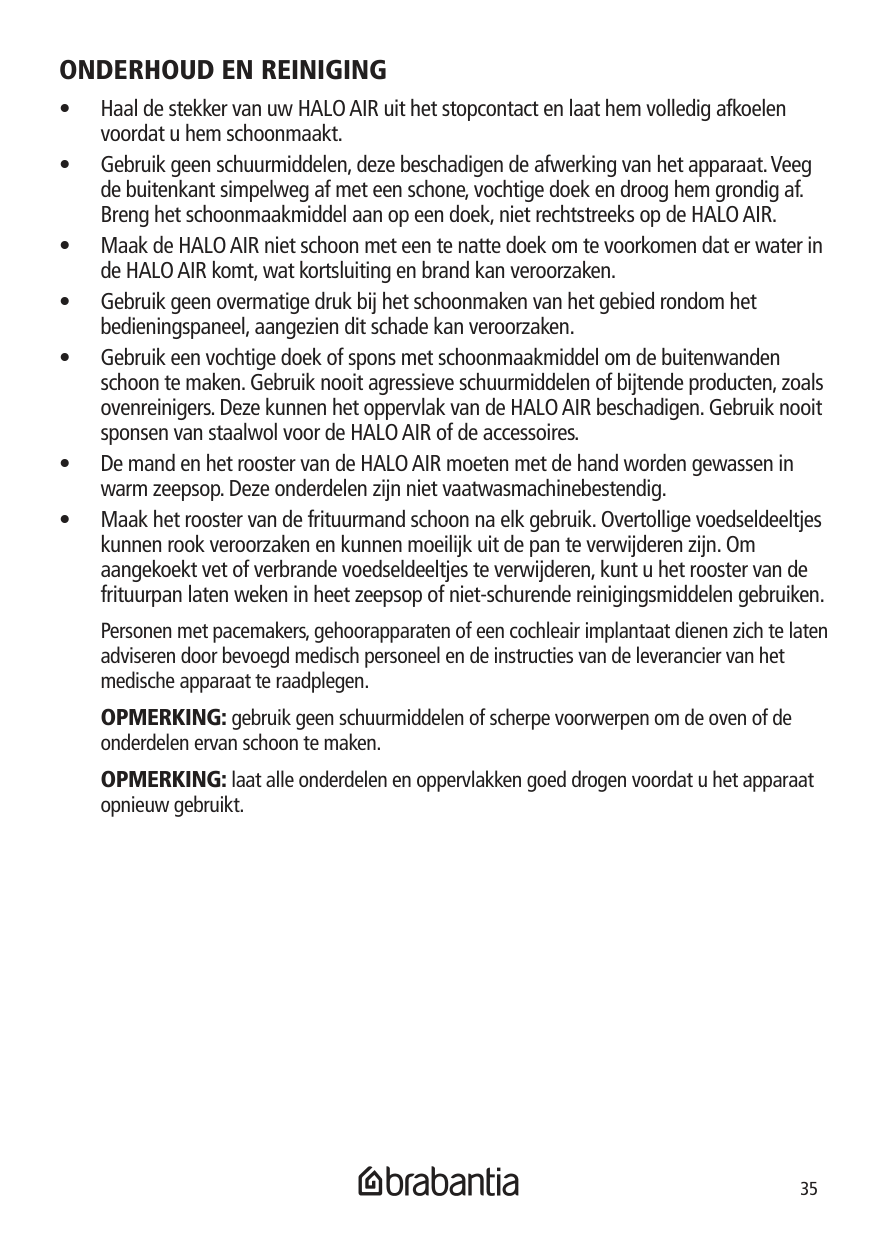
####### ONDERHOUD EN REINIGING
Personen met pacemakers, gehoorapparaten of een cochleair implantaat dienen zich te laten adviseren door bevoegd medisch personeel en de instructies van de leverancier van het medische apparaat te raadplegen.
OPMERKING: gebruik geen schuurmiddelen of scherpe voorwerpen om de oven of de onderdelen ervan schoon te maken.
OPMERKING: laat alle onderdelen en oppervlakken goed drogen voordat u het apparaat opnieuw gebruikt.
######## SPECIFICATIES Nominale spanning/frequentie: 230-240 V ~ 50-60 Hz Nominaal vermogen: 1700 W
GARANTIE Mocht u onverhoopt problemen ondervinden met uw apparaat van Brabantia, houd er dan rekening mee dat er 2 jaar garantie op uw Brabantia-apparaat zit. Neem voor alle vragen contact op met de winkel waar u dit product heeft gekocht of met het gratis nummer van Brabantia in Nieuw-Zeeland: 0800127727. Garantie-uitsluitingen: De garantie is niet geldig indien:
RAADPLEEG ALLE WAARSCHUWINGEN EN VOORZORGSMAATREGELEN IN DEZE INSTRUCTIEHANDLEIDING EN NEEM DEZE IN ACHT.
DOOR VOORTDURENDE PRODUCTONTWIKKELING, KUNNEN SPECIFICATIES ZONDER VOORAFGAANDE KENNISGEVING WORDEN GEWIJZIGD.
####### MILIEUVRIENDELIJKE VERWIJDERING
Dit symbool geeft aan dat dit product niet mag worden weggegooid met ander huishoudelijk afval. Om mogelijke schade aan het milieu of de menselijke gezondheid door ongecontroleerde afvalverwijdering te voorkomen, moet u het product op een verantwoorde manier recyclen om het duurzame hergebruik van materiële hulpbronnen te bevorderen. Om uw apparaat op de juiste manier weg te gooien, neemt u contact op met of brengt u het naar uw plaatselijke afval-/recyclingcentrum. U
kunt ook contact opnemen met uw gemeente voor informatie over uw plaatselijke recyclepunten. Maak dit product milieuvriendelijk voor recycling.
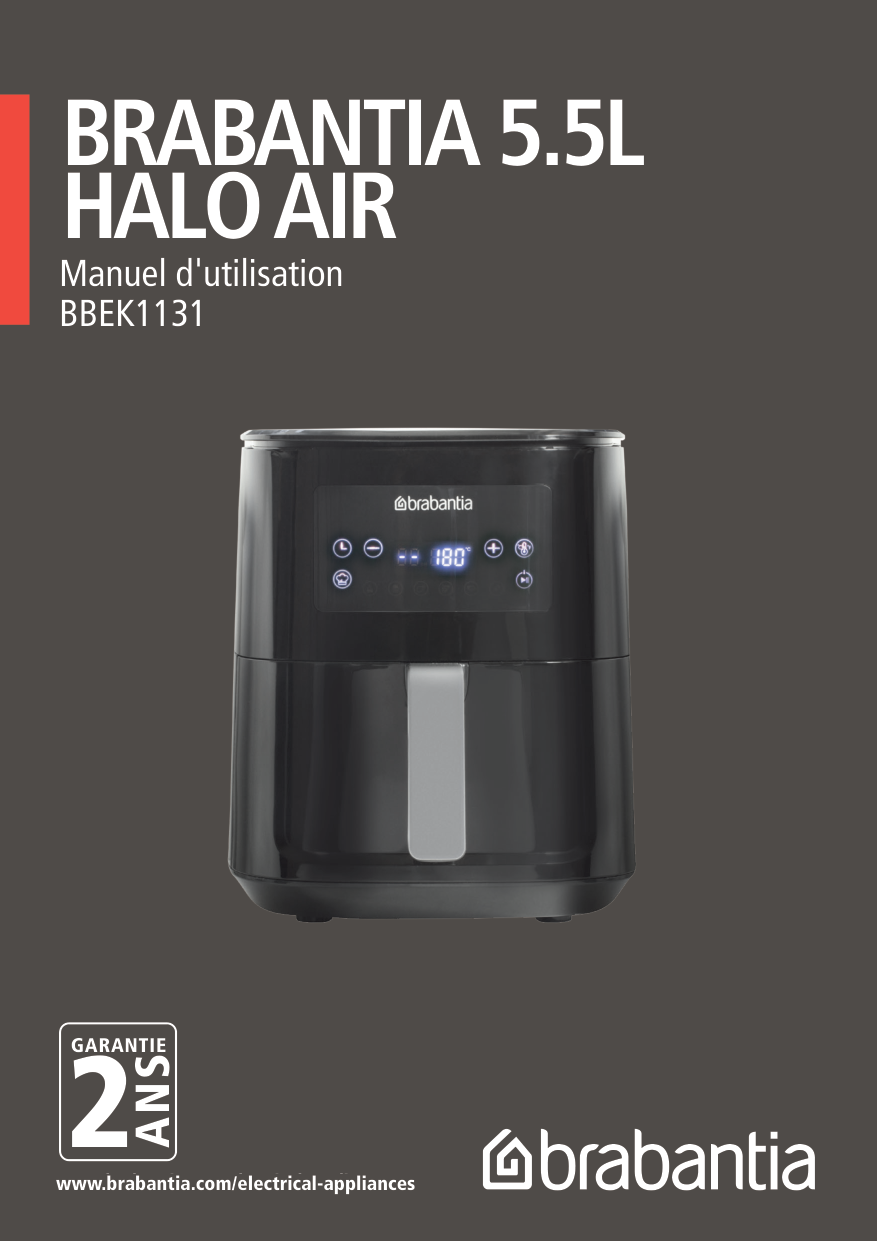
BRABANTIA 5.5L HALO AIR
Manuel d'utilisation BBEK1131

########### GARANTIE
2
ANS
www.brabantia.com/electrical-
www.brabantia.com/electrical-appliances
www.brabantia.com/electrical-appliances

MERCI D'AVOIR ACHETÉ NOTRE HALO AIR 5.5 L Nous espérons qu'il vous permettra de préparer de délicieux plats et qu'il trouvera une place spéciale chez vous. Profitez-en bien !
MISES EN GARDE IMPORTANTES Veillez à suivre les mesures de sécurité de base lorsque vous utilisez cet appareil, notamment :
AVERTISSEMENT : Ne pas laisser l'HALO AIR fonctionner sans surveillance. Pour éviter tout risque d'incendie, l'intérieur du capot doit rester parfaitement propre et ne présenter aucune trace d'aliment, d'huile, de graisse et de toute autre substance combustible.
AVERTISSEMENT : Il est possible qu'un incendie se déclare lorsque des matériaux inflammables comme des rideaux, draperies, murs et autres recouvrent ou touchent l'HALO AIR lorsqu'il est en fonctionnement ou après, quand il est encore chaud. Ne pas mettre les matériaux suivants en contact avec les parois de l'HALO AIR, ni au-dessus ni dedans : papier, carton, plastique, similaire.
####### CONSERVEZ CES INSTRUCTIONS
CET APPAREIL EST CONÇU POUR UNE UTILISATION DOMESTIQUE ET AUTRES APPLICATIONS SIMILAIRES COMME : CUISINES COLLECTIVES DANS DES BOUTIQUES, BUREAUX ET AUTRES ENVIRONNEMENTS DE TRAVAIL.
EXPLOITATIONS AGRICOLES. PAR LES CLIENTS DANS LES HOTELS, MOTELS ET AUTRES ENVIRONNEMENTS RÉSIDENTIELS ; ENVIRONNEMENTS DE TYPE BED & BREAKFAST
######### POUR UNE UTILISATION DOMESTIQUE EXCLUSIVEMENT NON CONÇU POUR UNE UTILISATION COMMERCIALE
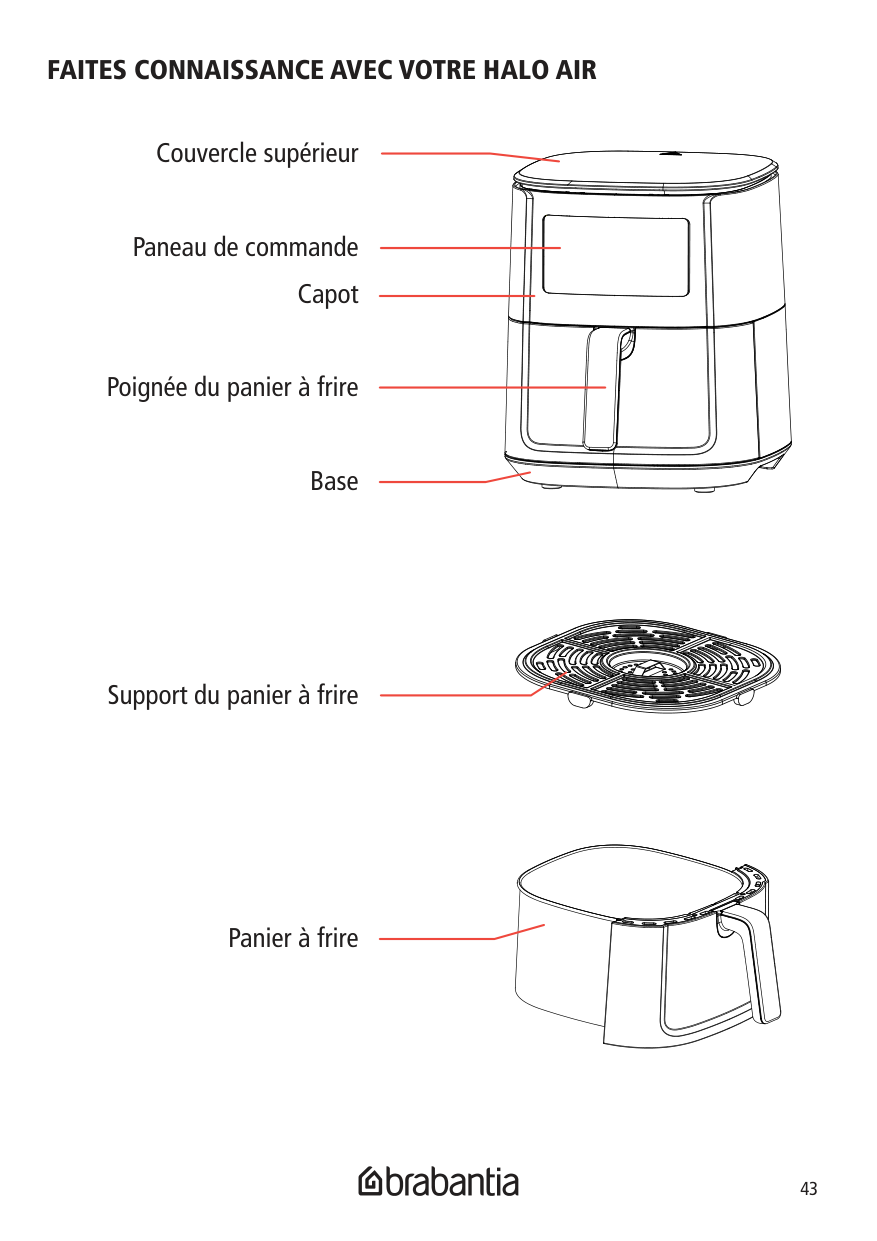
####### FAITES CONNAISSANCE AVEC VOTRE HALO AIR
Couvercle supérieur
Paneau de commande Capot
Poignée du panier à frire
Base
| | | |---|---| | | |
Support du panier à frire
Panier à frire
####### AVANT LA PREMIÈRE UTILISATION
####### INSTRUCTIONS DE FONCTIONNEMENT Préparation
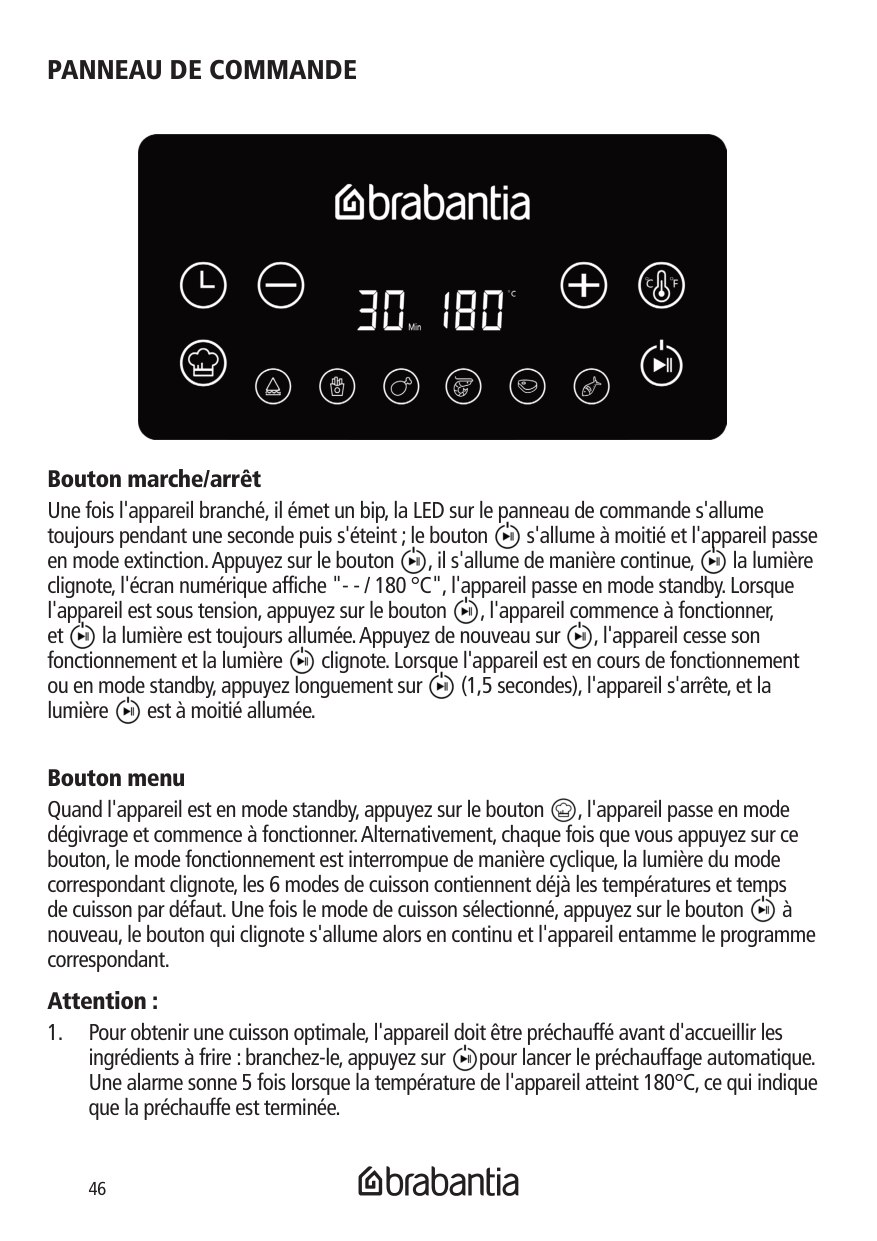
####### PANNEAU DE COMMANDE

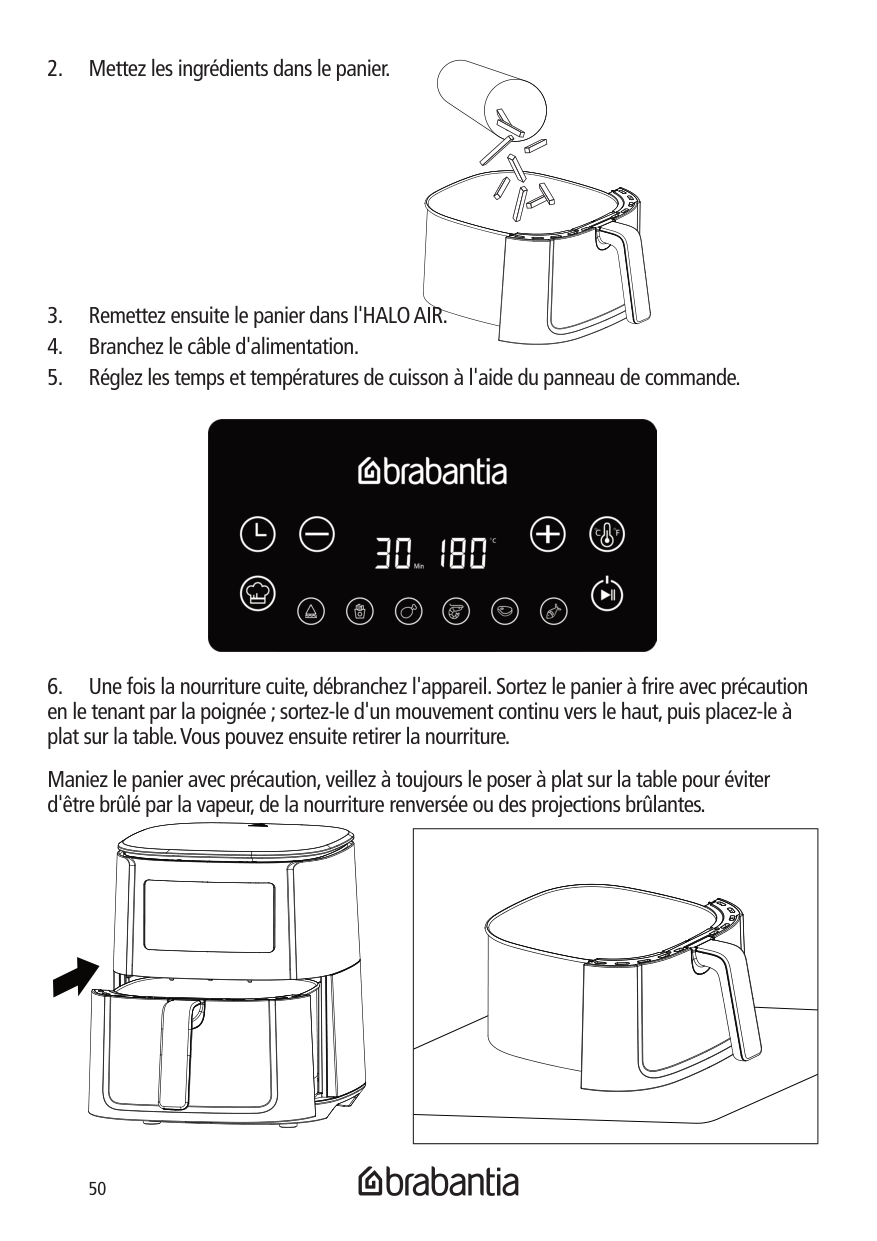
Bouton marche/arrêt Une fois l'appareil branché, il émet un bip, la LED sur le panneau de commande s'allume toujours pendant une seconde puis s'éteint ; le bouton s'allume à moitié et l'appareil passe en mode extinction. Appuyez sur le bouton , il s'allume de manière continue, la lumière clignote, l'écran numérique affiche "- - / 180 °C", l'appareil passe en mode standby. Lorsque l'appareil est sous tension, appuyez sur le bouton , l'appareil commence à fonctionner, et la lumière est toujours allumée. Appuyez de nouveau sur , l'appareil cesse son fonctionnement et la lumière clignote. Lorsque l'appareil est en cours de fonctionnement ou en mode standby, appuyez longuement sur (1,5 secondes), l'appareil s'arrête, et la lumière est à moitié allumée.


Bouton menu Quand l'appareil est en mode standby, appuyez sur le bouton , l'appareil passe en mode dégivrage et commence à fonctionner. Alternativement, chaque fois que vous appuyez sur ce bouton, le mode fonctionnement est interrompue de manière cyclique, la lumière du mode correspondant clignote, les 6 modes de cuisson contiennent déjà les températures et temps de cuisson par défaut. Une fois le mode de cuisson sélectionné, appuyez sur le bouton à nouveau, le bouton qui clignote s'allume alors en continu et l'appareil entamme le programme correspondant.


######### Attention :

ingrédients à frire : branchez-le, appuyez sur pour lancer le préchauffage automatique. Une alarme sonne 5 fois lorsque la température de l'appareil atteint 180°C, ce qui indique que la préchauffe est terminée.


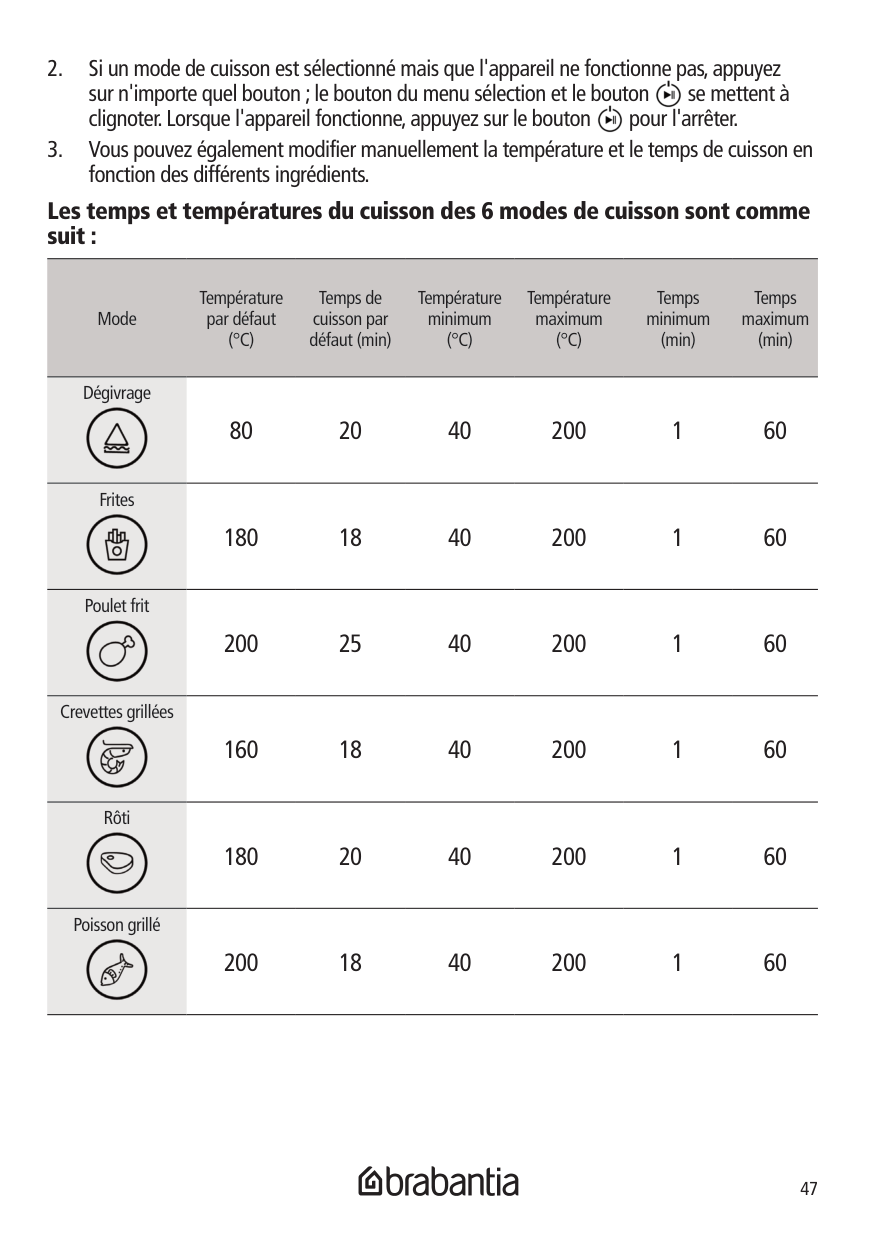
######### Les temps et températures du cuisson des 6 modes de cuisson sont comme suit :
Mode
Température par défaut (°C)
Temps de cuisson par défaut (min)
Température minimum (°C)
Température maximum (°C)
Temps minimum (min)
Temps maximum (min)
Dégivrage

Frites

Poulet frit

Crevettes grillées

Rôti

Poisson grillé

80 20 40 200 1 60
180 18 40 200 1 60
200 25 40 200 1 60
160 18 40 200 1 60
180 20 40 200 1 60
200 18 40 200 1 60
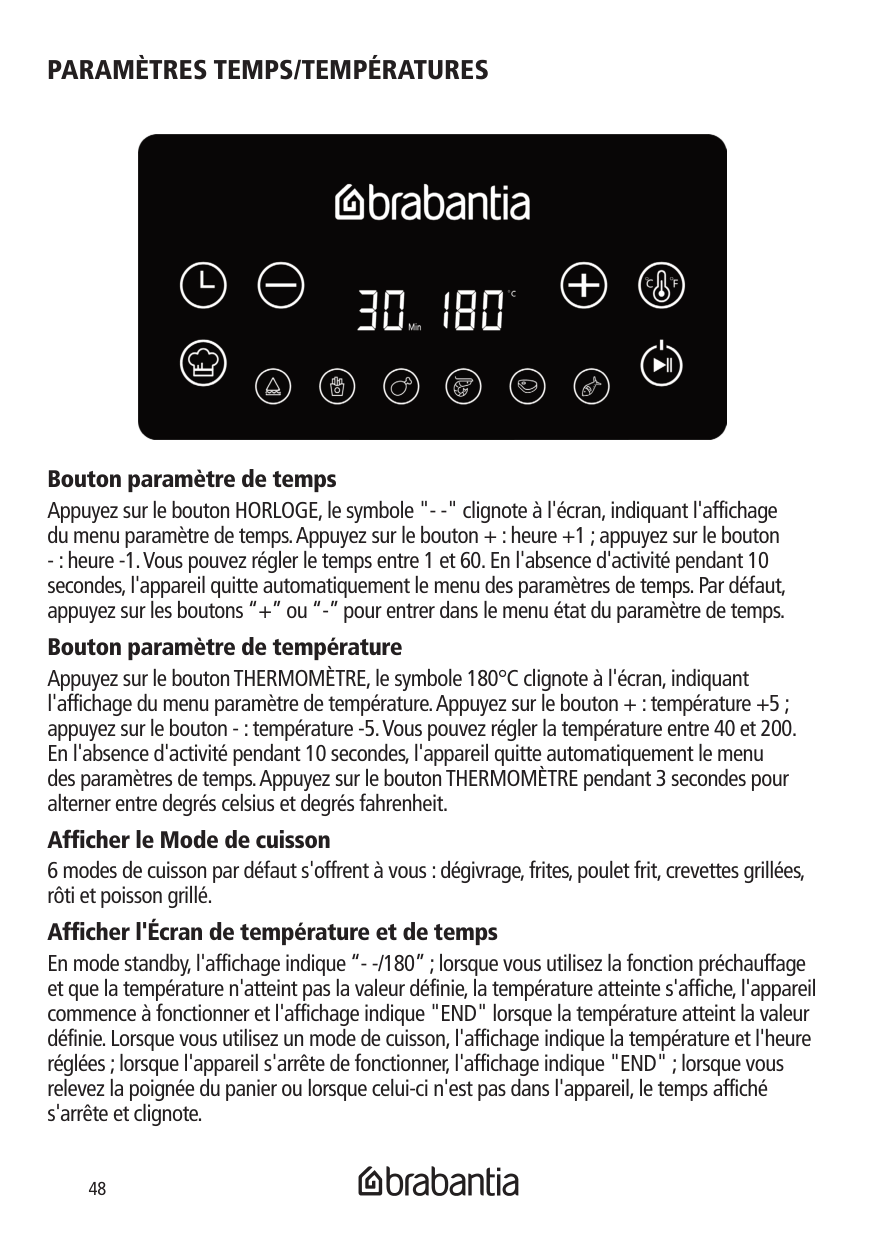
####### PARAMÈTRES TEMPS/TEMPÉRATURES

Bouton paramètre de temps Appuyez sur le bouton HORLOGE, le symbole "- -" clignote à l'écran, indiquant l'affichage du menu paramètre de temps. Appuyez sur le bouton + : heure +1 ; appuyez sur le bouton - : heure -1. Vous pouvez régler le temps entre 1 et 60. En l'absence d'activité pendant 10 secondes, l'appareil quitte automatiquement le menu des paramètres de temps. Par défaut, appuyez sur les boutons “+” ou “-” pour entrer dans le menu état du paramètre de temps. Bouton paramètre de température
Appuyez sur le bouton THERMOMÈTRE, le symbole 180°C clignote à l'écran, indiquant l'affichage du menu paramètre de température. Appuyez sur le bouton + : température +5 ; appuyez sur le bouton - : température -5. Vous pouvez régler la température entre 40 et 200. En l'absence d'activité pendant 10 secondes, l'appareil quitte automatiquement le menu des paramètres de temps. Appuyez sur le bouton THERMOMÈTRE pendant 3 secondes pour alterner entre degrés celsius et degrés fahrenheit.
Afficher le Mode de cuisson 6 modes de cuisson par défaut s'offrent à vous : dégivrage, frites, poulet frit, crevettes grillées, rôti et poisson grillé. Afficher l'Écran de température et de temps
En mode standby, l'affichage indique “- -/180” ; lorsque vous utilisez la fonction préchauffage et que la température n'atteint pas la valeur définie, la température atteinte s'affiche, l'appareil commence à fonctionner et l'affichage indique "END" lorsque la température atteint la valeur définie. Lorsque vous utilisez un mode de cuisson, l'affichage indique la température et l'heure réglées ; lorsque l'appareil s'arrête de fonctionner, l'affichage indique "END" ; lorsque vous relevez la poignée du panier ou lorsque celui-ci n'est pas dans l'appareil, le temps affiché s'arrête et clignote.
En cours de fonctionnement, appuyez sur le bouton POWER pour quitter le mode de cuisson : le ventilateur s'arrête de fonctionner après 60 secondes et l'appareil passe en mode standby ;
Attention : Les conditions suivantes doivent être remplie pour passer en mode de fonctionnement :
Après utilisation, débranchez la prise d'alimentation et attendez que l'HALO AIR ait refroidi avant de le déplacer.
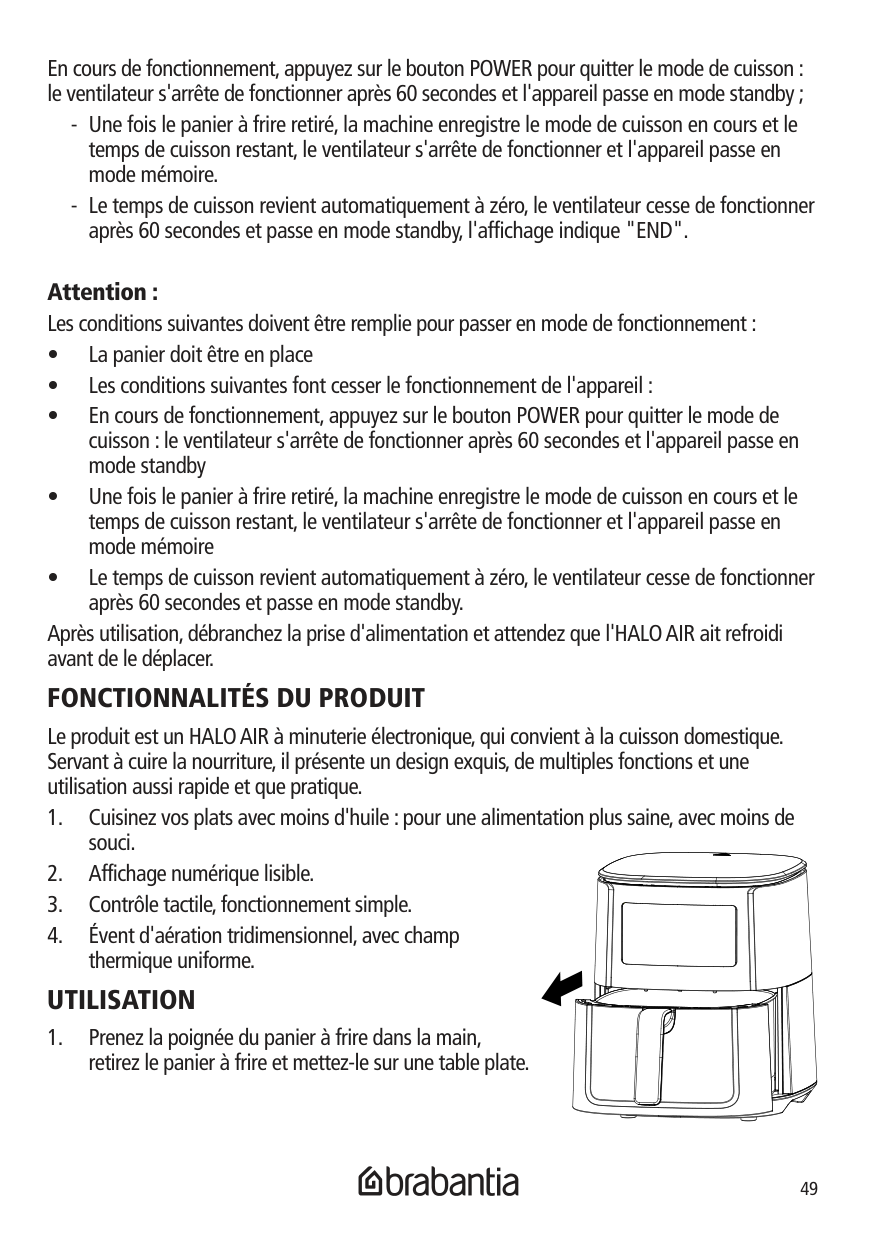
####### FONCTIONNALITÉS DU PRODUIT
Le produit est un HALO AIR à minuterie électronique, qui convient à la cuisson domestique. Servant à cuire la nourriture, il présente un design exquis, de multiples fonctions et une utilisation aussi rapide et que pratique.
####### UTILISATION

Maniez le panier avec précaution, veillez à toujours le poser à plat sur la table pour éviter d'être brûlé par la vapeur, de la nourriture renversée ou des projections brûlantes.
| | |---|
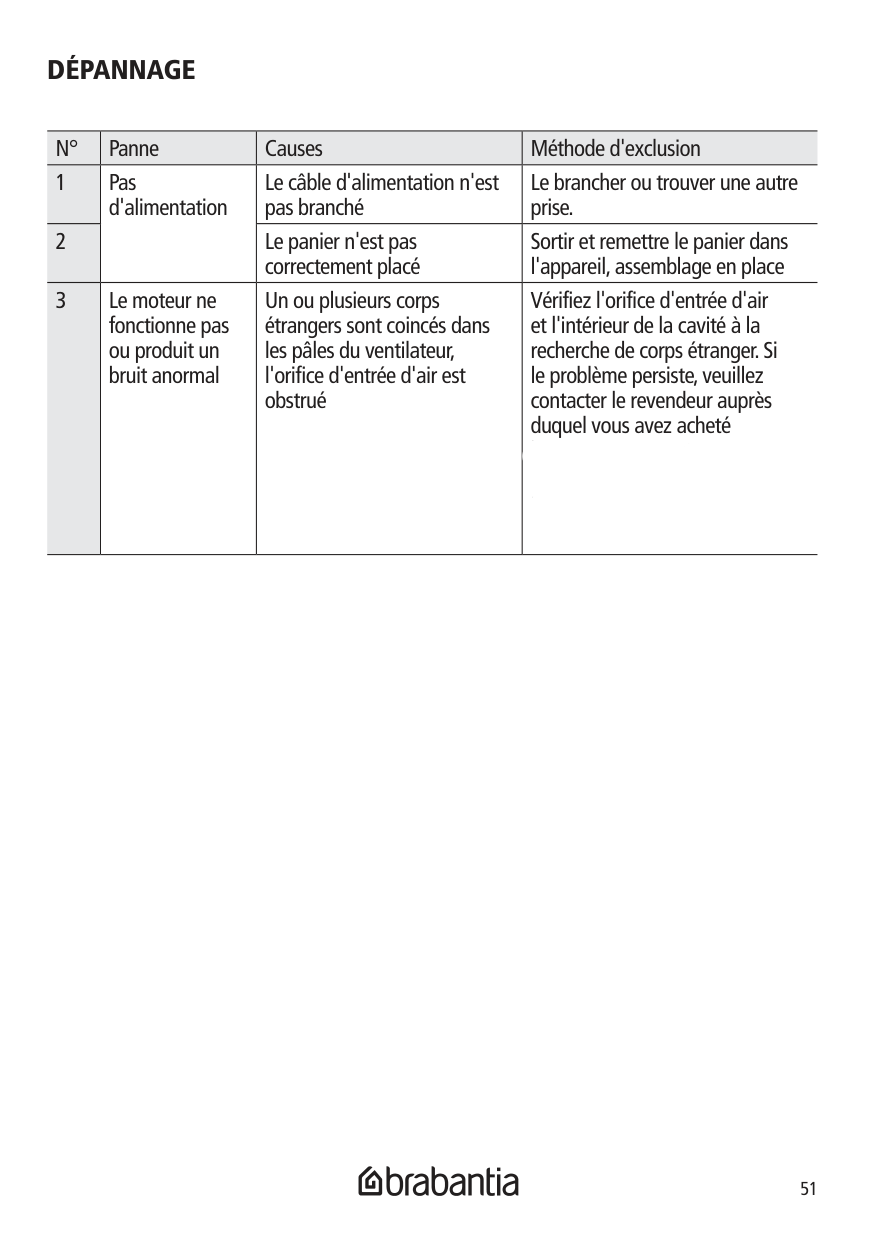
####### DÉPANNAGE
|N°|Panne|Causes|Méthode d'exclusion|

|---|---|---|---| |1|Pas d'alimentation|Le câble d'alimentation n'est pas branché|Le brancher ou trouver une autre prise.| |2|Pas d'alimentation|Le panier n'est pas correctement placé|Sortir et remettre le panier dans l'appareil, assemblage en place| |3|Le moteur ne fonctionne pas ou produit un bruit anormal|Un ou plusieurs corps étrangers sont coincés dans les pâles du ventilateur, l'orifice d'entrée d'air est obstrué|Vérifiez l'orifice d'entrée d'air et l'intérieur de la cavité à la recherche de corps étranger. Si le problème persiste, veuillez contacter le revendeur auprès duquel vous avez acheté
|
####### MESURES DE PRÉCAUTION :
Afin de garantir une utilisation en toute sécurité et éviter toute blessure, veuillez suivre les mesures de précaution ci-dessous. Le non respect de ces mesures ou un mauvais usage peut entraîner des accidents.
########## Avertissement
####### PRÉCAUTIONS QUAND VOUS CUISINEZ
Veuillez lire ce qui suit et toujours faire preuve de prudence lorsque vous cuisinez : la température de votre nourriture peut monter très fortement ; risque de brûlure.
####### ENTRETIEN & NETTOYAGE

Les personnes porteuses de stimulateur cardiaque, d'aides auditives ou d'implant cochléen sont invitées à consulter leur spécialiste et à prendre connaissance des instructions du fabricant de leur appareil médical.
NOTE : Ne pas utiliser de matériau abrasif ni aucun ustensile tranchant pour nettoyer le four ou ses pièces.
NOTE : Laisser toutes les pièces et surfaces sécher complètement avant d'utiliser à nouveau l'appareil.
######## CARACTÉRISTIQUES Tension/Fréquence : 230-240 V~50-60 Hz Puissance : 1700 W
GARANTIE Dans le cas peu probable où vous rencontrez un problème avec votre produit Brabantia, veuillez noter qu'il est assorti d'une garantie de deux ans. Pour toute demande, veuillez contacter le vendeur auprès duquel vous avez acheté l'appareil ou appeler au numéro non surtaxé de l'agent de New Zealand Brabantia : 0800 127 727. Exclusions de la garantie : La garantie est réputée nulle lorsque :

VEUILLEZ CONSULTER ET OBSERVER STRICTEMENT TOUS LES AVERTISSEMENTS ET TOUTES LES MESURES DE PRÉCAUTION FIGURANT DANS CE MANUEL D'UTILISATION.

EN RAISON DU DÉVELOPPEMENT CONTINU DES PRODUITS, LES CARACTÉRISTIQUES TECHNIQUES PEUVENT FAIRE L'OBJET DE MODIFICATIONS SANS PRÉAVIS.
####### ÉLIMINATION RESPECTUEUSE DE L'ENVIRONNEMENT
Ce marquage indique que ce produit ne doit pas être jeté avec les autres déchets ménagers. Pour prévenir les éventuels dommages causés à l'environnement ou à la santé humaine par une élimination incontrôlée des déchets, il est nécessaire de les recycler de manière responsable afin de promouvoir la réutilisation durable des ressources matérielles. Pour vous débarrasser correctement de votre appareil, veuillez contacter votre centre local de collecte et de recyclage des déchets ou l'y apporter directement. Vous pouvez
également contacter votre mairie pour obtenir des informations sur votre centre local de réutilisation. Veuillez faire en sorte que ce produit puisse être recyclé sans danger pour l'environnement.
BRABANTIA 5.5L HALO AIR
Bedienungsanleitung BBEK1131

2
###### JAHRE
########### GARANTIE
www.brabantia.com/electrical-
www.brabantia.com/elektrogeraete
www.brabantia.com/electrical-appliances

#### VIELEN DANK FÜR DEN KAUF DES 5,5L HALO AIRS
Wir hoffen, dass er Ihnen Freude bereitet und dass er einen besonderen Platz in Ihrem Haus einnehmen wird. Viel Spaß damit!
####### WICHTIGE SICHERHEITSMASSNAHMEN
Bei der Verwendung dieses Geräts sollten stets grundlegende Sicherheitsvorkehrungen befolgt werden, einschließlich, aber nicht beschränkt auf die folgenden:
VORSICHT: Lassen Sie den HALO AIR während des Betriebs nicht unbeaufsichtigt. Um das Brandrisiko zu verringern, halten Sie den Innenraum des Ofens vollständig sauber und frei von Speiseresten, Öl, Fett und anderen brennbaren Materialien.
VORSICHT: Es kann ein Brand entstehen, wenn der HALO AIR während des Betriebs oder danach, wenn er noch heiß ist, abgedeckt wird oder brennbare Materialien wie Vorhänge, Vorhänge, Wände und dergleichen berührt. Legen Sie keines der folgenden Materialien in den HALO AIR, auf die Oberseite des HALO AIRs oder in direkten Kontakt mit den Seiten oder Bodenflächen des HALO AIRs: Papier, Karton, Kunststoff oder ähnliches.
####### BEWAHREN SIE DIESE ANWEISUNGEN AUF
DIESES GERÄT IST FÜR DEN HAUSGEBRAUCH UND ÄHNLICHE ANWENDUNGEN BESTIMMT, WIE: KÜCHENBEREICHE DES PERSONALS IN GESCHÄFTEN, BÜROS UND ANDEREN ARBEITSUMGEBUNGEN.
BAUERNHÄUSERN. VON KUNDEN IN HOTELS, MOTELS UND ANDEREN WOHNÄHNLICHEN UMGEBUNGEN; IN UMGEBUNGEN MIT BED & BREAKFASTÄHNLICHEM CHARAKTER
######### NUR FÜR DEN HAUSGEBRAUCH NICHT ZUR KOMMERZIELLEN NUTZUNG BESTIMMT
####### LERNEN SIE IHREN HALO AIR KENNEN
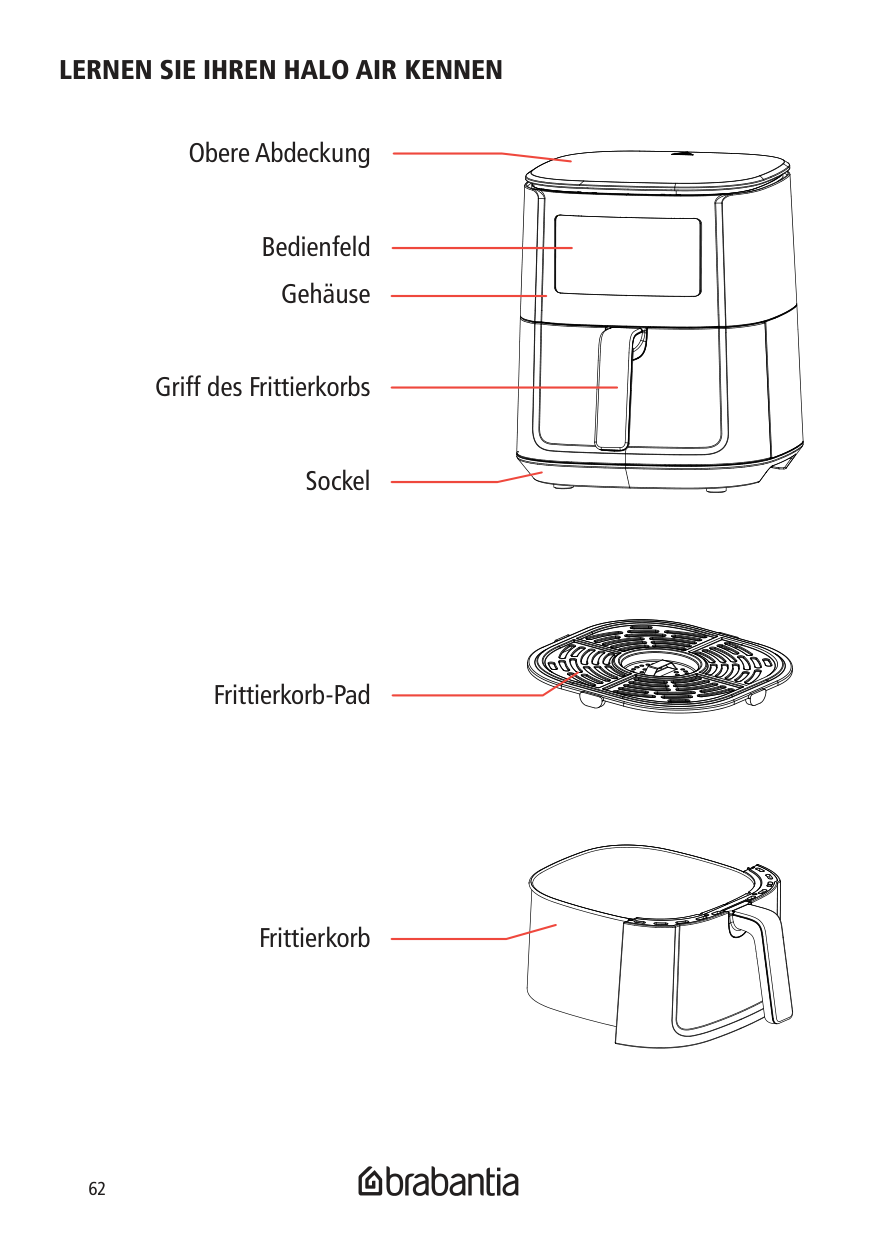
Obere Abdeckung
Bedienfeld Gehäuse
Griff des Frittierkorbs
Sockel
| | | |---|---| | | |
Frittierkorb-Pad
Frittierkorb
####### VOR DEM ERSTEN GEBRAUCH
Hinweis: Bei der erstmaligen Verwendung des HALO AIRs kann eine leichte Rauch- oder Geruchsentwicklung auftreten. Dies ist normal und wird bald nachlassen.
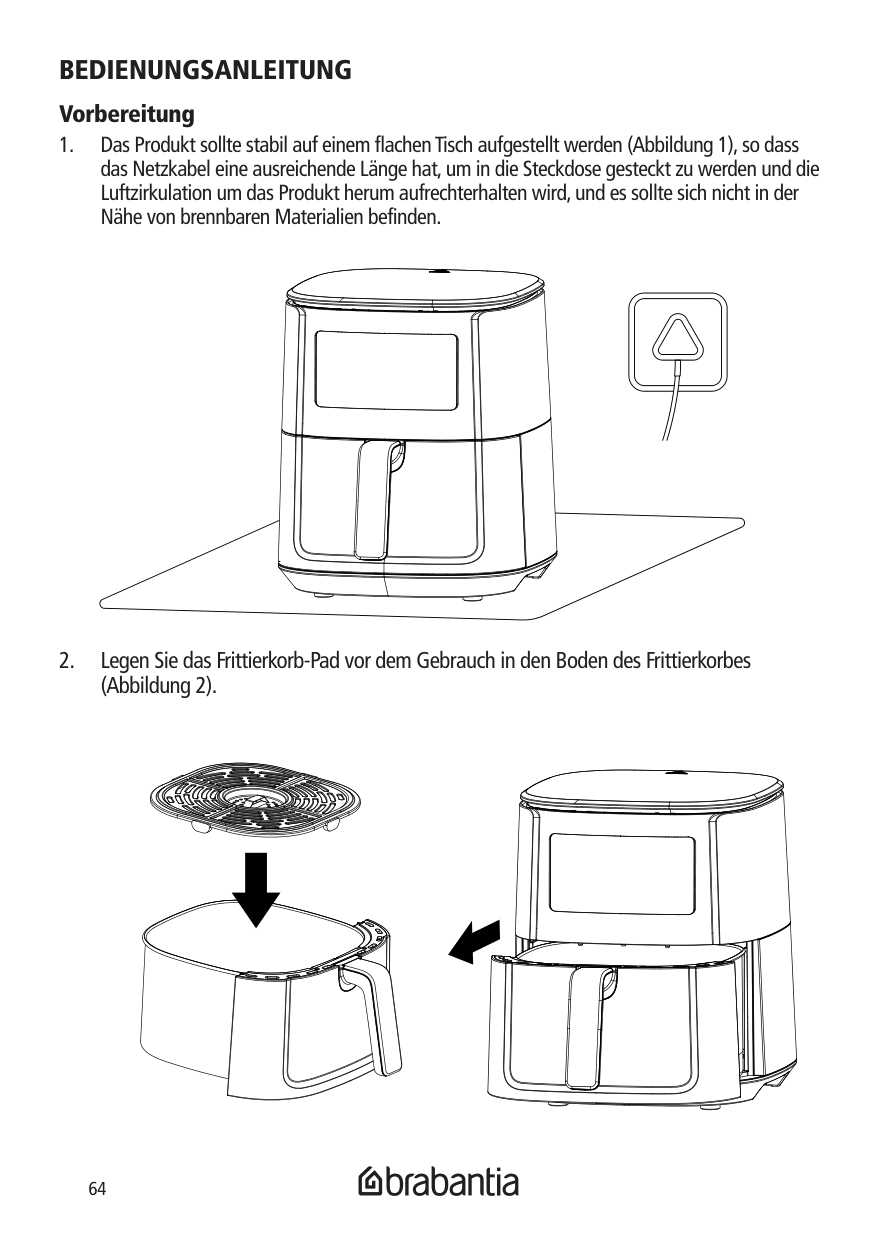
####### BEDIENUNGSANLEITUNG Vorbereitung
####### ANWEISUNGEN FÜR DAS BEDIENFELD

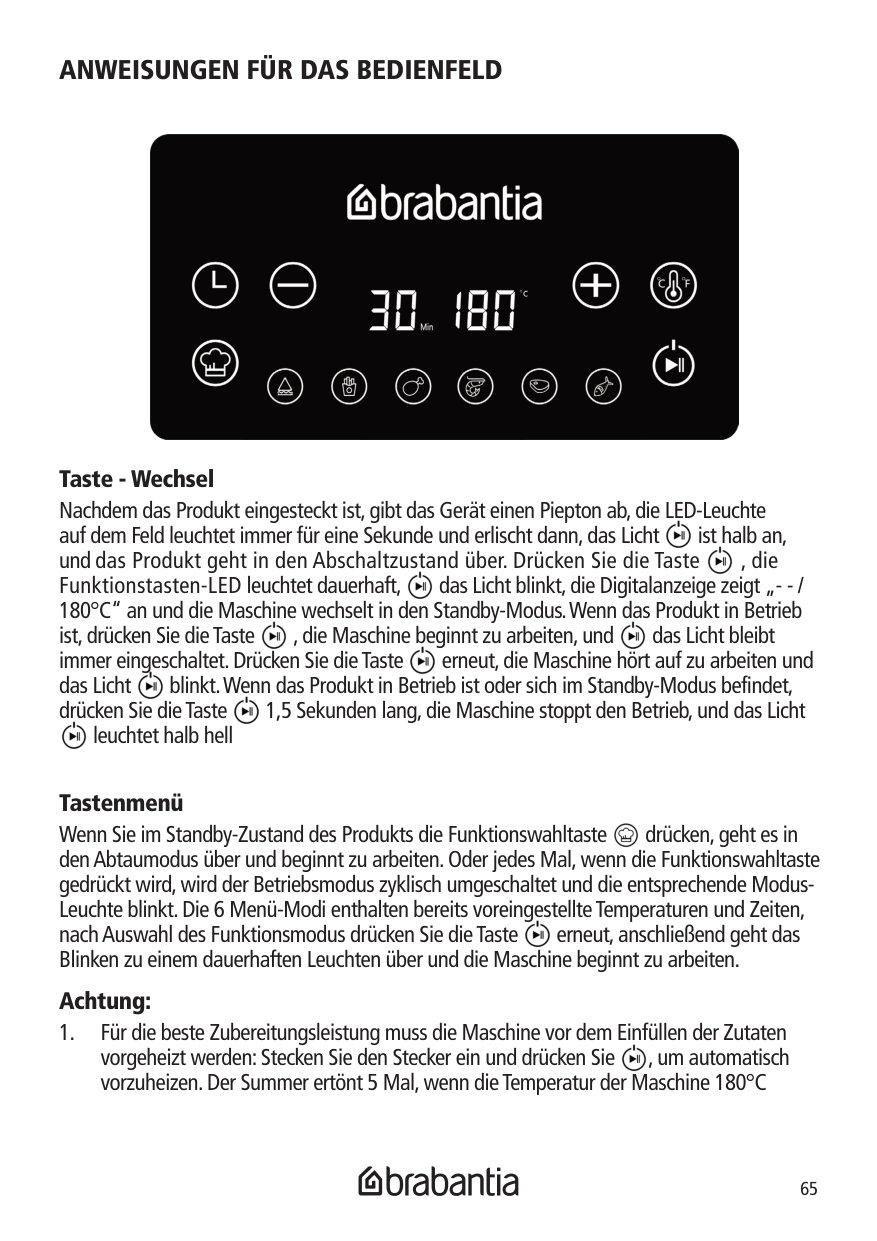
Taste - Wechsel Nachdem das Produkt eingesteckt ist, gibt das Gerät einen Piepton ab, die LED-Leuchte auf dem Feld leuchtet immer für eine Sekunde und erlischt dann, das Licht ist halb an, und das Produkt geht in den Abschaltzustand über. Drücken Sie die Taste , die Funktionstasten-LED leuchtet dauerhaft, das Licht blinkt, die Digitalanzeige zeigt „- - / 180°C“ an und die Maschine wechselt in den Standby-Modus. Wenn das Produkt in Betrieb ist, drücken Sie die Taste , die Maschine beginnt zu arbeiten, und das Licht bleibt immer eingeschaltet. Drücken Sie die Taste erneut, die Maschine hört auf zu arbeiten und das Licht blinkt. Wenn das Produkt in Betrieb ist oder sich im Standby-Modus befindet, drücken Sie die Taste 1,5 Sekunden lang, die Maschine stoppt den Betrieb, und das Licht


leuchtet halb hell
Tastenmenü Wenn Sie im Standby-Zustand des Produkts die Funktionswahltaste drücken, geht es in den Abtaumodus über und beginnt zu arbeiten. Oder jedes Mal, wenn die Funktionswahltaste gedrückt wird, wird der Betriebsmodus zyklisch umgeschaltet und die entsprechende ModusLeuchte blinkt. Die 6 Menü-Modi enthalten bereits voreingestellte Temperaturen und Zeiten, nach Auswahl des Funktionsmodus drücken Sie die Taste erneut, anschließend geht das Blinken zu einem dauerhaften Leuchten über und die Maschine beginnt zu arbeiten.


######### Achtung:


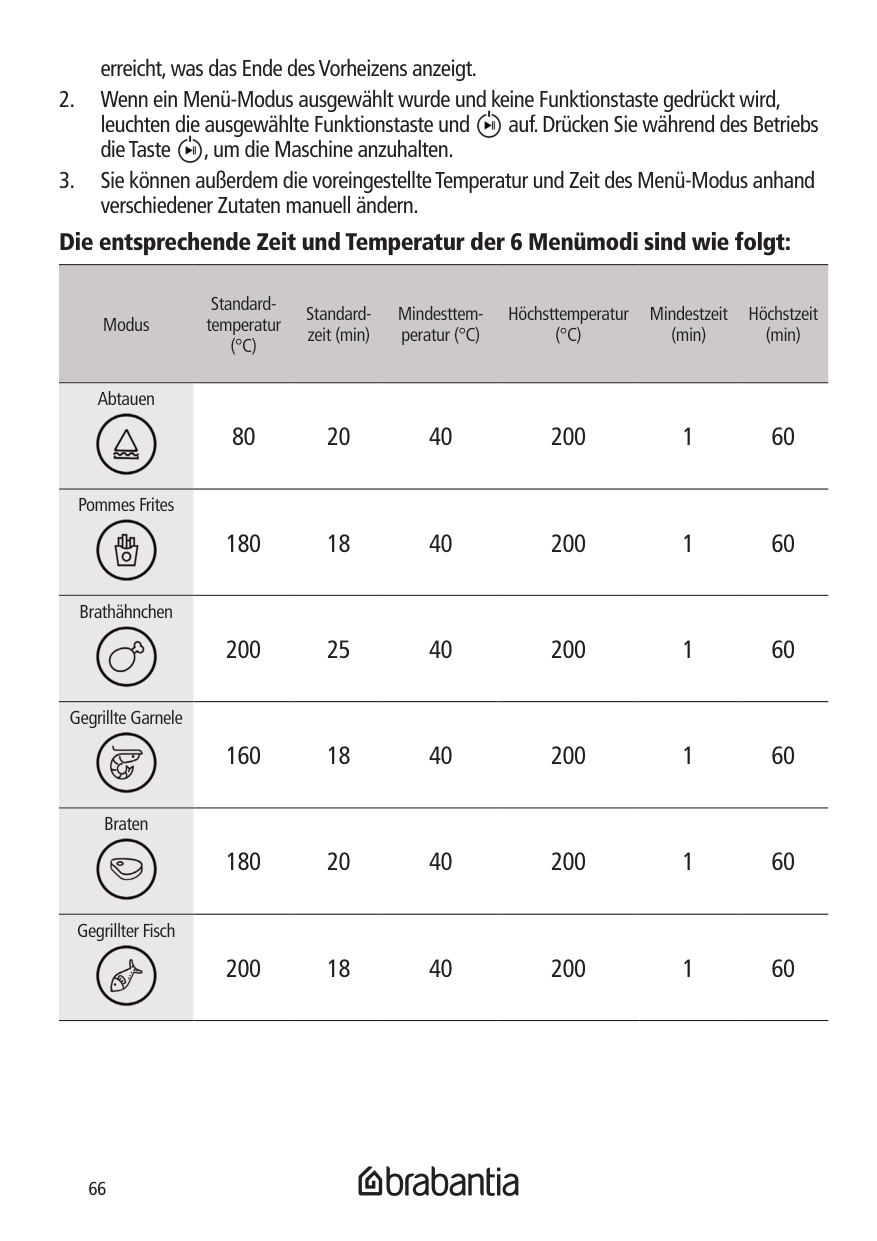
######### Die entsprechende Zeit und Temperatur der 6 Menümodi sind wie folgt:
Modus
Standardtemperatur (°C)
Standardzeit (min)
Mindesttemperatur (°C)
Höchsttemperatur (°C)
Mindestzeit (min)
Höchstzeit (min)
Abtauen

Pommes Frites

Brathähnchen

Gegrillte Garnele

Braten

Gegrillter Fisch

80 20 40 200 1 60
180 18 40 200 1 60
200 25 40 200 1 60
160 18 40 200 1 60
180 20 40 200 1 60
200 18 40 200 1 60
####### ZEIT-/TEMPERATUREINSTELLUNGEN

Taste – Zeiteinstellung Drücken Sie die ZEIT-Taste. Auf dem Display blinkt „- -“. Geben Sie die gewünschte Zeit ein, in dem Sie die „+“-Taste drücken, um Zeit um 1 Einheit zu erhöhen. Drücken Sie die „-“-Taste, um die Zeit um 1 Einheit zu verringern. Die Zeit kann von 1 bis 60 eingestellt werden. Wenn 10 Sekunden lang keine Bedienung erfolgt, wird die Zeiteinstellung automatisch beendet; standardmäßig drücken Sie die „+“ bzw. „-“-Taste, um die Zeiteinstellung aufzurufen. Taste – Temperatureinstellung
Drücken Sie die TEMP-Taste. Das Display zeigt blinkend 180°C an. Geben Sie die Temperatureinstellung ein, in dem Sie die „+“-Taste drücken und die Temperatur um 5 Einheiten zu erhöhen oder die „-“-Taste drücken, um die Temperatur um 5 Einheiten zu verringern. Die Temperatur kann zwischen 40 und 200 eingestellt werden. Wenn 10 Sekunden lang keine Bedienung erfolgt, wird die Temperatureinstellung automatisch beendet. Drücken und halten Sie die TEMP-Taste für 3 Sekunden, um zwischen Celsius und Fahrenheit zu wechseln.
Display – Menü-Modus Im Menü-Modus kann beliebig aus 6 Standardmenüs ausgewählt werden: Auftauen, Pommes Frites, Brathähnchen, Gegrillte Garnelen, Braten, Gegrillter Fisch. Display – Temperatur- und Zeitanzeige Im Standby-Modus zeigt das Display „- -/180“ an. Bei Verwendung der Vorheiz-Funktion wird, wenn die Temperatur nicht gleich der eingestellten Temperatur ist, die Temperaturanzeige eingeblendet und das Gerät beginnt zu arbeiten. Das Display zeigt „END“ an, wenn die Temperatur die gewünschte Temperatur erreicht hat. Wenn Sie den Menü-Modus verwenden, zeigt das Display die eingestellte Temperatur und Zeit an; wenn das Gerät nicht mehr arbeitet, zeigt das Display „END“ an; wenn der Griff des Korbs herausgezogen oder nicht an seinem Platz ist, hält die angezeigte Zeit an und blinkt auf. Drücken Sie während des Betriebs die POWER-Taste, um den Betriebsmodus zu beenden. Das
Gebläse stoppt nach 60 Sekunden Wartezeit und geht in den Standby-Modus über;
Achtung: Die folgenden Bedingungen müssen erfüllt sein, den Betriebsmodus zu starten:
nach 60 Sekunden Verzögerung und geht in den Standby-Modus über. Ziehen Sie nach dem Gebrauch den Netzstecker und warten Sie, bis der HALO AIR abgekühlt ist, bevor Sie das Produkt bewegen.
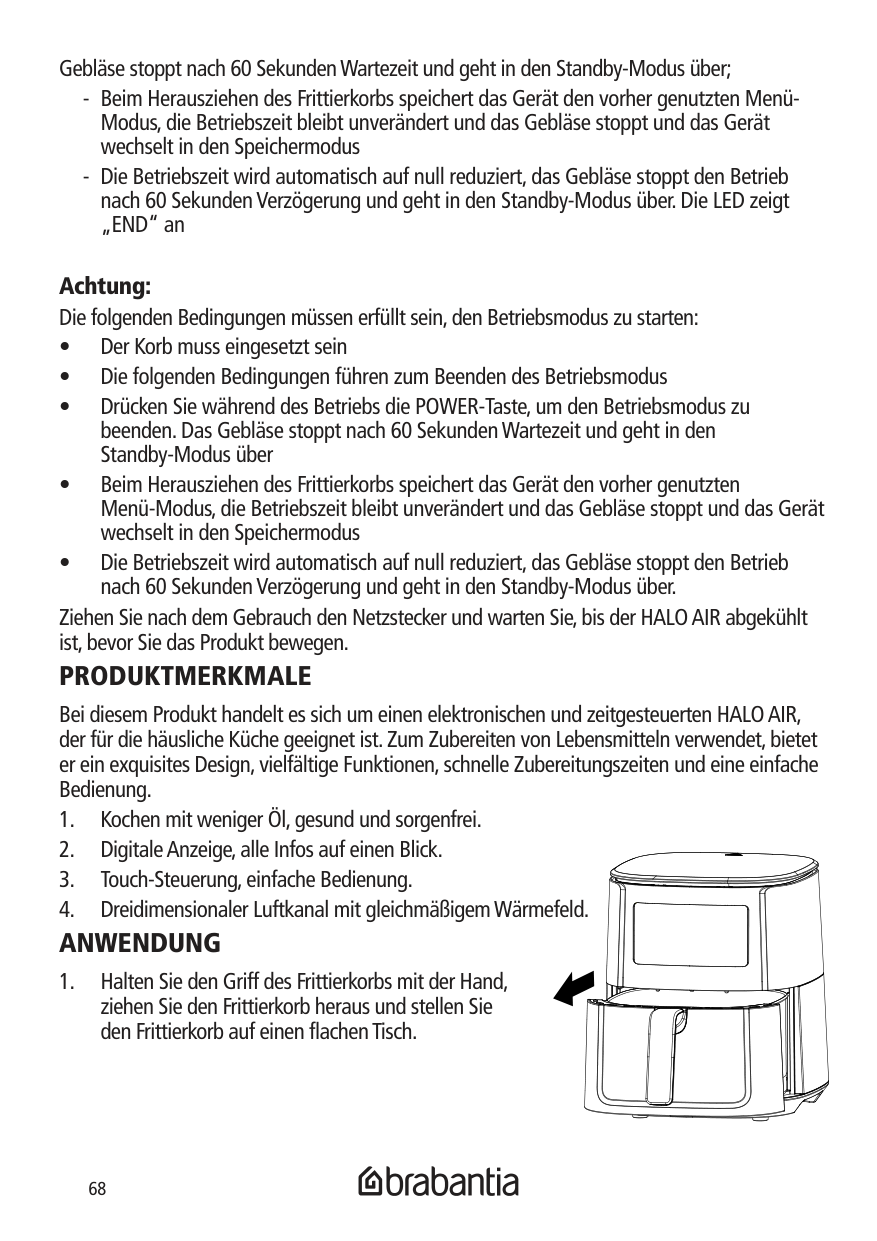
####### PRODUKTMERKMALE
Bei diesem Produkt handelt es sich um einen elektronischen und zeitgesteuerten HALO AIR, der für die häusliche Küche geeignet ist. Zum Zubereiten von Lebensmitteln verwendet, bietet er ein exquisites Design, vielfältige Funktionen, schnelle Zubereitungszeiten und eine einfache Bedienung.


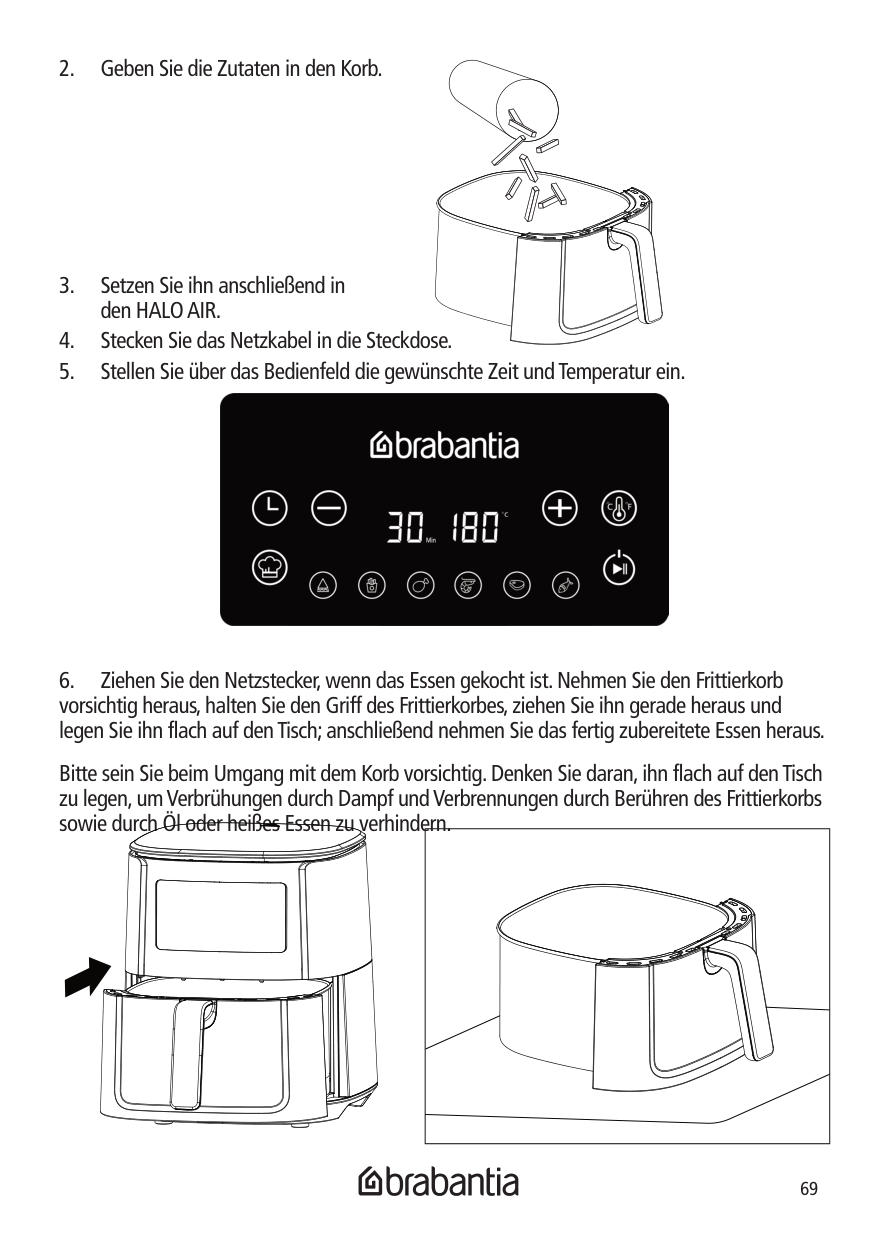
Bitte sein Sie beim Umgang mit dem Korb vorsichtig. Denken Sie daran, ihn flach auf den Tisch zu legen, um Verbrühungen durch Dampf und Verbrennungen durch Berühren des Frittierkorbs sowie durch Öl oder heißes Essen zu verhindern.
| | |---|
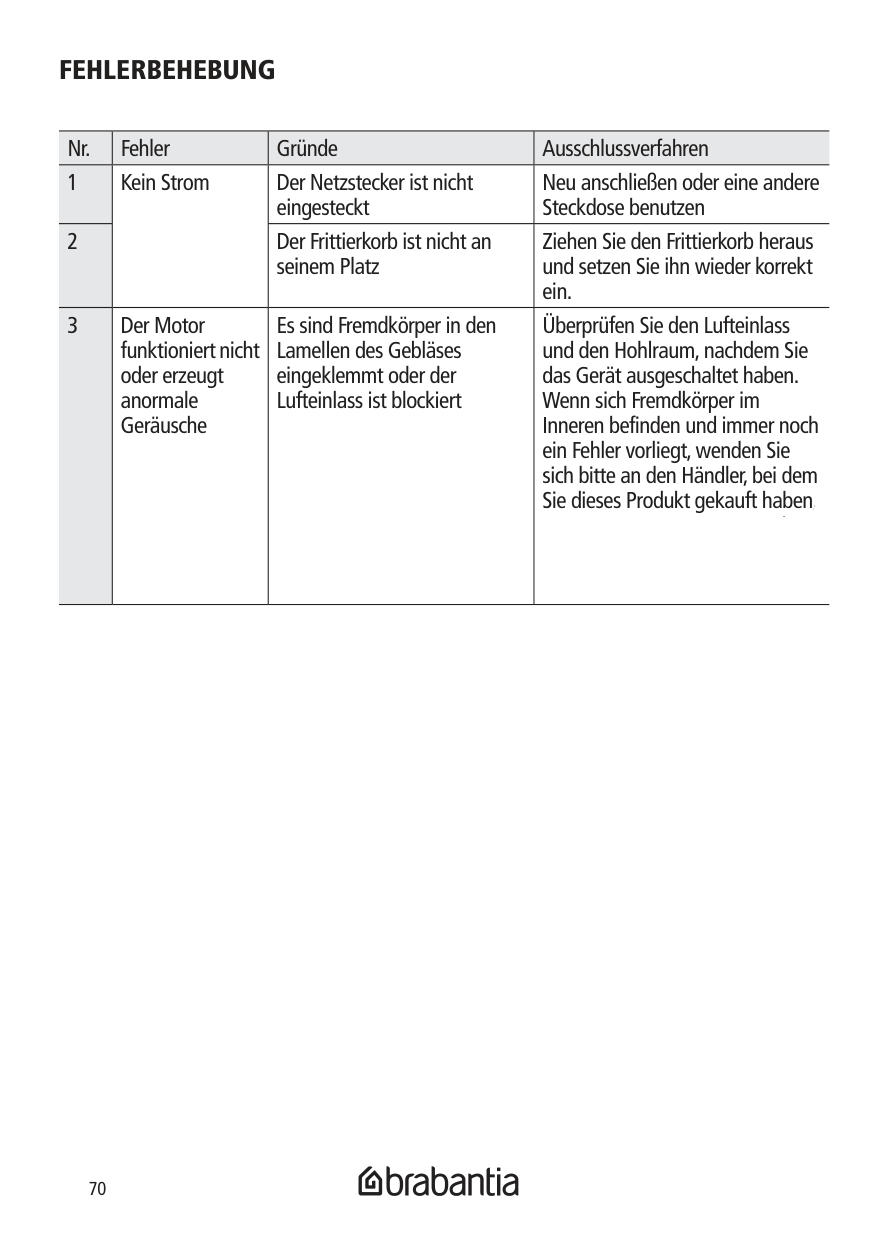
####### FEHLERBEHEBUNG
|Nr.|Fehler|Gründe|Ausschlussverfahren| |---|---|---|---| |1|Kein Strom|Der Netzstecker ist nicht eingesteckt|Neu anschließen oder eine andere Steckdose benutzen| |2|Kein Strom|Der Frittierkorb ist nicht an seinem Platz|Ziehen Sie den Frittierkorb heraus und setzen Sie ihn wieder korrekt ein.| |3|Der Motor funktioniert nicht oder erzeugt anormale Geräusche|Es sind Fremdkörper in den Lamellen des Gebläses eingeklemmt oder der Lufteinlass ist blockiert
|Überprüfen Sie den Lufteinlass und den Hohlraum, nachdem Sie das Gerät ausgeschaltet haben. Wenn sich Fremdkörper im Inneren befinden und immer noch ein Fehler vorliegt, wenden Sie sich bitte an den Händler, bei dem Sie dieses Produkt gekauft haben, oder an die deutsche Brabantia-
|
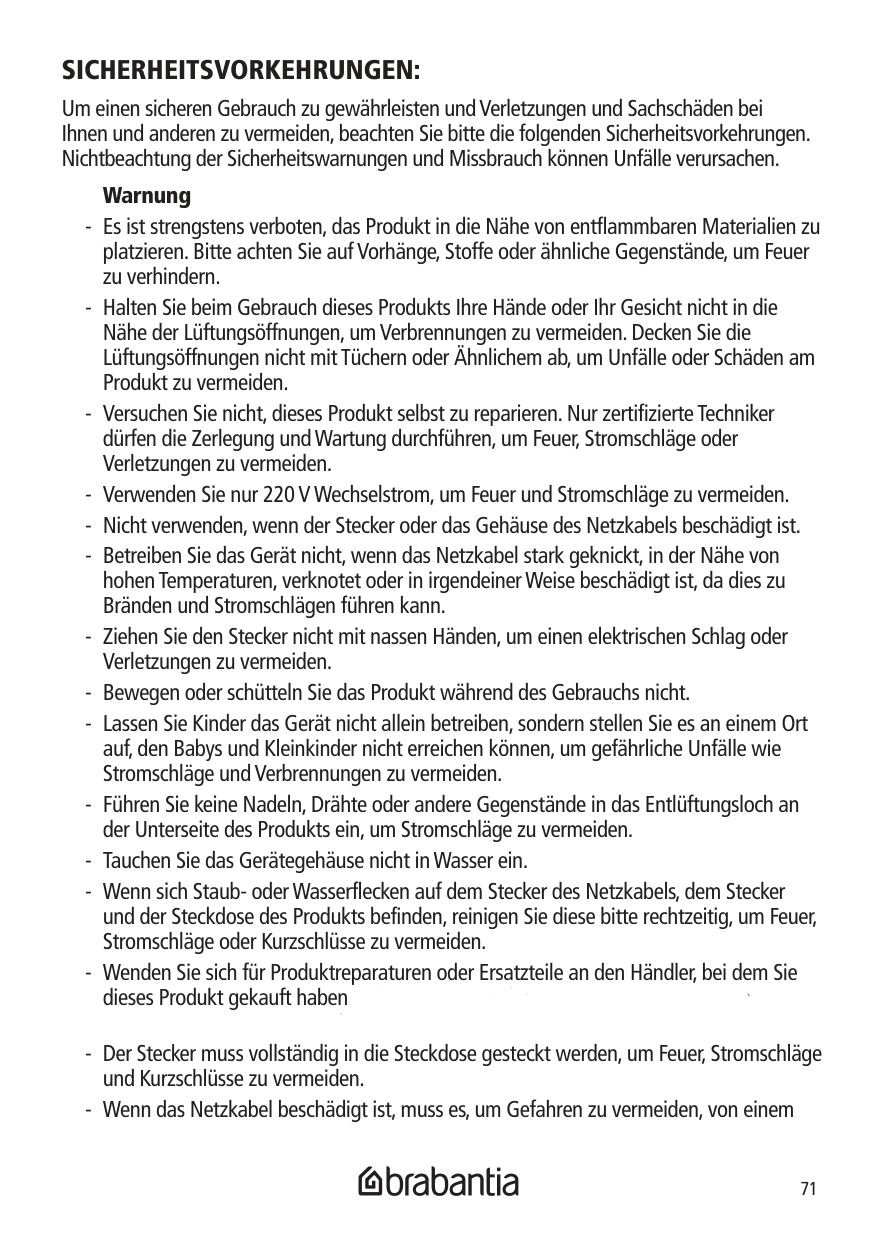
####### SICHERHEITSVORKEHRUNGEN:
Um einen sicheren Gebrauch zu gewährleisten und Verletzungen und Sachschäden bei Ihnen und anderen zu vermeiden, beachten Sie bitte die folgenden Sicherheitsvorkehrungen. Nichtbeachtung der Sicherheitswarnungen und Missbrauch können Unfälle verursachen.
########## Warnung


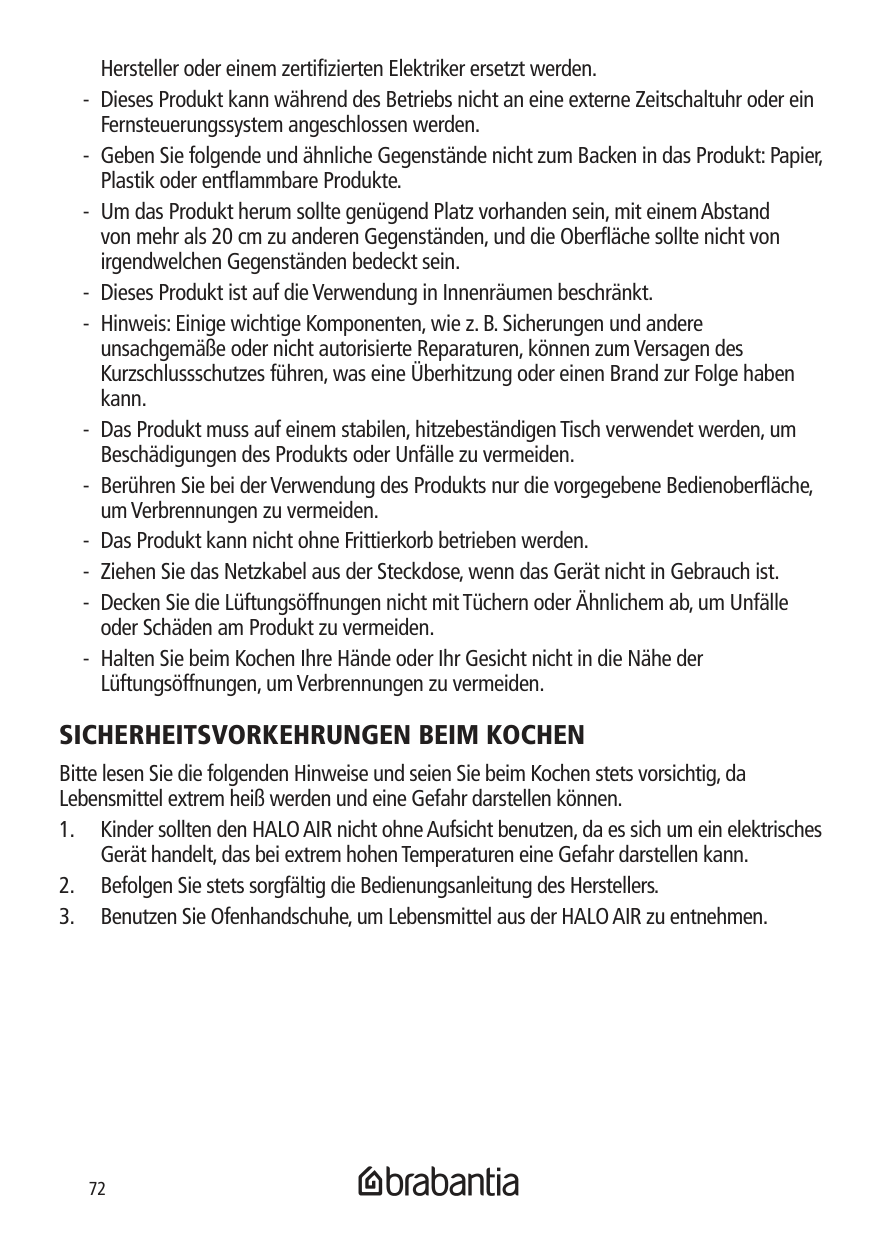
####### SICHERHEITSVORKEHRUNGEN BEIM KOCHEN
Bitte lesen Sie die folgenden Hinweise und seien Sie beim Kochen stets vorsichtig, da Lebensmittel extrem heiß werden und eine Gefahr darstellen können.
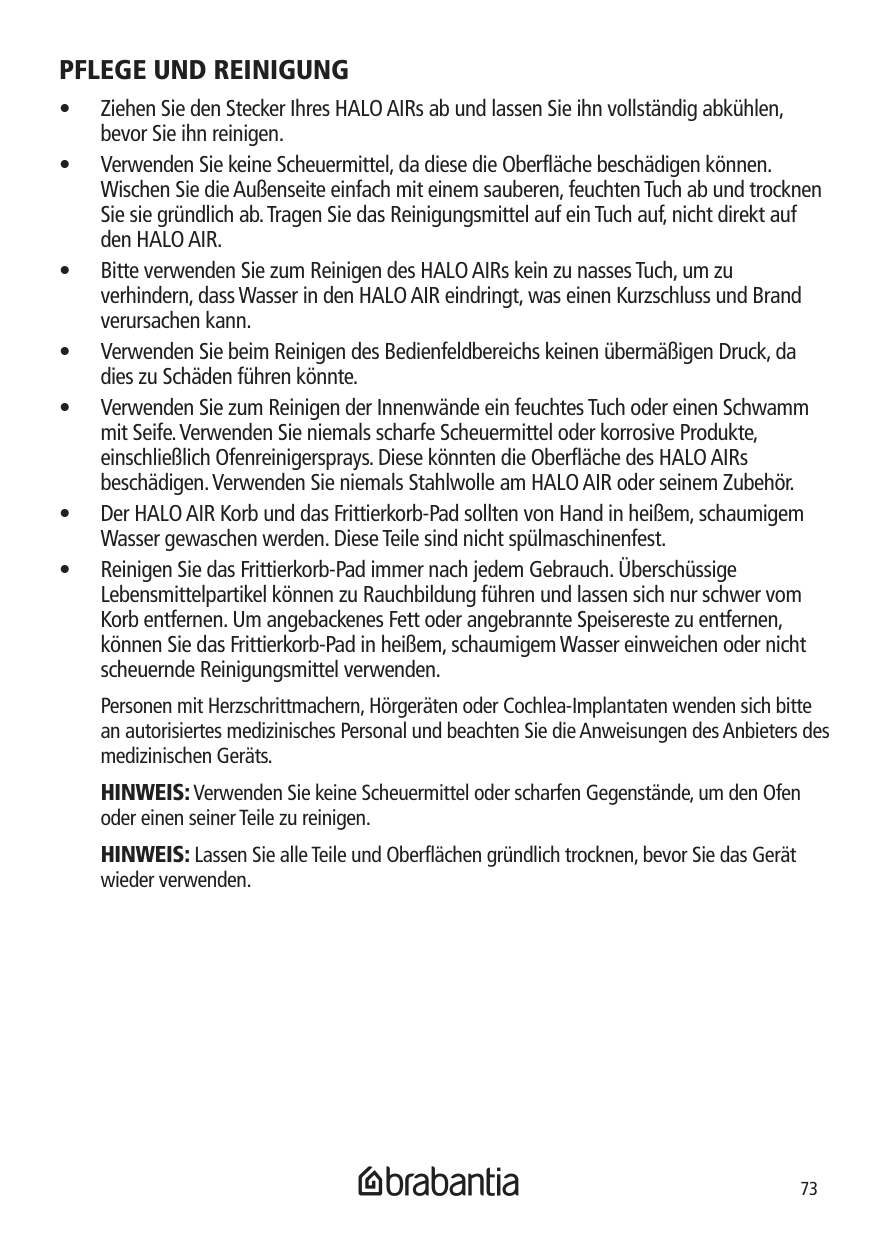
####### PFLEGE UND REINIGUNG
Personen mit Herzschrittmachern, Hörgeräten oder Cochlea-Implantaten wenden sich bitte an autorisiertes medizinisches Personal und beachten Sie die Anweisungen des Anbieters des medizinischen Geräts.
HINWEIS: Verwenden Sie keine Scheuermittel oder scharfen Gegenstände, um den Ofen oder einen seiner Teile zu reinigen.
HINWEIS: Lassen Sie alle Teile und Oberflächen gründlich trocknen, bevor Sie das Gerät wieder verwenden.
######## SPEZIFIKATIONEN Nennspannung/Frequenz: 230-240 V~50-60 Hz Nennleistung: 1700 W
GARANTIE In dem unwahrscheinlichen Fall, dass Sie ein Problem mit Ihrem Brabantia-Gerät haben, beachten Sie bitte, dass Ihr Brabantia-Gerät eine 2-Jahres-Garantie hat. Wenden Sie sich für jegliche Fragen an den Händler, bei dem Sie dieses Produkt gekauft haben, oder an die deutsche Brabantia-Vertretung unter der Nummer 0800 127 727 (gebührenfrei). Garantieausschlüsse: Die Garantie gilt in folgenden Fällen nicht:
BITTE BEACHTEN UND BEFOLGEN SIE ALLE WARNUNGEN UND VORSICHTSMASSNAHMEN IN DIESER GEBRAUCHSANWEISUNG.
AUFGRUND DER STÄNDIGEN WEITERENTWICKLUNG DES PRODUKTS KÖNNEN SPEZIFIKATIONEN OHNE VORHERIGE ANKÜNDIGUNG GEÄNDERT WERDEN.
####### UMWELTFREUNDLICHE ENTSORGUNG
Diese Kennzeichnung weist darauf hin, dass dieses Produkt nicht mit dem normalen Hausmüll entsorgt werden darf. Um eine mögliche Schädigung der Umwelt oder der menschlichen Gesundheit durch unkontrollierte Abfallentsorgung zu verhindern, sollten Sie das Produkt verantwortungsbewusst recyceln, um die nachhaltige Wiederverwendung von Materialressourcen zu fördern. Wenden Sie sich zur korrekten Entsorgung Ihres Geräts bitte an Ihr örtliches Abfall-/Recyclingzentrum oder bringen Sie es dorthin. Alternativ können Sie sich an Ihre örtliche Verwaltung wenden, um Informationen über Ihr örtliches Wertstoffsystem zu erhalten. Bitte sorgen Sie dafür, dass dieses Produkt umweltverträglich recycelt werden kann.
Manufactured by Elmarc B.V. under exclusive licence of Brabantia Nederland B.V.
Elmarc B.V. Kolenbranderstraat 28 2984 AT Ridderkerk Netherlands
####### PRODUCT INFORMATION BBEK1131 5.5L HALO AIR