
Ask AI
— answers from the official manualAnswers from the official manual.
Common questions
Common Questions
10 totalHow do I factory reset the Cen Tech 60581 charger?
Press and hold the Power button for 10 seconds until the LED flashes red. This clears all settings and resets the device to its factory defaults, clearing previous configurations and requiring re-pairing of connected devices. (Page 23)
What should I do if my Cen Tech 60581 charger's Charge Meter stays at the high end for more than 5-10 minutes?
If the Charge Meter remains pegged near the top of its range after initial charging, it likely indicates a short circuit within the battery. Unplug and stop use of the charger immediately, and have the battery checked by a professional technician. (Page 14)
Why does my Cen Tech 60581 charger's Reverse Connection LED come on?
If the Reverse Connection LED is illuminated, it means that the battery cables have been attached improperly. Disconnect and safely reconnect them in the correct configuration immediately or risk damaging your equipment (Page 7).
How do I charge a frozen battery using my Cen Tech 60581 charger?
Do not attempt to charge batteries that are frozen; charging them can result in damage or safety risks. Allow the battery to thaw before charging according to standard procedures (Page 7).
When I start my car with this charger, why doesn't it work immediately?
If your vehicle is not starting after attempting to charge the battery using the Cen Tech 60581 charger, ensure that you follow a 5-second maximum interval for each use of the Start setting followed by at least four minutes of rest before trying again (Page 9).
What is the correct voltage and amperage rating range expected for my Cen Tech 60581 charger?
The specifications indicate that the Input AC power rating of your Cen Tech 60581 charger is 120VAC, at a frequency of 60Hz, with an available current draw up to 2A. The Output ratings can be selected between 12 VDC at 10* A or as high as 12 VDC providing 50A during the Start mode (Page 6).
Full Manual
36 pages
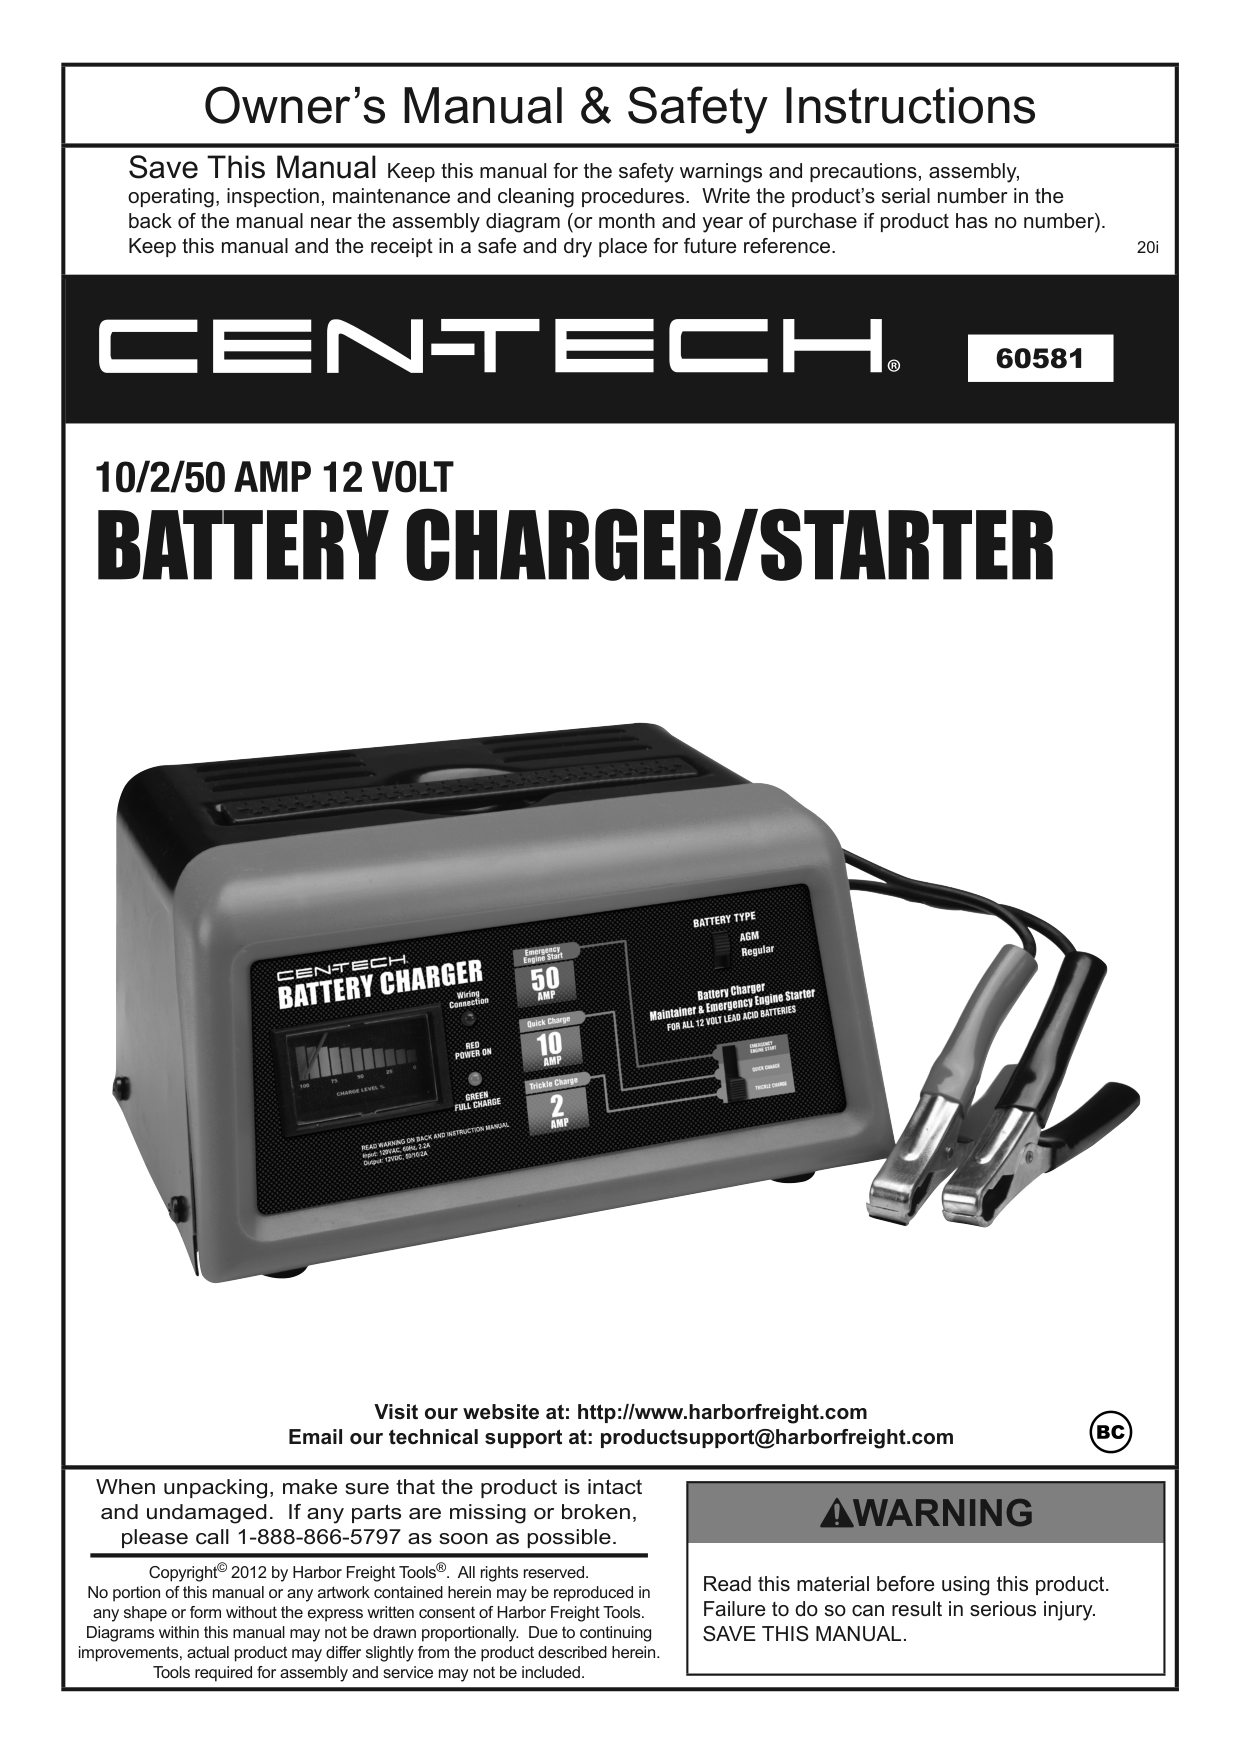
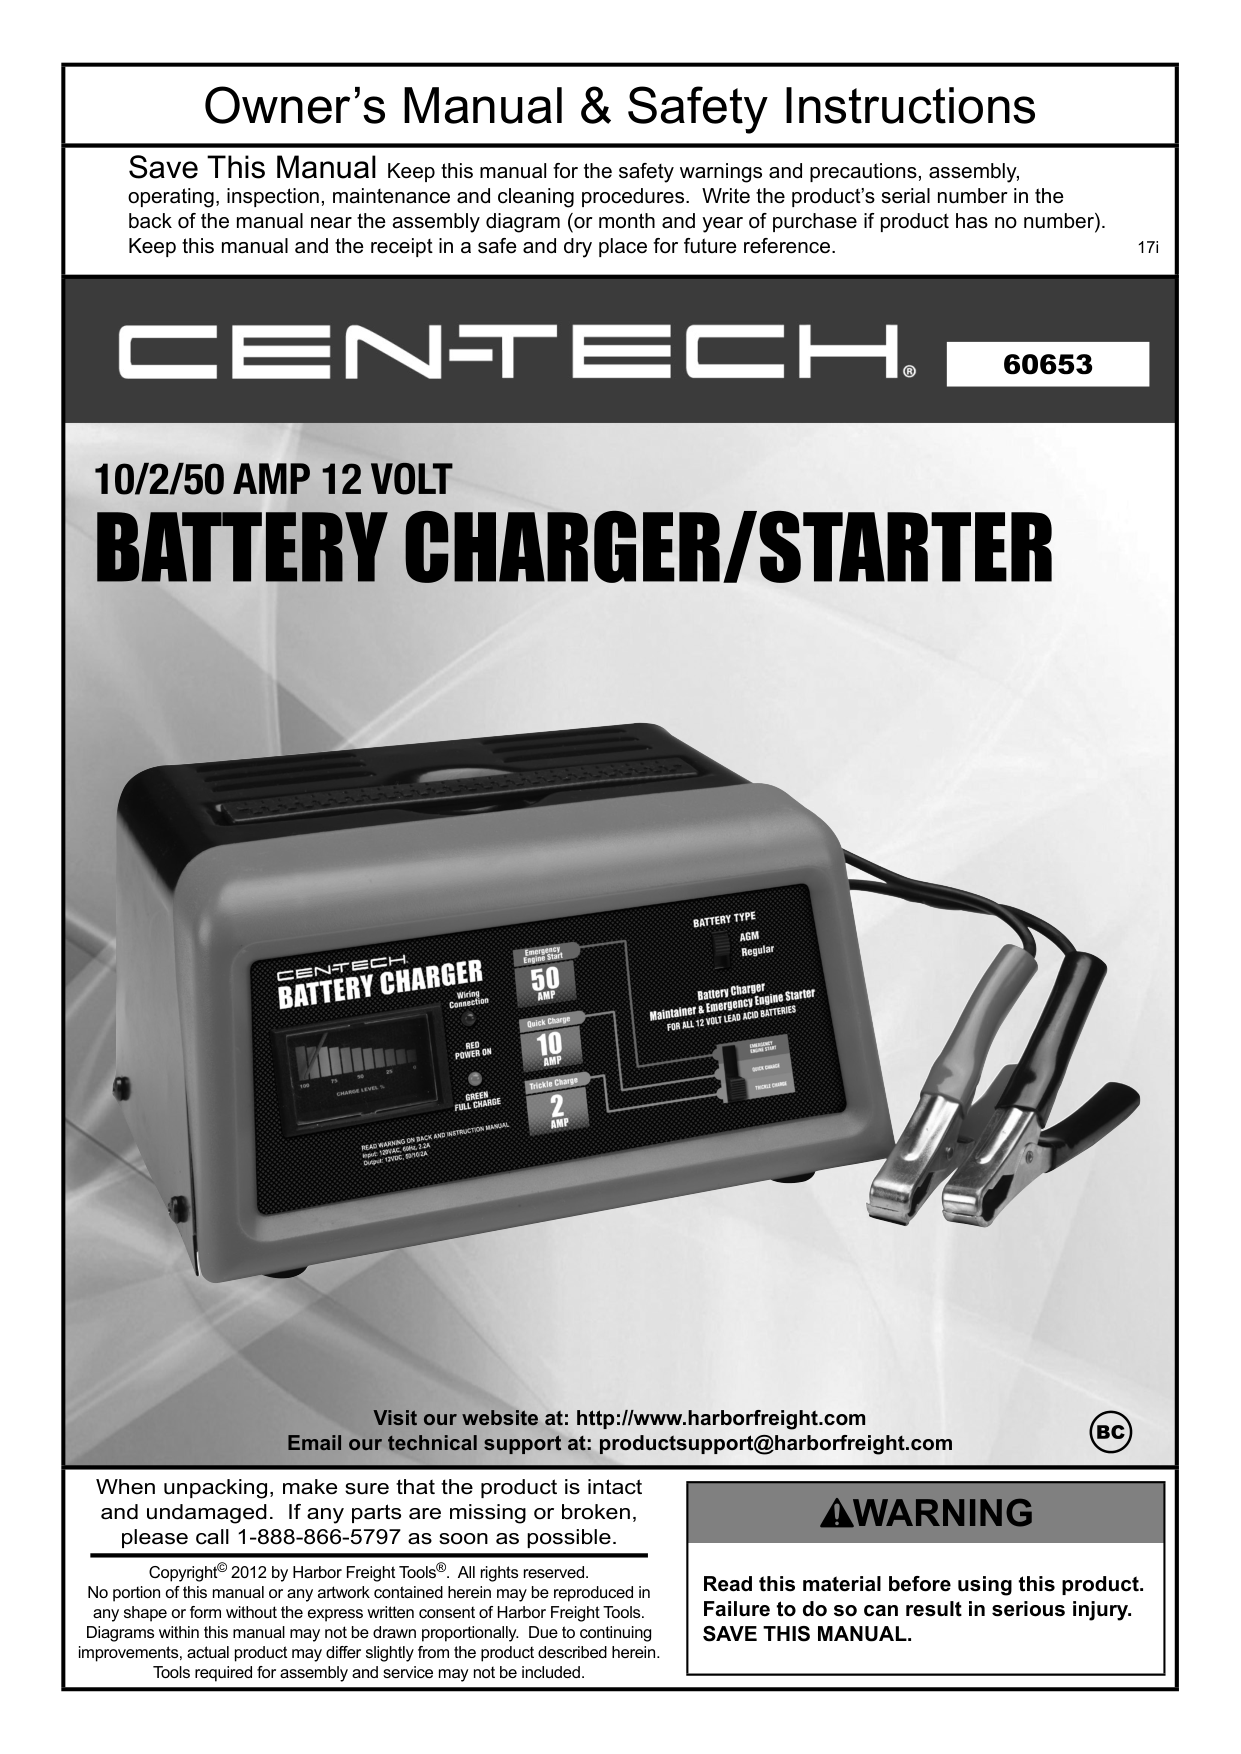
|Owner’s Manual & Safety Instructions| |---| |Save This Manual Keep this manual for the safety warnings and precautions, assembly, operating, inspection, maintenance and cleaning procedures. Write the product’s serial number in the back of the manual near the assembly diagram (or month and year of purchase if product has no number). Keep this manual and the receipt in a safe and dry place for future reference. 20i| |
Visit our website at: http://www.harborfreight.com Email our technical support at: productsupport@harborfreight.com| |When unpacking, make sure that the product is intact and undamaged. If any parts are missing or broken, please call 1-888-866-5797 as soon as possible.
Copyright© 2012 by Harbor Freight Tools®. All rights reserved. No portion of this manual or any artwork contained herein may be reproduced in any shape or form without the express written consent of Harbor Freight Tools. Diagrams within this manual may not be drawn proportionally. Due to continuing improvements, actual product may differ slightly from the product described herein. Tools required for assembly and service may not be included.
|Read this material before using this product. Failure to do so can result in serious injury. SAVE THIS MANUAL.| |---| |
SaFEtyOpEratiOnMaintEnancESpEciFicatiOnS
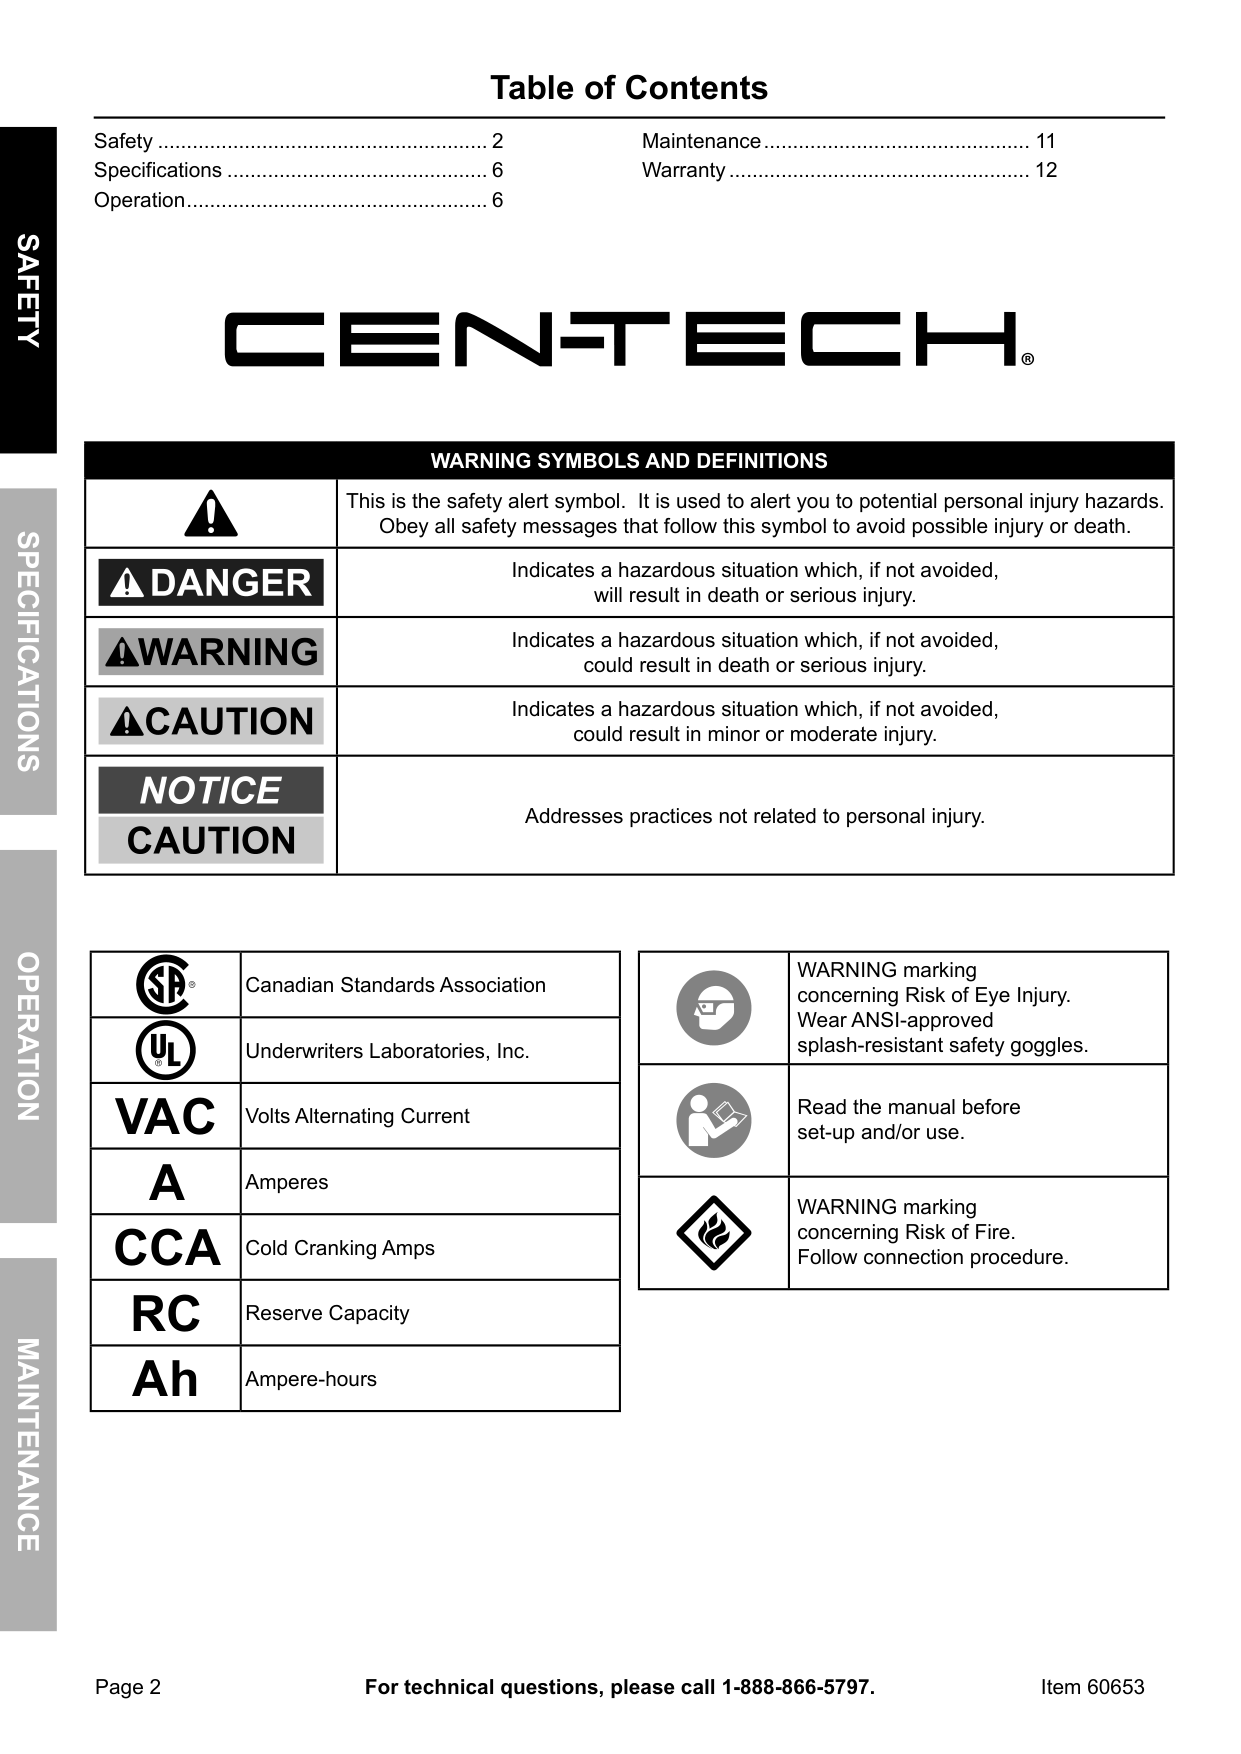
table of contents
Safety ......................................................... 2 Specifications ............................................. 6 Operation.................................................... 6
Maintenance.............................................. 11 Warranty.................................................... 12
|WarninG SyMBOLS anD DEFinitiOnS|WarninG SyMBOLS anD DEFinitiOnS| |---|---| | |This is the safety alert symbol. It is used to alert you to potential personal injury hazards. Obey all safety messages that follow this symbol to avoid possible injury or death.| | |Indicates a hazardous situation which, if not avoided, will result in death or serious injury.| | |Indicates a hazardous situation which, if not avoided, could result in death or serious injury.| | |Indicates a hazardous situation which, if not avoided, could result in minor or moderate injury.| | |Addresses practices not related to personal injury.|
|Vac|Volts Alternating Current| |---|---| |a|Amperes| |cca|Cold Cranking Amps| |rc|Reserve Capacity| |ah|Ampere-hours|
| |WARNING marking concerning Risk of Eye Injury. Wear ANSI-approved splash-resistant safety goggles.| |---|---| | |Read the manual before set-up and/or use.| | |WARNING marking concerning Risk of Fire. Follow connection procedure.|
iMpOrtant SaFEty inStrUctiOnS
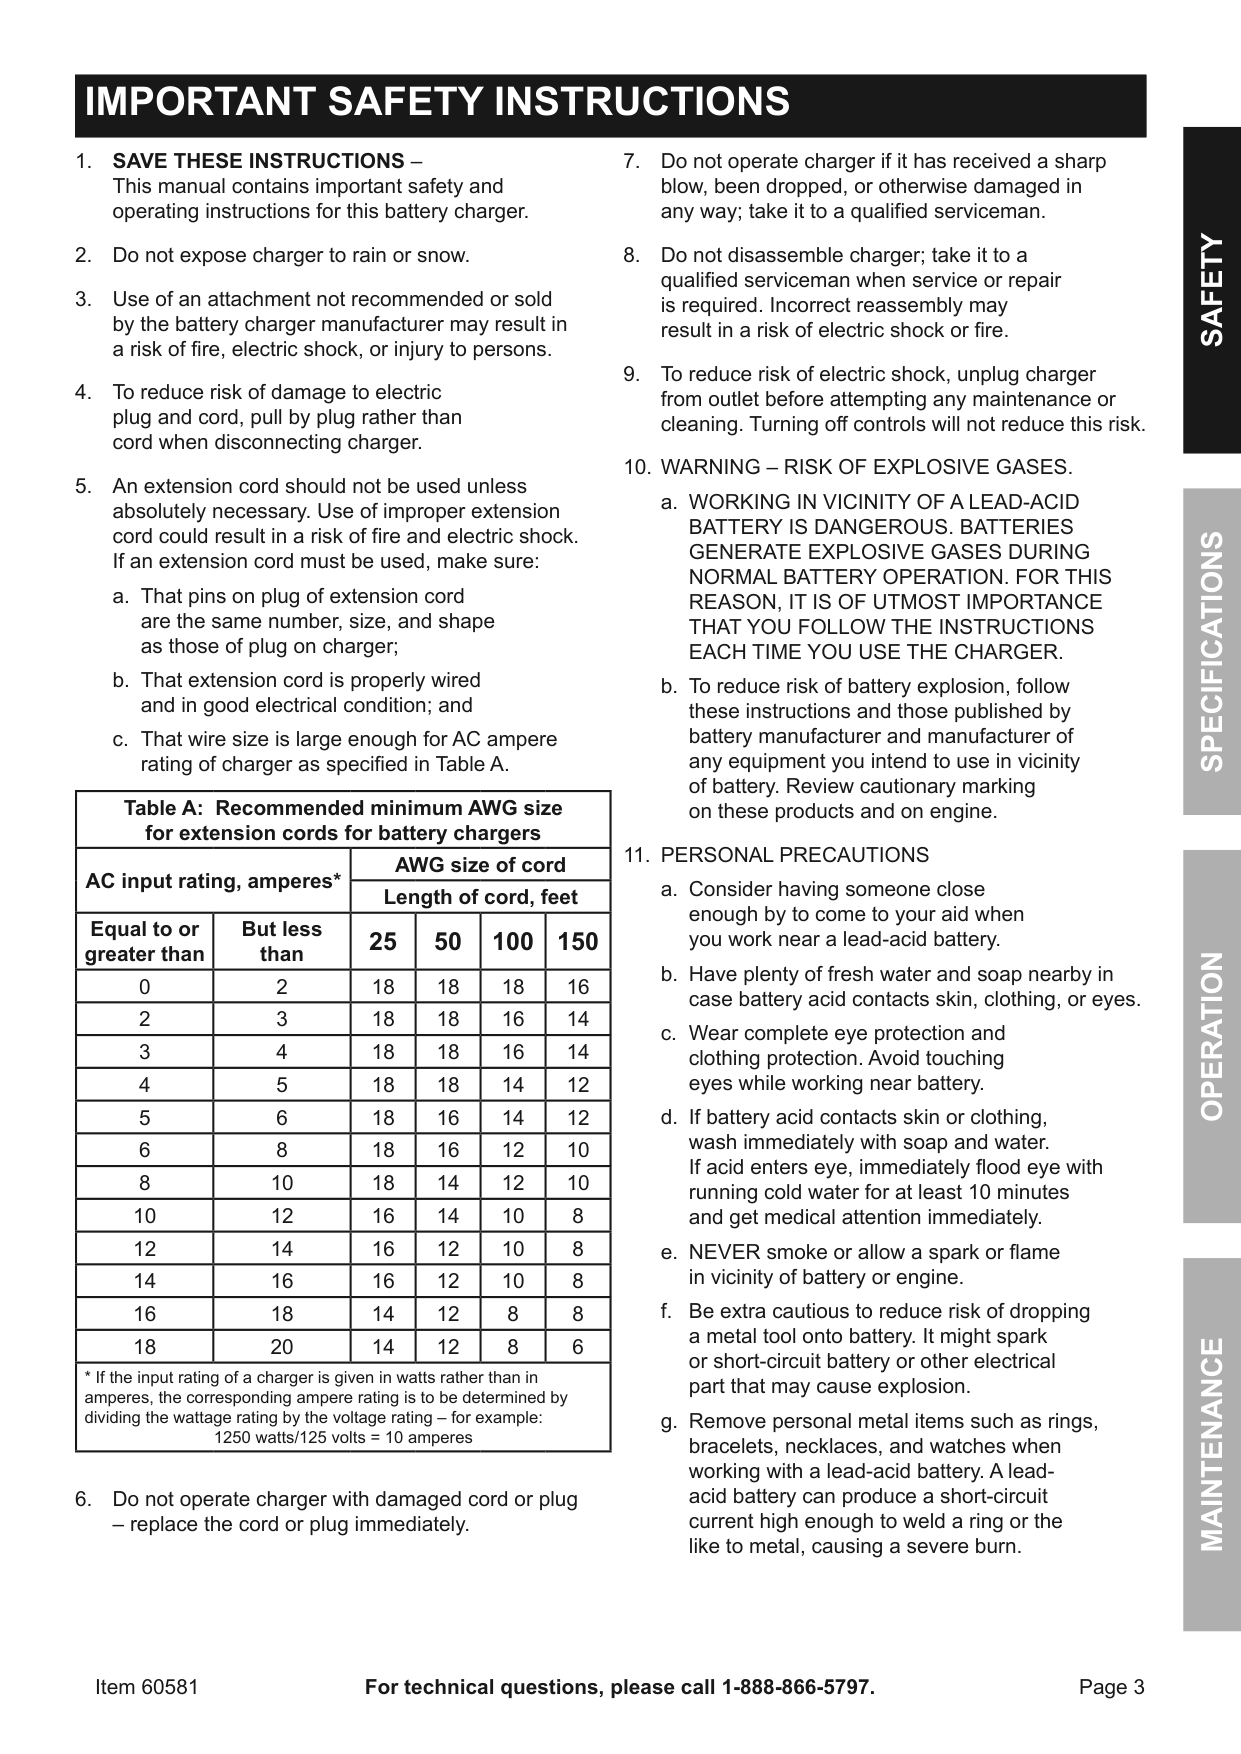
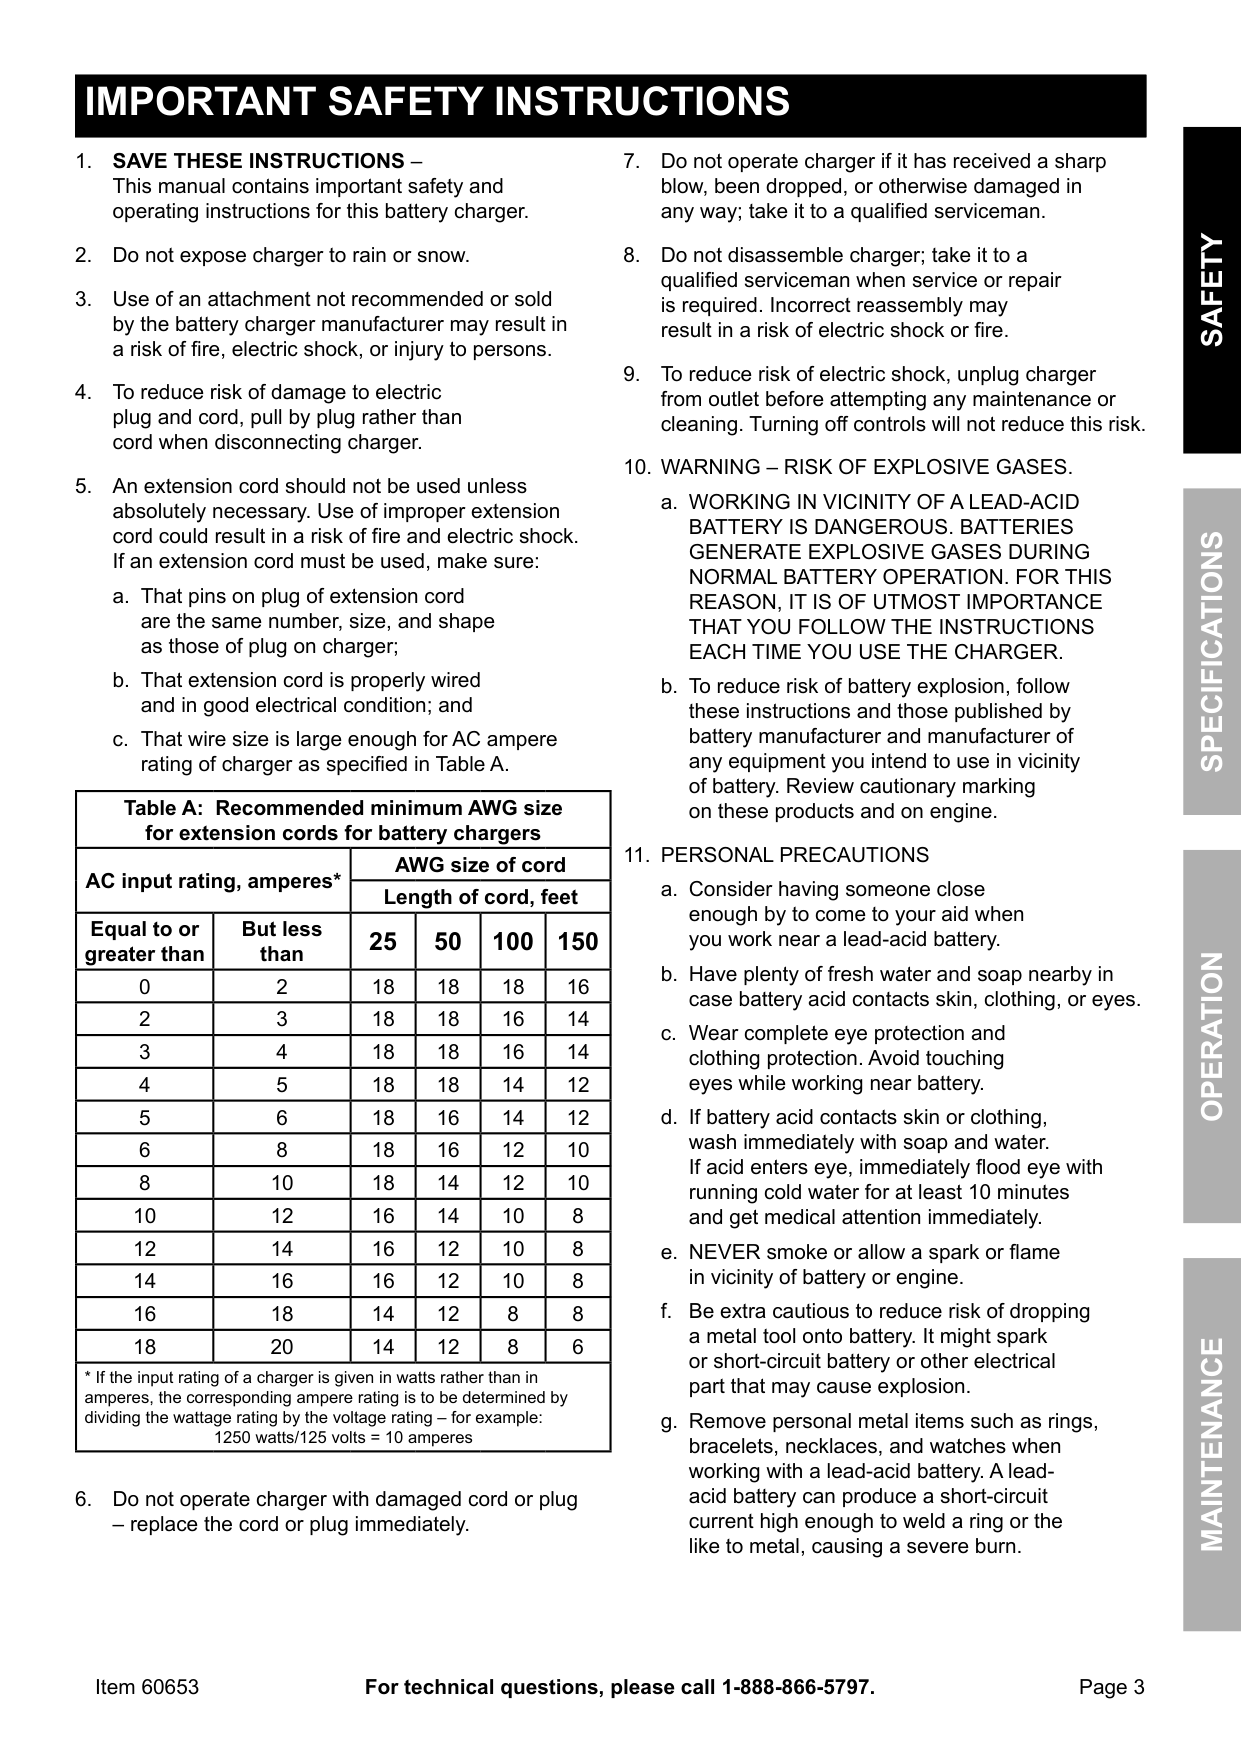
|table a: recommended minimum aWG size for extension cords for battery chargers|table a: recommended minimum aWG size for extension cords for battery chargers|table a: recommended minimum aWG size for extension cords for battery chargers|table a: recommended minimum aWG size for extension cords for battery chargers|table a: recommended minimum aWG size for extension cords for battery chargers|table a: recommended minimum aWG size for extension cords for battery chargers| |---|---|---|---|---|---| |ac input rating, amperes*|ac input rating, amperes*|aWG size of cord|aWG size of cord|aWG size of cord|aWG size of cord| |ac input rating, amperes*|ac input rating, amperes*|Length of cord, feet|Length of cord, feet|Length of cord, feet|Length of cord, feet| |Equal to or greater than|But less than|25|50|100|150| |0|2|18|18|18|16| |2|3|18|18|16|14| |3|4|18|18|16|14| |4|5|18|18|14|12| |5|6|18|16|14|12| |6|8|18|16|12|10| |8|10|18|14|12|10| |10|12|16|14|10|8| |12|14|16|12|10|8|

|14|16|16|12|10|8| |16|18|14|12|8|8| |18|20|14|12|8|6| |* If the input rating of a charger is given in watts rather than in amperes, the corresponding ampere rating is to be determined by dividing the wattage rating by the voltage rating – for example:
1250 watts/125 volts = 10 amperes|* If the input rating of a charger is given in watts rather than in amperes, the corresponding ampere rating is to be determined by dividing the wattage rating by the voltage rating – for example:
1250 watts/125 volts = 10 amperes|* If the input rating of a charger is given in watts rather than in amperes, the corresponding ampere rating is to be determined by dividing the wattage rating by the voltage rating – for example:
1250 watts/125 volts = 10 amperes|* If the input rating of a charger is given in watts rather than in amperes, the corresponding ampere rating is to be determined by dividing the wattage rating by the voltage rating – for example:
1250 watts/125 volts = 10 amperes|* If the input rating of a charger is given in watts rather than in amperes, the corresponding ampere rating is to be determined by dividing the wattage rating by the voltage rating – for example:
1250 watts/125 volts = 10 amperes|* If the input rating of a charger is given in watts rather than in amperes, the corresponding ampere rating is to be determined by dividing the wattage rating by the voltage rating – for example:
1250 watts/125 volts = 10 amperes|
– replace the cord or plug immediately.
SaFEtyOpEratiOnMaintEnancESpEciFicatiOnS
#### SaFEtyOpEratiOnMaintEnancESpEciFicatiOnS
a. Position AC and DC cables to reduce risk of damage by hood, door, or moving engine part.
– then connect NEGATIVE (BLACK) charger clip to free end of cable.
– it prevents sustained electrical shock.
SaVE tHESE inStrUctiOnS.
##### Grounding and ac power cord connection instructions
Charger should be grounded to reduce risk of electric shock. Charger is equipped with an electric cord having an equipment-grounding conductor and a grounding plug. The plug must be plugged into an outlet that is properly installed and grounded in accordance with all local codes and ordinances.
DanGEr – Never alter AC cord or plug provided – if it will not fit outlet, have proper outlet installed by a qualified electrician. Improper connection can result in a risk of an electric shock.
caUtiOn – risk of Fire or Electric Shock. Connect battery charger directly to grounding receptacle (three-prong). An adapter should not be used with battery charger.
SaFEtyOpEratiOnMaintEnancESpEciFicatiOnS
#### SaFEtyOpEratiOnMaintEnancESpEciFicatiOnS

##### Specifications
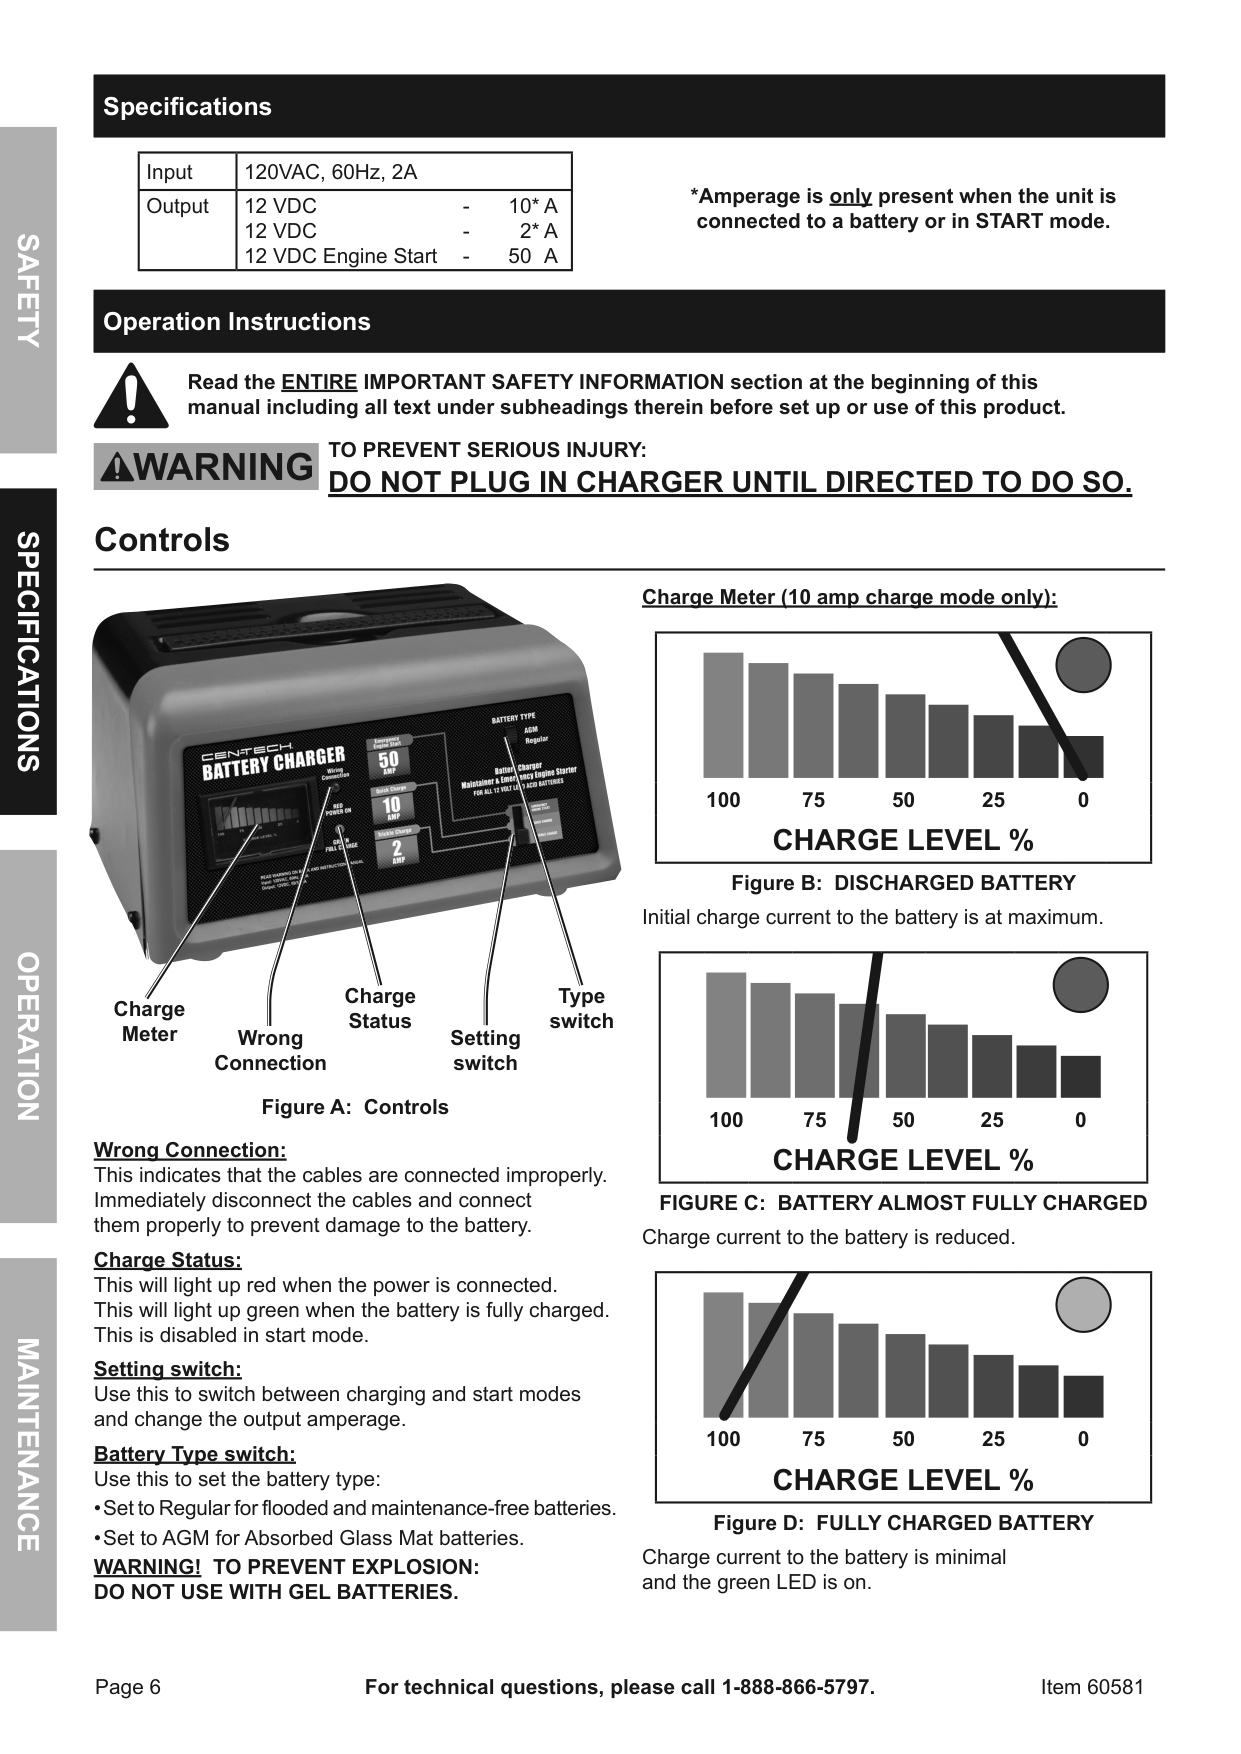
|Input|120VAC, 60Hz, 2A| |---|---| |Output|12 VDC - 10* A 12 VDC - 2* A 12 VDC Engine Start - 50 A|
*amperage is only present when the unit is connected to a battery or in Start mode.
##### Operation instructions
read the EntirE iMpOrtant SaFEty inFOrMatiOn section at the beginning of this manual including all text under subheadings therein before set up or use of this product.
tO prEVEnt SEriOUS inJUry:
DO nOt pLUG in cHarGEr UntiL DirEctED tO DO SO. controls

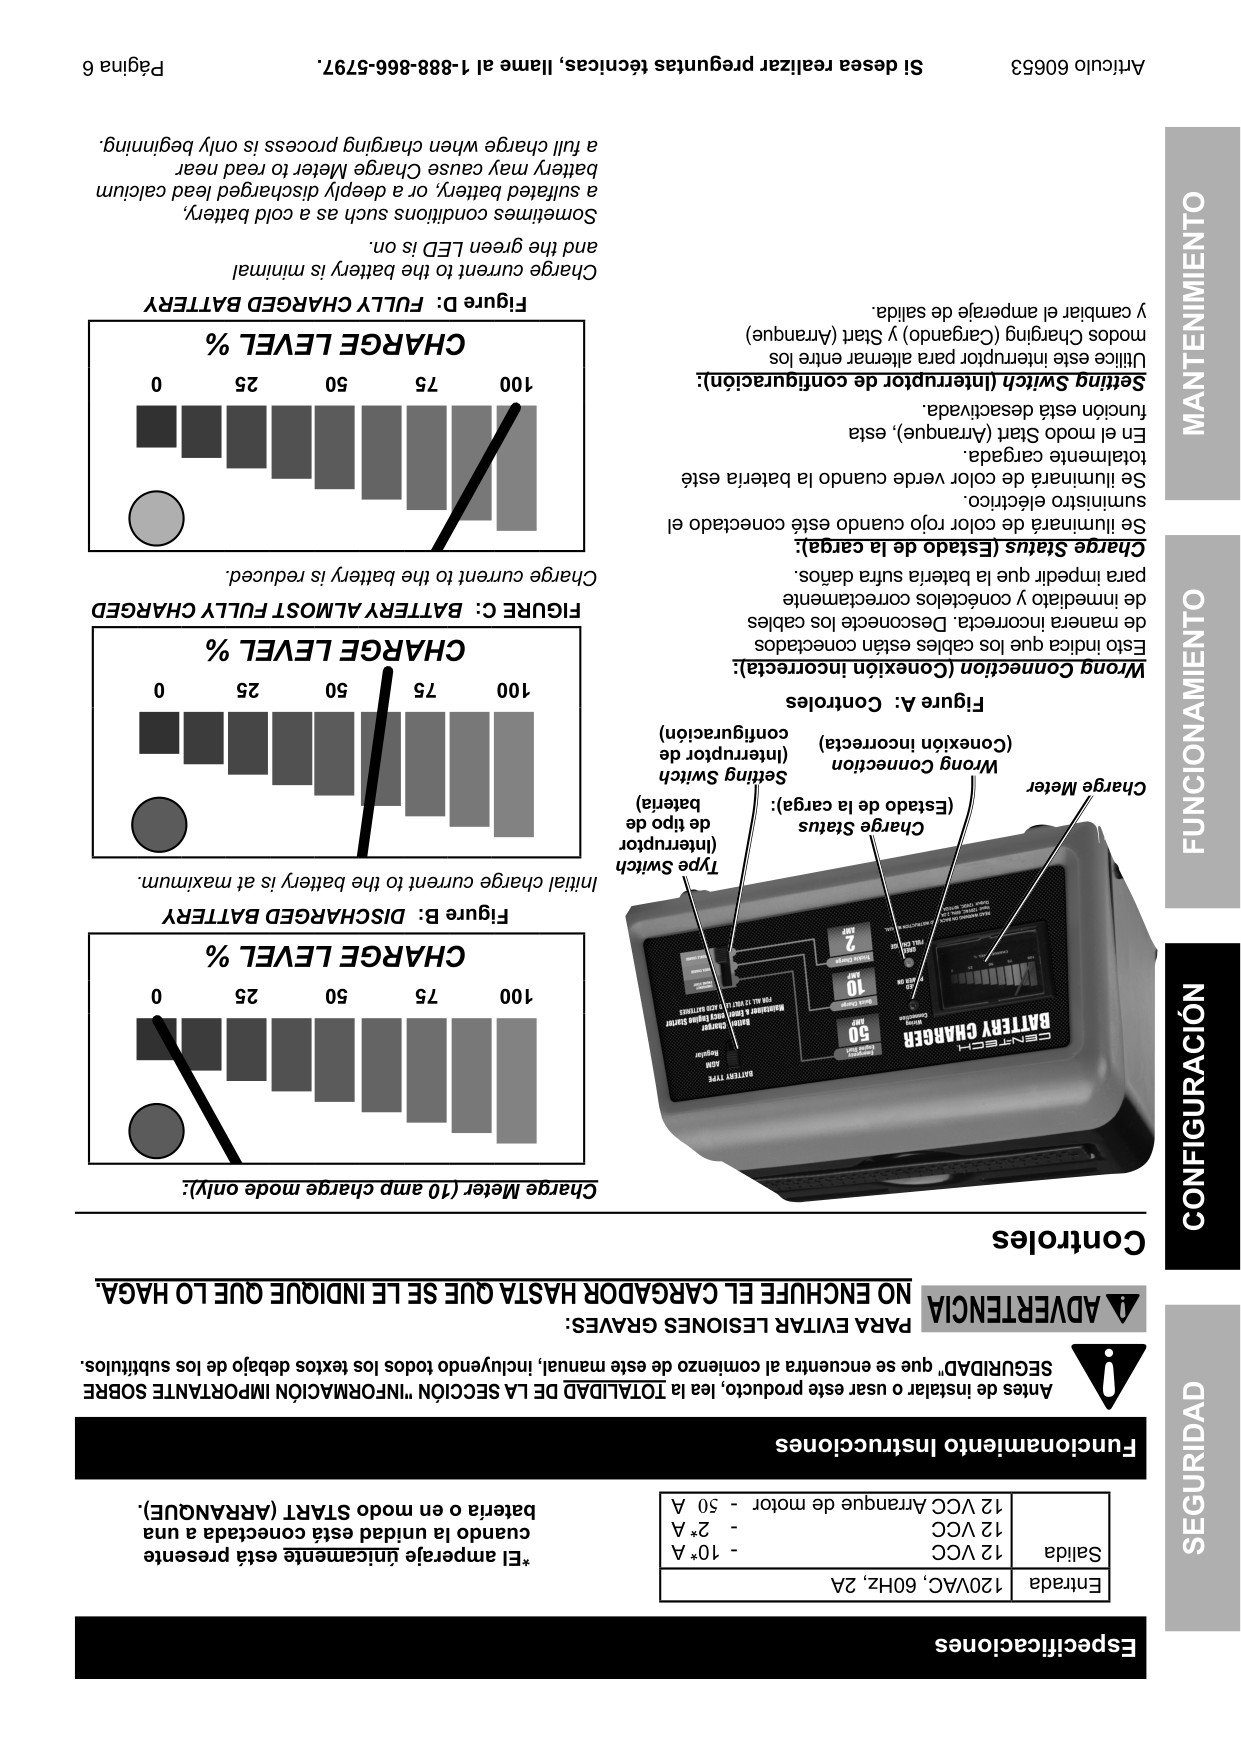
charge Meter (10 amp charge mode only):
|100 75 50 25 0
cHarGE LEVEL %| |---|
Figure B: DiScHarGED BattEry
Initial charge current to the battery is at maximum.
|100 75 50 25 0
cHarGE LEVEL %| |---|
charge Status
type switch
charge Meter
Wrong connection
Setting switch
Figure a: controls
Wrong connection: This indicates that the cables are connected improperly. Immediately disconnect the cables and connect them properly to prevent damage to the battery.
FiGUrE c: BattEry aLMOSt FULLy cHarGED Charge current to the battery is reduced.
charge Status: This will light up red when the power is connected. This will light up green when the battery is fully charged. This is disabled in start mode.
|100 75 50 25 0
cHarGE LEVEL %| |---|
Setting switch: Use this to switch between charging and start modes and change the output amperage.
Battery type switch: Use this to set the battery type:
Figure D: FULLy cHarGED BattEry
Charge current to the battery is minimal and the green LED is on.
Sometimes conditions such as a cold battery, a sulfated battery, or a deeply discharged lead calcium battery may cause Charge Meter to read near a full charge when charging process is only beginning.
note: The Charge Meter shows the amount of current being drawn from the charger. It does not show what the charger is capable of delivering. When the battery is fully charged and registering 100% on the Charge Meter, a small charge will continue to move from the charger to the battery. If the charger is not disconnected from the battery, eventually heat build up will cause the battery acid to boil and overcharge the battery causing damage to the battery. Monitor battery charging progress constantly and if battery gets warm, stop charging it immediately.
preparing to charge
Use this charger only on flooded lead-acid batteries. Other batteries may be damaged or may overheat, leak, or catch fire.
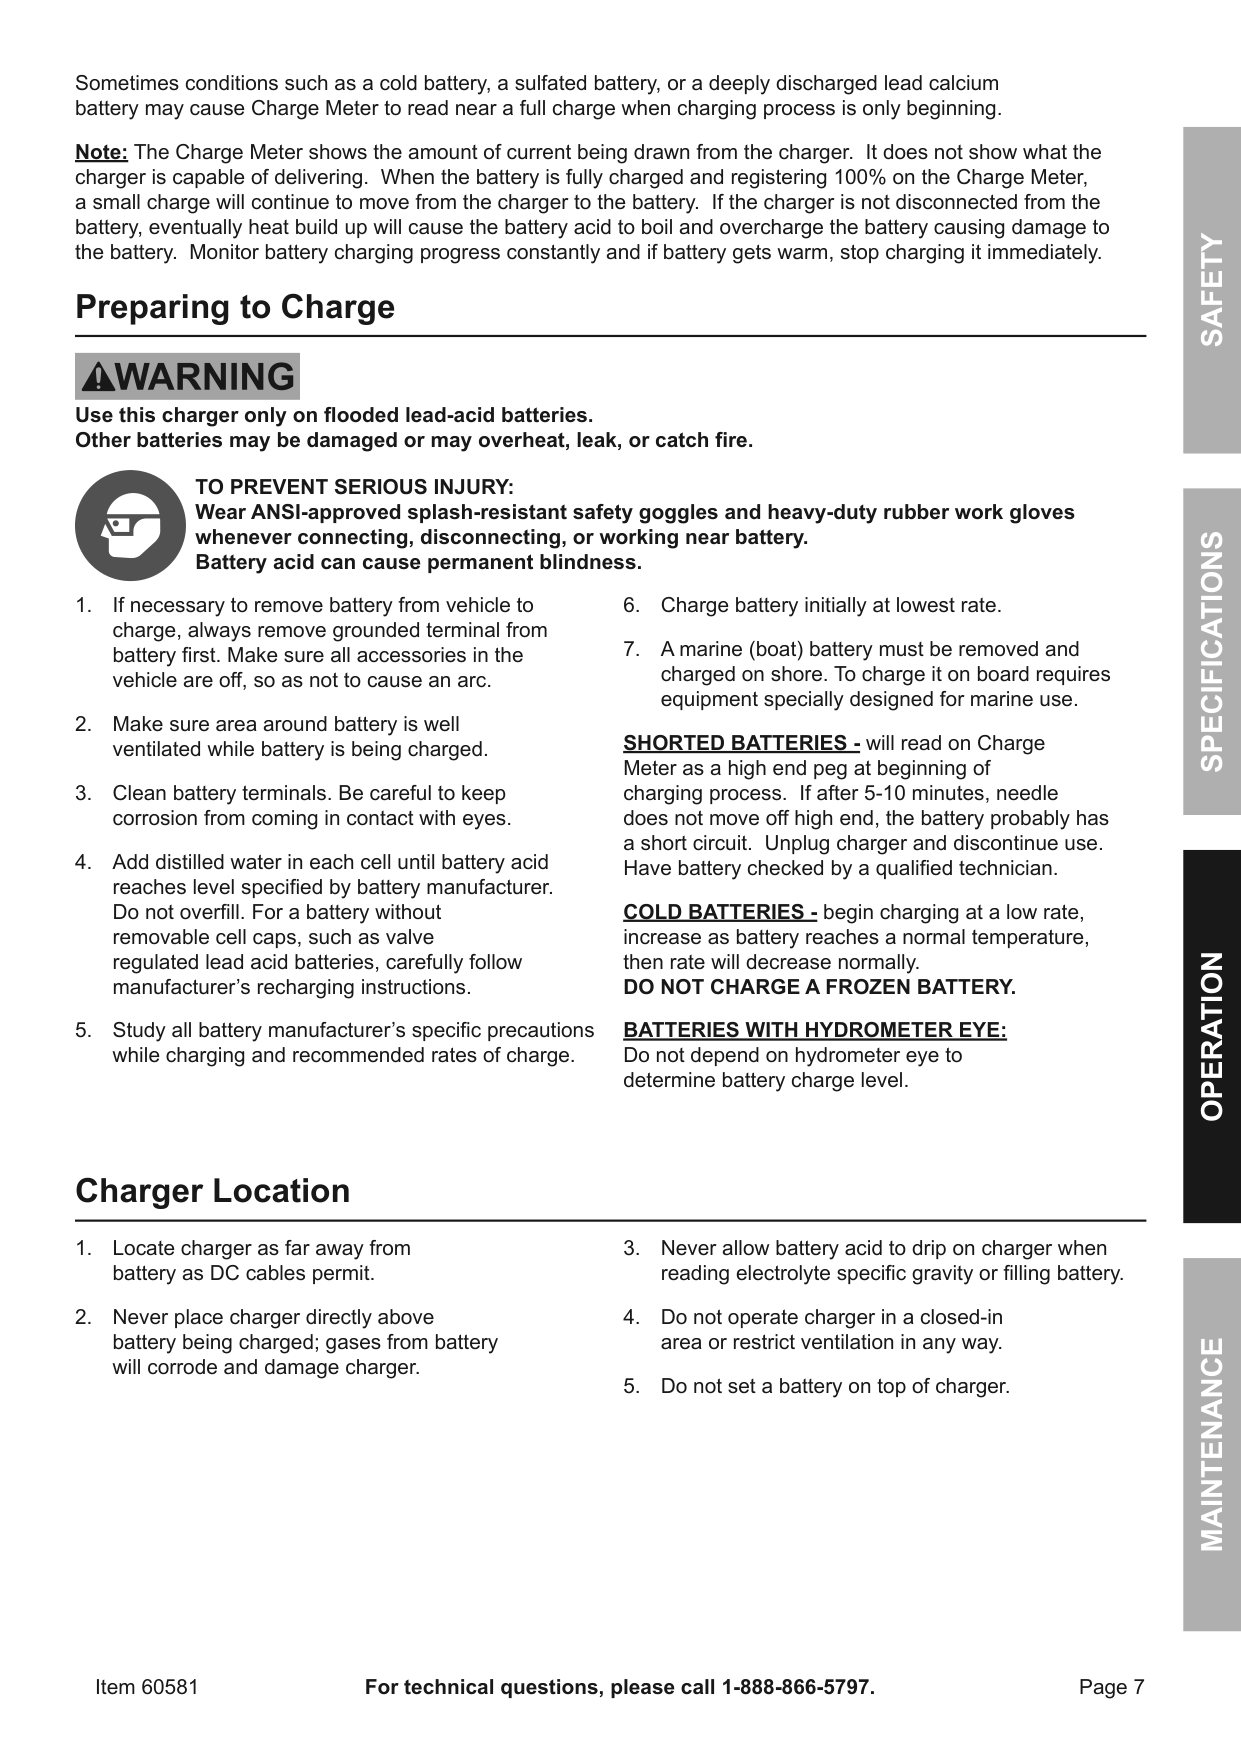
tO prEVEnt SEriOUS inJUry: Wear anSi-approved splash-resistant safety goggles and heavy-duty rubber work gloves whenever connecting, disconnecting, or working near battery. Battery acid can cause permanent blindness.
SHOrtED BattEriES - will read on Charge Meter as a high end peg at beginning of charging process. If after 5-10 minutes, needle does not move off high end, the battery probably has a short circuit. Unplug charger and discontinue use. Have battery checked by a qualified technician.
cOLD BattEriES - begin charging at a low rate, increase as battery reaches a normal temperature, then rate will decrease normally. DO nOt cHarGE a FrOZEn BattEry. BattEriES WitH HyDrOMEtEr EyE: Do not depend on hydrometer eye to determine battery charge level.
charger Location
SaFEtyOpEratiOnMaintEnancESpEciFicatiOnS
SaFEtyOpEratiOnMaintEnancESpEciFicatiOnS
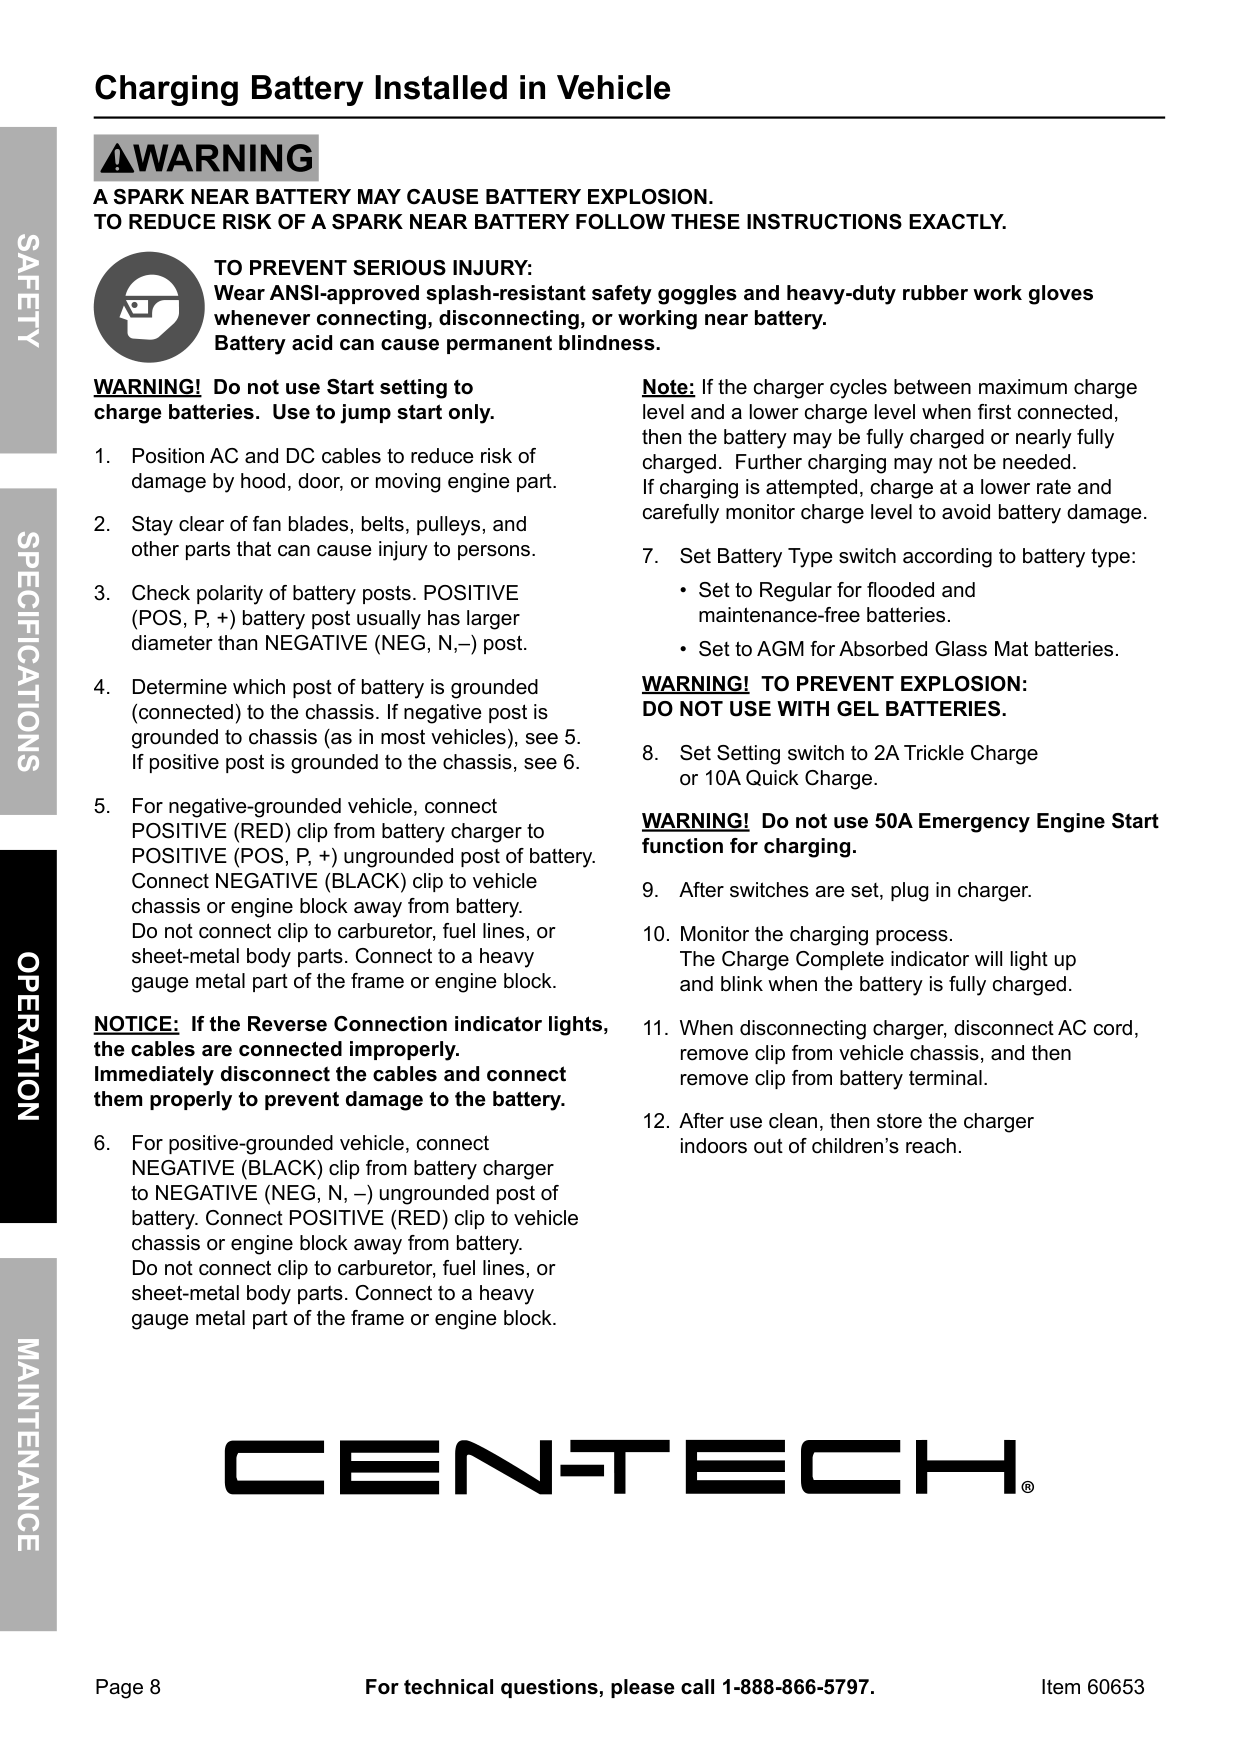
charging Battery installed in Vehicle
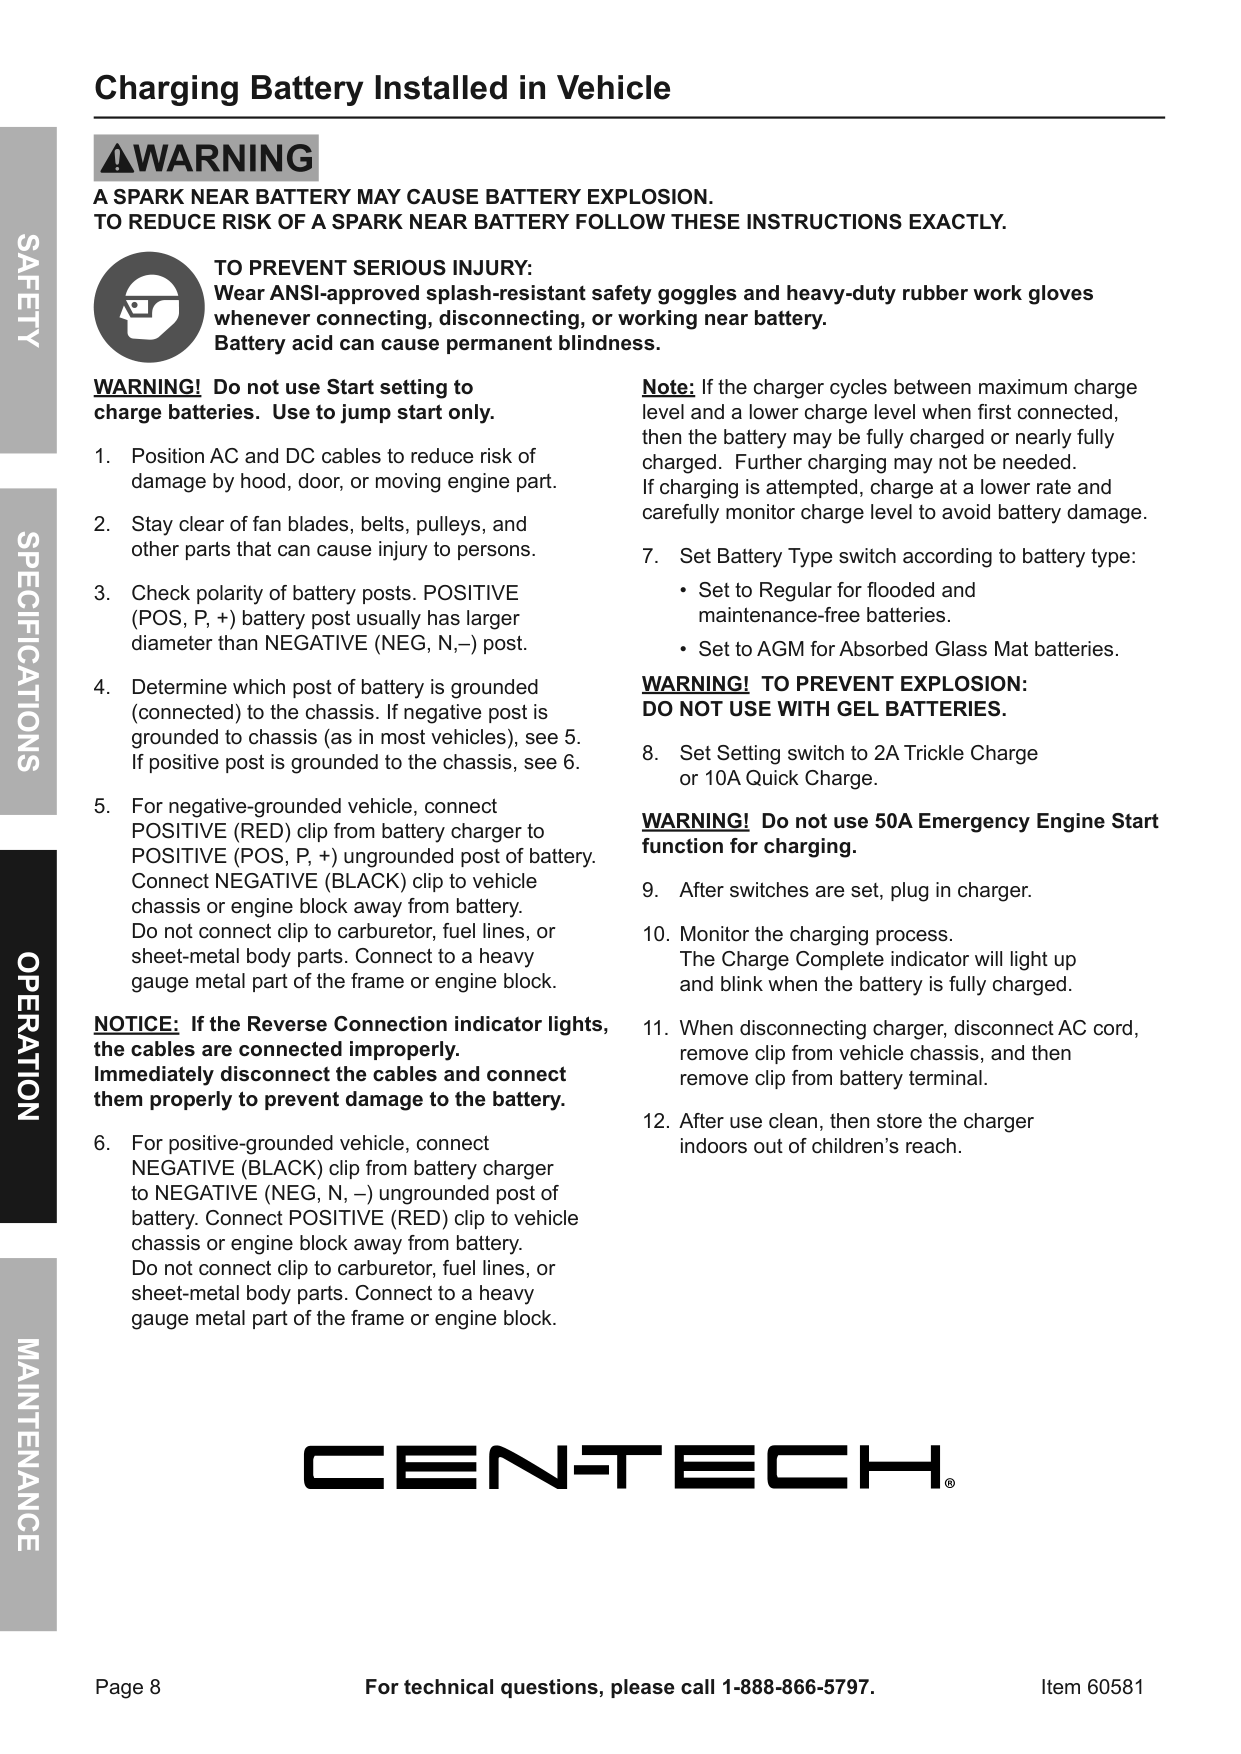
a SparK nEar BattEry May caUSE BattEry EXpLOSiOn. tO rEDUcE riSK OF a SparK nEar BattEry FOLLOW tHESE inStrUctiOnS EXactLy.
tO prEVEnt SEriOUS inJUry: Wear anSi-approved splash-resistant safety goggles and heavy-duty rubber work gloves whenever connecting, disconnecting, or working near battery. Battery acid can cause permanent blindness.
WarninG! Do not use Start setting to charge batteries. Use to jump start only.
nOticE: if the reverse connection indicator lights, the cables are connected improperly. immediately disconnect the cables and connect them properly to prevent damage to the battery.
note: If the charger cycles between maximum charge level and a lower charge level when first connected, then the battery may be fully charged or nearly fully charged. Further charging may not be needed. If charging is attempted, charge at a lower rate and carefully monitor charge level to avoid battery damage.
WarninG! tO prEVEnt EXpLOSiOn: DO nOt USE WitH GEL BattEriES.
WarninG! Do not use 50a Emergency Engine Start function for charging.
charging Battery Outside Vehicle
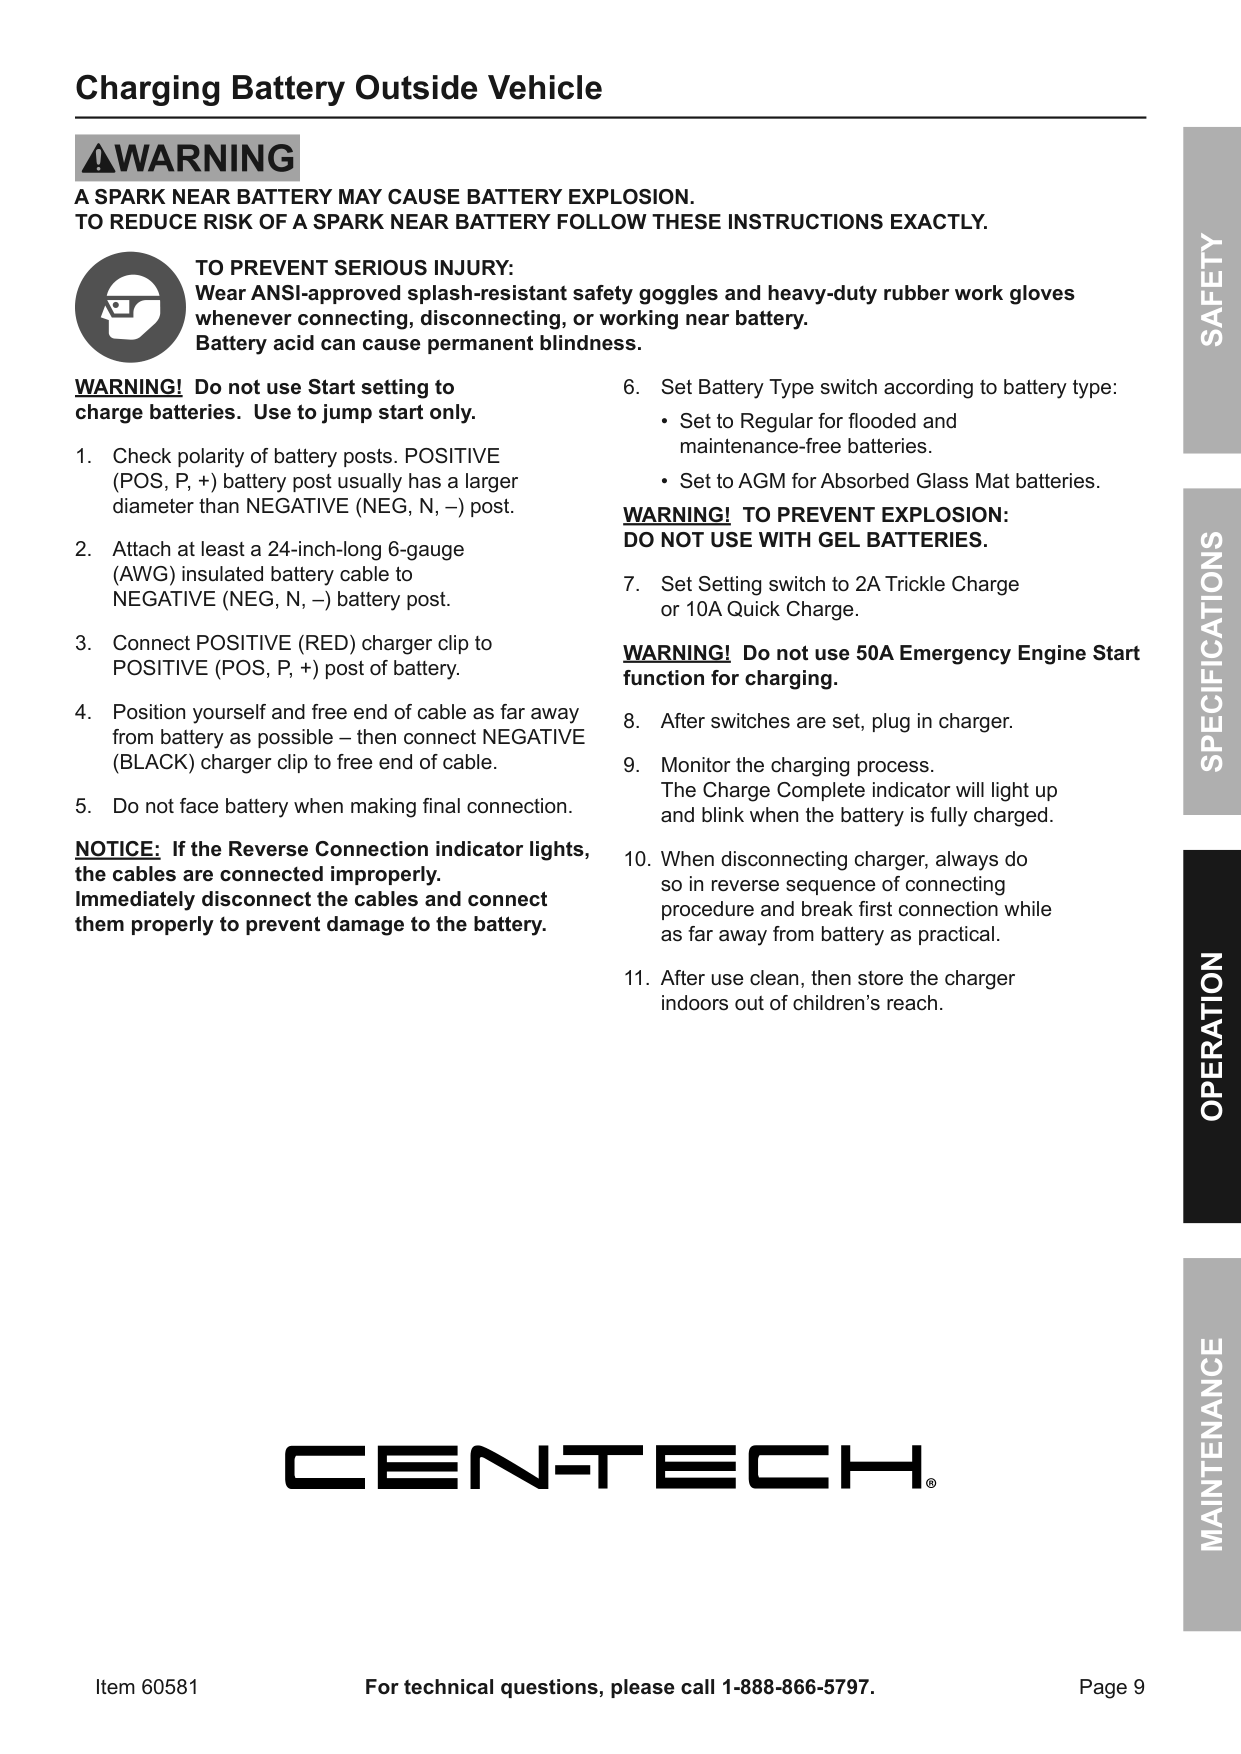
a SparK nEar BattEry May caUSE BattEry EXpLOSiOn. tO rEDUcE riSK OF a SparK nEar BattEry FOLLOW tHESE inStrUctiOnS EXactLy.
tO prEVEnt SEriOUS inJUry: Wear anSi-approved splash-resistant safety goggles and heavy-duty rubber work gloves whenever connecting, disconnecting, or working near battery. Battery acid can cause permanent blindness.
WarninG! Do not use Start setting to charge batteries. Use to jump start only.
nOticE: if the reverse connection indicator lights, the cables are connected improperly. immediately disconnect the cables and connect them properly to prevent damage to the battery.
WarninG! tO prEVEnt EXpLOSiOn: DO nOt USE WitH GEL BattEriES.
WarninG! Do not use 50a Emergency Engine Start function for charging.
SaFEtyOpEratiOnMaintEnancESpEciFicatiOnS
SaFEtyOpEratiOnMaintEnancESpEciFicatiOnS
12V Engine Starting
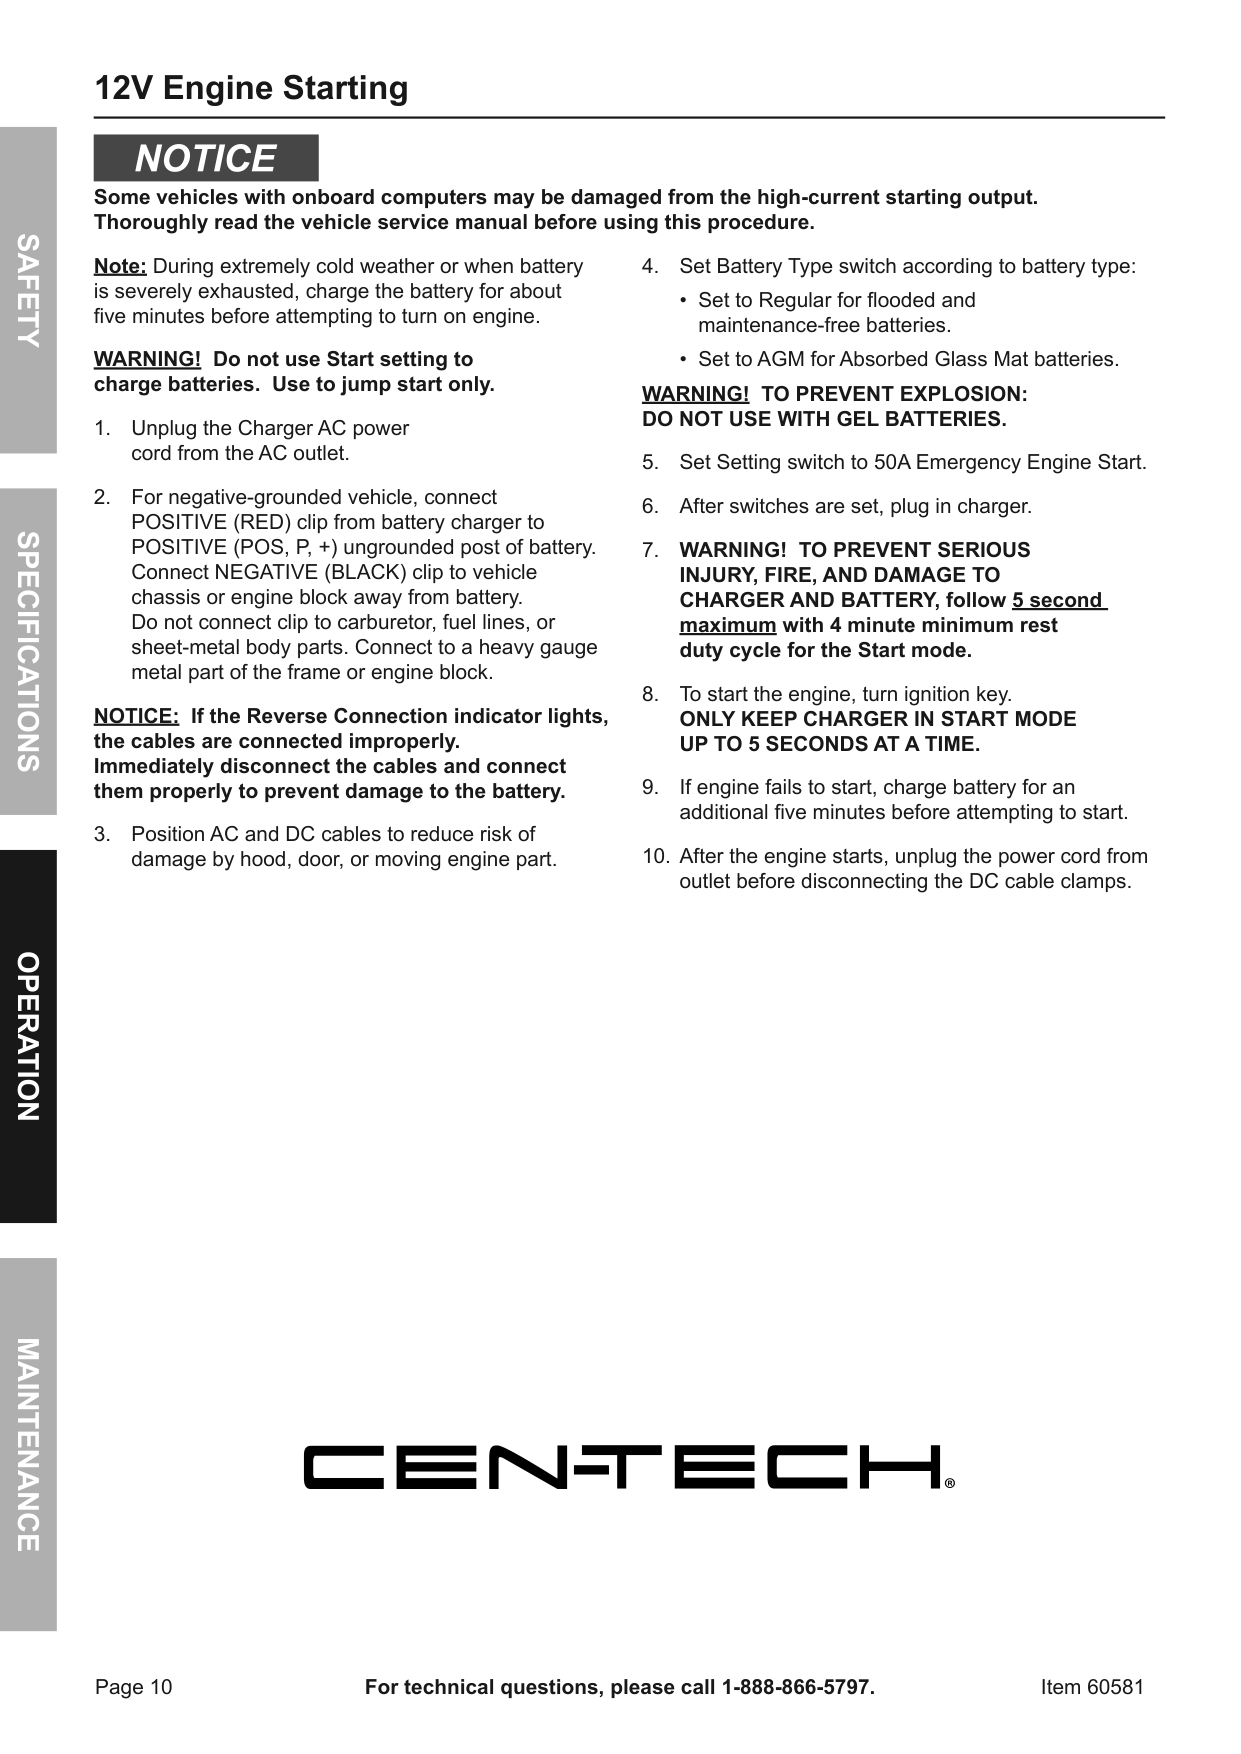
Some vehicles with onboard computers may be damaged from the high-current starting output. thoroughly read the vehicle service manual before using this procedure.
note: During extremely cold weather or when battery is severely exhausted, charge the battery for about five minutes before attempting to turn on engine.
WarninG! Do not use Start setting to charge batteries. Use to jump start only.
nOticE: if the reverse connection indicator lights, the cables are connected improperly. immediately disconnect the cables and connect them properly to prevent damage to the battery.
WarninG! tO prEVEnt EXpLOSiOn: DO nOt USE WitH GEL BattEriES.
##### Maintenance instructions
procedures not specifically explained in this manual must be performed only by a qualified technician.
tO prEVEnt SEriOUS inJUry: Unplug the charger, disconnect any battery, and allow charger to cool completely before performing any inspection, maintenance, or cleaning procedures.
tO prEVEnt SEriOUS inJUry FrOM cHarGEr FaiLUrE: Do not use damaged equipment. if abnormal noise or vibration occurs, have the problem corrected before further use.
record product’s Serial number Here: note: If product has no serial number, record month and year of purchase instead. note: Internal parts are not user-serviceable. Replacement parts are not available. Reference UPC 193175318268.
#### SaFEtyOpEratiOnMaintEnancESpEciFicatiOnS
##### Limited 90 Day Warranty
Harbor Freight Tools Co. makes every effort to assure that its products meet high quality and durability standards, and warrants to the original purchaser that this product is free from defects in materials and workmanship for the period of 90 days from the date of purchase. This warranty does not apply to damage due directly or indirectly, to misuse, abuse, negligence or accidents, repairs or alterations outside our facilities, criminal activity, improper installation, normal wear and tear, or to lack of maintenance. We shall in no event be liable for death, injuries to persons or property, or for incidental, contingent, special or consequential damages arising from the use of our product. Some states do not allow the exclusion or limitation of incidental or consequential damages, so the above limitation of exclusion may not apply to you. THIS WARRANTY IS EXPRESSLY IN LIEU OF ALL OTHER WARRANTIES, EXPRESS OR IMPLIED, INCLUDING THE WARRANTIES OF MERCHANTABILITY AND FITNESS.
To take advantage of this warranty, the product or part must be returned to us with transportation charges prepaid. Proof of purchase date and an explanation of the complaint must accompany the merchandise. If our inspection verifies the defect, we will either repair or replace the product at our election or we may elect to refund the purchase price if we cannot readily and quickly provide you with a replacement. We will return repaired products at our expense, but if we determine there is no defect, or that the defect resulted from causes not within the scope of our warranty, then you must bear the cost of returning the product.
This warranty gives you specific legal rights and you may also have other rights which vary from state to state.
26541 agoura road • calabasas, ca 91302 • 1-888-866-5797
|Owner’s Manual & Safety Instructions| |---| |Save This Manual Keep this manual for the safety warnings and precautions, assembly, operating, inspection, maintenance and cleaning procedures. Write the product’s serial number in the back of the manual near the assembly diagram (or month and year of purchase if product has no number). Keep this manual and the receipt in a safe and dry place for future reference. 17i| |
Visit our website at: http://www.harborfreight.com Email our technical support at: productsupport@harborfreight.com
| |When unpacking, make sure that the product is intact and undamaged. If any parts are missing or broken, please call 1-888-866-5797 as soon as possible.
Copyright© 2012 by Harbor Freight Tools®. All rights reserved. No portion of this manual or any artwork contained herein may be reproduced in any shape or form without the express written consent of Harbor Freight Tools. Diagrams within this manual may not be drawn proportionally. Due to continuing improvements, actual product may differ slightly from the product described herein. Tools required for assembly and service may not be included.
|Read this material before using this product. Failure to do so can result in serious injury. SAVE THIS MANUAL.| |---| |
SAFETyOpERATIONMAINTENANcESpEcIFIcATIONS
Table of contents
Safety ......................................................... 2 Specifications ............................................. 6 Operation .................................................... 6
Maintenance .............................................. 11 Warranty.................................................... 12
|WARNING SyMBOLS AND DEFINITIONS|WARNING SyMBOLS AND DEFINITIONS| |---|---| | |This is the safety alert symbol. It is used to alert you to potential personal injury hazards. Obey all safety messages that follow this symbol to avoid possible injury or death.| | |Indicates a hazardous situation which, if not avoided, will result in death or serious injury.| | |Indicates a hazardous situation which, if not avoided, could result in death or serious injury.| | |Indicates a hazardous situation which, if not avoided, could result in minor or moderate injury.| | |Addresses practices not related to personal injury.|
| |Canadian Standards Association| |---|---| | |Underwriters Laboratories, Inc.| |VAc|Volts Alternating Current| |A|Amperes| |ccA|Cold Cranking Amps| |Rc|Reserve Capacity| |Ah|Ampere-hours|
| |WARNING marking concerning Risk of Eye Injury. Wear ANSI-approved splash-resistant safety goggles.| |---|---| | |Read the manual before set-up and/or use.| | |WARNING marking concerning Risk of Fire. Follow connection procedure.|
IMpORTANT SAFETy INSTRUcTIONS
|Table A: Recommended minimum AWG size for extension cords for battery chargers|Table A: Recommended minimum AWG size for extension cords for battery chargers|Table A: Recommended minimum AWG size for extension cords for battery chargers|Table A: Recommended minimum AWG size for extension cords for battery chargers|Table A: Recommended minimum AWG size for extension cords for battery chargers|Table A: Recommended minimum AWG size for extension cords for battery chargers| |---|---|---|---|---|---| |Ac input rating, amperes*|Ac input rating, amperes*|AWG size of cord|AWG size of cord|AWG size of cord|AWG size of cord| |Ac input rating, amperes*|Ac input rating, amperes*|Length of cord, feet|Length of cord, feet|Length of cord, feet|Length of cord, feet| |Equal to or greater than|But less than|25|50|100|150| |0|2|18|18|18|16| |2|3|18|18|16|14| |3|4|18|18|16|14| |4|5|18|18|14|12| |5|6|18|16|14|12| |6|8|18|16|12|10| |8|10|18|14|12|10| |10|12|16|14|10|8| |12|14|16|12|10|8| |14|16|16|12|10|8| |16|18|14|12|8|8| |18|20|14|12|8|6| |* If the input rating of a charger is given in watts rather than in amperes, the corresponding ampere rating is to be determined by dividing the wattage rating by the voltage rating – for example:
1250 watts/125 volts = 10 amperes|* If the input rating of a charger is given in watts rather than in amperes, the corresponding ampere rating is to be determined by dividing the wattage rating by the voltage rating – for example:
1250 watts/125 volts = 10 amperes|* If the input rating of a charger is given in watts rather than in amperes, the corresponding ampere rating is to be determined by dividing the wattage rating by the voltage rating – for example:
1250 watts/125 volts = 10 amperes|* If the input rating of a charger is given in watts rather than in amperes, the corresponding ampere rating is to be determined by dividing the wattage rating by the voltage rating – for example:
1250 watts/125 volts = 10 amperes|* If the input rating of a charger is given in watts rather than in amperes, the corresponding ampere rating is to be determined by dividing the wattage rating by the voltage rating – for example:
1250 watts/125 volts = 10 amperes|* If the input rating of a charger is given in watts rather than in amperes, the corresponding ampere rating is to be determined by dividing the wattage rating by the voltage rating – for example:
1250 watts/125 volts = 10 amperes|
– replace the cord or plug immediately.
SAFETyOpERATIONMAINTENANcESpEcIFIcATIONS
#### SAFETyOpERATIONMAINTENANcESpEcIFIcATIONS
a. Position AC and DC cables to reduce risk of damage by hood, door, or moving engine part.
a. Check polarity of battery posts. POSITIVE
(POS, P, +) battery post usually has a larger diameter than NEGATIVE (NEG, N, –) post.
– it prevents sustained electrical shock.
SAVE THESE INSTRUcTIONS.
##### Grounding and Ac power cord connection Instructions
Charger should be grounded to reduce risk of electric shock. Charger is equipped with an electric cord having an equipment-grounding conductor and a grounding plug. The plug must be plugged into an outlet that is properly installed and grounded in accordance with all local codes and ordinances.
DANGER – Never alter AC cord or plug provided – if it will not fit outlet, have proper outlet installed by a qualified electrician. Improper connection can result in a risk of an electric shock.
cAUTION – Risk of Fire or Electric Shock. Connect battery charger directly to grounding receptacle (three-prong). An adapter should not be used with battery charger.
SAFETyOpERATIONMAINTENANcESpEcIFIcATIONS
#### SAFETyOpERATIONMAINTENANcESpEcIFIcATIONS
##### Specifications
|Input|120VAC, 60Hz, 2A| |---|---| |Output|12 VDC - 10* A 12 VDC - 2* A 12 VDC Engine Start - 50 A|
*Amperage is only present when the unit is connected to a battery or in START mode.
##### Operation Instructions
Read the ENTIRE IMpORTANT SAFETy INFORMATION section at the beginning of this manual including all text under subheadings therein before set up or use of this product.
TO pREVENT SERIOUS INJURy:
DO NOT pLUG IN cHARGER UNTIL DIREcTED TO DO SO. controls

charge Meter (10 amp charge mode only):
|100 75 50 25 0
cHARGE LEVEL %| |---|
Figure B: DIScHARGED BATTERy
Initial charge current to the battery is at maximum.
|100 75 50 25 0
cHARGE LEVEL %| |---|
charge Status
Type switch
charge Meter
Wrong connection
Setting switch
Figure A: controls
Wrong connection: This indicates that the cables are connected improperly. Immediately disconnect the cables and connect them properly to prevent damage to the battery.
FIGURE c: BATTERy ALMOST FULLy cHARGED Charge current to the battery is reduced.
charge Status: This will light up red when the power is connected. This will light up green when the battery is fully charged. This is disabled in start mode.
|100 75 50 25 0
cHARGE LEVEL %| |---|
Setting switch: Use this to switch between charging and start modes and change the output amperage.
Battery Type switch: Use this to set the battery type:
Figure D: FULLy cHARGED BATTERy
Charge current to the battery is minimal and the green LED is on.
Sometimes conditions such as a cold battery, a sulfated battery, or a deeply discharged lead calcium battery may cause Charge Meter to read near a full charge when charging process is only beginning.
Note: The Charge Meter shows the amount of current being drawn from the charger. It does not show what the charger is capable of delivering. When the battery is fully charged and registering 100% on the Charge Meter, a small charge will continue to move from the charger to the battery. If the charger is not disconnected from the battery, eventually heat build up will cause the battery acid to boil and overcharge the battery causing damage to the battery. Monitor battery charging progress constantly and if battery gets warm, stop charging it immediately.
preparing to charge
Use this charger only on flooded lead-acid batteries. Other batteries may be damaged or may overheat, leak, or catch fire.
TO pREVENT SERIOUS INJURy: Wear ANSI-approved splash-resistant safety goggles and heavy-duty rubber work gloves whenever connecting, disconnecting, or working near battery. Battery acid can cause permanent blindness.
SHORTED BATTERIES - will read on Charge Meter as a high end peg at beginning of charging process. If after 5-10 minutes, needle does not move off high end, the battery probably has a short circuit. Unplug charger and discontinue use. Have battery checked by a qualified technician.
cOLD BATTERIES - begin charging at a low rate, increase as battery reaches a normal temperature, then rate will decrease normally. DO NOT cHARGE A FROZEN BATTERy. BATTERIES WITH HyDROMETER EyE: Do not depend on hydrometer eye to determine battery charge level.
charger Location
SAFETyOpERATIONMAINTENANcESpEcIFIcATIONS
SAFETyOpERATIONMAINTENANcESpEcIFIcATIONS
charging Battery Installed in Vehicle
A SpARK NEAR BATTERy MAy cAUSE BATTERy EXpLOSION. TO REDUcE RISK OF A SpARK NEAR BATTERy FOLLOW THESE INSTRUcTIONS EXAcTLy.
TO pREVENT SERIOUS INJURy: Wear ANSI-approved splash-resistant safety goggles and heavy-duty rubber work gloves whenever connecting, disconnecting, or working near battery. Battery acid can cause permanent blindness.
WARNING! Do not use Start setting to charge batteries. Use to jump start only.
NOTIcE: If the Reverse connection indicator lights, the cables are connected improperly. Immediately disconnect the cables and connect them properly to prevent damage to the battery.
Note: If the charger cycles between maximum charge level and a lower charge level when first connected, then the battery may be fully charged or nearly fully charged. Further charging may not be needed. If charging is attempted, charge at a lower rate and carefully monitor charge level to avoid battery damage.
WARNING! TO pREVENT EXpLOSION: DO NOT USE WITH GEL BATTERIES.
WARNING! Do not use 50A Emergency Engine Start function for charging.
charging Battery Outside Vehicle
A SpARK NEAR BATTERy MAy cAUSE BATTERy EXpLOSION. TO REDUcE RISK OF A SpARK NEAR BATTERy FOLLOW THESE INSTRUcTIONS EXAcTLy.
TO pREVENT SERIOUS INJURy: Wear ANSI-approved splash-resistant safety goggles and heavy-duty rubber work gloves whenever connecting, disconnecting, or working near battery. Battery acid can cause permanent blindness.
WARNING! Do not use Start setting to charge batteries. Use to jump start only.
(POS, P, +) battery post usually has a larger diameter than NEGATIVE (NEG, N, –) post.
NOTIcE: If the Reverse connection indicator lights, the cables are connected improperly. Immediately disconnect the cables and connect them properly to prevent damage to the battery.
WARNING! TO pREVENT EXpLOSION: DO NOT USE WITH GEL BATTERIES.
WARNING! Do not use 50A Emergency Engine Start function for charging.
SAFETyOpERATIONMAINTENANcESpEcIFIcATIONS
SAFETyOpERATIONMAINTENANcESpEcIFIcATIONS
12V Engine Starting
Some vehicles with onboard computers may be damaged from the high-current starting output. Thoroughly read the vehicle service manual before using this procedure.
Note: During extremely cold weather or when battery is severely exhausted, charge the battery for about five minutes before attempting to turn on engine.
WARNING! Do not use Start setting to charge batteries. Use to jump start only.
NOTIcE: If the Reverse connection indicator lights, the cables are connected improperly. Immediately disconnect the cables and connect them properly to prevent damage to the battery.
WARNING! TO pREVENT EXpLOSION: DO NOT USE WITH GEL BATTERIES.
##### Maintenance Instructions
procedures not specifically explained in this manual must be performed only by a qualified technician.
TO pREVENT SERIOUS INJURy: Unplug the charger, disconnect any battery, and allow charger to cool completely before performing any inspection, maintenance, or cleaning procedures.
TO pREVENT SERIOUS INJURy FROM cHARGER FAILURE: Do not use damaged equipment. If abnormal noise or vibration occurs, have the problem corrected before further use.
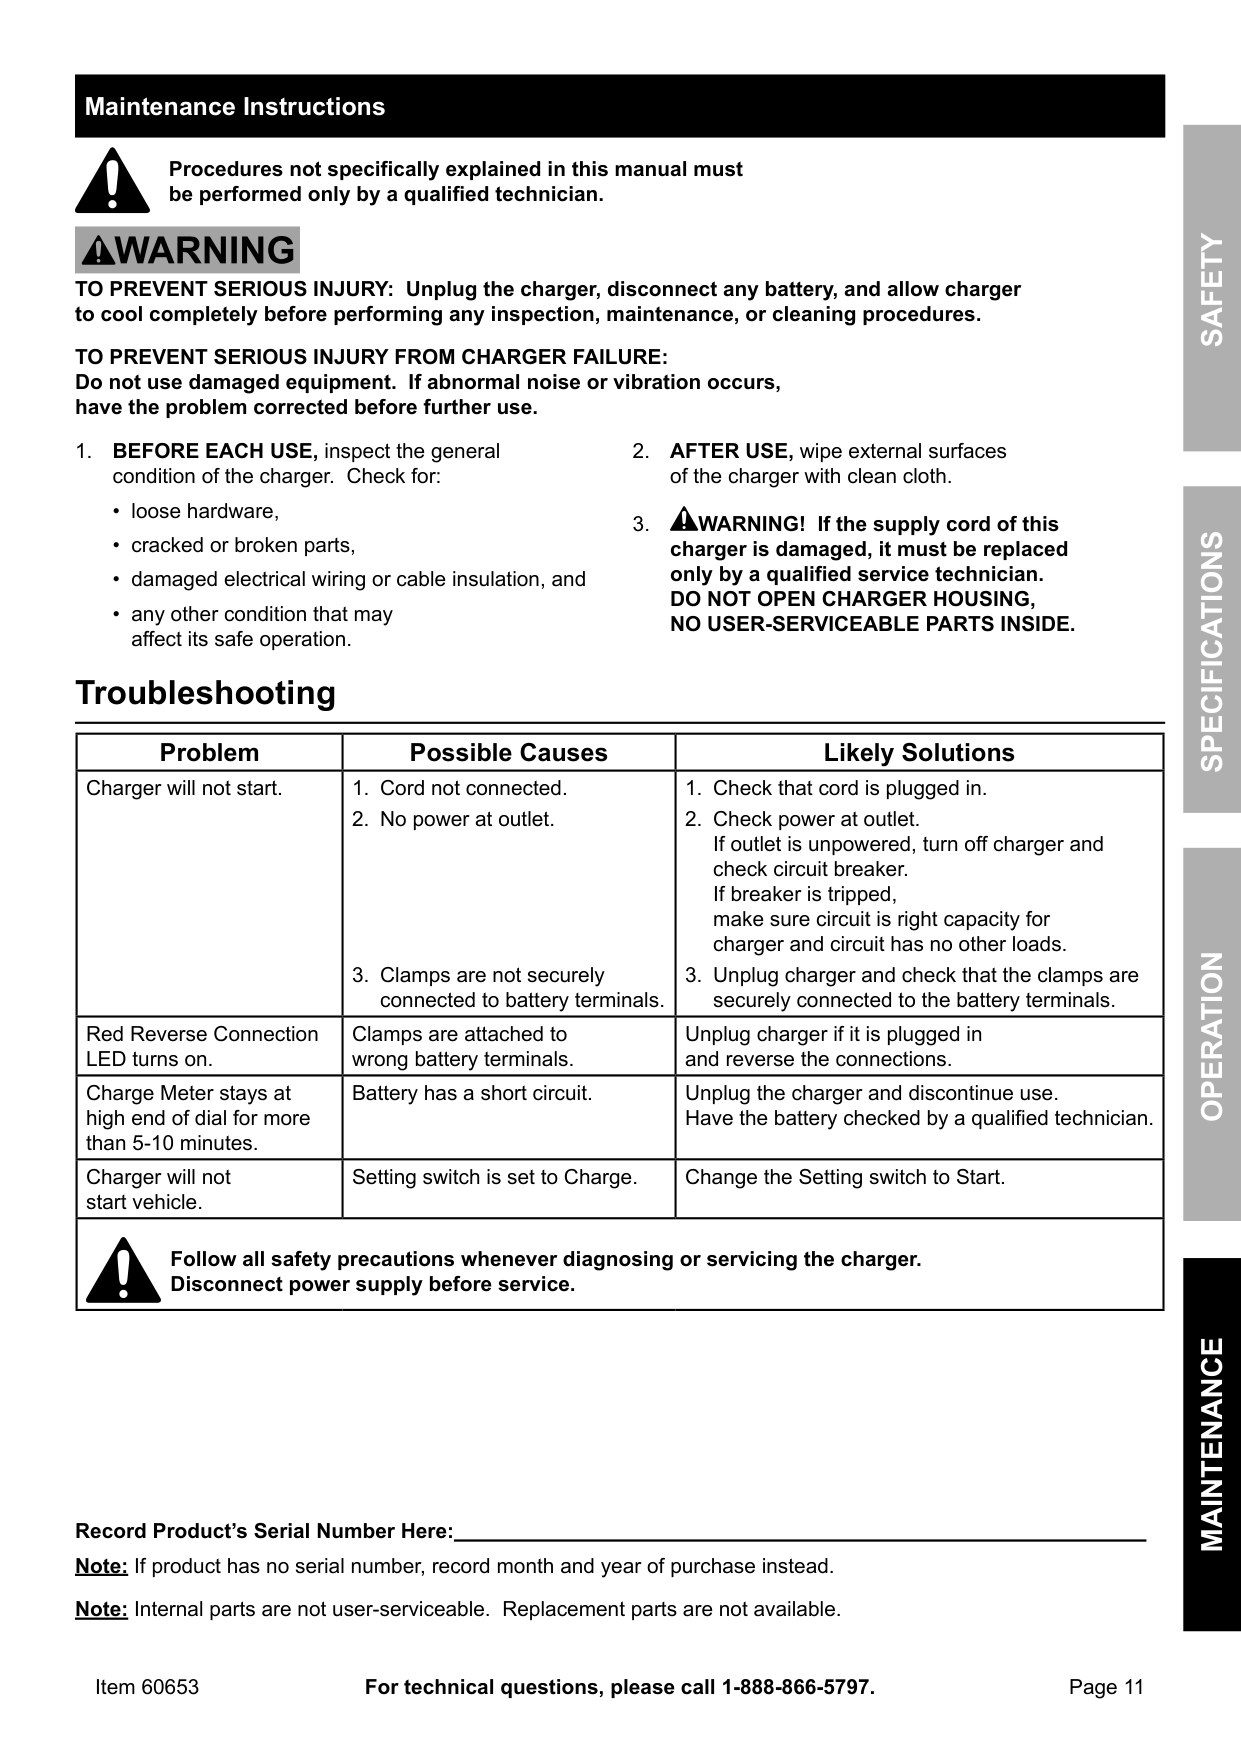
Troubleshooting
|problem|possible causes|Likely Solutions| |---|---|---| |Charger will not start.|1. Cord not connected.
2. No power at outlet.
3. Clamps are not securely connected to battery terminals.
|1. Check that cord is plugged in.
2. Check power at outlet. If outlet is unpowered, turn off charger and check circuit breaker. If breaker is tripped, make sure circuit is right capacity for charger and circuit has no other loads.
3. Unplug charger and check that the clamps are securely connected to the battery terminals.
| |Red Reverse Connection LED turns on.|Clamps are attached to wrong battery terminals.|Unplug charger if it is plugged in and reverse the connections.| |Charge Meter stays at high end of dial for more than 5-10 minutes.|Battery has a short circuit.|Unplug the charger and discontinue use. Have the battery checked by a qualified technician.| |Charger will not start vehicle.|Setting switch is set to Charge.|Change the Setting switch to Start.| |Follow all safety precautions whenever diagnosing or servicing the charger. Disconnect power supply before service.|Follow all safety precautions whenever diagnosing or servicing the charger. Disconnect power supply before service.|Follow all safety precautions whenever diagnosing or servicing the charger. Disconnect power supply before service.|
Record product’s Serial Number Here: Note: If product has no serial number, record month and year of purchase instead. Note: Internal parts are not user-serviceable. Replacement parts are not available.
#### SAFETyOpERATIONMAINTENANcESpEcIFIcATIONS
##### Limited 90 Day Warranty
Harbor Freight Tools Co. makes every effort to assure that its products meet high quality and durability standards, and warrants to the original purchaser that this product is free from defects in materials and workmanship for the period of 90 days from the date of purchase. This warranty does not apply to damage due directly or indirectly, to misuse, abuse, negligence or accidents, repairs or alterations outside our facilities, criminal activity, improper installation, normal wear and tear, or to lack of maintenance. We shall in no event be liable for death, injuries to persons or property, or for incidental, contingent, special or consequential damages arising from the use of our product. Some states do not allow the exclusion or limitation of incidental or consequential damages, so the above limitation of exclusion may not apply to you. THIS WARRANTY IS EXPRESSLY IN LIEU OF ALL OTHER WARRANTIES, EXPRESS OR IMPLIED, INCLUDING THE WARRANTIES OF MERCHANTABILITY AND FITNESS.
To take advantage of this warranty, the product or part must be returned to us with transportation charges prepaid. Proof of purchase date and an explanation of the complaint must accompany the merchandise. If our inspection verifies the defect, we will either repair or replace the product at our election or we may elect to refund the purchase price if we cannot readily and quickly provide you with a replacement. We will return repaired products at our expense, but if we determine there is no defect, or that the defect resulted from causes not within the scope of our warranty, then you must bear the cost of returning the product.
This warranty gives you specific legal rights and you may also have other rights which vary from state to state.
3491 Mission Oaks Blvd. • pO Box 6009 • camarillo, cA 93011 • 1-888-866-5797
3491 Mission Oaks Blvd. • pO Box 6009 • camarillo, cA 93011 • 1-888-866-5797
Esta garantía le otorga derechos legales específicos y también puede tener otros derechos que varían entre estados.
dentro del alcance de nuestra garantía, usted deberá hacerse cargo de los costos de envío del producto.
determinamos que no existe ningún defecto, o que el defecto fue resultado de circunstancias que no se encuentran
proporcionarle un reemplazo. Los gastos de envío de los productos reparados correrán por nuestra cuenta, pero si
a nuestra elección, o podemos optar por reintegrar el precio de compra si no podemos fácil y rápidamente
explicación de su reclamo. Si nuestra inspección verifica el defecto, repararemos o sustituiremos el producto,
prepagados. Junto con el artículo, deberá remitir, además, el comprobante de la fecha de compra y una
Para obtener los beneficios de esta garantía, deberá remitirnos el producto o pieza con los gastos de transporte
GARANTÍAS, EXPRESAS O IMPLÍCITAS, INCLUIDAS LAS GARANTÍAS DE COMERCIABILIDAD Y ADECUACIÓN.
de exclusión no sea aplicable a usted. ESTA GARANTÍA SUSTITUYE EXPRESAMENTE TODAS LAS DEMÁS
la exclusión o limitación de daños incidentales o consecuentes, por lo cual es posible que la anterior limitación
contingentes, especiales o consecuentes derivados del uso de nuestro producto. Algunos estados no permiten
En ningún caso seremos responsables por muerte, lesiones a personas o bienes, o en el caso de daños incidentales,
fuera de nuestras instalaciones, actividad delictiva, instalación incorrecta, desgaste normal o falta de mantenimiento.
daños resultantes, directa o indirectamente, del mal uso, abuso, negligencia o accidentes, reparaciones o alteraciones
y mano de obra durante un plazo de 90 días a partir de la fecha de compra. Esta garantía no corresponde a los
calidad y durabilidad, y garantiza al comprador original que este producto está libre de defectos en sus materiales
Harbor Freight Tools Co. hace todo lo posible para asegurar que sus productos cumplen con altos estándares de
##### Garantía limitada de 90 días
Artículo 60653 Si desea realizar preguntas técnicas, llame al 1-888-866-5797.
Página 11
#### SEGURIDADFUNcIONAMIENTOMANTENIMIENTOcONFIGURAcIóN
Las piezas de repuesto no están disponibles.
Nota:Las piezas internas no pueden ser reparadas o reemplazadas por el usuario.
Nota: Si el producto no posee número de serie, tome nota del mes y el año de la compra.
Anote el número de serie del producto aquí:
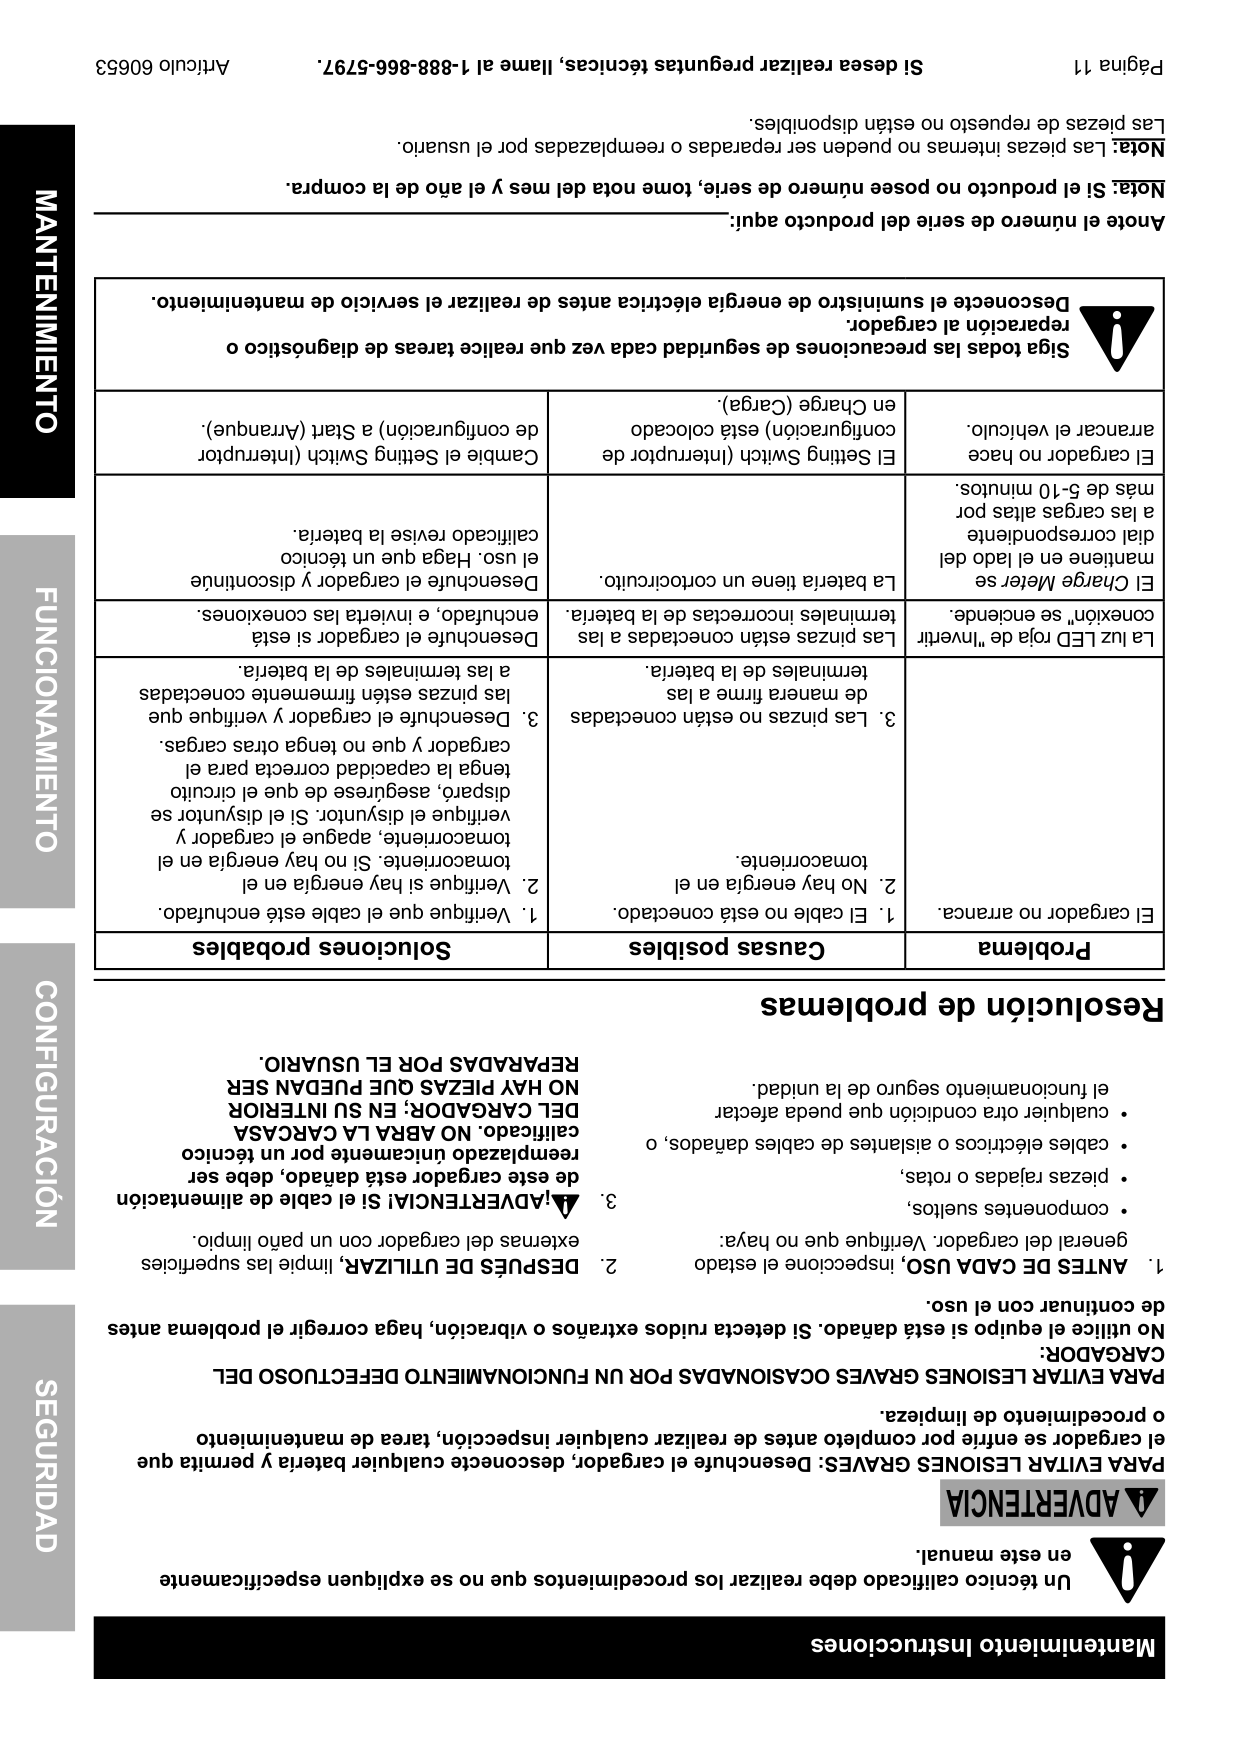
|Siga todas las precauciones de seguridad cada vez que realice tareas de diagnóstico o
reparación al cargador.
Desconecte el suministro de energía eléctrica antes de realizar el servicio de mantenimiento.|Siga todas las precauciones de seguridad cada vez que realice tareas de diagnóstico o
reparación al cargador.
Desconecte el suministro de energía eléctrica antes de realizar el servicio de mantenimiento.|Siga todas las precauciones de seguridad cada vez que realice tareas de diagnóstico o
reparación al cargador.
Desconecte el suministro de energía eléctrica antes de realizar el servicio de mantenimiento.| |---|---|---| |Cambie el Setting Switch (Interruptor
de configuración) a Start (Arranque).|El Setting Switch (Interruptor de
configuración) está colocado
en Charge (Carga).|El cargador no hace
arrancar el vehículo.| |Desenchufe el cargador y discontinúe
el uso. Haga que un técnico
calificado revise la batería.|La batería tiene un cortocircuito.|ElCharge Meterse
mantiene en el lado del
dial correspondiente
a las cargas altas por
más de 5-10 minutos.| |Desenchufe el cargador si está
enchufado, e invierta las conexiones.|Las pinzas están conectadas a las
terminales incorrectas de la batería.|La luz LED roja de "Invertir
conexión" se enciende.| |1.Verifique que el cable esté enchufado.
2.Verifique si hay energía en el
tomacorriente. Si no hay energía en el
tomacorriente, apague el cargador y
verifique el disyuntor. Si el disyuntor se
disparó, asegúrese de que el circuito
tenga la capacidad correcta para el
cargador y que no tenga otras cargas.
3.Desenchufe el cargador y verifique que
las pinzas estén firmemente conectadas
a las terminales de la batería.|1.El cable no está conectado.
2.No hay energía en el
tomacorriente.
3.Las pinzas no están conectadas
de manera firme a las
terminales de la batería.|El cargador no arranca.| |Soluciones probables|causas posibles|problema|
Resolución de problemas
REpARADAS pOR EL USUARIO.
NO HAy pIEZAS QUE pUEDAN SER
DEL cARGADOR; EN SU INTERIOR
calificado. NO ABRA LA cARcASA
reemplazado únicamente por un técnico
de este cargador está dañado, debe ser
externas del cargador con un paño limpio.
el funcionamiento seguro de la unidad.
•cualquier otra condición que pueda afectar
•cables eléctricos o aislantes de cables dañados, o
general del cargador. Verifique que no haya:
1.ANTES DE cADA USO,inspeccione el estado
de continuar con el uso.
No utilice el equipo si está dañado. Si detecta ruidos extraños o vibración, haga corregir el problema antes
cARGADOR:
pARA EVITAR LESIONES GRAVES OcASIONADAS pOR UN FUNcIONAMIENTO DEFEcTUOSO DEL
o procedimiento de limpieza.
el cargador se enfríe por completo antes de realizar cualquier inspección, tarea de mantenimiento
pARA EVITAR LESIONES GRAVES: Desenchufe el cargador, desconecte cualquier batería y permita que
ADVERTENcIA
en este manual.
Un técnico calificado debe realizar los procedimientos que no se expliquen específicamente
Mantenimiento Instrucciones
Página 10
Artículo 60653Si desea realizar preguntas técnicas, llame al 1-888-866-5797.
las pinzas del cable de CC.
el cable del tomacorriente antes de desconectar
cinco minutos antes de intentar hacerlo arrancar.
(ARRANQUE) SóLO HASTA 5 segundos pOR VEZ.
MANTENGA EL cARGADOR EN MODO START
8.Para encender el motor, gire la llave de encendido.
mínimo para el modo Start (Arranque).
5 segundos máximo con 4 minutos de descanso
y LA BATERÍA, siga un ciclo de trabajo de
GRAVES, INcENDIO y DAÑOS AL cARGADOR
7.¡ADVERTENcIA! pARA EVITAR LESIONES
enchufe el cargador.
6.Una vez configurados los interruptores,
(Arranque de emergencia del motor) de 50A .
configuración) en Emergency Engine Start
5.Coloque el Setting Switch (Interruptor de
NO UTILIcE cON BATERÍAS DE GEL.
¡ADVERTENcIA! pARA EVITAR EXpLOSIONES:
con separadores de fibra de vidrio absorbente).
Separador de fibra de vidrio absorbente (baterías
•Colóquelo en AGM para baterías
y baterías libres de mantenimiento.
•Colóquelo en Regular para baterías líquidas
de acuerdo al tipo de batería:
4.Configure el Interruptor de tipo de batería
capó, la puerta o alguna pieza móvil del motor.
de reducir el riesgo de daños causados por el
3.Coloque los cables de CA y CC de modo tal
para impedir que la batería sufra daños.
de inmediato y conéctelos correctamente
manera incorrecta. Desconecte los cables
conexión", los cables están conectados de
AVISO: Si se enciende el indicador de "Invertir
alto calibre del bastidor o del bloque del motor.
la carrocería. Conecte a una pieza de metal de
a tuberías de combustible o a piezas de chapa de
de la batería. No conecte la pinza al carburador,
al chasis o al bloque del motor del vehículo, lejos
la batería. Conecte la pinza NEGATIVA (NEGRA)
POSITIVO (POS, P, +) no conectado a tierra de
POSITIVA (ROJA) del cargador de baterías al borne
negativo conectado a tierra, conecte la pinza
2.En el caso de un vehículo que tenga el borne
del tomacorriente de CA.
1.Desenchufe el cable de CA del cargador

antes de intentar encender el motor.
cargue la batería durante unos cinco minutos
o cuando la batería esté muy agotada,
Nota:En condiciones de clima extremadamente frío
Lea detalladamente el manual de servicio del vehículo antes de utilizar este procedimiento.
de salida durante el arranque.
Algunos vehículos que poseen computadoras integradas pueden resultar dañados por las altas corrientes
AVISO
cómo hacer arrancar un motor de 12 voltios
SEGURIDADFUNcIONAMIENTOMANTENIMIENTOcONFIGURAcIóN
Artículo 60653 Si desea realizar preguntas técnicas, llame al 1-888-866-5797.
Página 9
SEGURIDADFUNcIONAMIENTOMANTENIMIENTOcONFIGURAcIóN
bajo techo, fuera del alcance de los niños.
11.Después de utilizar el cargador, límpielo y guárdelo
alejado de la batería como resulte práctico.
primero la conexión mientras se encuentre tan
para el procedimiento de conexión e interrumpa
en secuencia inversa a la secuencia seguida
10.Al desconectar el cargador, hágalo siempre
cuando la batería esté totalmente cargada.
"Carga completa" se encenderá y parpadeará
9.Monitoree el proceso de carga. El indicador de
enchufe el cargador.
configuración) en el amperaje de carga deseado.
NO UTILIcE cON BATERÍAS DE GEL.
¡ADVERTENcIA! pARA EVITAR EXpLOSIONES:
con separadores de fibra de vidrio absorbente).
Separador de fibra de vidrio absorbente (baterías
•Colóquelo en AGM para baterías
y baterías libres de mantenimiento.

•Colóquelo en Regular para baterías líquidas
de acuerdo al tipo de batería:
6.Configure el Interruptor de tipo de batería
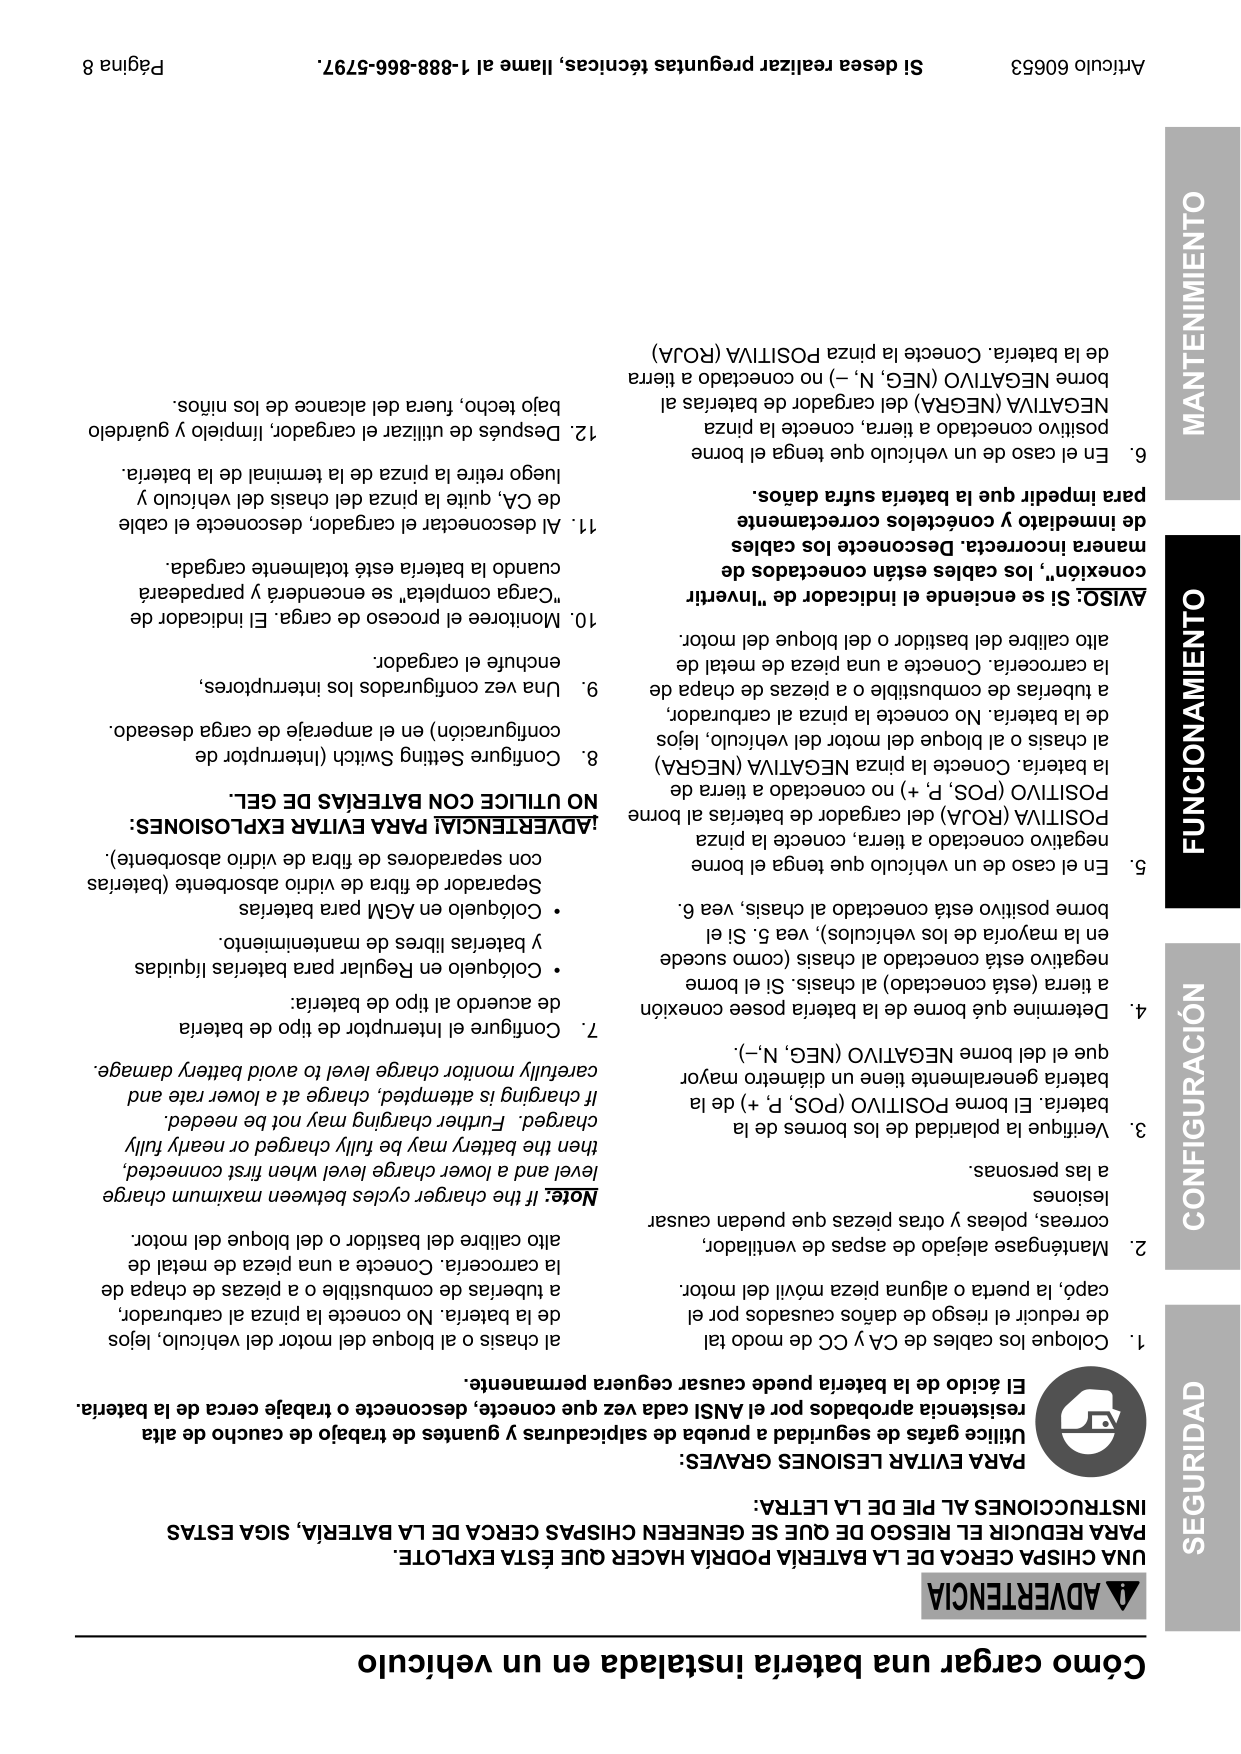
para impedir que la batería sufra daños.
de inmediato y conéctelos correctamente
manera incorrecta. Desconecte los cables
conexión", los cables están conectados de
AVISO: Si se enciende el indicador de "Invertir
la conexión final.
al borne POSITIVO (POS, P, +) de la batería.
cable tan lejos como sea posible de la batería;
luego, conecte la pinza NEGATIVA (NEGRA)
del cargador al extremo libre del cable.
NEGATIVO (NEG, N, –) de la batería.
longitud y calibre americano 6 al borne
que tenga al menos 24 pulgadas de
2.Conecte un cable de batería con aislante
que el del borne NEGATIVO (NEG, N, –).
batería generalmente tiene un diámetro mayor
batería. El borne POSITIVO (POS, P, +) de la
1.Verifique la polaridad de los bornes de la
El ácido de la batería puede causar ceguera permanente.
resistencia aprobados por el ANSI cada vez que conecte, desconecte o trabaje cerca de la batería.
Utilice gafas de seguridad a prueba de salpicaduras y guantes de trabajo de caucho de alta
pARA EVITAR LESIONES GRAVES:
INSTRUccIONES AL pIE DE LA LETRA:
pARA REDUcIR EL RIESGO DE QUE SE GENEREN cHISpAS cERcA DE LA BATERÍA, SIGA ESTAS
UNA cHISpA cERcA DE LA BATERÍA pODRÍA HAcER QUE ÉSTA EXpLOTE.
ADVERTENcIA
cómo cargar una batería fuera del vehículo
Página 8
Artículo 60653Si desea realizar preguntas técnicas, llame al 1-888-866-5797.
bajo techo, fuera del alcance de los niños.
12.Después de utilizar el cargador, límpielo y guárdelo
luego retire la pinza de la terminal de la batería.
de CA, quite la pinza del chasis del vehículo y
configuración) en el amperaje de carga deseado.
"Carga completa" se encenderá y parpadeará
cuando la batería esté totalmente cargada.
NO UTILIcE cON BATERÍAS DE GEL.
¡ADVERTENcIA! pARA EVITAR EXpLOSIONES:
con separadores de fibra de vidrio absorbente).
Separador de fibra de vidrio absorbente (baterías
•Colóquelo en AGM para baterías
y baterías libres de mantenimiento.
•Colóquelo en Regular para baterías líquidas
de acuerdo al tipo de batería:
7.Configure el Interruptor de tipo de batería
carefully monitor charge level to avoid battery damage.
If charging is attempted, charge at a lower rate and
charged. Further charging may not be needed.
then the battery may be fully charged or nearly fully
level and a lower charge level when first connected,
Note:If the charger cycles between maximum charge
alto calibre del bastidor o del bloque del motor.
la carrocería. Conecte a una pieza de metal de
a tuberías de combustible o a piezas de chapa de
de la batería. No conecte la pinza al carburador,
al chasis o al bloque del motor del vehículo, lejos
de la batería. Conecte la pinza POSITIVA (ROJA)
borne NEGATIVO (NEG, N, –) no conectado a tierra
NEGATIVA (NEGRA) del cargador de baterías al
positivo conectado a tierra, conecte la pinza
6.En el caso de un vehículo que tenga el borne
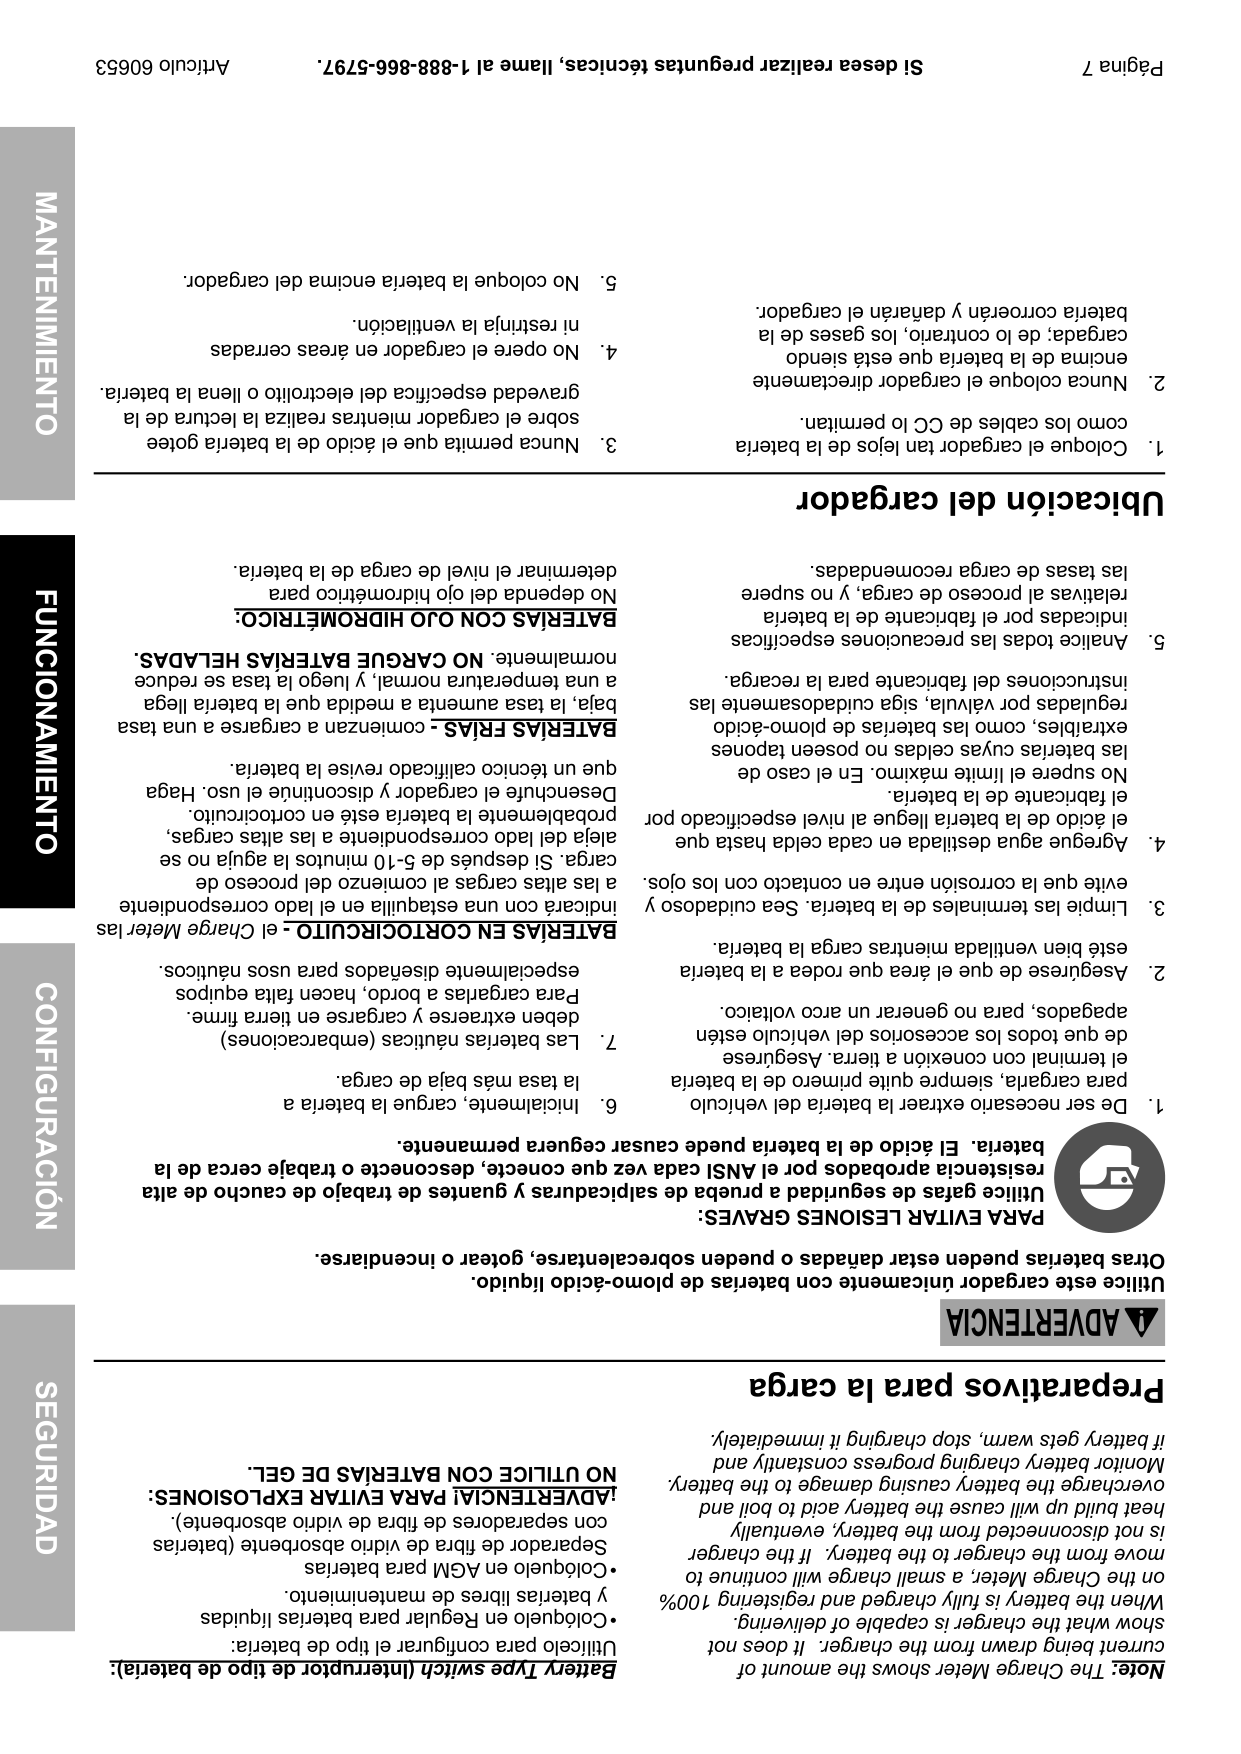
para impedir que la batería sufra daños.
de inmediato y conéctelos correctamente
manera incorrecta. Desconecte los cables
conexión", los cables están conectados de
AVISO: Si se enciende el indicador de "Invertir
alto calibre del bastidor o del bloque del motor.
la carrocería. Conecte a una pieza de metal de
a tuberías de combustible o a piezas de chapa de
de la batería. No conecte la pinza al carburador,
al chasis o al bloque del motor del vehículo, lejos
la batería. Conecte la pinza NEGATIVA (NEGRA)
POSITIVO (POS, P, +) no conectado a tierra de
POSITIVA (ROJA) del cargador de baterías al borne
negativo conectado a tierra, conecte la pinza
5.En el caso de un vehículo que tenga el borne
borne positivo está conectado al chasis, vea 6.
en la mayoría de los vehículos), vea 5. Si el
negativo está conectado al chasis (como sucede
a tierra (está conectado) al chasis. Si el borne
4.Determine qué borne de la batería posee conexión
que el del borne NEGATIVO (NEG, N,–).
batería generalmente tiene un diámetro mayor
batería. El borne POSITIVO (POS, P, +) de la
3.Verifique la polaridad de los bornes de la
a las personas.
lesiones
correas, poleas y otras piezas que puedan causar
2.Manténgase alejado de aspas de ventilador,
capó, la puerta o alguna pieza móvil del motor.
de reducir el riesgo de daños causados por el
1.Coloque los cables de CA y CC de modo tal
El ácido de la batería puede causar ceguera permanente.
resistencia aprobados por el ANSI cada vez que conecte, desconecte o trabaje cerca de la batería.
Utilice gafas de seguridad a prueba de salpicaduras y guantes de trabajo de caucho de alta
pARA EVITAR LESIONES GRAVES:
INSTRUccIONES AL pIE DE LA LETRA:
pARA REDUcIR EL RIESGO DE QUE SE GENEREN cHISpAS cERcA DE LA BATERÍA, SIGA ESTAS
UNA cHISpA cERcA DE LA BATERÍA pODRÍA HAcER QUE ÉSTA EXpLOTE.
ADVERTENcIA
cómo cargar una batería instalada en un vehículo
SEGURIDADFUNcIONAMIENTOMANTENIMIENTOcONFIGURAcIóN
Página 7
#### SEGURIDADFUNcIONAMIENTOMANTENIMIENTOcONFIGURAcIóN
5.No coloque la batería encima del cargador.
ni restrinja la ventilación.
4.No opere el cargador en áreas cerradas
gravedad específica del electrolito o llena la batería.
sobre el cargador mientras realiza la lectura de la
3.Nunca permita que el ácido de la batería gotee
batería corroerán y dañarán el cargador.
cargada; de lo contrario, los gases de la
encima de la batería que está siendo
como los cables de CC lo permitan.
Ubicación del cargador
determinar el nivel de carga de la batería.
las tasas de carga recomendadas.
No dependa del ojo hidrométrico para
relativas al proceso de carga, y no supere
BATERÍAS cON OJO HIDROMÉTRIcO:
indicadas por el fabricante de la batería
5.Analice todas las precauciones específicas
normalmente.NO cARGUE BATERÍAS HELADAS.
a una temperatura normal, y luego la tasa se reduce
instrucciones del fabricante para la recarga.
baja, la tasa aumenta a medida que la batería llega
reguladas por válvula, siga cuidadosamente las
BATERÍAS FRÍAS -comienzan a cargarse a una tasa
extraíbles, como las baterías de plomo-ácido
las baterías cuyas celdas no poseen tapones
que un técnico calificado revise la batería.
No supere el límite máximo. En el caso de
Desenchufe el cargador y discontinúe el uso. Haga
el fabricante de la batería.
probablemente la batería esté en cortocircuito.
el ácido de la batería llegue al nivel especificado por
aleja del lado correspondiente a las altas cargas,
4.Agregue agua destilada en cada celda hasta que
carga. Si después de 5-10 minutos la aguja no se
a las altas cargas al comienzo del proceso de
evite que la corrosión entre en contacto con los ojos.
indicará con una estaquilla en el lado correspondiente
3.Limpie las terminales de la batería. Sea cuidadoso y
BATERÍAS EN cORTOcIRcUITO -elCharge Meterlas
esté bien ventilada mientras carga la batería.
especialmente diseñados para usos náuticos.
para cargarla, siempre quite primero de la batería
el terminal con conexión a tierra. Asegúrese
de que todos los accesorios del vehículo estén
apagados, para no generar un arco voltaico.
Para cargarlas a bordo, hacen falta equipos
deben extraerse y cargarse en tierra firme.

7.Las baterías náuticas (embarcaciones)
la tasa más baja de carga.
6.Inicialmente, cargue la batería a
batería. El ácido de la batería puede causar ceguera permanente.
resistencia aprobados por el ANSI cada vez que conecte, desconecte o trabaje cerca de la
Utilice gafas de seguridad a prueba de salpicaduras y guantes de trabajo de caucho de alta
pARA EVITAR LESIONES GRAVES:
Otras baterías pueden estar dañadas o pueden sobrecalentarse, gotear o incendiarse.
Utilice este cargador únicamente con baterías de plomo-ácido líquido.
ADVERTENcIA
preparativos para la carga
NO UTILIcE cON BATERÍAS DE GEL.
¡ADVERTENcIA! pARA EVITAR EXpLOSIONES:
con separadores de fibra de vidrio absorbente).
Separador de fibra de vidrio absorbente (baterías
•Colóquelo en AGM para baterías
y baterías libres de mantenimiento.
•Colóquelo en Regular para baterías líquidas
Utilícelo para configurar el tipo de batería:
Battery Type switch(Interruptor de tipo de batería):
if battery gets warm, stop charging it immediately.
Monitor battery charging progress constantly and
overcharge the battery causing damage to the battery.
heat build up will cause the battery acid to boil and
is not disconnected from the battery, eventually
move from the charger to the battery. If the charger
on the Charge Meter, a small charge will continue to
When the battery is fully charged and registering 100%
show what the charger is capable of delivering.
current being drawn from the charger. It does not
Note:The Charge Meter shows the amount of
Página 6
a full charge when charging process is only beginning.
battery may cause Charge Meter to read near
a sulfated battery, or a deeply discharged lead calcium
#### SEGURIDADFUNcIONAMIENTOMANTENIMIENTOcONFIGURAcIóN
Sometimes conditions such as a cold battery,
and the green LED is on.
Charge current to the battery is minimal
Figure D:FULLY CHARGED BATTERY
y cambiar el amperaje de salida.
|1007550250
CHARGE LEVEL %| |---|
modos Charging (Cargando) y Start (Arranque)
Utilice este interruptor para alternar entre los
Setting Switch(Interruptor de configuración):
función está desactivada.
En el modo Start (Arranque), esta
totalmente cargada.
Se iluminará de color verde cuando la batería esté
suministro eléctrico.
Se iluminará de color rojo cuando esté conectado el
Charge Status(Estado de la carga):
Charge current to the battery is reduced.
para impedir que la batería sufra daños.
de inmediato y conéctelos correctamente
FIGURE c:BATTERY ALMOST FULLY CHARGED
de manera incorrecta. Desconecte los cables
|1007550250
CHARGE LEVEL %| |---|
Esto indica que los cables están conectados
Wrong Connection(conexión incorrecta):
Figure A: controles
configuración)
(conexión incorrecta)
(Interruptor de
Wrong Connection
Setting Switch
Charge Meter Charge Status (Estado de la carga):
batería)

de tipo de
(Interruptor
Type Switch
Initial charge current to the battery is at maximum.
Figure B:DISCHARGED BATTERY
|1007550250
CHARGE LEVEL %| |---|
Charge Meter (10 amp charge mode only):
controles
ADVERTENcIApARA EVITAR LESIONES GRAVES:NO ENcHUFE EL cARGADOR HASTA QUE SE LE INDIQUE QUE LO HAGA.
SEGURIDAD"que se encuentra al comienzo de este manual, incluyendo todos los textos debajo de los subtítulos.
Antes de instalar o usar este producto, lea la TOTALIDADDE LA SEccIóN "INFORMAcIóN IMpORTANTE SOBRE
Funcionamiento Instrucciones
|12 VCC-10*A
12 VCC-2*A
12 VCC Arranque de motor-50A|Salida| |---|---| |120VAC, 60Hz, 2A|Entrada|
batería o en modo START (ARRANQUE).
cuando la unidad está conectada a una
*El amperaje únicamente está presente
Especificaciones
Página 5
#### SEGURIDADFUNcIONAMIENTOMANTENIMIENTOcONFIGURAcIóN
un adaptador con el cargador para baterías.
conexión a tierra (tres patas). No debe utilizarse
baterías directamente a un tomacorriente con
todos los códigos y ordenanzas locales.
o descarga eléctrica.Conecte el cargador para
instalado y conectado a tierra y que cumpla con
pREcAUcION – Riesgo de incendio
a un tomacorriente que esté adecuadamente

puede generar riesgo de descarga eléctrica.
conexión a tierra. El enchufe debe conectarse
un tomacorriente adecuado. Una conexión incorrecta
que conecta a tierra el equipo y un enchufe para
tomacorriente, haga que un técnico calificado instale
equipado con un cable que posee un conductor
enchufe provistos; si el enchufe no calza en el
el riesgo de descargas eléctricas. El cargador está
pELIGRO– Nunca altere el cable de CA ni el
Se debe conectar a tierra el cargador para reducir
Instrucciones para la puesta a tierra y la conexión del cable de alimentación de cA
cONSERVE ESTAS INSTRUccIONES.
sino que corren por cuenta del operador.
pueden fabricarse e incorporarse al producto,
sentido común y la cautela son factores que no
operador del equipo debe entender que el
condiciones posibles que pueden ocurrir. El
no pueden cubrir todas las situaciones y
que se ofrecen en este manual de instrucciones
29.Las advertencias, precauciones e instrucciones
un incendio y daños a la propiedad.
Desatender el cargador puede generar
impide las descargas eléctricas prolongadas.
NO dependa únicamente de él.
interruptor de circuito por falla a tierra (GFCI);
21.Si bien este cargador posee un disyuntor,
alimentación. También debe implementarse un
• Conectar a tierra correctamente el cable de
de inspección, mantenimiento o limpieza.
del equipo, para evitar descargas eléctricas.
una batería o realizar cualquier procedimiento
• Inspeccionar y realizar un mantenimiento adecuado
tomacorriente antes de conectar sus cables a
• Evitar operar el cargador estando solos.
20.Desenchufe el cargador para baterías del
marcapasos deben:
fuera del alcance de los niños.
funcione mal. Además, las personas que utilizan
19.Este producto no es un juguete. Manténgalo
funcionamiento del marcapasos o hacer que éste
a un marcapasos podrían interferir con el
Harbor Freight Tools para solicitar un reemplazo.
equipo. Los campos electromagnéticos próximos
Si faltan o son ilegibles, póngase en contacto con
consultar a su(s) médico(s) antes de utilizar el
Contienen información de seguridad importante.
28.Las personas que utilizan marcapasos deben
18.Conserve las etiquetas y placas del cargador.
permita que el cargador se enfríe.
el suministro eléctrico y la batería; luego,
27.Antes de mover el cargador, desconecte
puede ocasionar graves lesiones personales.
más breve falta de atención al operar un cargador
alcohol o medicamentos, no utilice el cargador La
26.Cuando esté cansado o bajo la influencia de drogas,
mantenga la seguridad del cargador.
a las del equipo. Esto garantizará que se
únicamente piezas de repuesto idénticas
a cargo de una persona calificada que utilice
25.El servicio técnico de su cargador debe estar
o no recargables.
NO UTILIcE cON BATERÍAS DE GEL.
libres de mantenimiento.
elCharge Meter. No cargue de más las baterías
monitoree siempre el avance de la carga revisando
Cuando cargue una batería libre de mantenimiento,
de fibra de vidrio absorbente.
plomo-ácido líquido o baterías con separadores
22.Utilice este cargador únicamente con baterías de
causar ceguera permanente.
batería. El ácido de la batería puede
desconecte o trabaje cerca de la
por el ANSI cada vez que conecte,
caucho de alta resistencia aprobados
salpicaduras y guantes de trabajo de
17.Utilice gafas de seguridad a prueba de
especialmente diseñados para usos náuticos.
Para cargarlas a bordo, hacen falta equipos
deben extraerse y cargarse en tierra firme.
g.Las baterías náuticas (embarcaciones)
alejado de la batería como resulte práctico.
primero la conexión mientras se encuentre tan
el procedimiento de conexión, e interrumpa
secuencia inversa a la secuencia seguida para
f.Al desconectar el cargador, hágalo siempre en
realice la conexión final.
e.No se ponga de frente a la batería cuando
del cargador al extremo libre del cable.
luego, conecte la pinza NEGATIVA (NEGRA)
cable tan lejos como sea posible de la batería;
d.Colóquese usted y coloque el extremo libre del
al borne POSITIVO (POS, P, +) de la batería.
c.Conecte la pinza POSITIVA (ROJA) del cargador
Página 4
NEGATIVO (NEG, N, –) de la batería.
longitud y calibre americano 6 al borne
que tenga al menos 24 pulgadas de
b.Conecte un cable de batería con aislante
que el del borne NEGATIVO (NEG, N, –).
batería generalmente tiene un diámetro mayor
batería. El borne POSITIVO (POS, P, +) de la
a.Verifique la polaridad de los bornes de la
SE GENEREN CHISPAS CERCA DE LA BATERÍA:
EXPLOTE. PARA REDUCIR EL RIESGO DE QUE
DE LA BATERÍA PODRÍA HACER QUE ÉSTA
FUERA DEL VEHÍCULO. UNA CHISPA CERCA
16.SIGA ESTOS PASOS CUANDO LA BATERÍA ESTÉ
instrucciones para la operación.
el tiempo de carga, consulte las
h.Para obtener información sobre
luego retire la pinza de la terminal de la batería.
de CA, quite la pinza del chasis del vehículo y
g.Al desconectar el cargador, desconecte el cable
alto calibre del bastidor o del bloque del motor.
carrocería. Conecte a una pieza de metal de
de combustible o a piezas de chapa de la
No conecte la pinza al carburador, a tuberías
del motor del vehículo, lejos de la batería.
pinza POSITIVA (ROJA) al chasis o al bloque
conectado a tierra de la batería. Conecte la
baterías al borne NEGATIVO (NEG, N, –) no
pinza NEGATIVA (NEGRA) del cargador de
borne positivo conectado a tierra, conecte la
f.En el caso de un vehículo que tenga el
alto calibre del bastidor o del bloque del motor.
carrocería. Conecte a una pieza de metal de
de combustible o a piezas de chapa de la
No conecte la pinza al carburador, a tuberías
del motor del vehículo, lejos de la batería.
NEGATIVA (NEGRA) al chasis o al bloque
a tierra de la batería. Conecte la pinza
al borne POSITIVO (POS, P, +) no conectado
POSITIVA (ROJA) del cargador de baterías
negativo conectado a tierra, conecte la pinza
e.En el caso de un vehículo que tenga el borne
el borne positivo está conectado al chasis, vea (f).
sucede en la mayoría de los vehículos), vea (e). Si
borne negativo está conectado al chasis (como
conexión a tierra (está conectado) al chasis. Si el
d.Determine qué borne de la batería posee
que el del borne NEGATIVO (NEG, N,–).
batería generalmente tiene un diámetro mayor
batería. El borne POSITIVO (POS, P, +) de la
c.Verifique la polaridad de los bornes de la
causar lesiones a las personas.
correas, poleas y otras piezas que puedan
b.Manténgase alejado de aspas de ventilador,
capó, la puerta o alguna pieza móvil del motor.
de reducir el riesgo de daños causados por el
a.Coloque los cables de CA y CC de modo tal
CHISPAS CERCA DE LA BATERÍA:
REDUCIR EL RIESGO DE QUE SE GENEREN
HACER QUE ÉSTA EXPLOTE. PARA
CHISPA CERCA DE LA BATERÍA PODRÍA
ESTÉ INSTALADA EN EL VEHÍCULO. UNA
15.SIGA ESTOS PASOS CUANDO LA BATERÍA
se indica en 15(e), 15(f), y 16(b) a 16(d).
b.Conecte las pinzas a la batería y al chasis como
que las pinzas entren en contacto.
cable de CA del enchufe. Nunca permita
de CC únicamente después de quitar el
a.Conecte y desconecte las pinzas de salida
14.PRECAUCIONES PARA LA CONEXIÓN A CC
e.No coloque la batería encima del cargador.
cerradas ni restrinja la ventilación.
d.No opere el cargador en áreas
del electrolito o llena la batería.
la lectura de la gravedad específica
gotee sobre el cargador mientras realiza
como los cables de CC lo permitan.
encima de la batería que está siendo
cargada; de lo contrario, los gases de la
batería corroerán y dañarán el cargador.
13.UBICACIÓN DEL CARGADOR
la tasa más baja de carga.
f.Inicialmente, cargue la batería a
las tasas de carga recomendadas.
relativas al proceso de carga, y no supere
indicadas por el fabricante de la batería
e.Analice todas las precauciones específicas
instrucciones del fabricante para la recarga.
reguladas por válvula, siga cuidadosamente las
extraíbles, como las baterías de plomo-ácido
las baterías cuyas celdas no poseen tapones
No supere el límite máximo. En el caso de
especificado por el fabricante de la batería.
que el ácido de la batería llegue al nivel
d.Agregue agua destilada en cada celda hasta
entre en contacto con los ojos.
Sea cuidadoso y evite que la corrosión
c.Limpie los terminales de la batería.
esté bien ventilada mientras carga la batería.
para cargarla, siempre quite primero de la batería
el terminal con conexión a tierra. Asegúrese
de que todos los accesorios del vehículo estén
apagados, para no generar un arco voltaico.
12.PREPARATIVOS PARA LA CARGA
i.NUNCA cargue una batería helada.
a las personas y daños a la propiedad.
baterías pueden estallar y causar lesiones
se utilizan con los electrodomésticos. Esas
para cargar las baterías secas que generalmente
de arranque. No utilice el cargador de baterías
para aplicaciones que no sean las de un motor
sistema eléctrico de bajo voltaje que se utilice
utilizarse para suministrar energía eléctrica a un
baterías de PLOMO-ÁCIDO. El cargador no debe
h.Utilice el cargador para cargar únicamente
al metal, y causar, así, una grave quemadura.
como para soldar un anillo o elemento similar
corriente de cortocircuito lo suficientemente alta
Una batería de plomo-ácido puede generar una
cuando trabaje con una batería de plomo-ácido.
como anillos, brazaletes, collares y relojes
g.Quítese cualquier artículo personal de metal,
#### SEGURIDADFUNcIONAMIENTOMANTENIMIENTOcONFIGURAcIóN
Página 3
SEGURIDADFUNcIONAMIENTOMANTENIMIENTOcONFIGURAcIóN
en cortocircuito y ocasionen explosiones.
piezas eléctricas generen chispas o entren
batería. Podrían hacer que la batería u otras
|* Si la potencia nominal de entrada de un cargador está indicada
en vatios y no en amperios, la potencia nominal correspondiente
en amperios debe determinarse dividiendo la potencia nominal de
vatios por la potencia nominal de voltaje – por ejemplo:
1250 vatios/125 voltios= 10 amperios|* Si la potencia nominal de entrada de un cargador está indicada
en vatios y no en amperios, la potencia nominal correspondiente
en amperios debe determinarse dividiendo la potencia nominal de
vatios por la potencia nominal de voltaje – por ejemplo:
1250 vatios/125 voltios= 10 amperios|* Si la potencia nominal de entrada de un cargador está indicada
en vatios y no en amperios, la potencia nominal correspondiente
en amperios debe determinarse dividiendo la potencia nominal de
vatios por la potencia nominal de voltaje – por ejemplo:
1250 vatios/125 voltios= 10 amperios|* Si la potencia nominal de entrada de un cargador está indicada
en vatios y no en amperios, la potencia nominal correspondiente
en amperios debe determinarse dividiendo la potencia nominal de
vatios por la potencia nominal de voltaje – por ejemplo:
1250 vatios/125 voltios= 10 amperios|* Si la potencia nominal de entrada de un cargador está indicada
en vatios y no en amperios, la potencia nominal correspondiente
en amperios debe determinarse dividiendo la potencia nominal de
vatios por la potencia nominal de voltaje – por ejemplo:
1250 vatios/125 voltios= 10 amperios|* Si la potencia nominal de entrada de un cargador está indicada
en vatios y no en amperios, la potencia nominal correspondiente
en amperios debe determinarse dividiendo la potencia nominal de
vatios por la potencia nominal de voltaje – por ejemplo:
1250 vatios/125 voltios= 10 amperios| |---|---|---|---|---|---| |6|8|12|14|20|18| |8|8|12|14|18|16| |8|10|12|16|16|14| |8|10|12|16|14|12| |8|10|14|16|12|10| |10|12|14|18|10|8| |10|12|16|18|8|6| |12|14|16|18|6|5|
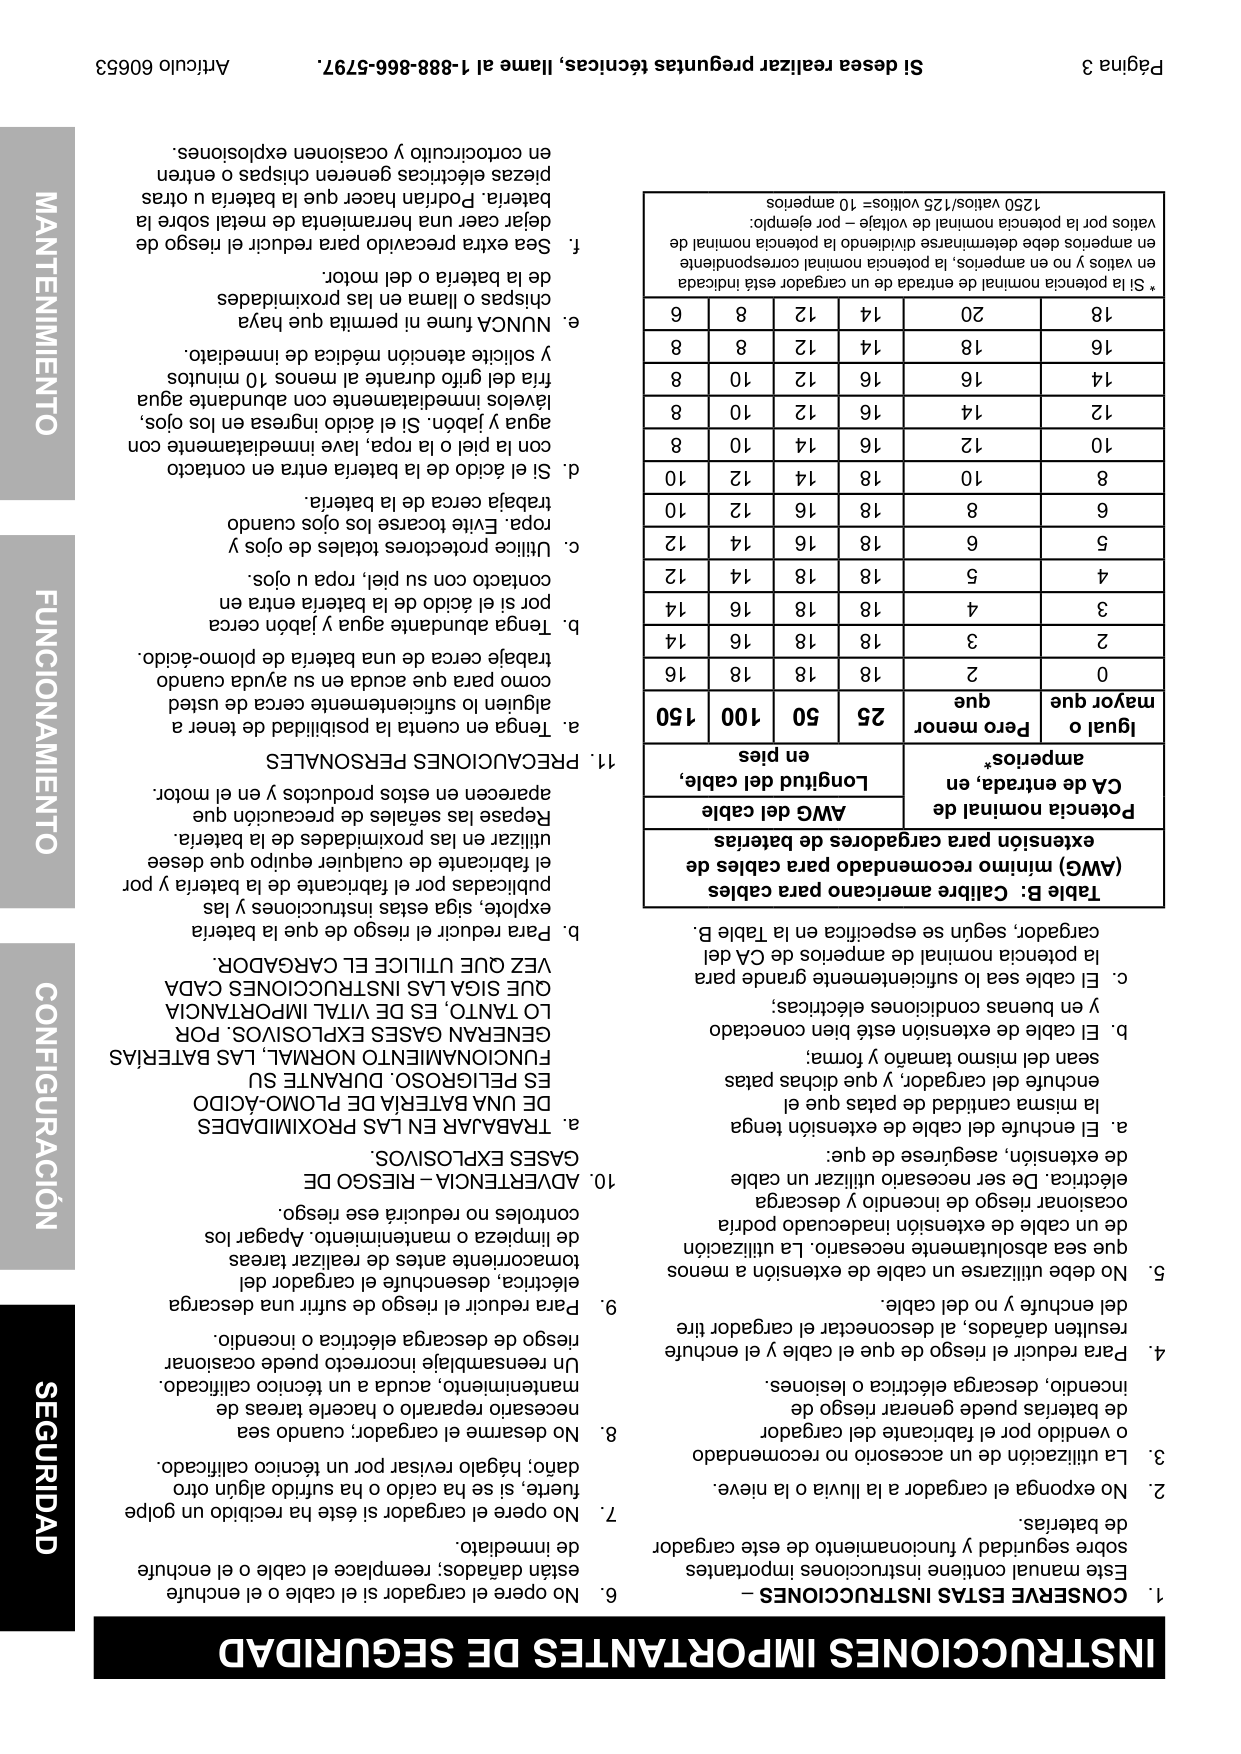
|12|14|18|18|5|4| |14|16|18|18|4|3| |14|16|18|18|3|2| |16|18|18|18|2|0| |150|100|50|25|pero menor
que|Igual o
mayor que| |Longitud del cable,
en pies|Longitud del cable,
en pies|Longitud del cable,
en pies|Longitud del cable,
en pies|potencia nominal de
cA de entrada, en
amperios*|potencia nominal de
cA de entrada, en
amperios*| |AWG del cable|AWG del cable|AWG del cable|AWG del cable|potencia nominal de
cA de entrada, en
amperios*|potencia nominal de
cA de entrada, en
amperios*| |Table B: calibre americano para cables
(AWG) mínimo recomendado para cables de
extensión para cargadores de baterías|Table B: calibre americano para cables
(AWG) mínimo recomendado para cables de
extensión para cargadores de baterías|Table B: calibre americano para cables
(AWG) mínimo recomendado para cables de
extensión para cargadores de baterías|Table B: calibre americano para cables
(AWG) mínimo recomendado para cables de
extensión para cargadores de baterías|Table B: calibre americano para cables
(AWG) mínimo recomendado para cables de
extensión para cargadores de baterías|Table B: calibre americano para cables
(AWG) mínimo recomendado para cables de
extensión para cargadores de baterías|
dejar caer una herramienta de metal sobre la
f.Sea extra precavido para reducir el riesgo de
de la batería o del motor.
chispas o llama en las proximidades
e.NUNCA fume ni permita que haya
y solicite atención médica de inmediato.
fría del grifo durante al menos 10 minutos
lávelos inmediatamente con abundante agua
agua y jabón. Si el ácido ingresa en los ojos,
con la piel o la ropa, lave inmediatamente con
d.Si el ácido de la batería entra en contacto
trabaja cerca de la batería.
ropa. Evite tocarse los ojos cuando
por si el ácido de la batería entra en
contacto con su piel, ropa u ojos.
trabaje cerca de una batería de plomo-ácido.
como para que acuda en su ayuda cuando
alguien lo suficientemente cerca de usted
a.Tenga en cuenta la posibilidad de tener a
11.PRECAUCIONES PERSONALES
aparecen en estos productos y en el motor.
Repase las señales de precaución que
utilizar en las proximidades de la batería.
el fabricante de cualquier equipo que desee
publicadas por el fabricante de la batería y por
explote, siga estas instrucciones y las
b.Para reducir el riesgo de que la batería
cargador, según se especifica en la Table B.
la potencia nominal de amperios de CA del
VEZ QUE UTILICE EL CARGADOR.
la misma cantidad de patas que el
enchufe del cargador, y que dichas patas
sean del mismo tamaño y forma;
y en buenas condiciones eléctricas;
QUE SIGA LAS INSTRUCCIONES CADA
LO TANTO, ES DE VITAL IMPORTANCIA
GENERAN GASES EXPLOSIVOS. POR
FUNCIONAMIENTO NORMAL, LAS BATERÍAS
ES PELIGROSO. DURANTE SU
DE UNA BATERÍA DE PLOMO-ÁCIDO
a.TRABAJAR EN LAS PROXIMIDADES
GASES EXPLOSIVOS.
de extensión, asegúrese de que:
10.ADVERTENCIA – RIESGO DE
eléctrica. De ser necesario utilizar un cable
ocasionar riesgo de incendio y descarga
controles no reducirá ese riesgo.
de un cable de extensión inadecuado podría
de limpieza o mantenimiento. Apagar los
que sea absolutamente necesario. La utilización
tomacorriente antes de realizar tareas
resulten dañados, al desconectar el cargador tire
del enchufe y no del cable.
eléctrica, desenchufe el cargador del
9.Para reducir el riesgo de sufrir una descarga
riesgo de descarga eléctrica o incendio.
Un reensamblaje incorrecto puede ocasionar
mantenimiento, acuda a un técnico calificado.
incendio, descarga eléctrica o lesiones.
necesario repararlo o hacerle tareas de
de baterías puede generar riesgo de
8.No desarme el cargador; cuando sea
o vendido por el fabricante del cargador
daño; hágalo revisar por un técnico calificado.
fuerte, si se ha caído o ha sufrido algún otro
7.No opere el cargador si éste ha recibido un golpe
de baterías.
de inmediato.
sobre seguridad y funcionamiento de este cargador
están dañados; reemplace el cable o el enchufe
Este manual contiene instrucciones importantes
6.No opere el cargador si el cable o el enchufe
1.cONSERVE ESTAS INSTRUccIONES–
INSTRUccIONES IMpORTANTES DE SEGURIDAD
Página 2
|Señal de ADVERTENCIA que
refiere a riesgo de incendio.
Siga el procedimiento para la conexión.| | |---|---| |Lea el manual antes de
la instalación y/o el uso.| | |Señal de ADVERTENCIA que refiere
a riesgo de sufrir lesiones oculares.
Utilice gafas de seguridad a prueba de
salpicaduras aprobadas por el ANSI.| |
|Amperios-hora|Ah| |---|---| |Capacidad de reserva|Rc| |Amperios arranque en frío|ccA| |Amperios|A| |Voltios corriente alterna|VAc| |Underwriters Laboratories, Inc.| | |Canadian Standards Association| |
|Hace referencia a prácticas no relacionadas con lesiones personales.|pREcAUcIóN AVISO
| |---|---| |Indica una situación peligrosa que, de no evitarse,
podría provocar lesiones menores o de moderada gravedad.|pREcAUcIóN| |Indica una situación peligrosa que, de no evitarse,
podría provocar la muerte o lesiones graves.|ADVERTENcIA| |Indica una situación peligrosa que, de no evitarse,
provocará la muerte o lesiones graves.|pELIGRO
| |Este es el símbolo de alerta de seguridad. Se utiliza para alertarlo sobre potenciales
riesgos de sufrir lesiones personales. Para evitar posibles lesiones o la muerte,
acate todos los mensajes de seguridad que acompañan a esta señal.| | |SÍMBOLOS DE ADVERTENcIA y DEFINIcIONES|SÍMBOLOS DE ADVERTENcIA y DEFINIcIONES|
Funcionamiento ..........................................6
Garantía.....................................................12
Especificaciones .........................................6
Mantenimiento...........................................11
Seguridad...................................................2
contenido
SEGURIDADFUNcIONAMIENTOMANTENIMIENTOcONFIGURAcIóN
|Al desembalar el producto, asegúrese de que esté intacto
y no haya sufrido daños. Si alguna pieza falta o está rota,
llame al 1-888-866-5797 tan pronto como sea posible.
Copyright©2012 por Harbor Freight Tools®. Todos los derechos reservados. Queda
prohibido cualquier tipo de reproducción de los contenidos de este manual, incluyendo
sus ilustraciones gráficas, sin el expreso consentimiento escrito de Harbor Freight Tools.
Es posible que los diagramas incluidos en este manual no hayan sido dibujados
guardando las proporciones. Debido a las mejoras continuas, el producto real puede
diferir ligeramente del descrito en este documento. Es posible que las herramientas
necesarias para el montaje y el mantenimiento técnico no estén incluidas.
|Lea el siguiente material antes
de usar este producto.
De no hacerlo, podría sufrir lesiones graves.
cONSERVE ESTE MANUAL.| |---| |ADVERTENcIA| | |---| |
Visite nuestro sitio web: http://www.harborfreight.com
Si lo necesita, envíe un correo electrónico a nuestro
Servicio Técnico: productsupport@harborfreight.com
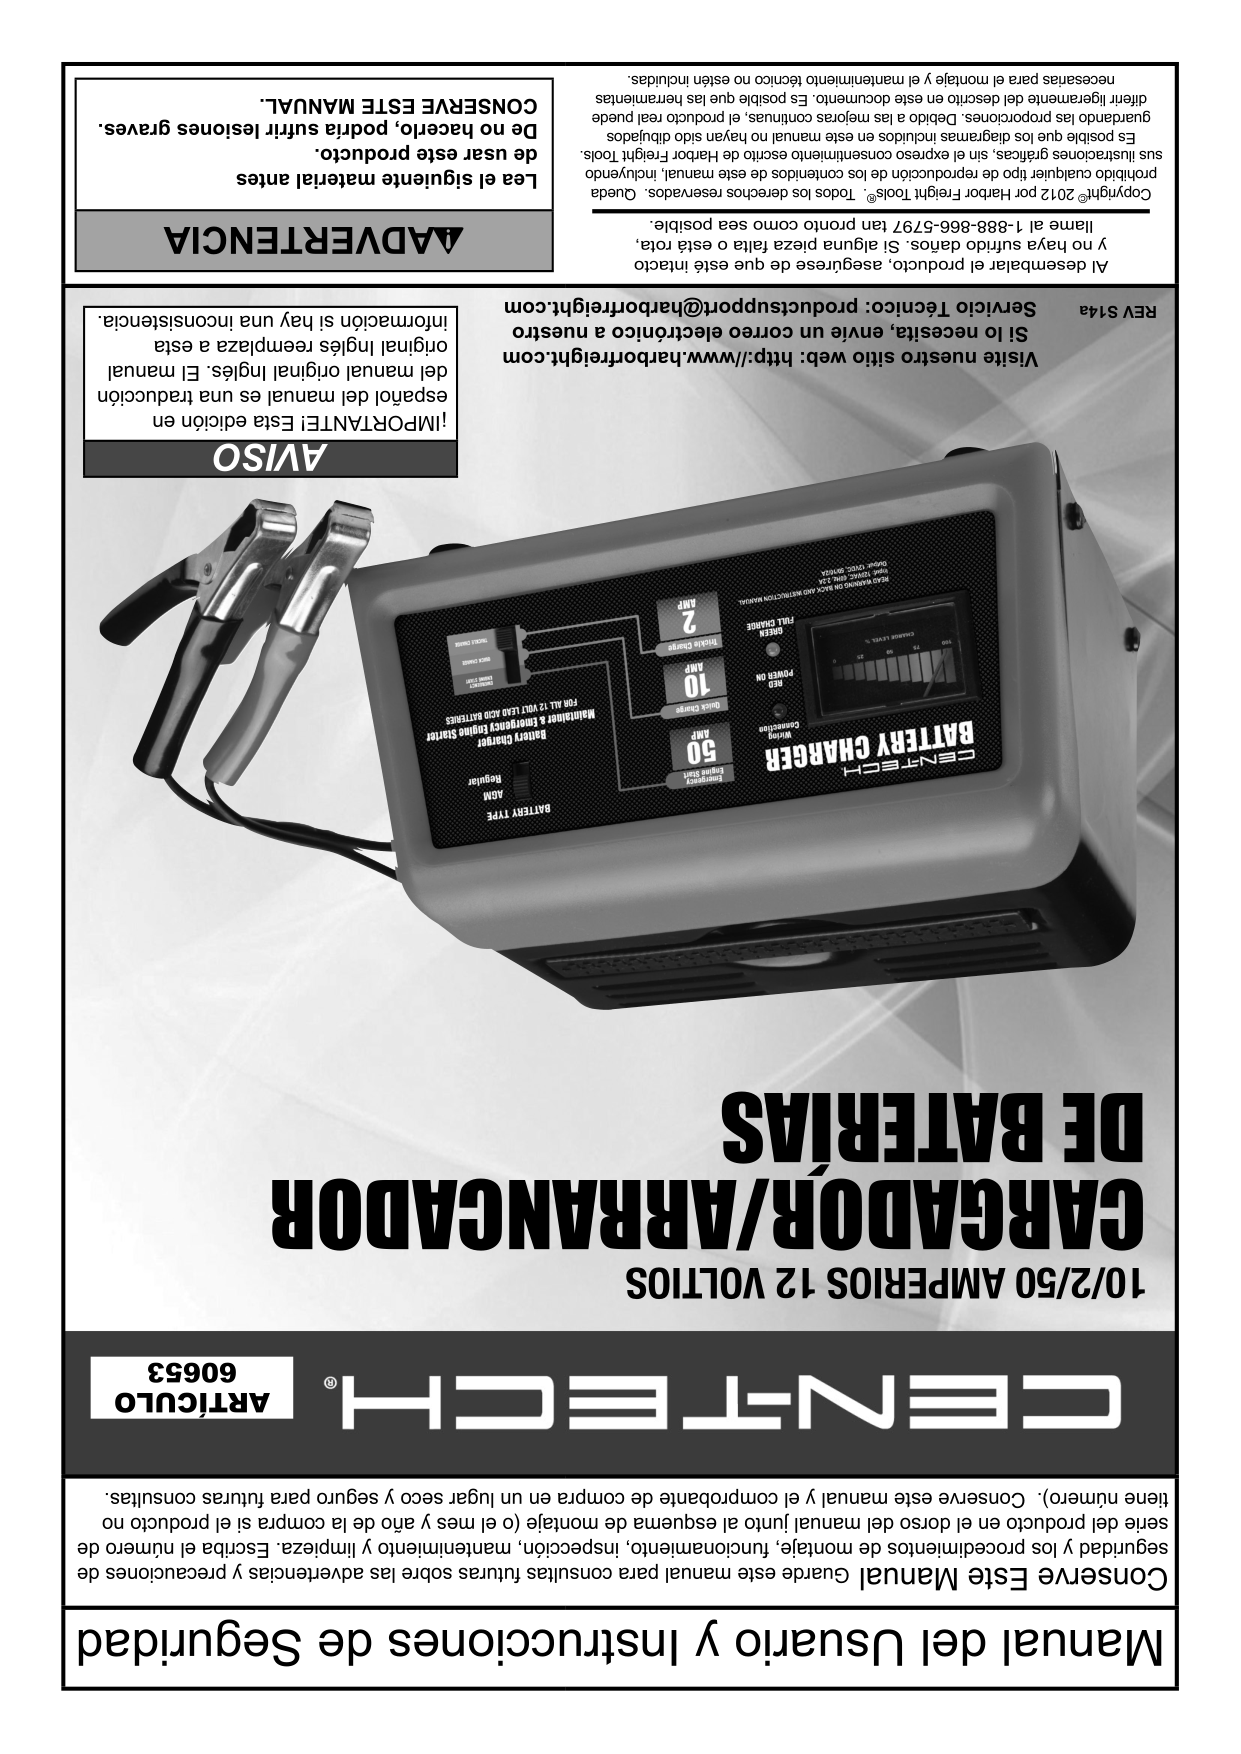
ARTÍCULO
60653
10/2/50 AMPERIOS 12 VOLTIOS
CARGADOR/ARRANCADOR
DE BATERÍAS

REV S14a
|¡IMPORTANTE! Esta edición en
español del manual es una traducción
del manual original Inglés. El manual
original Inglés reemplaza a esta
información si hay una inconsistencia.| |---| |AVISO| | |Conserve Este ManualGuarde este manual para consultas futuras sobre las advertencias y precauciones de
seguridad y los procedimientos de montaje, funcionamiento, inspección, mantenimiento y limpieza. Escriba el número de
serie del producto en el dorso del manual junto al esquema de montaje (o el mes y año de la compra si el producto no
tiene número). Conserve este manual y el comprobante de compra en un lugar seco y seguro para futuras consultas.| |Manual del Usuario y Instrucciones de Seguridad|