
Ask AI
— answers from the official manualAnswers from the official manual.
Common questions
Common Questions
40 totalWhat are the first steps to set up my Farberware Air Fryer?
First, remove all packaging materials, stickers, and labels from the appliance. Then wash the basket and pan with warm water, mild detergent, and a non-abrasive sponge, and wipe the interior and exterior with a damp cloth. Place the air fryer on a stable, horizontal, and level surface with at least 6 inches of space around it for proper ventilation. Finally, run the air fryer empty at 400°F for 5 minutes to eliminate any manufacturing residues before first use.
How do I use the Farberware Air Fryer to cook food?
Insert the basket into the pan and place your food items into the basket without overfilling. Set the temperature and timer according to your recipe or food type using the Settings chart on the inside back cover. Slide the pan and basket into the appliance, and shake the basket halfway through cooking for even results. Once the timer expires, the appliance will automatically shut off, and you can carefully remove the basket using the cool-touch handle.
Why is my food not cooking evenly in the Farberware Air Fryer?
Uneven cooking is typically caused by overfilling the basket, so avoid filling it too much. Make sure to shake the basket halfway through the cooking time to ensure even cooking of all food items. Additionally, always preheat the appliance before adding food to achieve consistent results.
What do the error codes E1 and E2 mean?
Error code E1 indicates overheating; you should unplug the appliance immediately and allow it to cool down before resuming use. Error code E2 indicates a temperature sensor error, and you will need to contact customer service for assistance with this issue.
Can I cook frozen foods in the Farberware Air Fryer?
Yes, frozen foods like fries, chicken nuggets, and fish sticks can be prepared in the air fryer. Refer to the Settings chart included on the inside back cover for specific cooking instructions for frozen items.
Is it normal to smell an unpleasant odor during first use?
Yes, an unpleasant odor during the first use is normal and is caused by residue from manufacturing. The odor should dissipate after the initial heating cycle, so there is no cause for concern.
Show 34 more questions
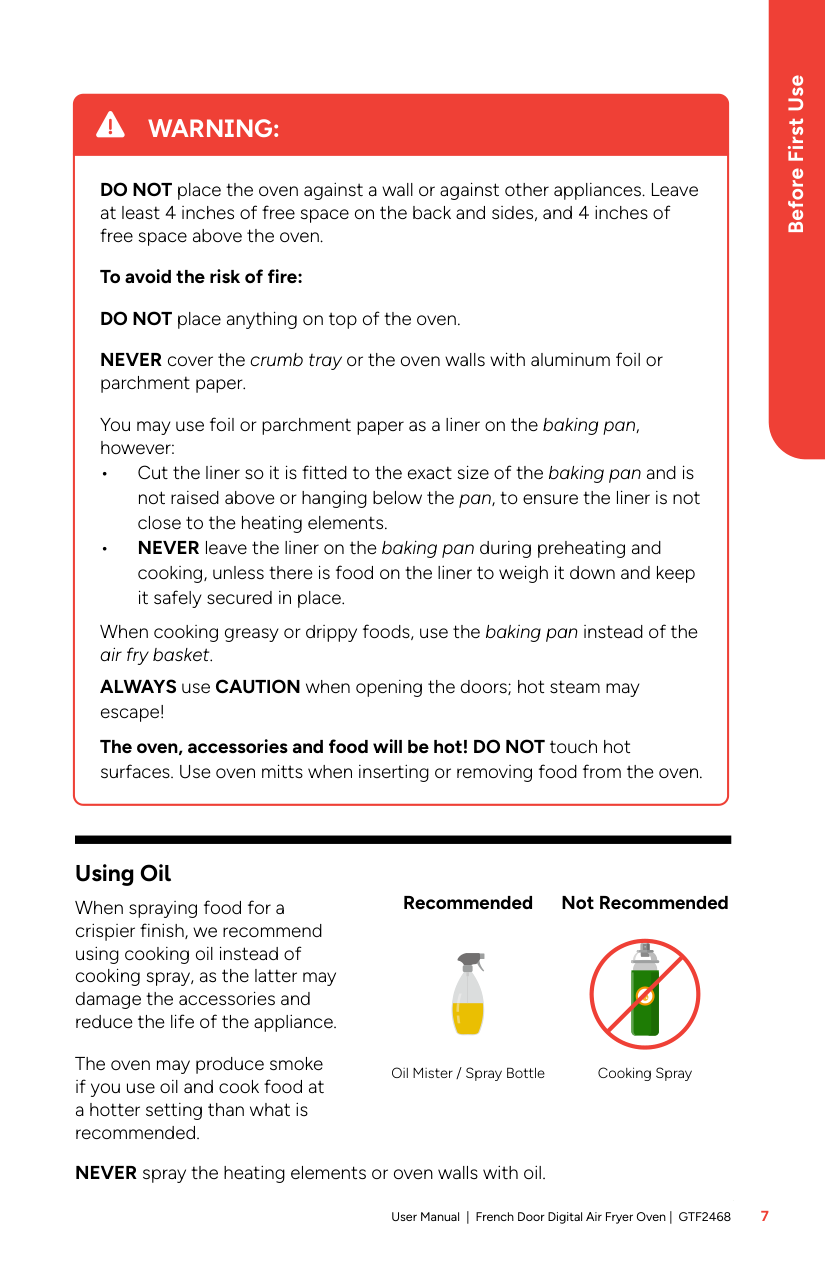
Can I use oil in the Farberware Air Fryer?
How do I clean and maintain my Farberware Air Fryer?
What are the specifications and temperature range of the Farberware Air Fryer?
What should I do if my air fryer is not turning on?
How far away from walls and other objects should I keep the Air Fryer during use?
What is the maximum temperature and timer range for this Air Fryer?
How do I properly turn off and unplug the Air Fryer?
How do I remove the basket from the basket holder?
Can the basket and basket holder be washed in a dishwasher?
Why is my food coming out soggy and not crispy?
What should I do if the power cord is damaged or the appliance is malfunctioning?
What can I cook in the Air Fryer and does it require assembly before use?
What should I do if there is a food flare-up during cooking?
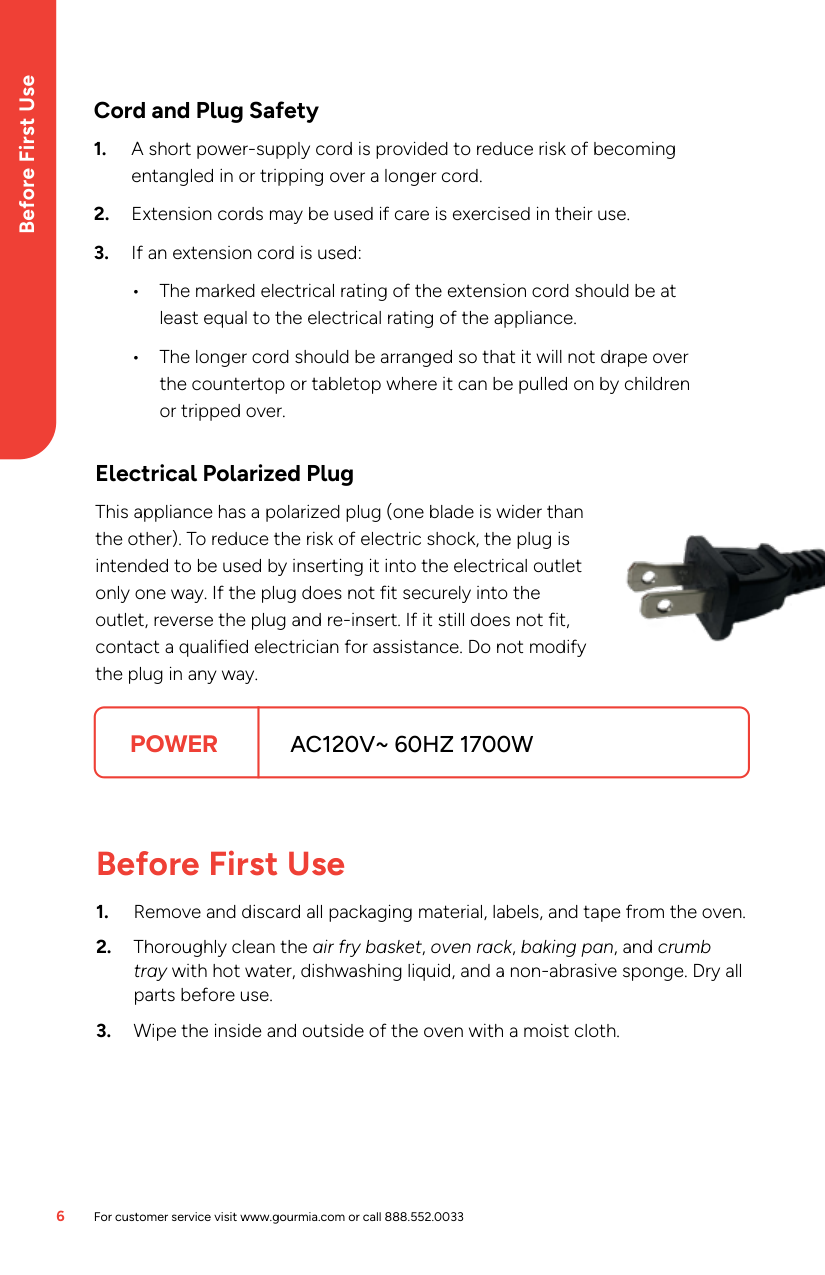
What power supply does the Air Fryer require?
How do I factory reset my Farberware Air Fryer?
What are the safety precautions when using the air fryer?
What should I do if the appliance is damaged or malfunctioning?
How do I remove the basket from the holder?
What happens if food is soggy during cooking?
How do I clean the air fryer safely after use?
What kind of foods can I cook with this air fryer?
What is the cooking capacity of the air fryer?
How do I properly dispose of hot grease after use?
Why isn't my air fryer heating up or showing any temperature?
How do I properly preheat the air fryer before using any functions other than BROIL?
What steps should I take if my air fryer starts producing smoke during its first use?
How do I safely clean and maintain my air fryer after use?
What should I do if my air fryer does not reach the set temperature during cooking?
How do I clean the crumb/drip tray when needed?
What is the correct distance to keep around my air fryer for safety reasons?
How do I use the air fry function to cook homemade French fries?
What is the recommended way to store my air fryer after use?
How do I factory reset the air fryer to its original settings?
What safety precautions should I follow when using metal utensils with the air fryer?
Full Manual
36 pages

This Owner's Manual is provided and hosted by Appliance Factory Parts.

Farberware 201797 Owner's Manual
###### Shop genuine replacement parts for Farberware 201797

####### Find Your Farberware Deep Fryer Parts - Select From 8 Models
-------- Manual continues below --------
AIR FRYER TOASTER OVEN
Model Number: 201797 UPC: 655772-01797-0
########## Customer Assistance 1-855-451-2897 (US)

Please consider the option to recycle the packaging material.
When using electrical appliances, basic safety precautions should always be followed, including the following:
SAVE THESE INSTRUCTIONS!
2
SAVE THESE INSTRUCTIONS!
3
ADDITIONAL SAFEGUARDS
This appliance is for HOUSEHOLD USE ONLY. WARNING:
######## Grounding instructions
This appliance must be grounded while in use. Do not remove or ignore the grounding pin during use.
########## WARNING:
• Do not let children handle or put the electrical cord into their mouths
SAVE THESE INSTRUCTIONS!
4
#### ILLUSTRATIONS
#### PARTS
Housing Air Vents
START/CANCEL Button
| | | |---|---| | | |
| | | |---|---| | | |
FUNCTION Knob TIME/TEMP Knob
| | | |---|---| | | |
| | | |---|---| | | |
TIME/TEMP Button
Digital LCD Display
Cord Storage
Rails
Glass Door
Power Cord with Plug
Cooking Basket
Handle
Heating Element
Crumb / Drip Tray
Cooking Rack
Cooking Pan
5
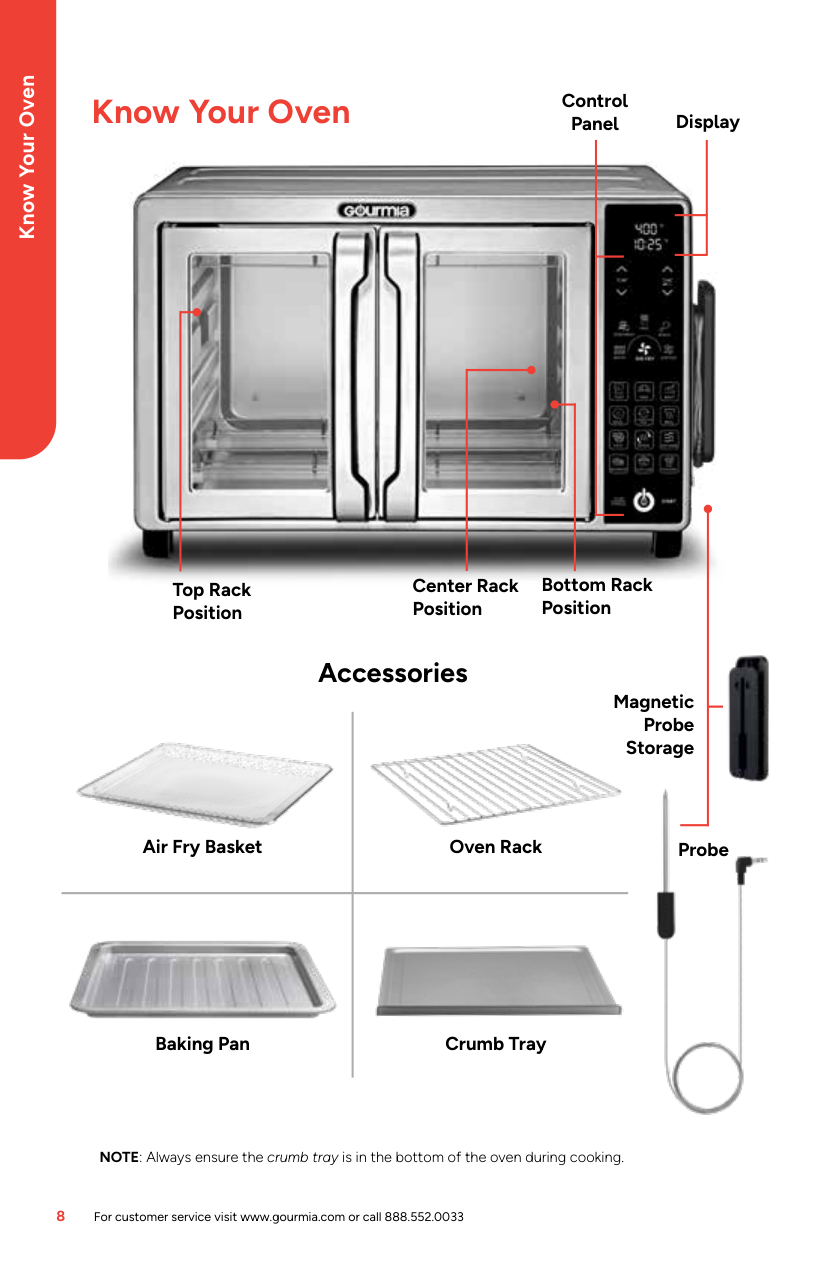
##### KNOW YOUR AIR FRYER TOASTER OVEN
Prepare your favorite foods and snacks in a quick, healthy, and easy way with your new Farberware Air Fryer Toaster Oven. The Air Fryer Toaster Oven is a versatile oven that uses rapid hot air technology to rapidly and evenly cook all your favorite foods when used on the air frying setting. This Air Fryer Toaster Oven features:
Other great advantages provided by your Air Fryer Toaster Oven include:
#### OPERATION
########### WARNING:
Escaping steam can burn and the appliance Housing is hot. Before first use
########### Danger of suffocation!
6
########### NOTE:
|Accessory|Illustration|Usage| |---|---|---| |Crumb/Drip Tray| |All programs| |Cooking Basket| |AIR FRY, TOAST, WARM| |Cooking Rack| |BAKE, BROIL, CONVECTION BAKE, CONVECTION BROIL, TOAST, WARM| |Cooking Pan| |BAKE, BROIL, CONVECTION BAKE, CONVECTION BROIL, TOAST, WARM|
######## Cooking programs
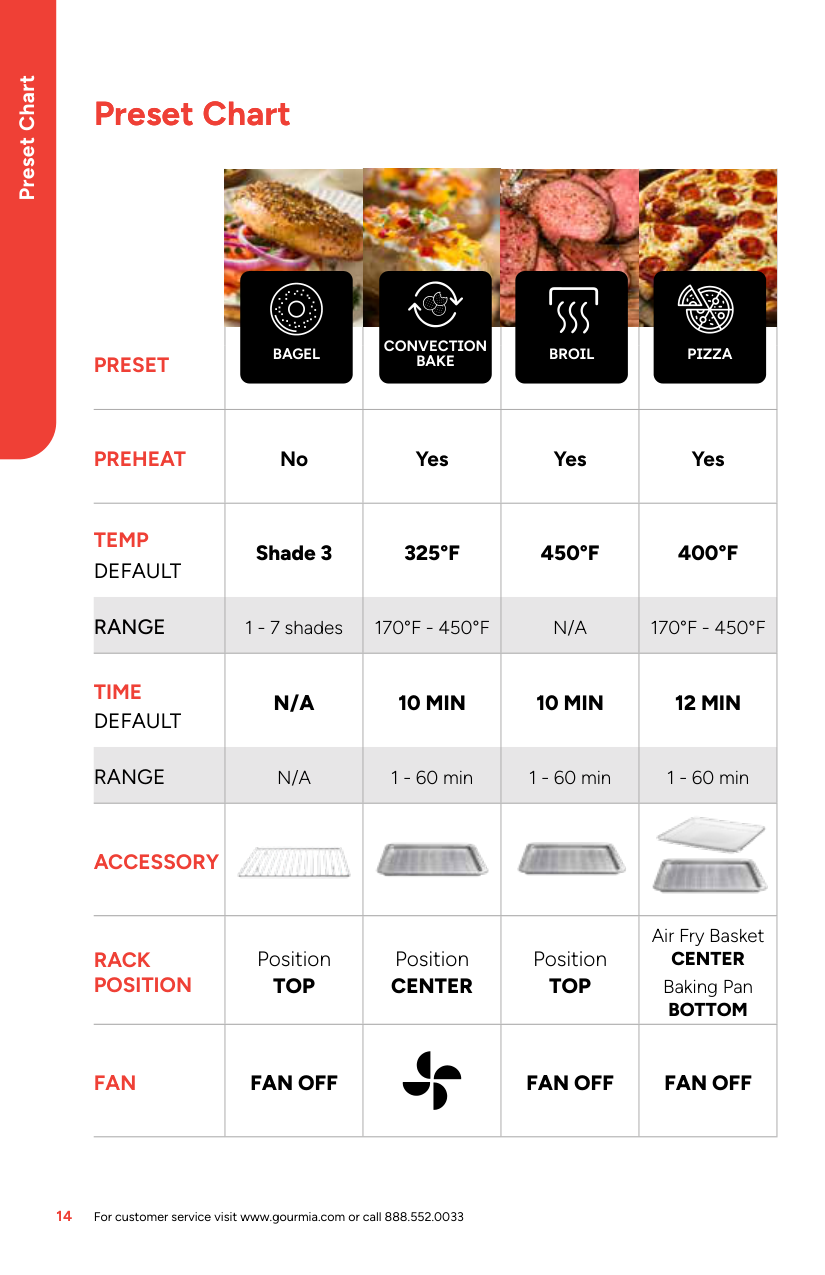
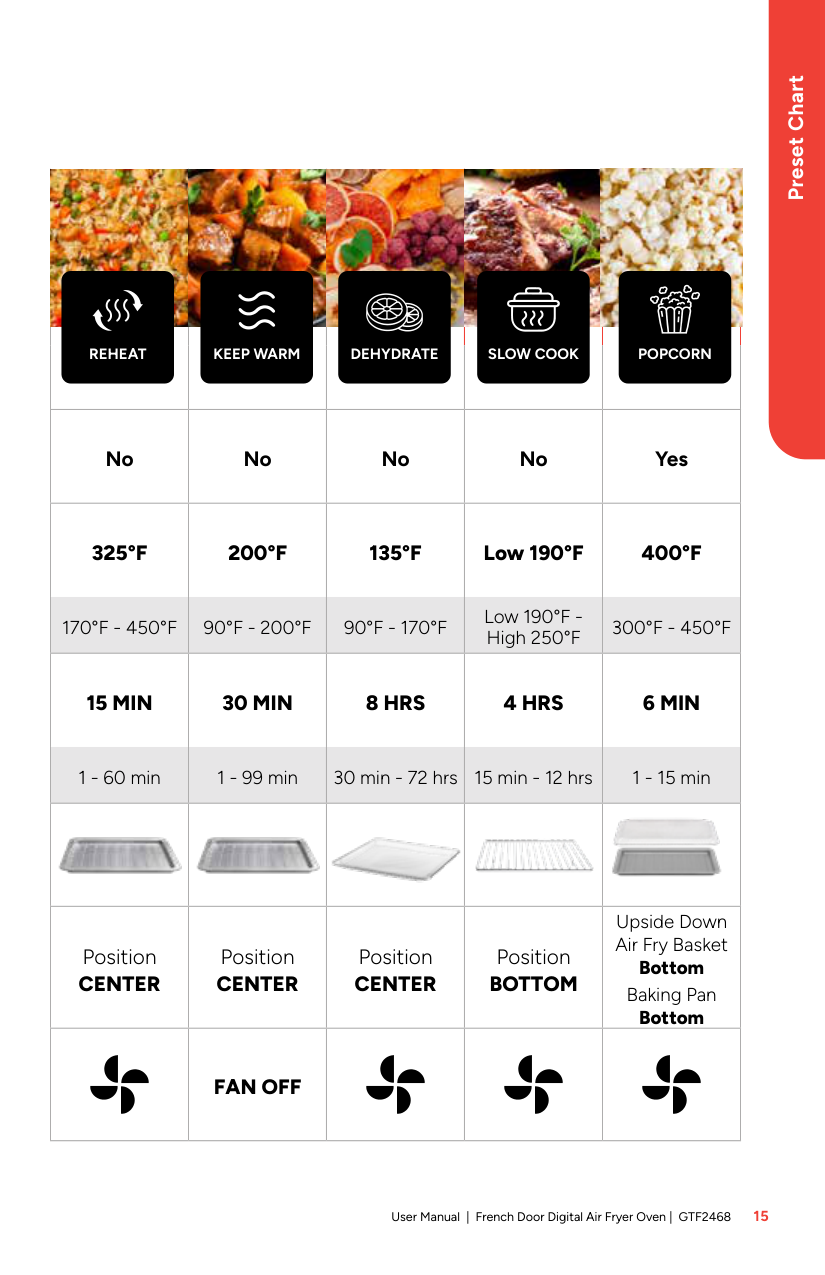
The appliance is equipped with several pre-set cooking programs. The cooking times and temperatures can be adjusted to suit your own taste, food quantities and food manufacturers’ instructions. (According to different setting)
7
WARNING: Always use the appliance with the Crumb/Drip Tray in place under the lower Heating Elements.
|Cooking program|Display|Default time / Time range (min.)|Default temperature / Temperature Range (°F)|Accessories|Rail position| |---|---|---|---|---|---| |Air Fry| |25 / 1~45|400 / 150~400|Cooking Basket|Upper| |Bake| |25 / 1~90|350 / 150~425|Cooking Rack or Cooking Pan or Cooking Basket|Lower| |Broil| |10 / 1~30|400 / 150~400|Cooking Rack or Cooking Pan or Cooking Basket|Upper| |Convection Bake| |20 / 1~90|350 / 150~425|Cooking Rack or Cooking Pan or Cooking Basket|Upper or lower| |Convection Broil| |10 / 1~30|400 / 150~400|Cooking Rack or Cooking Pan or Cooking Basket|Upper or lower| |Toast| |4'35"|450|Cooking Basket or Cooking Rack or Cooking Pan|Upper| |Warm| |30 / 1~120|150|Cooking Basket or Cooking Rack or Cooking Pan|Lower|
#### USING THE APPLIANCE
This appliance can be used for preparing fries and potatoes, meat and poultry, snacks and baking, toasting, broiling, roasting, defrosting frozen food or reheating or keeping cooked food warm ( Recommended cooking times and temperatures).
When using the air frying setting, this appliance uses a combination of hot air, high speed air circulation and a top Heating Element to cook food from all sides. It is an alternative way to cook food and snacks in a quick, healthy and easy way.
########### NOTE:
8
a
| | | |---|---|
| | |
| | | |---|---| | | |
| | | |---|---| | | |
| | | |---|---| | | |
b
8 inches
8 inches8 inches
| | | |---|---| | | |
| | | |---|---| | | |
########### WARNING:
c
| | | |---|---| | | |
| | | |---|---| | | |
| | | |---|---| | | |
| | | |---|---| | | |
d
| | | |---|---| | | |
| | | |---|---| | | |
| | | |---|---| | | |
| | | |---|---| | | |
9
########### Danger of burns!
| | | |---|---| | | |
| | | |---|---| | | |
| | | |---|---| | | |
| | | |---|---| | | |
e
| | | |---|---| | | |
| | | |---|---| | | |
| | | |---|---| | | |
| | | |---|---| | | |
f
########### WARNING:
10
g
| | | |---|---| | | |
| | | |---|---| | | |
| | | |---|---| | | |
| | | |---|---| | | |
h
| | | |---|---| | | |
| | | |---|---|
| | |
| | | |---|---| | | |
| | | |---|---| | | |
i
| | | |---|---| | | |
| | | |---|---| | | |
| | | |---|---| | | |
| | | |---|---|
| | |
j
| | | |---|---| | | |
| | | |---|---| | | |
| | | |---|---| | | |
| | | |---|---| | | |
11
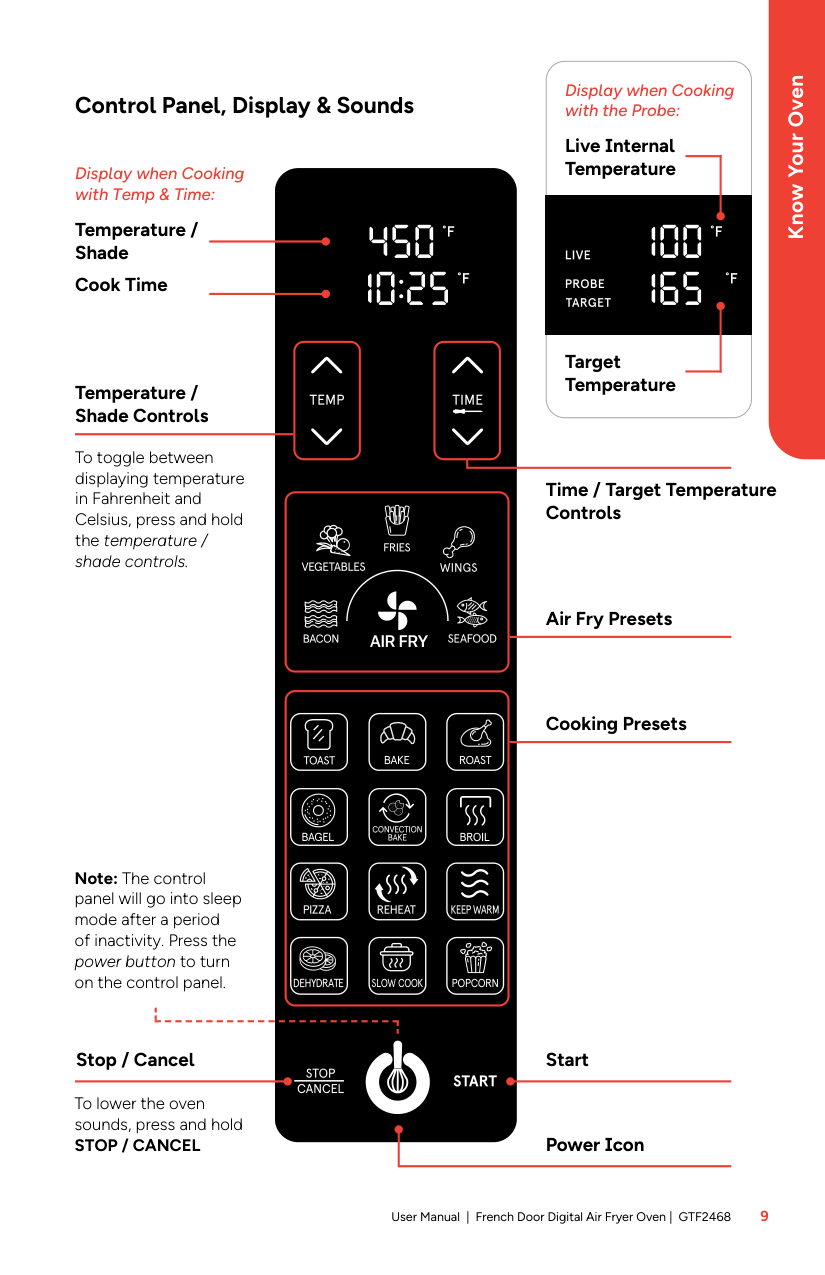
Control Panel
| | | |---|---| | | |
| | | |---|---| | | |
| | | |---|---| | | |
| | | |---|---| | | |
|Button|Function|Possible settings| |---|---|---| |START/ CANCEL Button|Starting or cancelling an operation|-| |TIME/TEMP Knob|Increasing / decreasing operating time and temperature; setting browning level / slice quantity|1 - 7 minutes / 450°F, browning level:
/
slice quantity: 1 – 6 (TOAST function only)| |TIME/TEMP Button|Activating setting of operating time and temperature / slice quantity|TIME: 1 to 120 minutes TEMP: 150°F to 450°F (65°C to 232°C)| |FUNCTION Knob|Setting the operating function|AIR FRY / BAKE / BROIL / CONV. BAKE / CONV. BROIL / TOAST / WARM|
########### NOTE:
12
######### k
|1.| |---|
| | | |---|---| | | |
| | | |---|---| | | |
| | | |---|---| | | |
| | | |---|---| | | |
| | | |---|---| | | |
|2.| |---|
the cooking process has finished. NOTE:
########### Danger of burns!
13
#### CLEANING AND MAINTENANCE
#### USING THE APPLIANCE
l
| | | |---|---| | | |
| | | |---|---| | | |
| | | |---|---|
| | |
| | | |---|---| | | |
AIR FRY function This function uses the 4 upper Heating Elements.
########### NOTE:
14
######## BAKE function
The 2 lower Heating Elements turn on when using this function. The 2 upper Heating Elements may also turn on to help maintain the set temperature.
BROIL function
The 2 upper Heating Elements turn on when using this function. The 2 lower Heating Elements may also turn on to help maintain the set temperature.
CONVECTION BAKE function
The 2 lower Heating Elements turn on when using this function. The 2 upper Heating Elements may also turn on to help maintain the set temperature.
CONVECTION BROIL function
The 2 upper Heating Elements turn on when using this function. The 2 lower Heating Elements may also turn on to help maintain the set temperature.
15
#### TROUBLESHOOTING
TOAST function This function uses the 2 lower and 2 upper Heating Elements.
WARM function This function uses the 2 lower Heating Elements.
#### RECIPES
Crispy Chicken Strips Makes 4 servings
| |Nonstick cooking spray| |---|---| |2|boneless, skinless chicken breast halves| |1 cup|buttermilk| |1|egg| |1½ cups|self-rising flour| |1 tbsp|Cajun seasoning spice| | |Salt and pepper, to taste| | |Favorite dipping sauce|
16
########## Air Fryer Roasted Chicken Makes 4 to 6 servings
| |Nonstick cooking spray| |---|---| |1 (3½ pound)|whole chicken, split lengthwise| |2 tbsp|olive oil| |1½ tsp|salt| |1 tsp|coarse black pepper| |1 tsp|paprika| |1 tsp|dried thyme leaves|
########## “Fried” Shrimp Makes 4 servings
| |Nonstick cooking spray| |---|---| |½ cup|milk| |½ cup|buttermilk| |1/3 cup|cayenne pepper sauce| |1 cup|self-rising flour| |2 tbsp|cornmeal| |2 tsp|salt|
17
|½ tsp|coarse black pepper| |---|---| |1 pound|medium shrimp, peeled, deveined and patted dry with paper towels| | |Favorite dipping sauce or cocktail sauce|
Fish and Chips Makes 4 servings
| |Nonstick cooking spray| |---|---| |½ pound|russet potatoes, cut into thin strips about ¼ inch thick| |2½ tsp|salt, or to taste| |1 tbsp|canola or vegetable oil| |16 ounces|cod fish fillets, cut into pieces about 1 x 3 to 4 inches| |1½ cups|finely crushed salt and vinegar potato chips (about 6 cups chips, finely crushed)| |½ tsp|salt| |½ tsp|coarse pepper| |¼ cup|all-purpose flour| |2|egg whites| |2 tbsp|water|
18
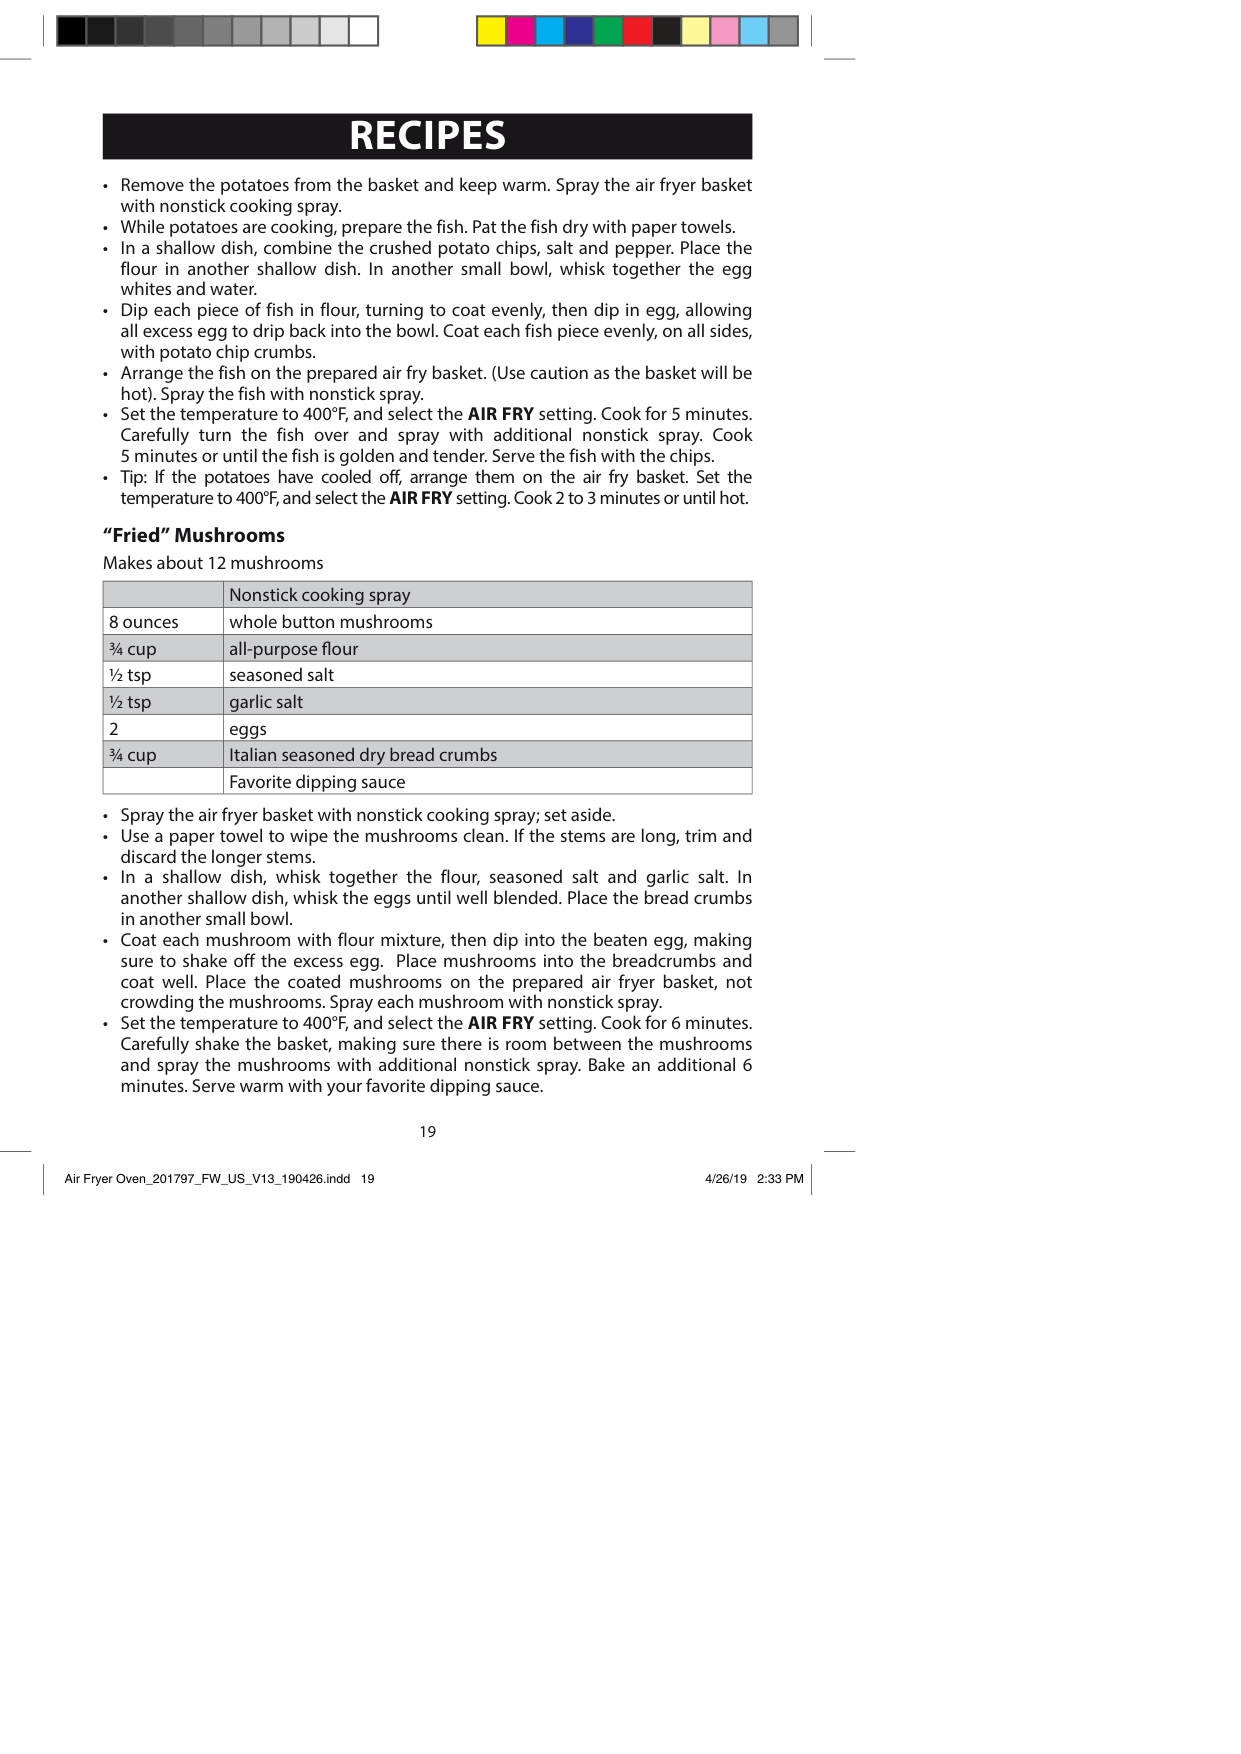
“Fried” Mushrooms Makes about 12 mushrooms
| |Nonstick cooking spray| |---|---| |8 ounces|whole button mushrooms| |¾ cup|all-purpose flour| |½ tsp|seasoned salt| |½ tsp|garlic salt| |2|eggs| |¾ cup|Italian seasoned dry bread crumbs| | |Favorite dipping sauce|
19
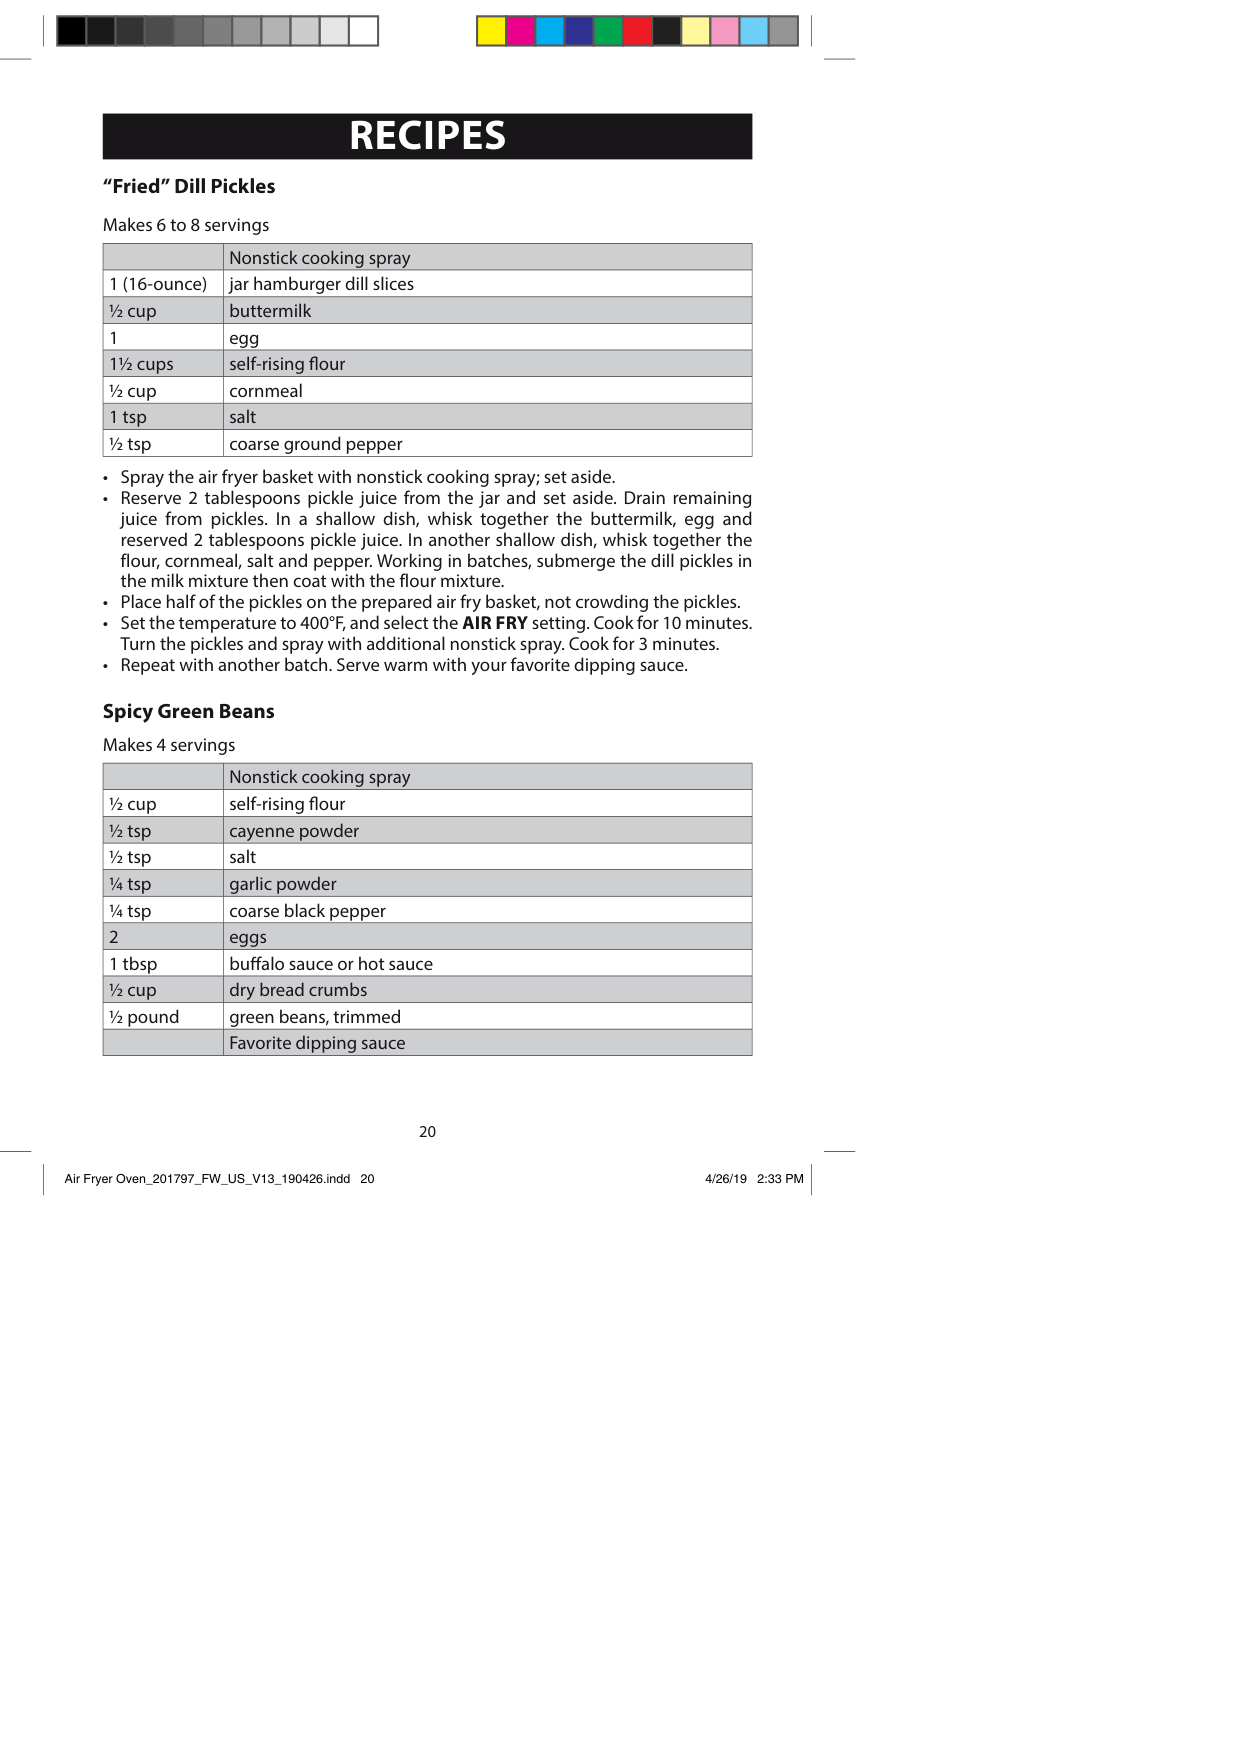
########## “Fried” Dill Pickles Makes 6 to 8 servings
| |Nonstick cooking spray| |---|---|
|1 (16-ounce)|jar hamburger dill slices| |½ cup|buttermilk| |1|egg| |1½ cups|self-rising flour| |½ cup|cornmeal| |1 tsp|salt| |½ tsp|coarse ground pepper|
########## Spicy Green Beans Makes 4 servings
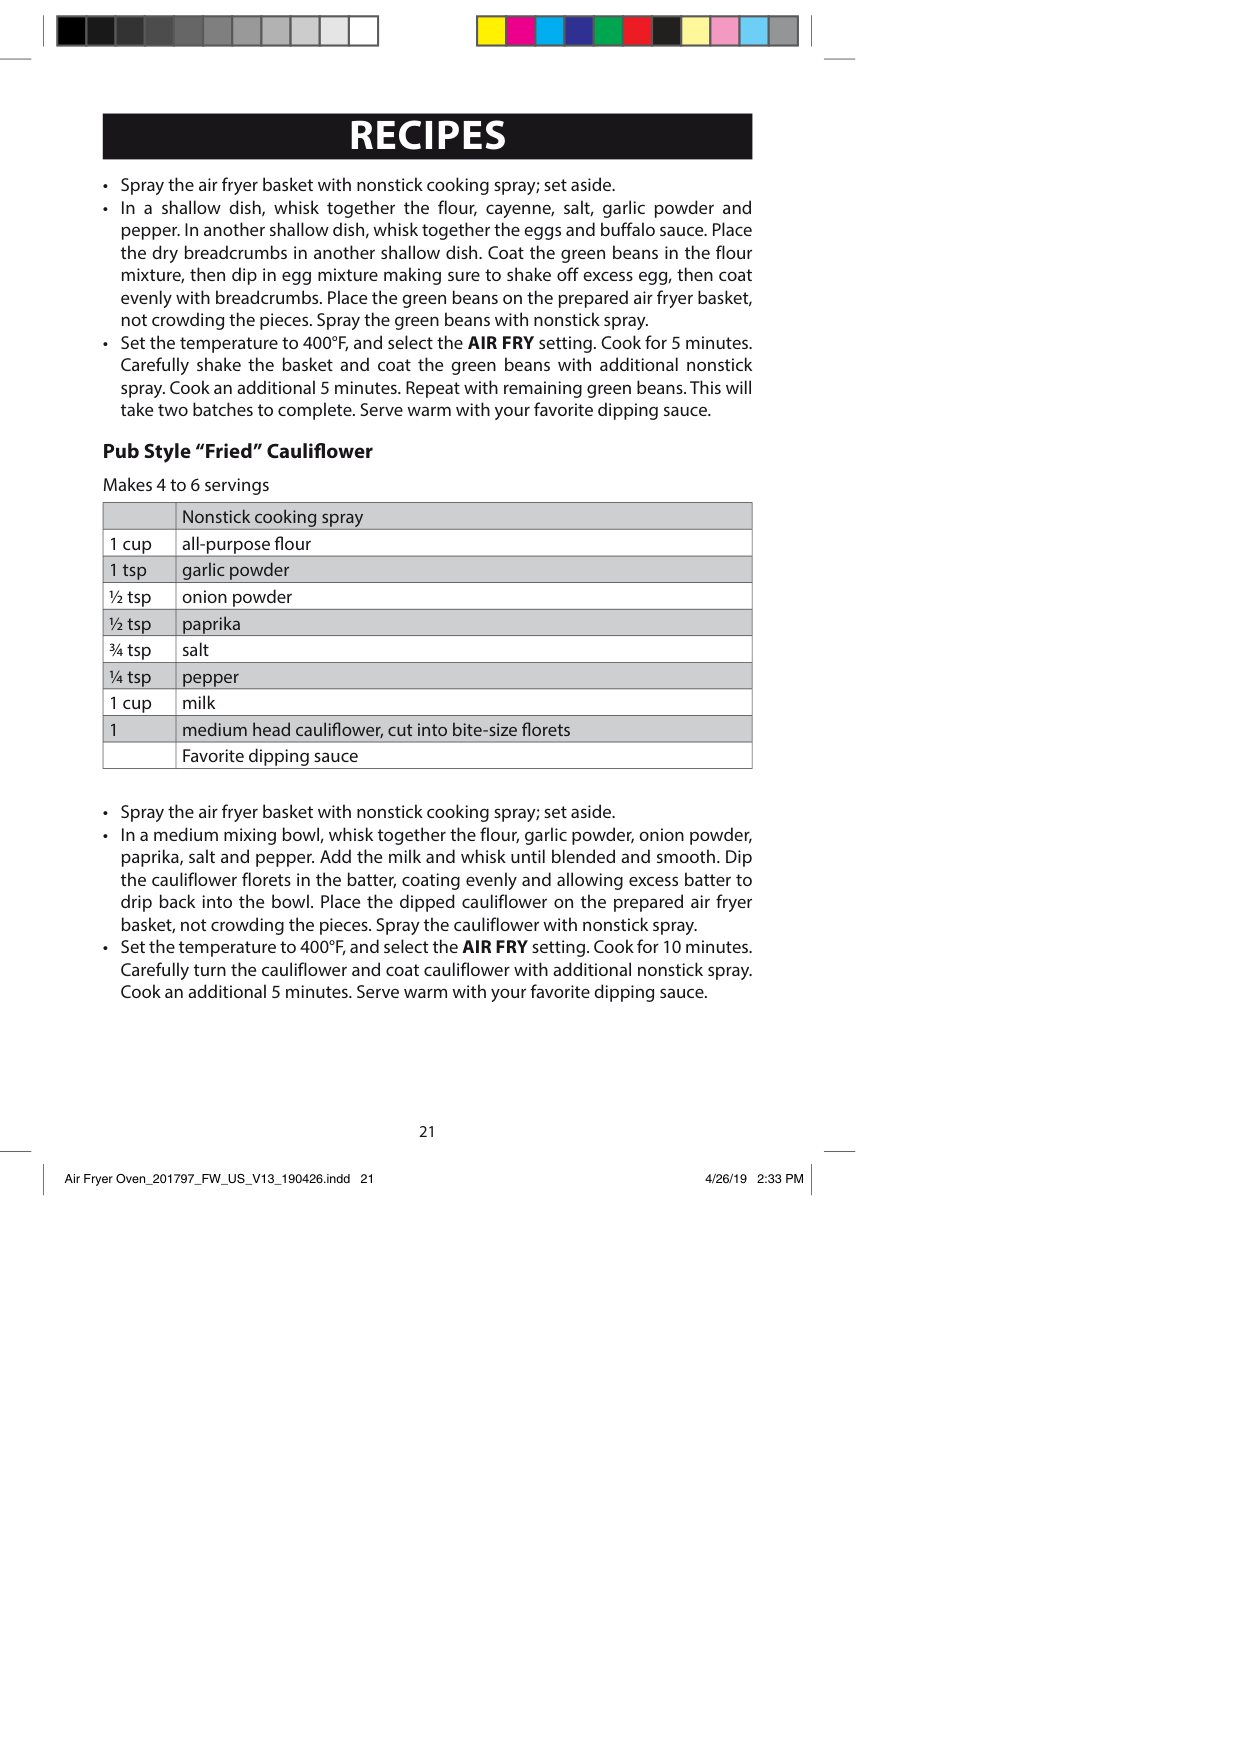
| |Nonstick cooking spray| |---|---| |½ cup|self-rising flour| |½ tsp|cayenne powder| |½ tsp|salt| |¼ tsp|garlic powder| |¼ tsp|coarse black pepper| |2|eggs| |1 tbsp|buffalo sauce or hot sauce| |½ cup|dry bread crumbs| |½ pound|green beans, trimmed| | |Favorite dipping sauce|
########## Pub Style “Fried” Cauliflower Makes 4 to 6 servings
| |Nonstick cooking spray| |---|---| |1 cup|all-purpose flour| |1 tsp|garlic powder| |½ tsp|onion powder| |½ tsp|paprika| |¾ tsp|salt| |¼ tsp|pepper| |1 cup|milk| |1|medium head cauliflower, cut into bite-size florets| | |Favorite dipping sauce|
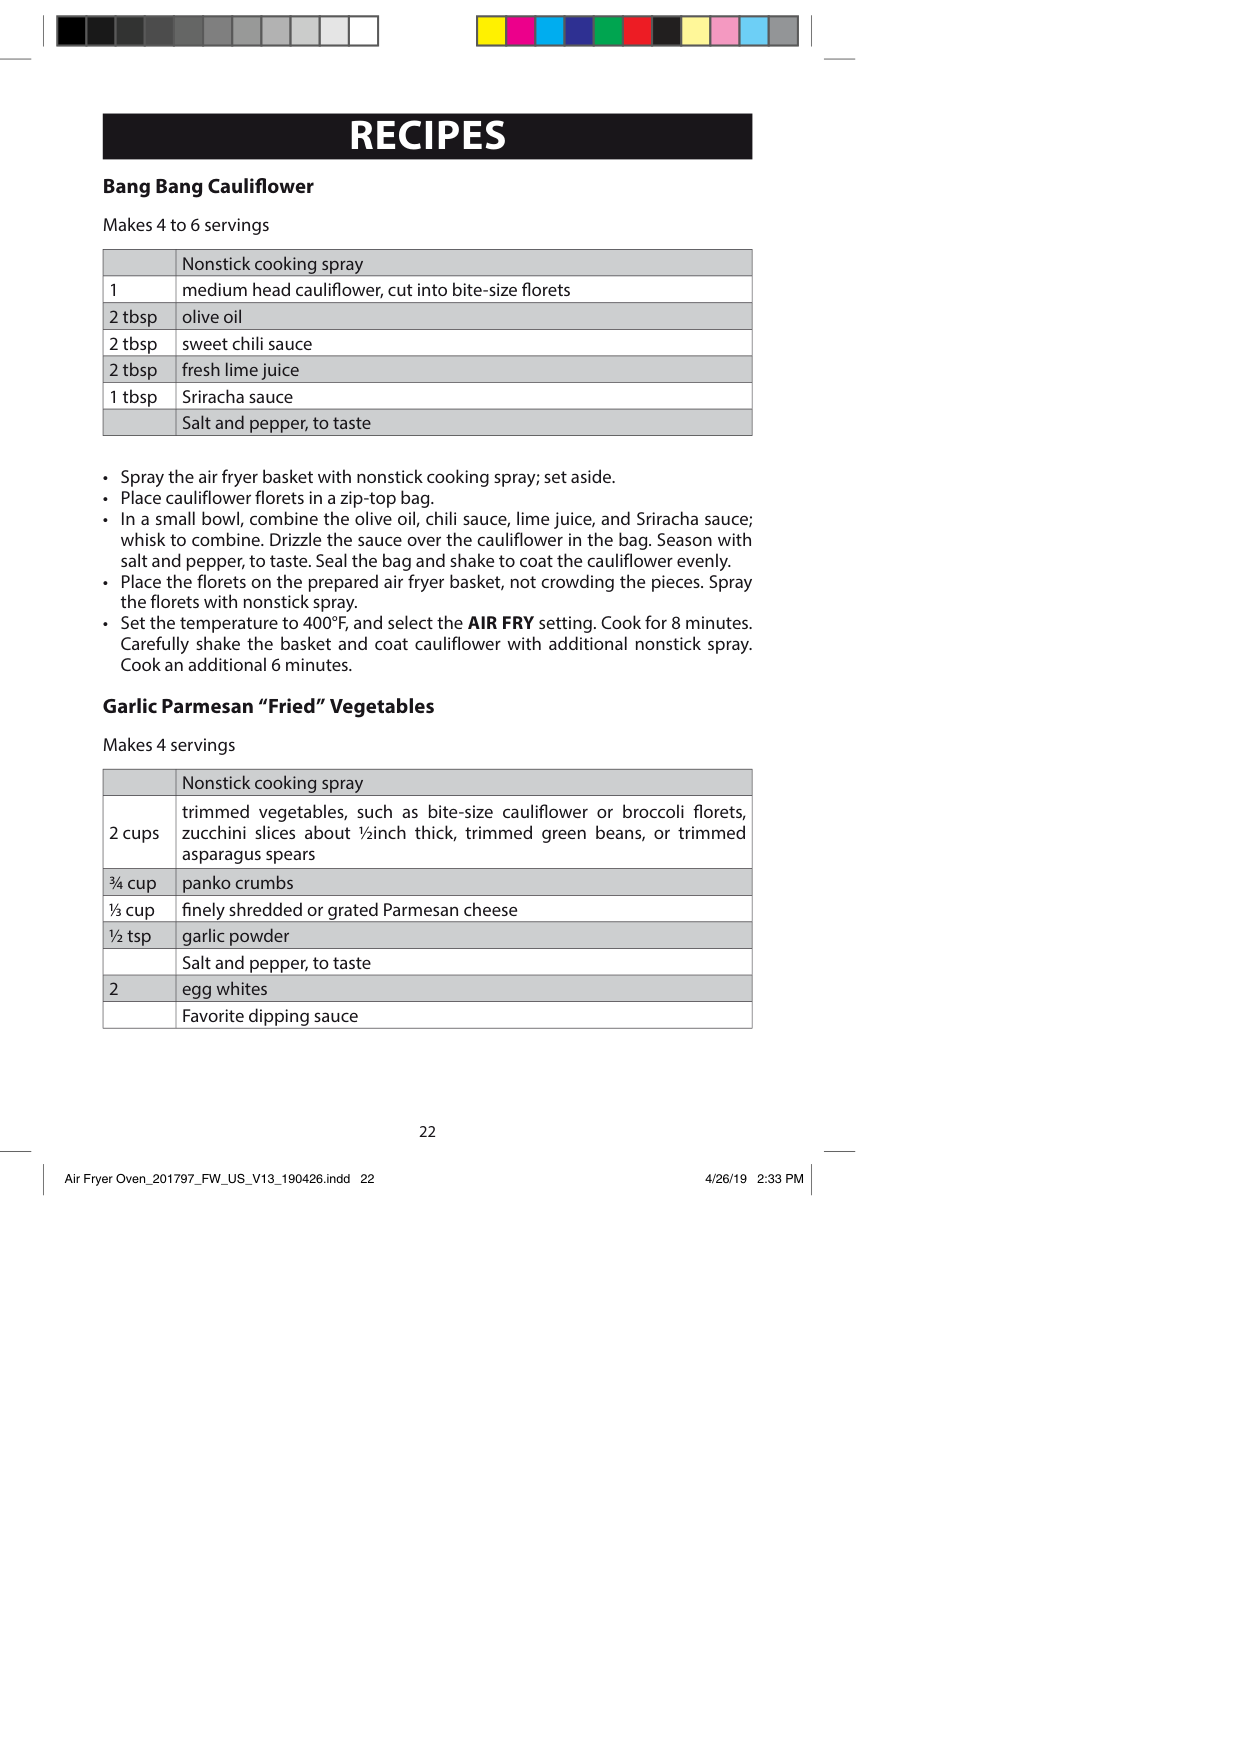
########## Bang Bang Cauliflower Makes 4 to 6 servings
| |Nonstick cooking spray| |---|---| |1|medium head cauliflower, cut into bite-size florets| |2 tbsp|olive oil| |2 tbsp|sweet chili sauce| |2 tbsp|fresh lime juice| |1 tbsp|Sriracha sauce| | |Salt and pepper, to taste|
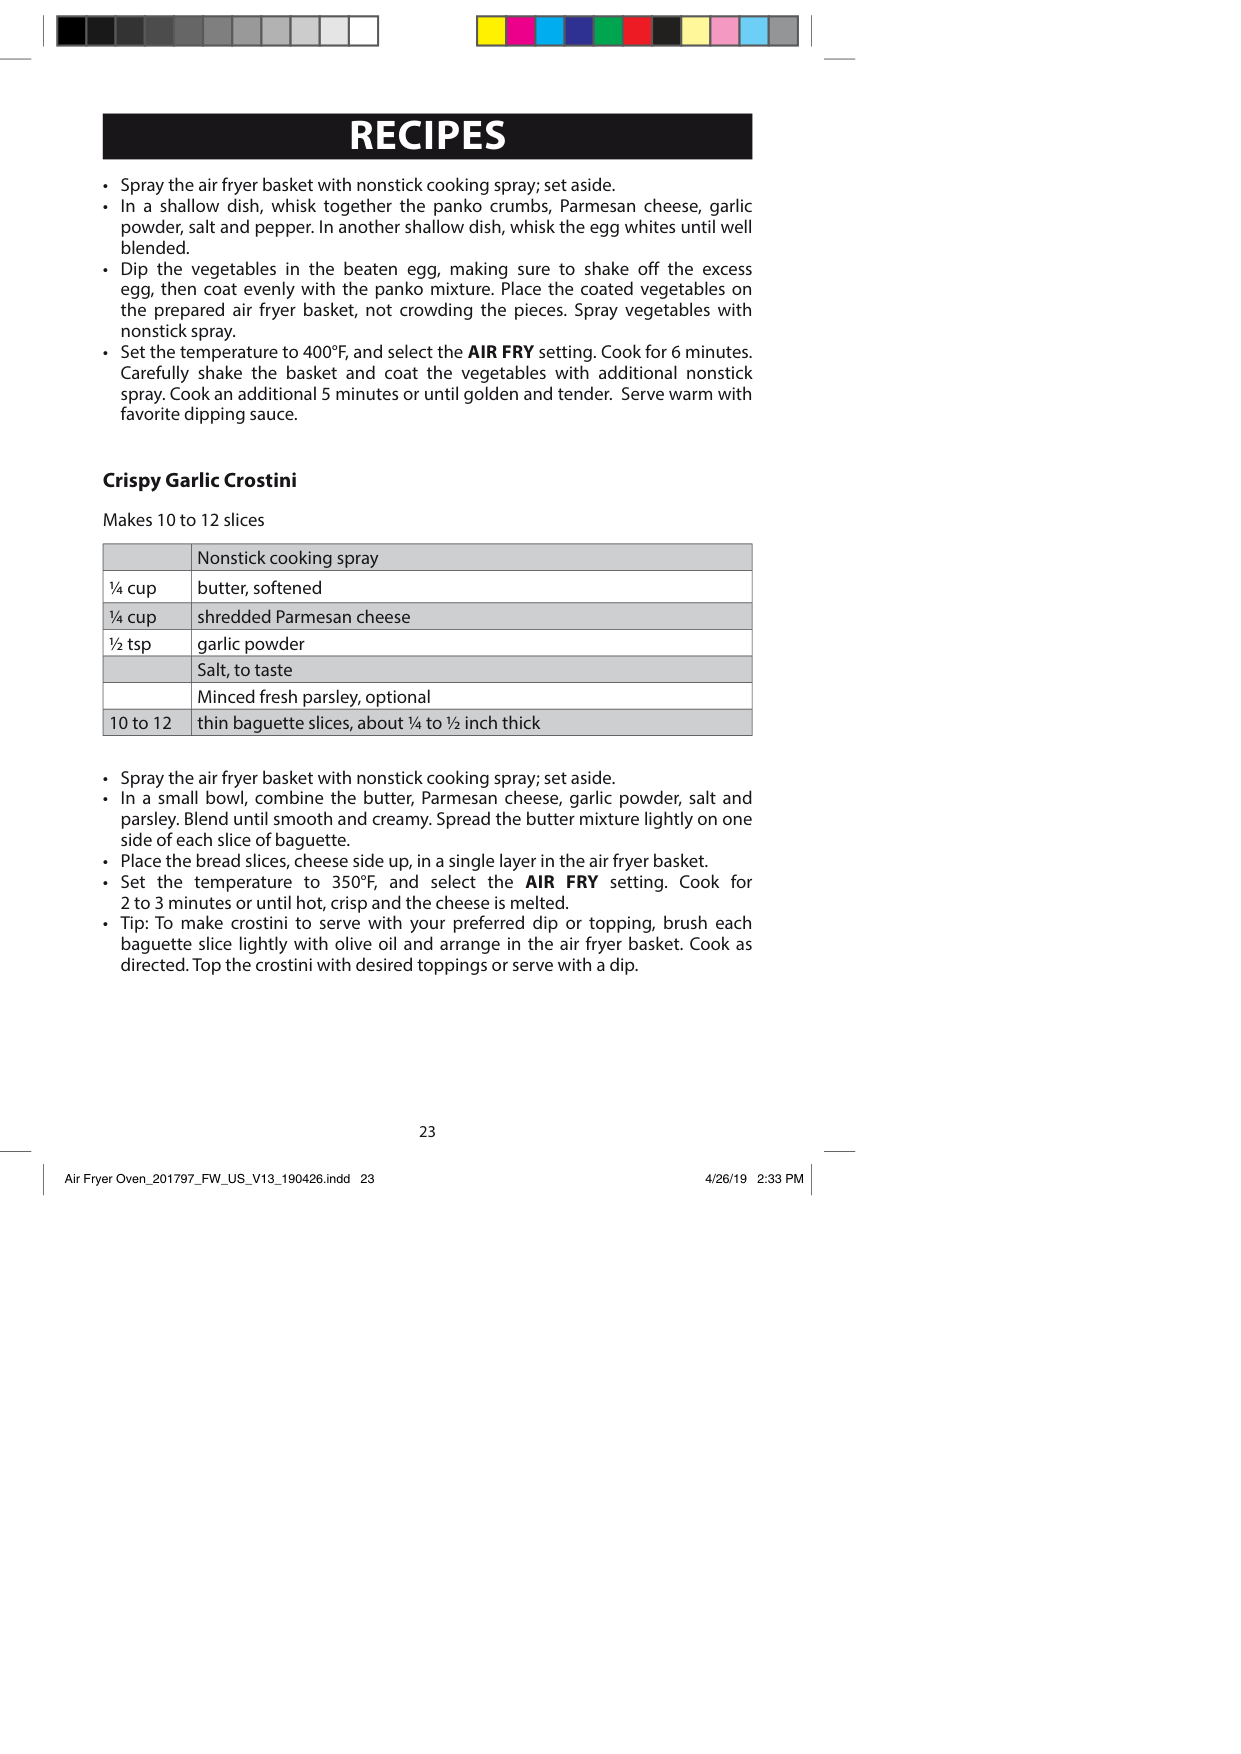
########## Garlic Parmesan “Fried” Vegetables Makes 4 servings
| |Nonstick cooking spray| |---|---| |2 cups|trimmed vegetables, such as bite-size cauliflower or broccoli florets, zucchini slices about ½inch thick, trimmed green beans, or trimmed asparagus spears| |¾ cup|panko crumbs| |1/3 cup|finely shredded or grated Parmesan cheese| |½ tsp|garlic powder| | |Salt and pepper, to taste| |2|egg whites| | |Favorite dipping sauce|
22
########## Crispy Garlic Crostini Makes 10 to 12 slices
| |Nonstick cooking spray| |---|---| |¼ cup|butter, softened| |¼ cup|shredded Parmesan cheese| |½ tsp|garlic powder| | |Salt, to taste| | |Minced fresh parsley, optional| |10 to 12|thin baguette slices, about ¼ to ½ inch thick|
23
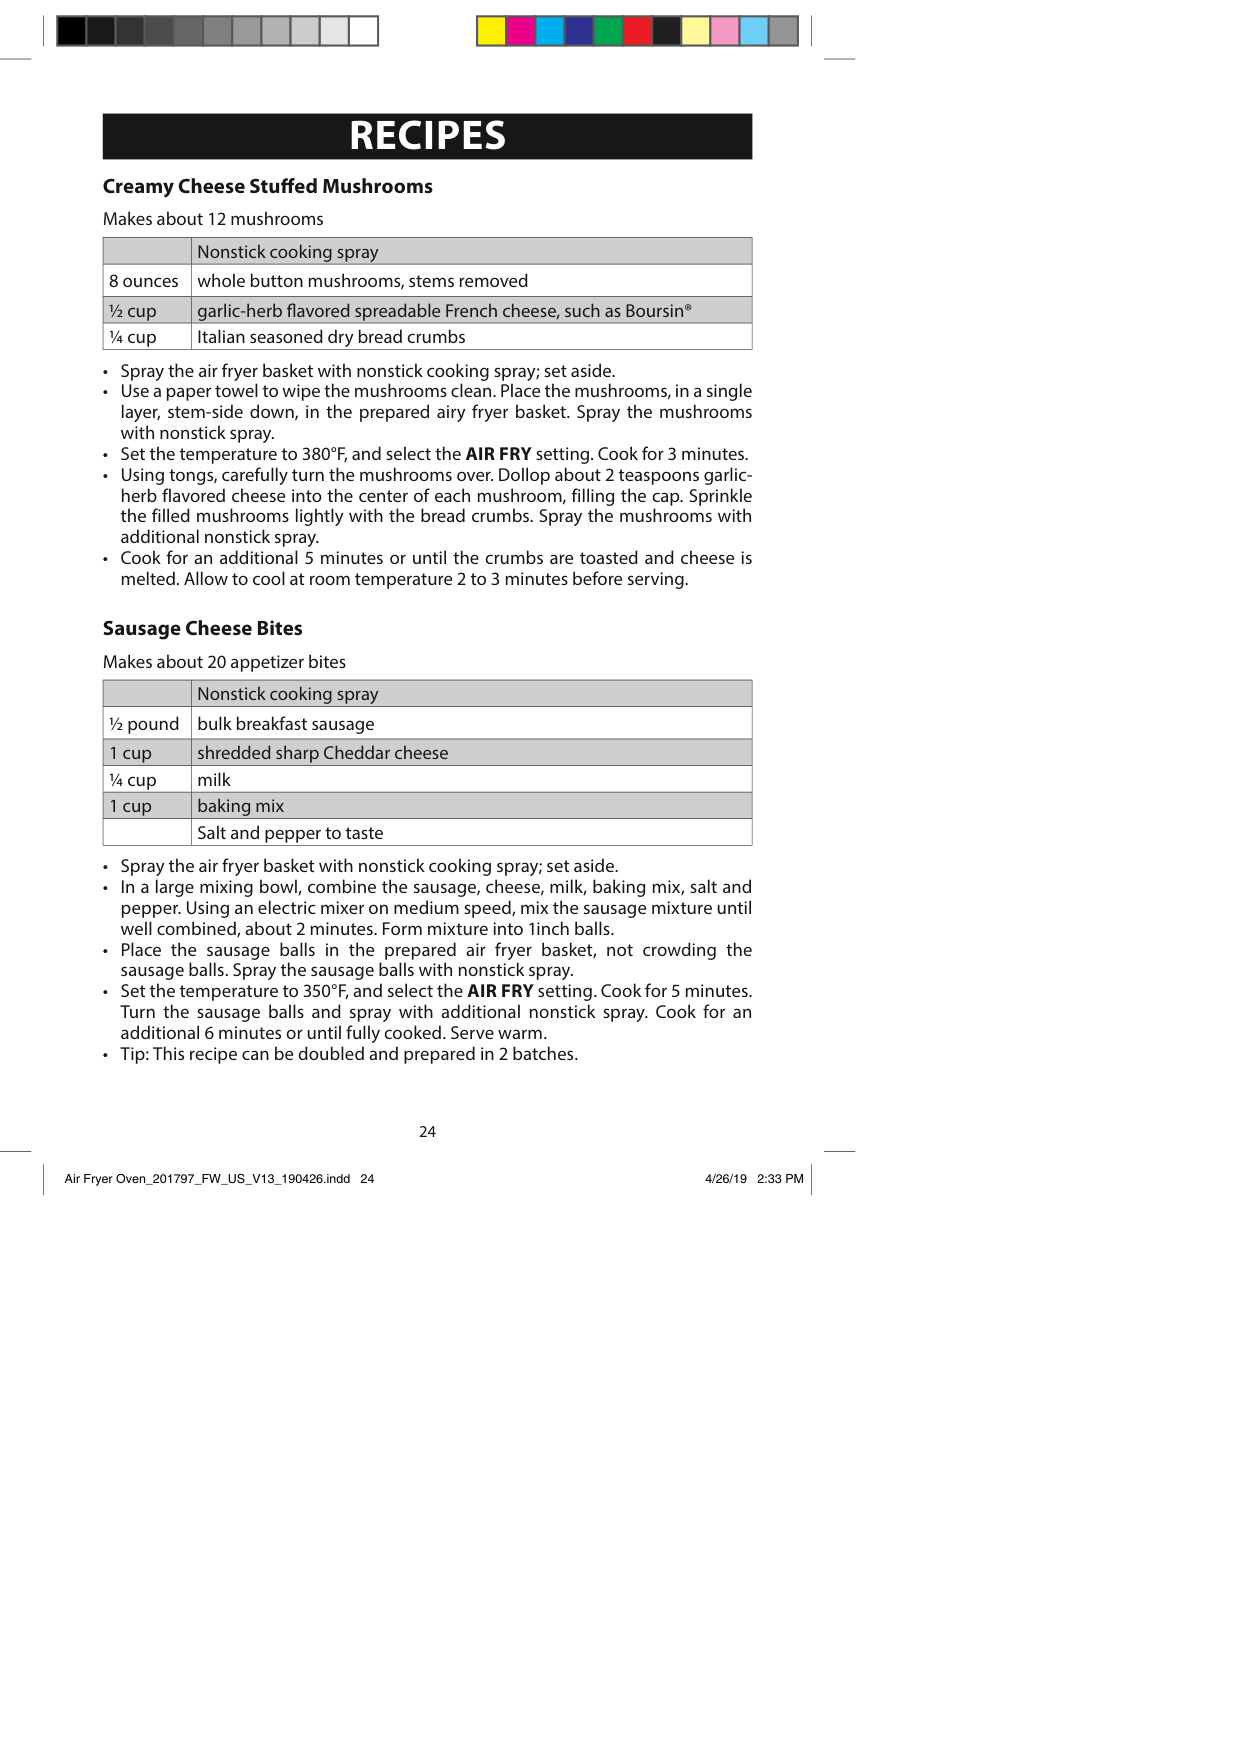
########## Creamy Cheese Stuffed Mushrooms Makes about 12 mushrooms
| |Nonstick cooking spray| |---|---| |8 ounces|whole button mushrooms, stems removed| |½ cup|garlic-herb flavored spreadable French cheese, such as Boursin®| |¼ cup|Italian seasoned dry bread crumbs|
Sausage Cheese Bites Makes about 20 appetizer bites
| |Nonstick cooking spray| |---|---| |½ pound|bulk breakfast sausage| |1 cup|shredded sharp Cheddar cheese| |¼ cup|milk| |1 cup|baking mix| | |Salt and pepper to taste|
24
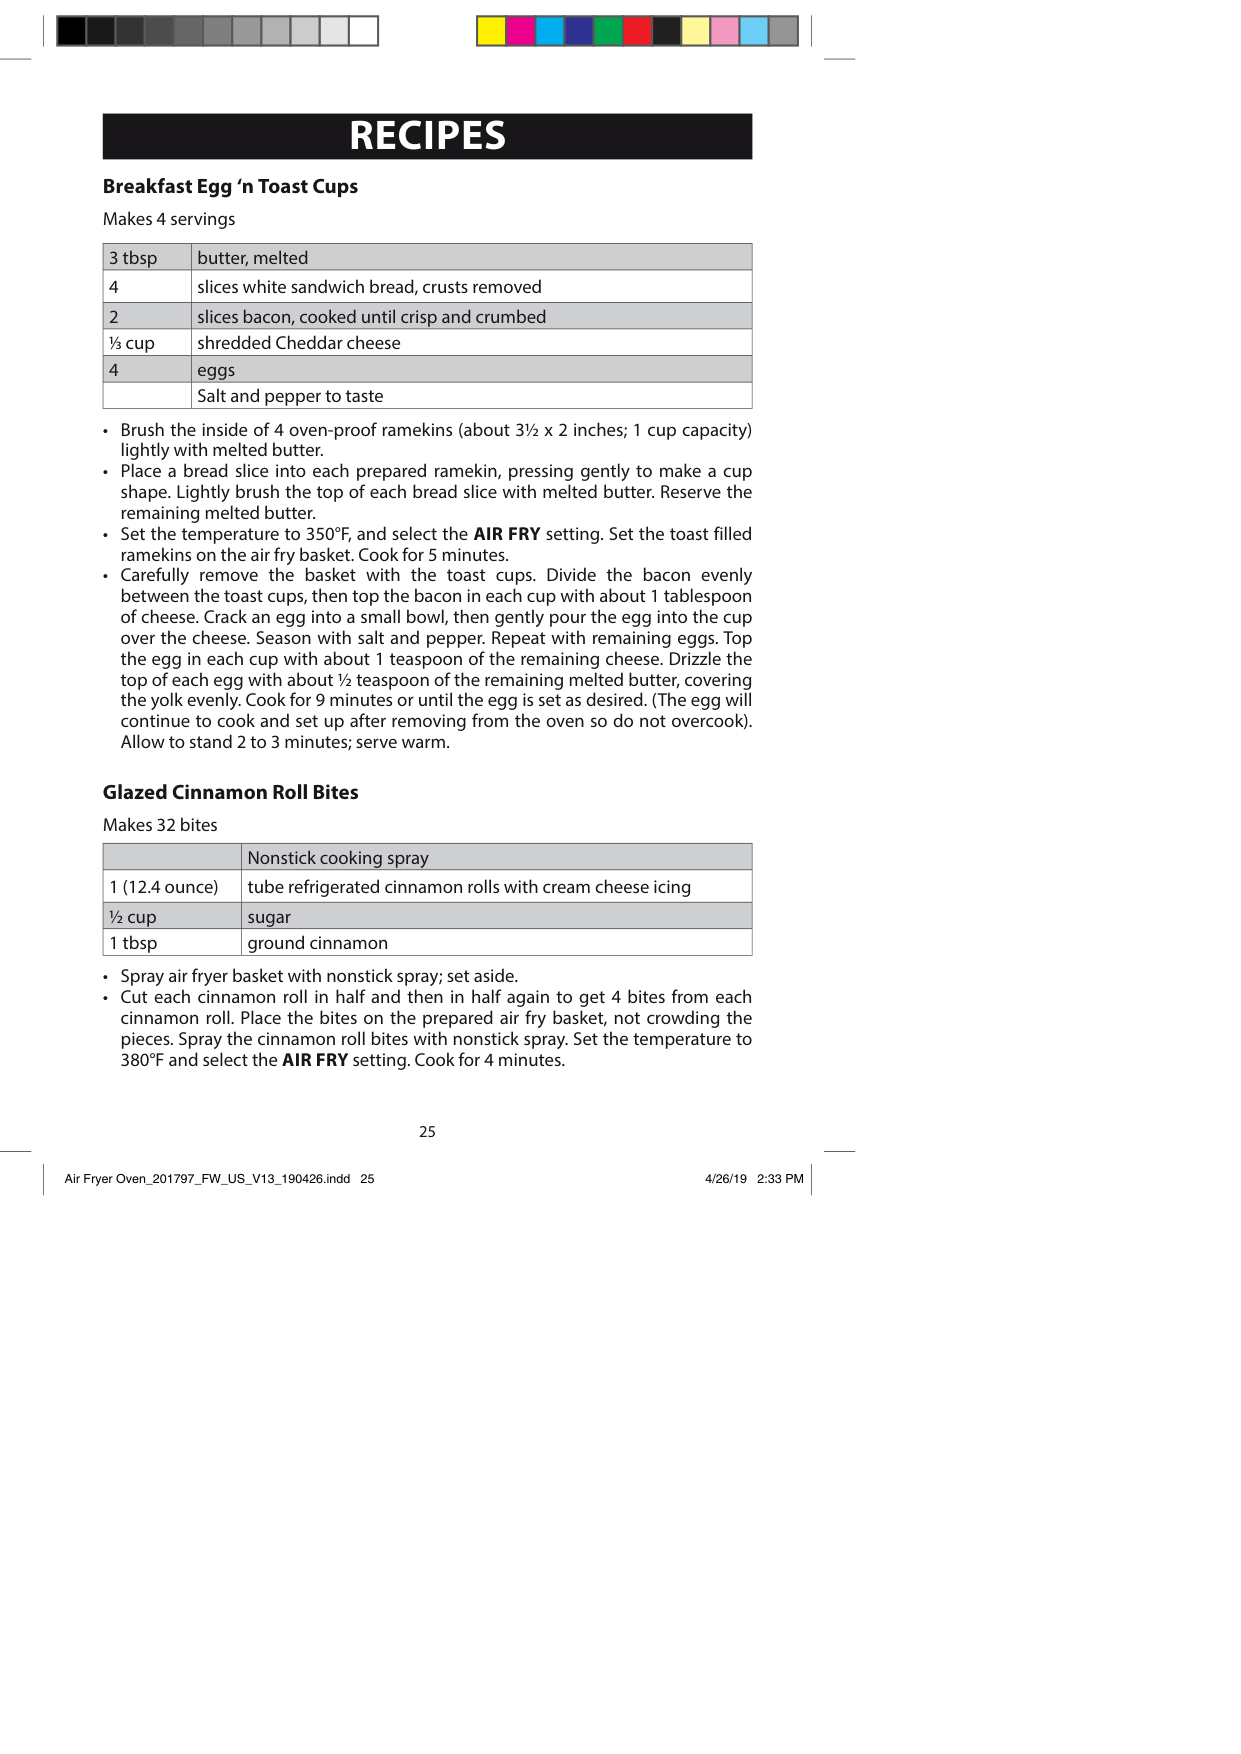
########## Breakfast Egg ‘n Toast Cups Makes 4 servings
|3 tbsp|butter, melted| |---|---| |4|slices white sandwich bread, crusts removed| |2|slices bacon, cooked until crisp and crumbed| |1/3 cup|shredded Cheddar cheese| |4|eggs| | |Salt and pepper to taste|
########## Glazed Cinnamon Roll Bites Makes 32 bites
| |Nonstick cooking spray| |---|---| |1 (12.4 ounce)|tube refrigerated cinnamon rolls with cream cheese icing| |½ cup|sugar| |1 tbsp|ground cinnamon|
25
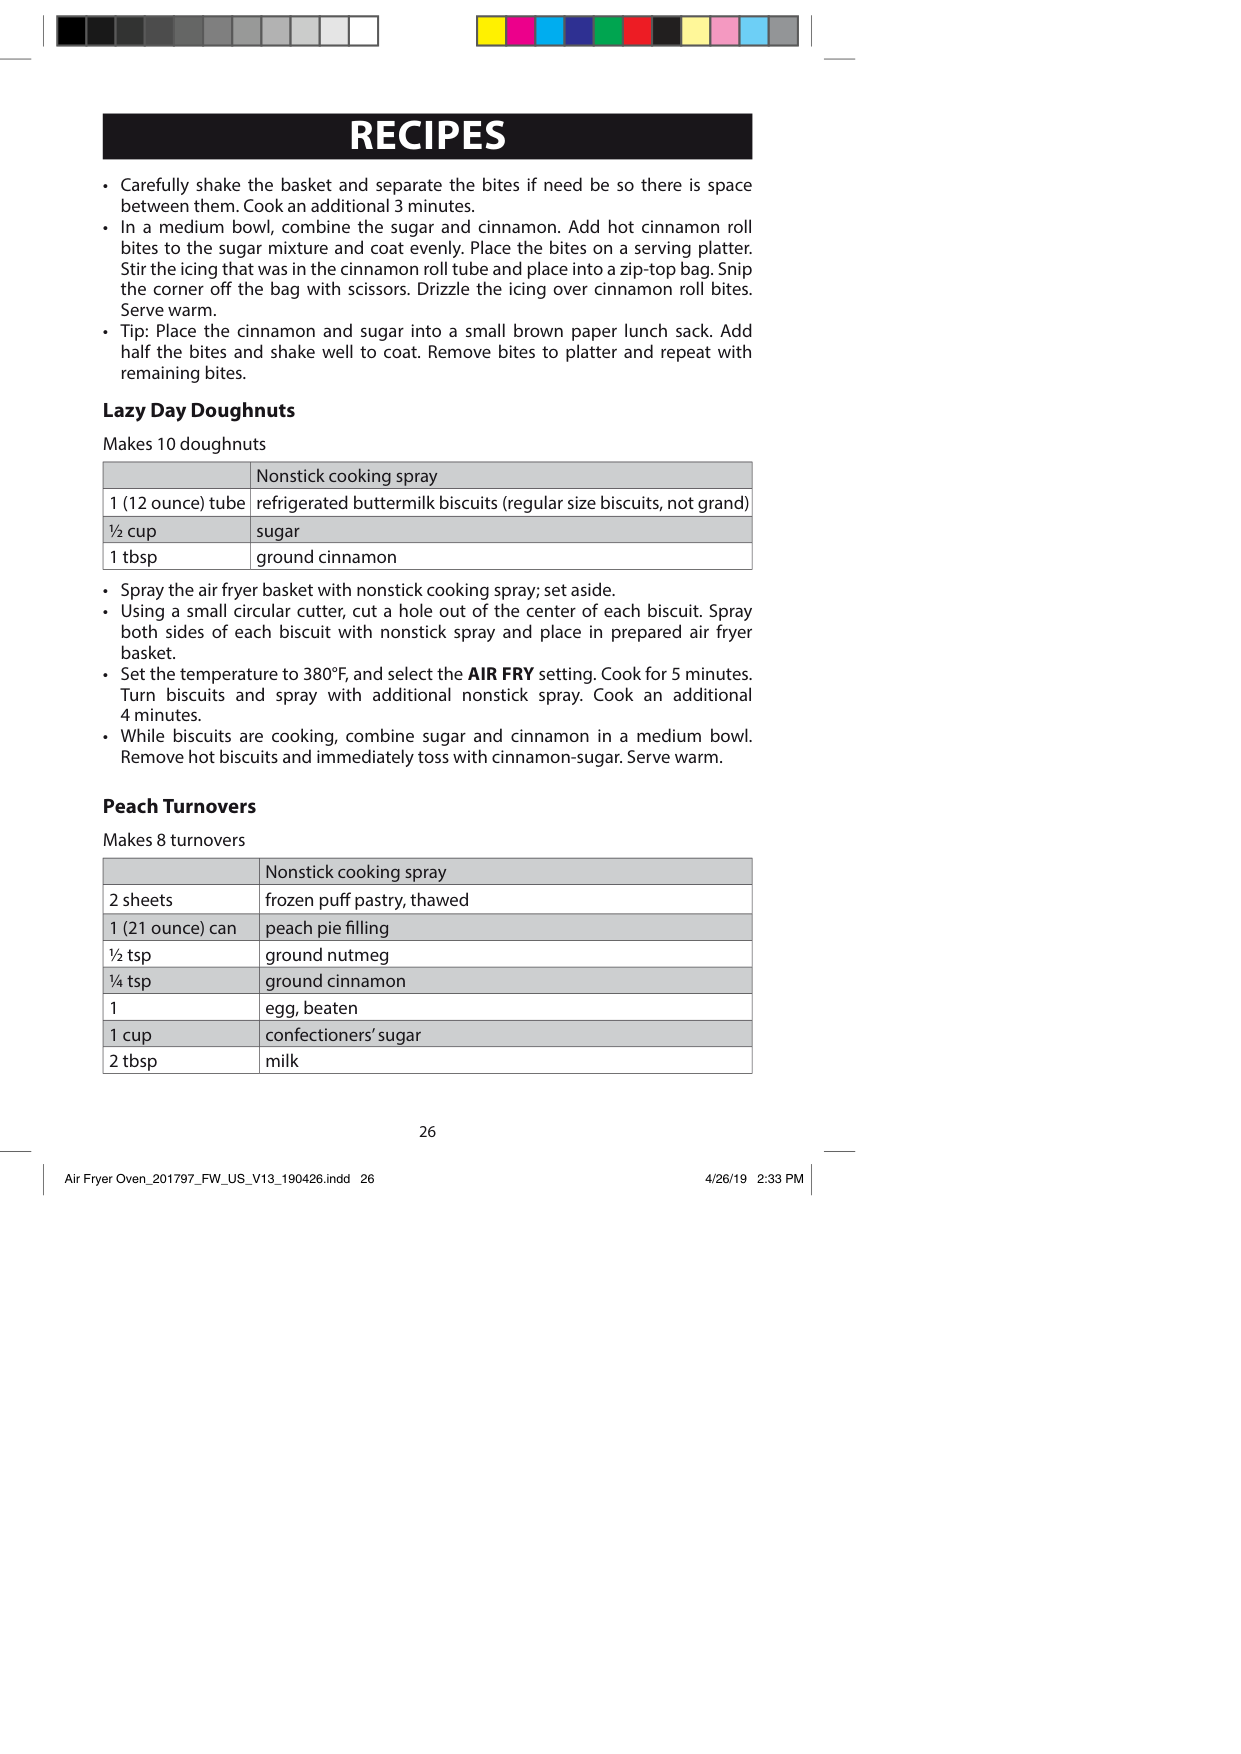
########## Lazy Day Doughnuts Makes 10 doughnuts
| |Nonstick cooking spray| |---|---| |1 (12 ounce) tube|refrigerated buttermilk biscuits (regular size biscuits, not grand)| |½ cup|sugar| |1 tbsp|ground cinnamon|
########## Peach Turnovers Makes 8 turnovers
| |Nonstick cooking spray| |---|---| |2 sheets|frozen puff pastry, thawed| |1 (21 ounce) can|peach pie filling| |½ tsp|ground nutmeg| |¼ tsp|ground cinnamon| |1|egg, beaten| |1 cup|confectioners’ sugar| |2 tbsp|milk|
26
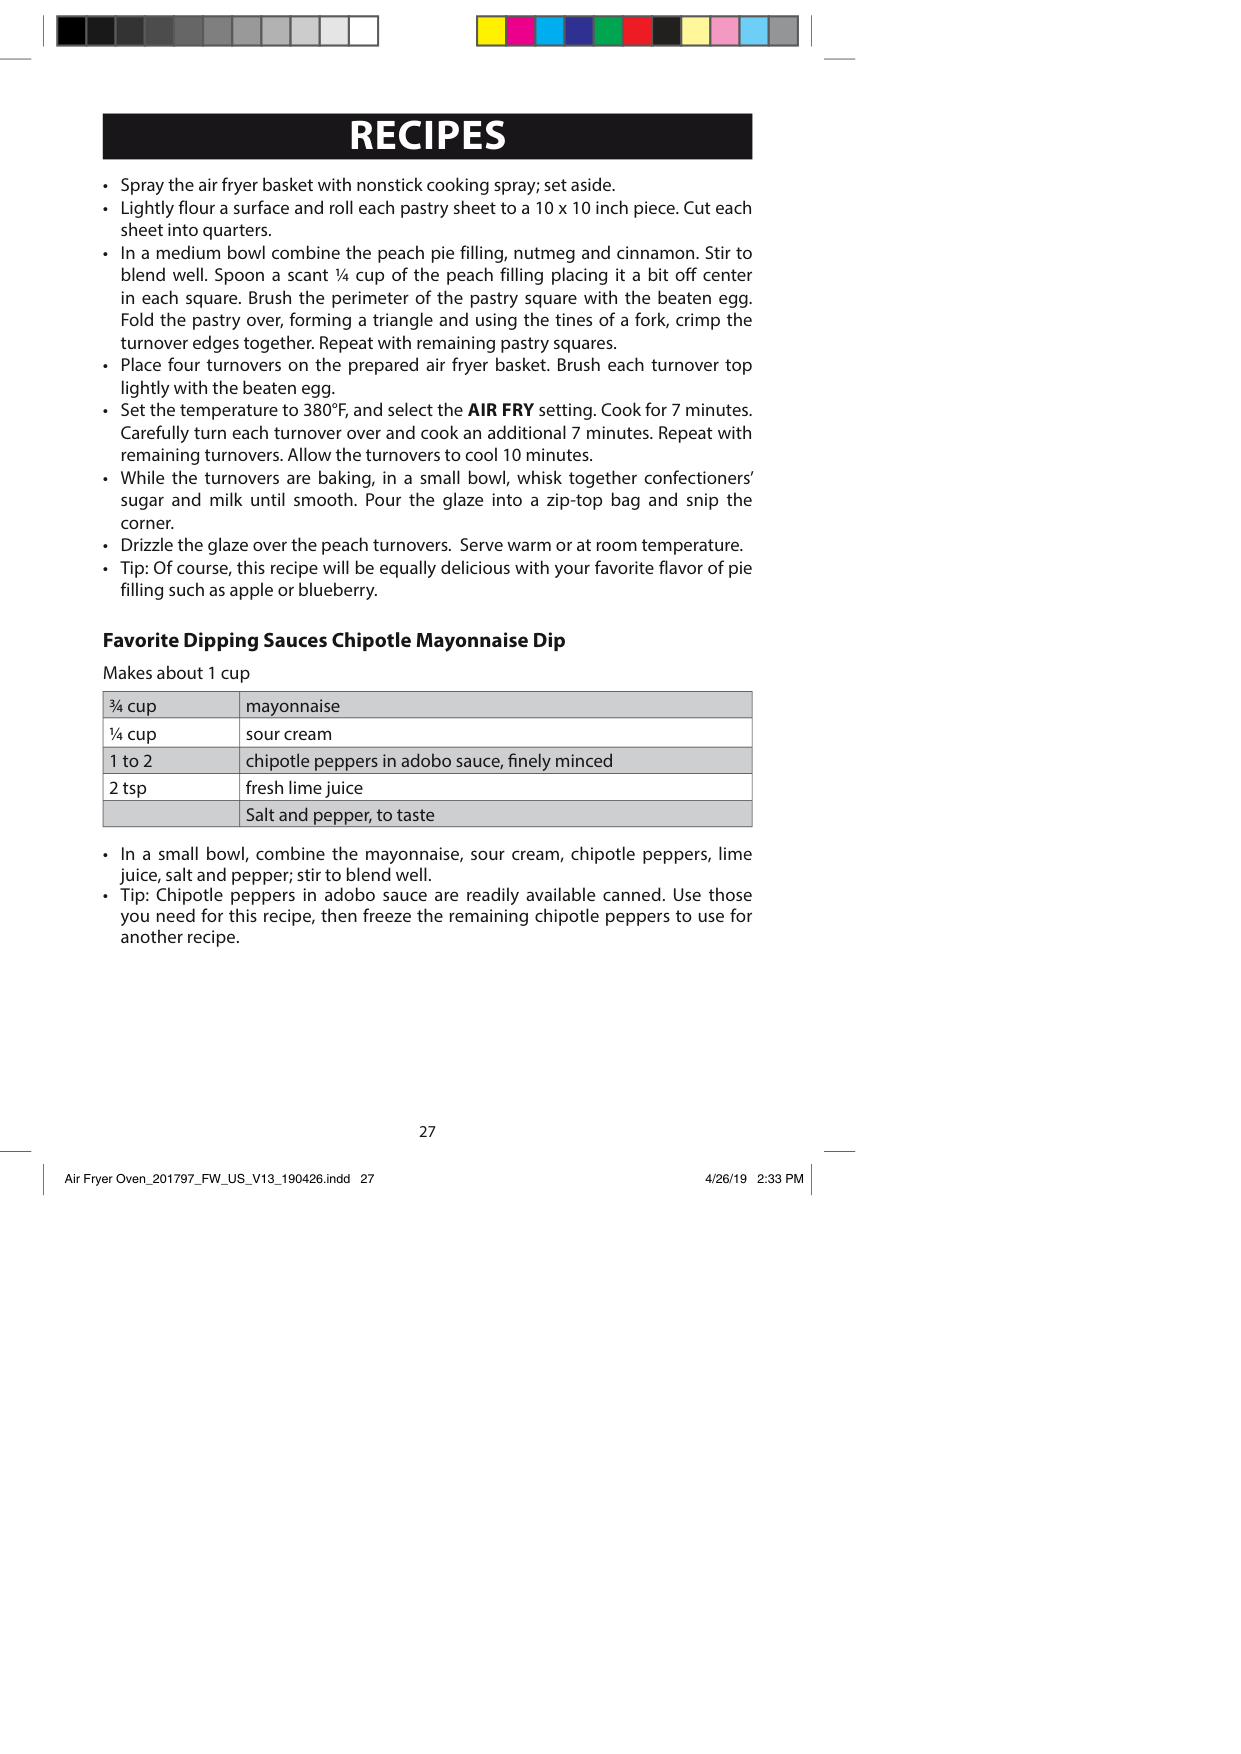
########## Favorite Dipping Sauces Chipotle Mayonnaise Dip Makes about 1 cup
|¾ cup|mayonnaise| |---|---| |¼ cup|sour cream| |1 to 2|chipotle peppers in adobo sauce, finely minced| |2 tsp|fresh lime juice| | |Salt and pepper, to taste|
27
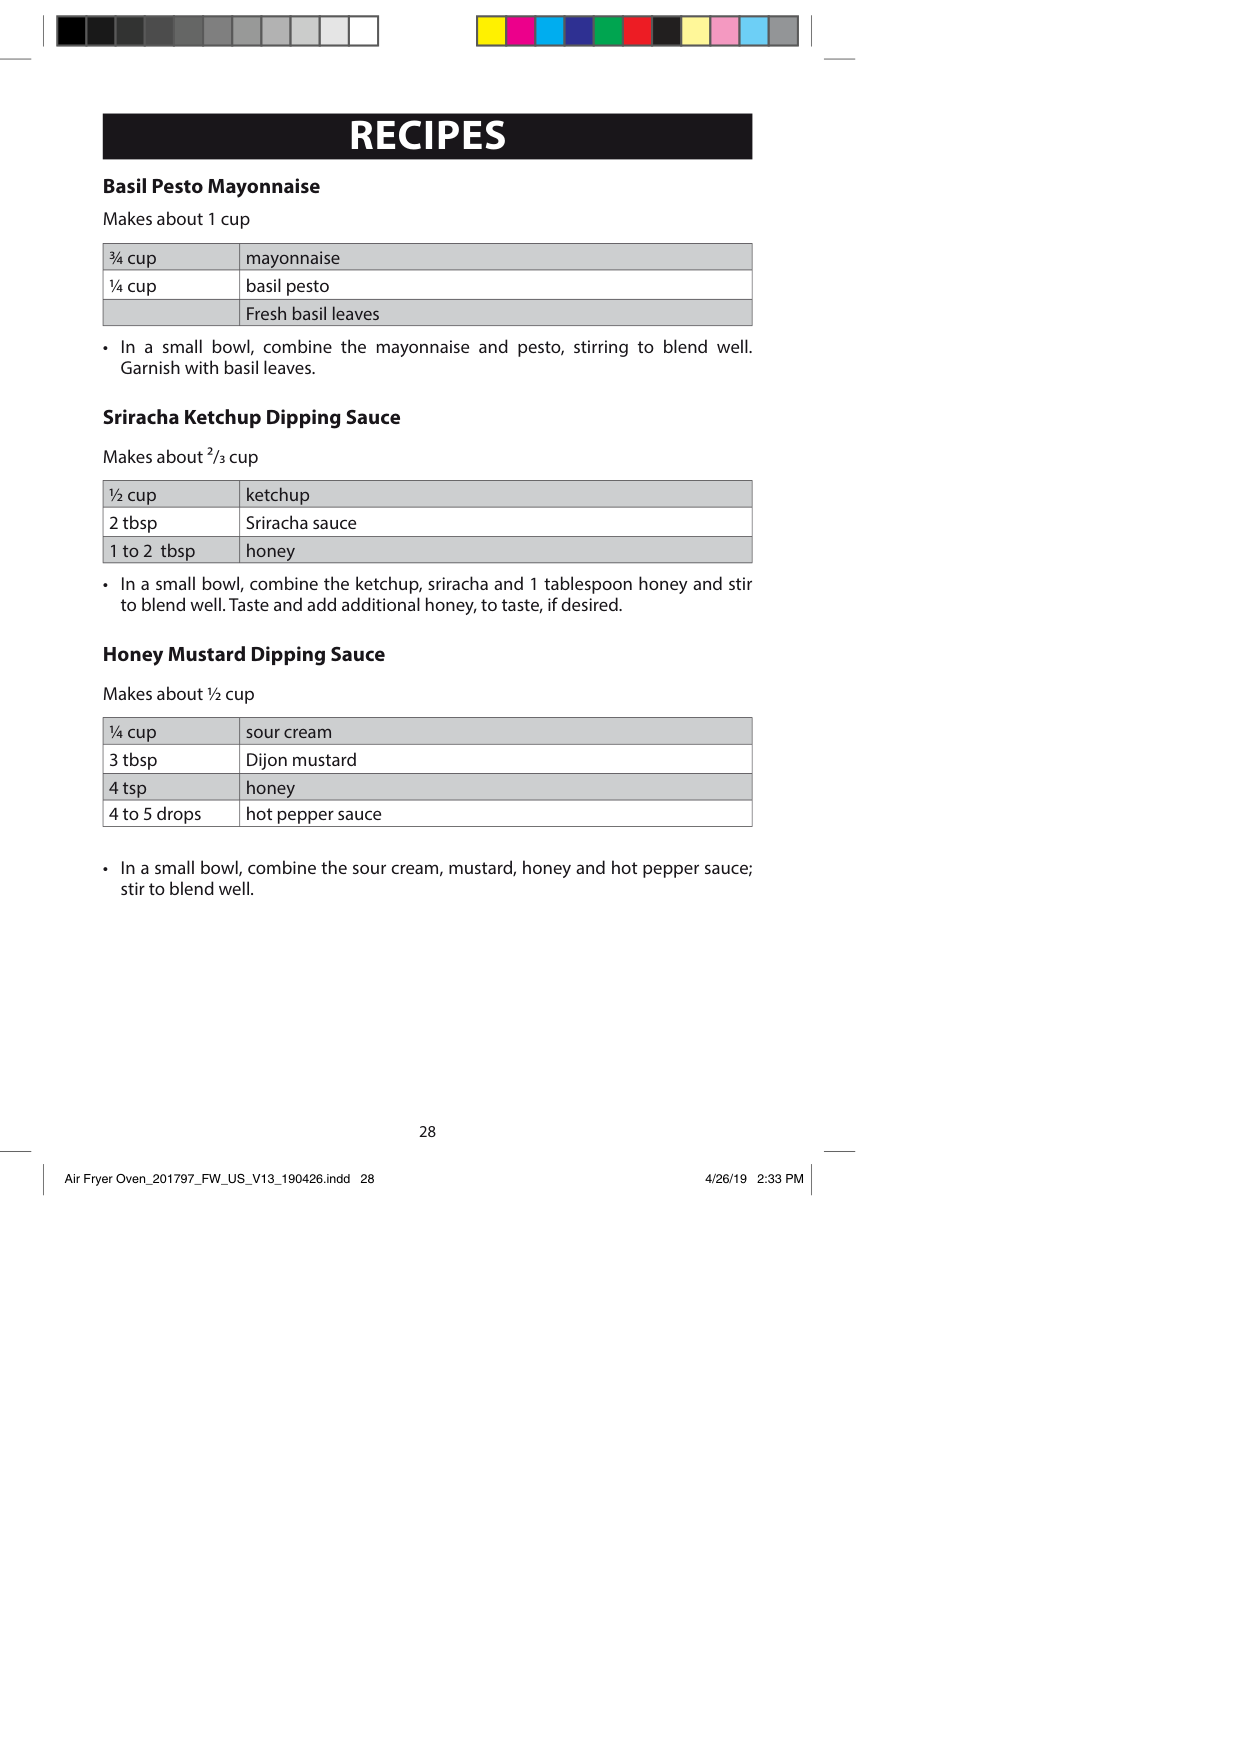
########## Basil Pesto Mayonnaise Makes about 1 cup
|¾ cup|mayonnaise| |---|---| |¼ cup|basil pesto| | |Fresh basil leaves|
• In a small bowl, combine the mayonnaise and pesto, stirring to blend well. Garnish with basil leaves.
########## Sriracha Ketchup Dipping Sauce Makes about 2/3 cup
|½ cup|ketchup| |---|---| |2 tbsp|Sriracha sauce| |1 to 2 tbsp|honey|
• In a small bowl, combine the ketchup, sriracha and 1 tablespoon honey and stir to blend well. Taste and add additional honey, to taste, if desired.
########## Honey Mustard Dipping Sauce Makes about ½ cup
|¼ cup|sour cream| |---|---| |3 tbsp|Dijon mustard| |4 tsp|honey| |4 to 5 drops|hot pepper sauce|
28
#### HINTS AND TIPS
########### NOTE:
29
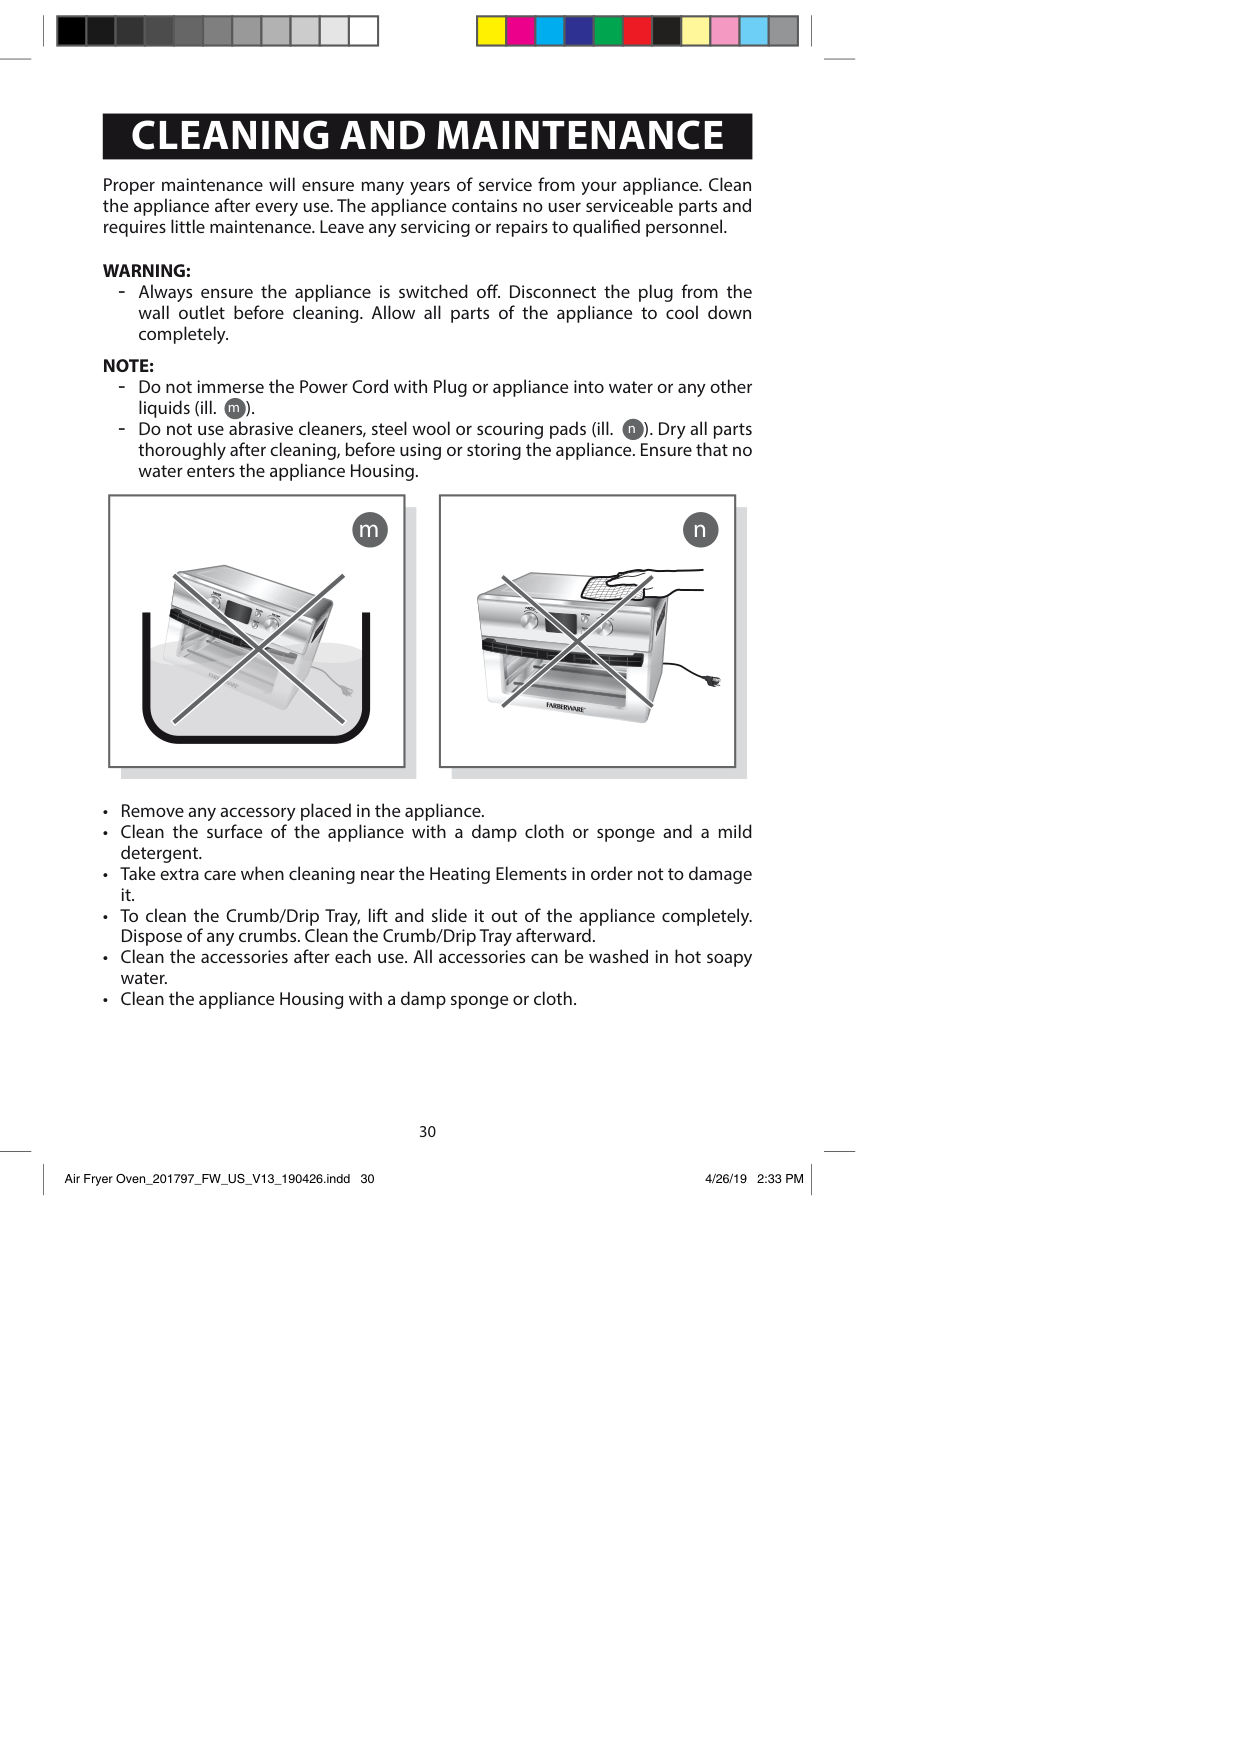
Proper maintenance will ensure many years of service from your appliance. Clean the appliance after every use. The appliance contains no user serviceable parts and requires little maintenance. Leave any servicing or repairs to qualified personnel.
########### WARNING:
########### NOTE:
m
| | |
|---|---| | | |
| | | |---|---| | | |
| | | |---|---| | | |
| | | |---|---| | | |
n
| | | |---|---| | | |
| | | |---|---| | | |
| | | |---|---| | | |
| | |
|---|---| | | |
30
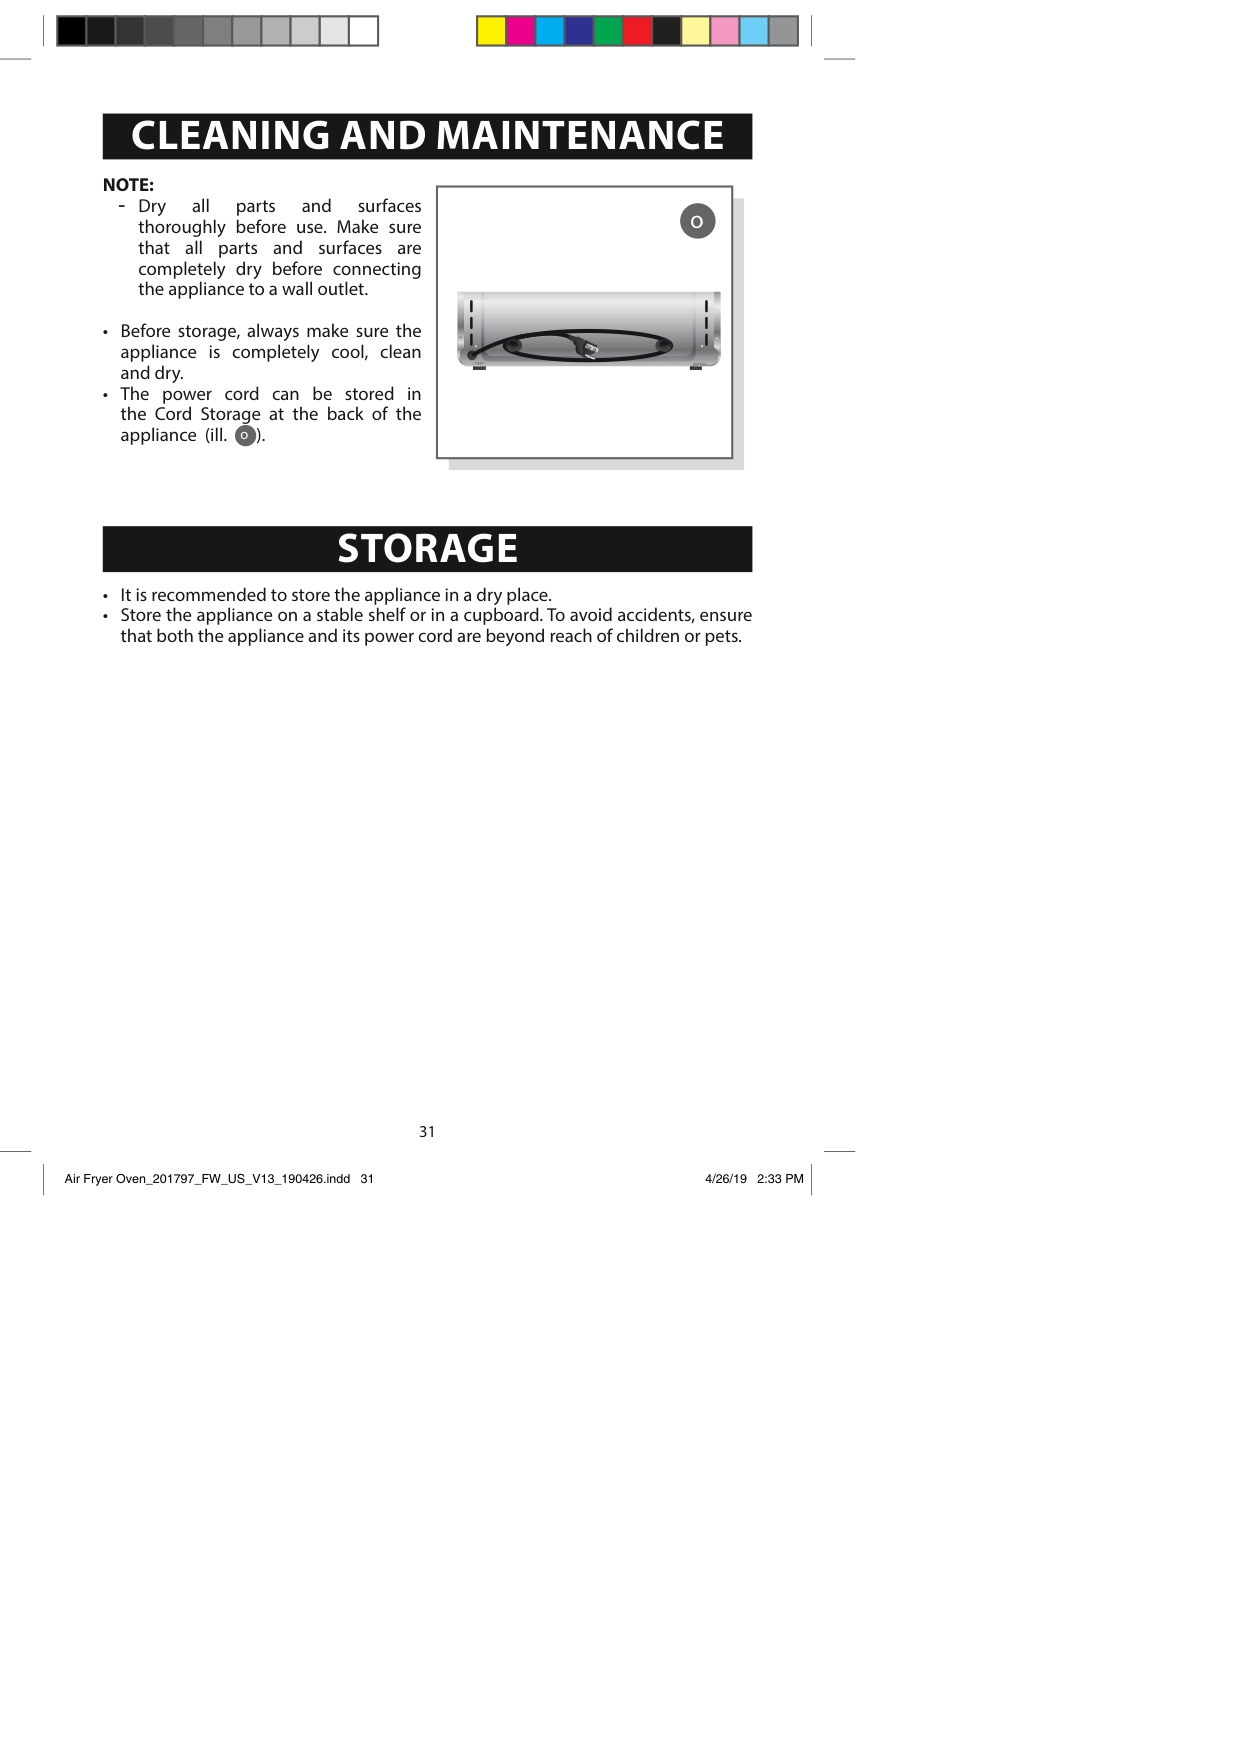
########### NOTE:
o
STORAGE
31
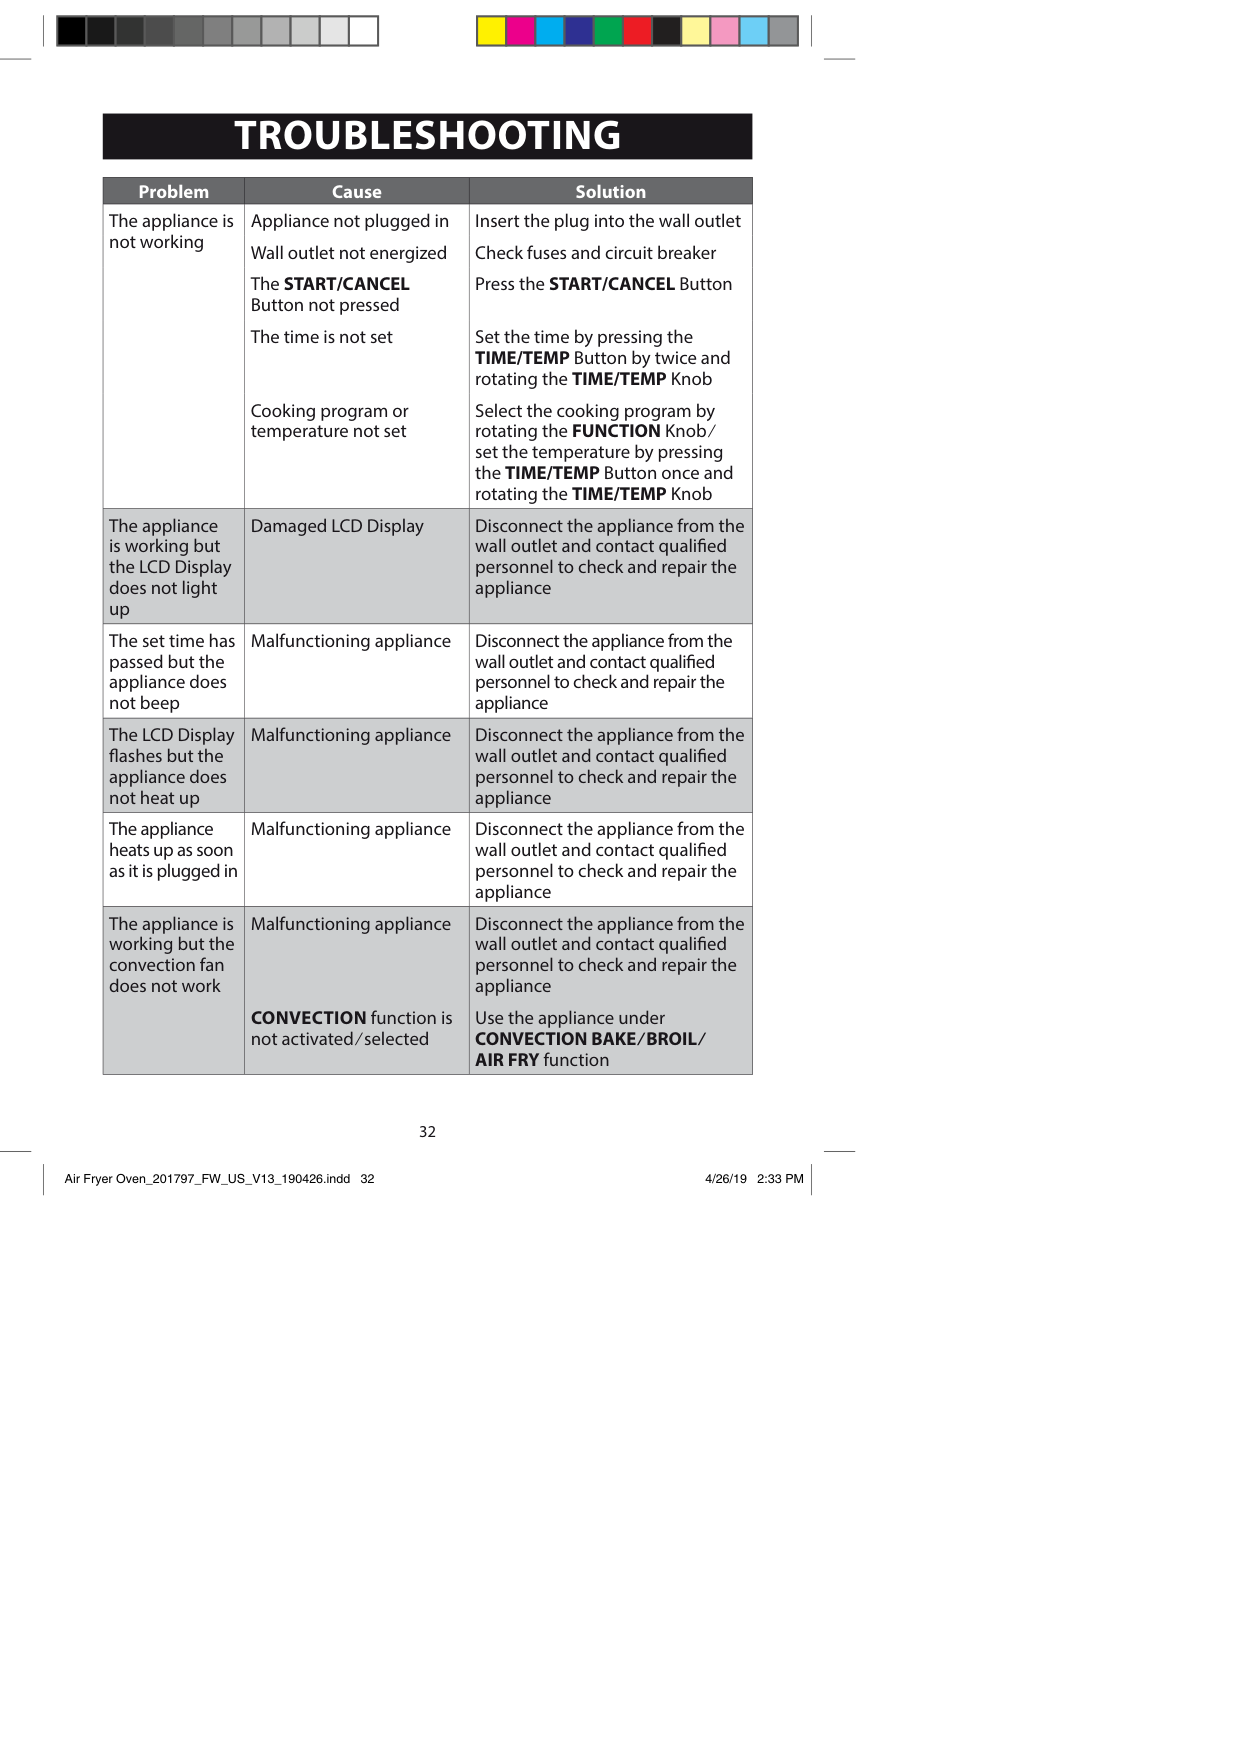
|Problem|Cause|Solution| |---|---|---| |The appliance is not working|Appliance not plugged in Wall outlet not energized The START/CANCEL Button not pressed The time is not set
Cooking program or temperature not set|Insert the plug into the wall outlet Check fuses and circuit breaker Press the START/CANCEL Button
Set the time by pressing the TIME/TEMP Button by twice and rotating the TIME/TEMP Knob Select the cooking program by rotating the FUNCTION Knob / set the temperature by pressing the TIME/TEMP Button once and rotating the TIME/TEMP Knob| |The appliance is working but the LCD Display does not light up|Damaged LCD Display|Disconnect the appliance from the wall outlet and contact qualified personnel to check and repair the appliance| |The set time has passed but the appliance does not beep|Malfunctioning appliance|Disconnect the appliance from the wall outlet and contact qualified personnel to check and repair the appliance| |The LCD Display flashes but the appliance does not heat up|Malfunctioning appliance|Disconnect the appliance from the wall outlet and contact qualified personnel to check and repair the appliance|
|The appliance heats up as soon as it is plugged in|Malfunctioning appliance|Disconnect the appliance from the wall outlet and contact qualified personnel to check and repair the appliance| |The appliance is working but the convection fan does not work|Malfunctioning appliance
CONVECTION function is not activated / selected|Disconnect the appliance from the wall outlet and contact qualified personnel to check and repair the appliance
Use the appliance under CONVECTION BAKE / BROIL / AIR FRY function|
############# 32
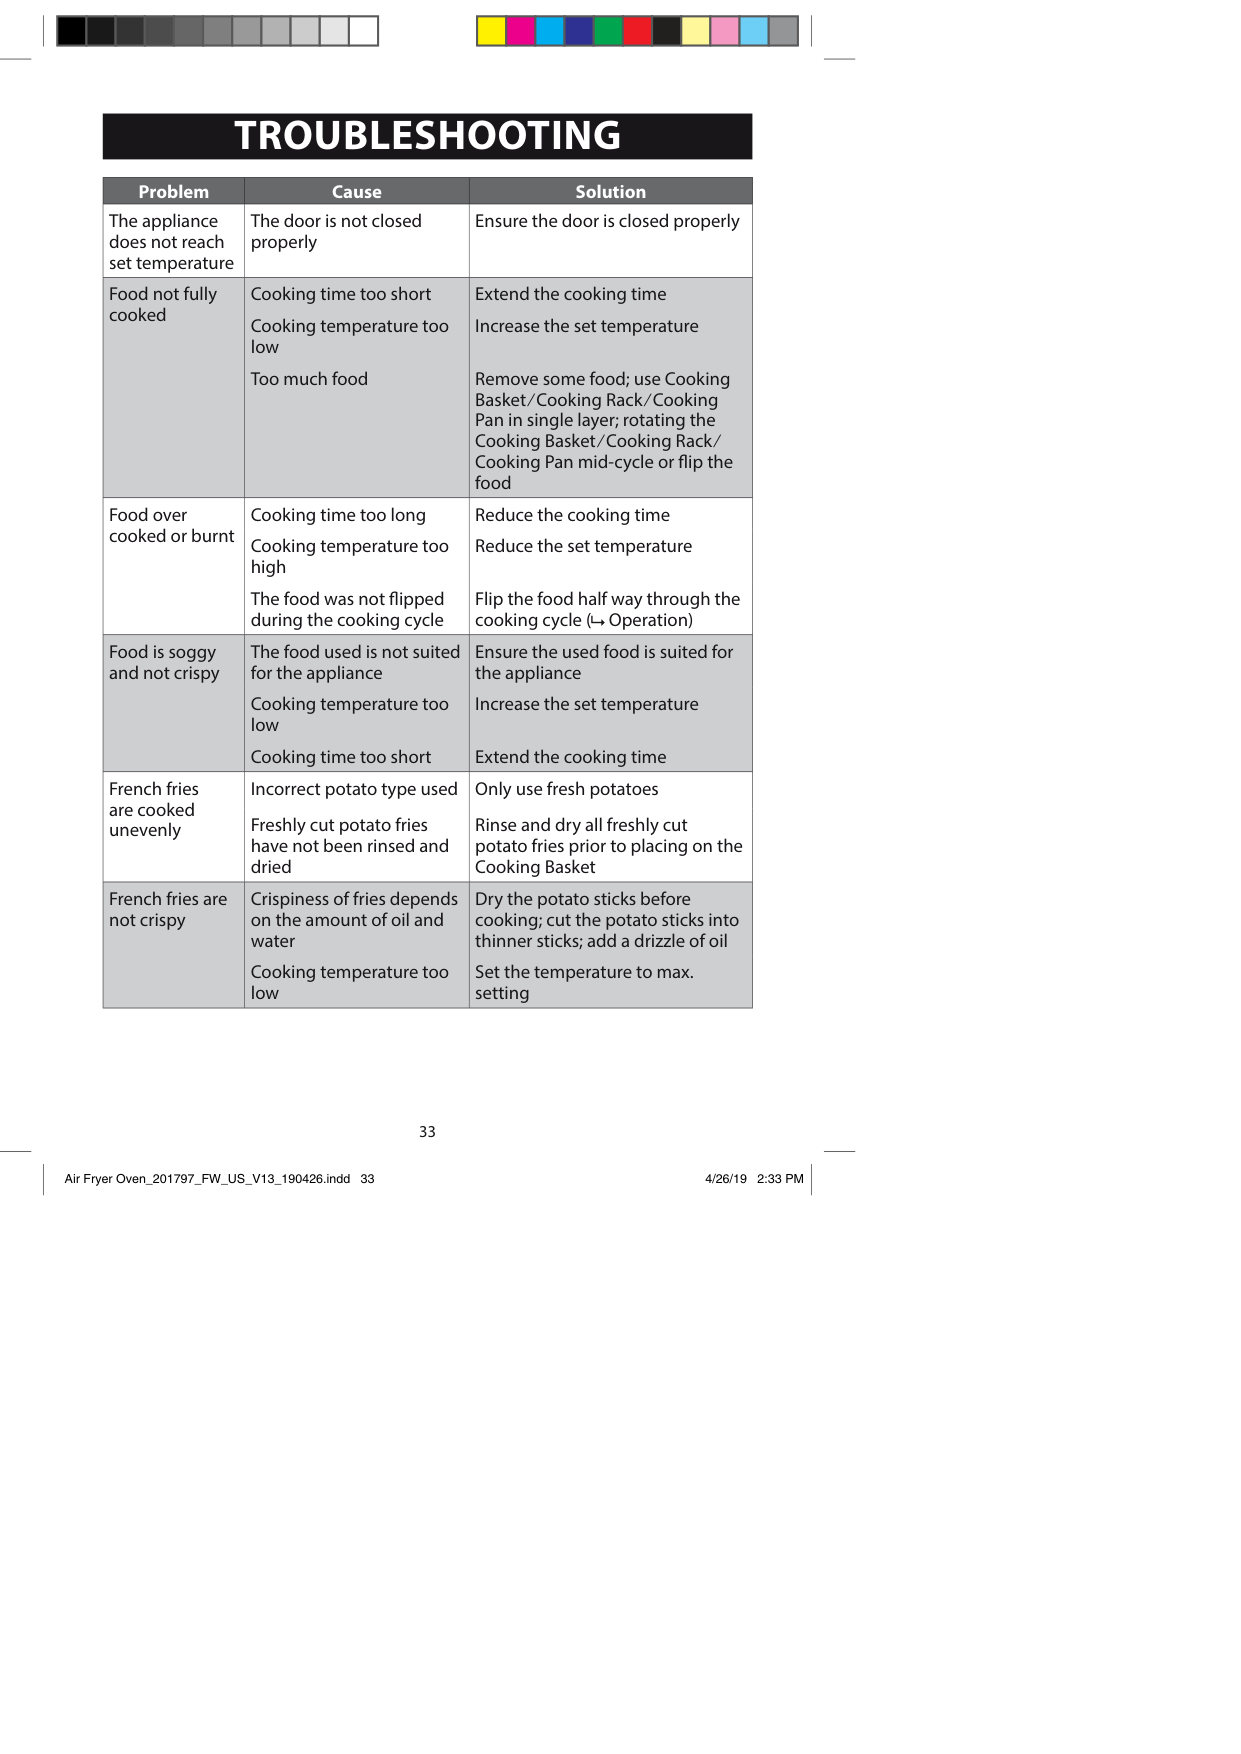
|Problem|Cause|Solution| |---|---|---| |The appliance does not reach set temperature|The door is not closed properly|Ensure the door is closed properly| |Food not fully cooked|Cooking time too short Cooking temperature too low Too much food|Extend the cooking time Increase the set temperature
Remove some food; use Cooking Basket / Cooking Rack / Cooking Pan in single layer; rotating the Cooking Basket / Cooking Rack / Cooking Pan mid-cycle or flip the food| |Food over cooked or burnt|Cooking time too long Cooking temperature too high
The food was not flipped during the cooking cycle|Reduce the cooking time Reduce the set temperature
Flip the food half way through the cooking cycle ( Operation)
| |Food is soggy and not crispy|The food used is not suited for the appliance
Cooking temperature too low
Cooking time too short|Ensure the used food is suited for the appliance
Increase the set temperature
Extend the cooking time| |French fries are cooked unevenly|Incorrect potato type used Freshly cut potato fries have not been rinsed and dried|Only use fresh potatoes Rinse and dry all freshly cut potato fries prior to placing on the Cooking Basket| |French fries are not crispy|Crispiness of fries depends on the amount of oil and water
Cooking temperature too low|Dry the potato sticks before cooking; cut the potato sticks into thinner sticks; add a drizzle of oil
Set the temperature to max. setting|
############# 33
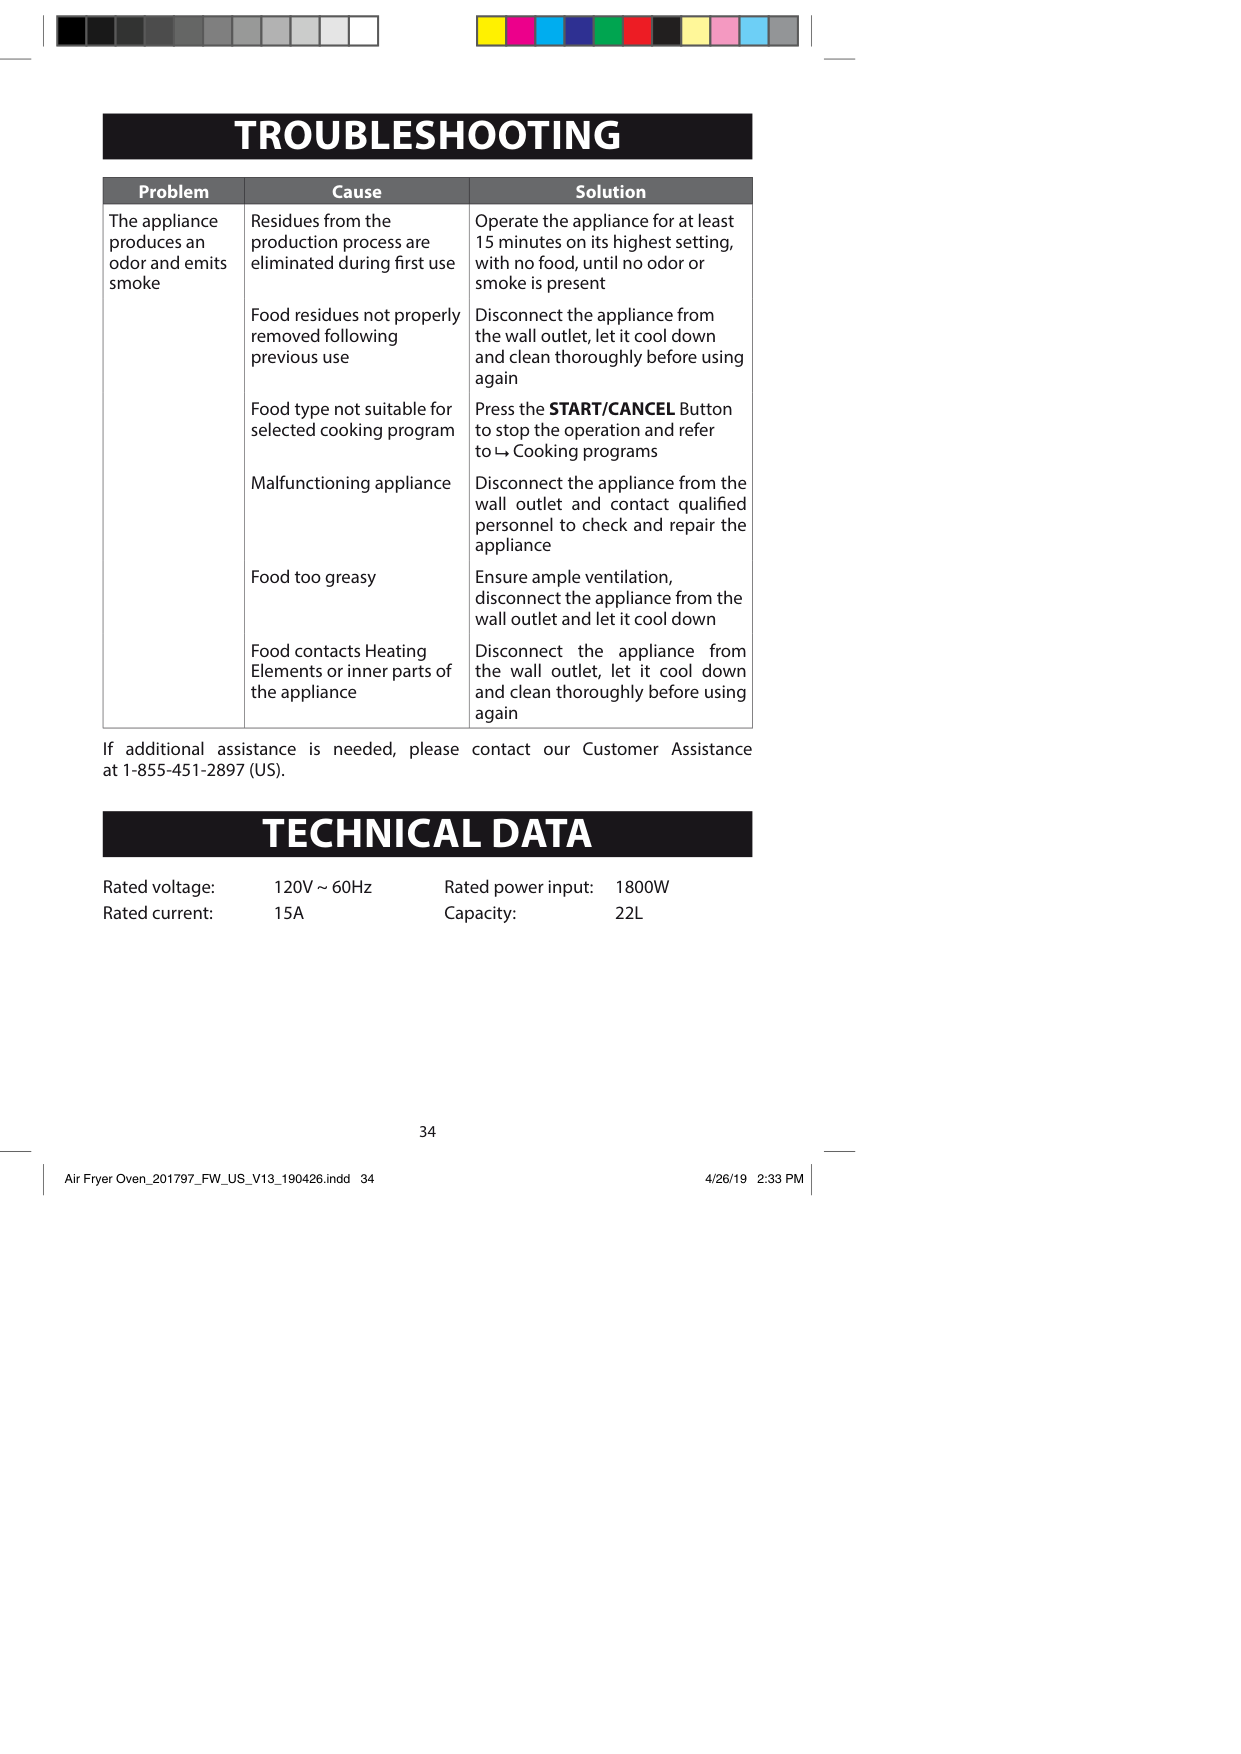
|Problem|Cause|Solution| |---|---|---| |The appliance produces an odor and emits smoke|Residues from the production process are eliminated during first use
Food residues not properly removed following previous use
Food type not suitable for selected cooking program
Malfunctioning appliance
Food too greasy
Food contacts Heating Elements or inner parts of the appliance|Operate the appliance for at least 15 minutes on its highest setting, with no food, until no odor or smoke is present
Disconnect the appliance from the wall outlet, let it cool down and clean thoroughly before using again
Press the START/CANCEL Button to stop the operation and refer to Cooking programs
Disconnect the appliance from the wall outlet and contact qualified personnel to check and repair the appliance
Ensure ample ventilation, disconnect the appliance from the wall outlet and let it cool down
Disconnect the appliance from the wall outlet, let it cool down and clean thoroughly before using again|
If additional assistance is needed, please contact our Customer Assistance
#### TECHNICAL DATA
Rated voltage: 120V ~ 60Hz Rated power input: 1800W Rated current: 15A Capacity: 22L
#### CUSTOMER ASSISTANCE
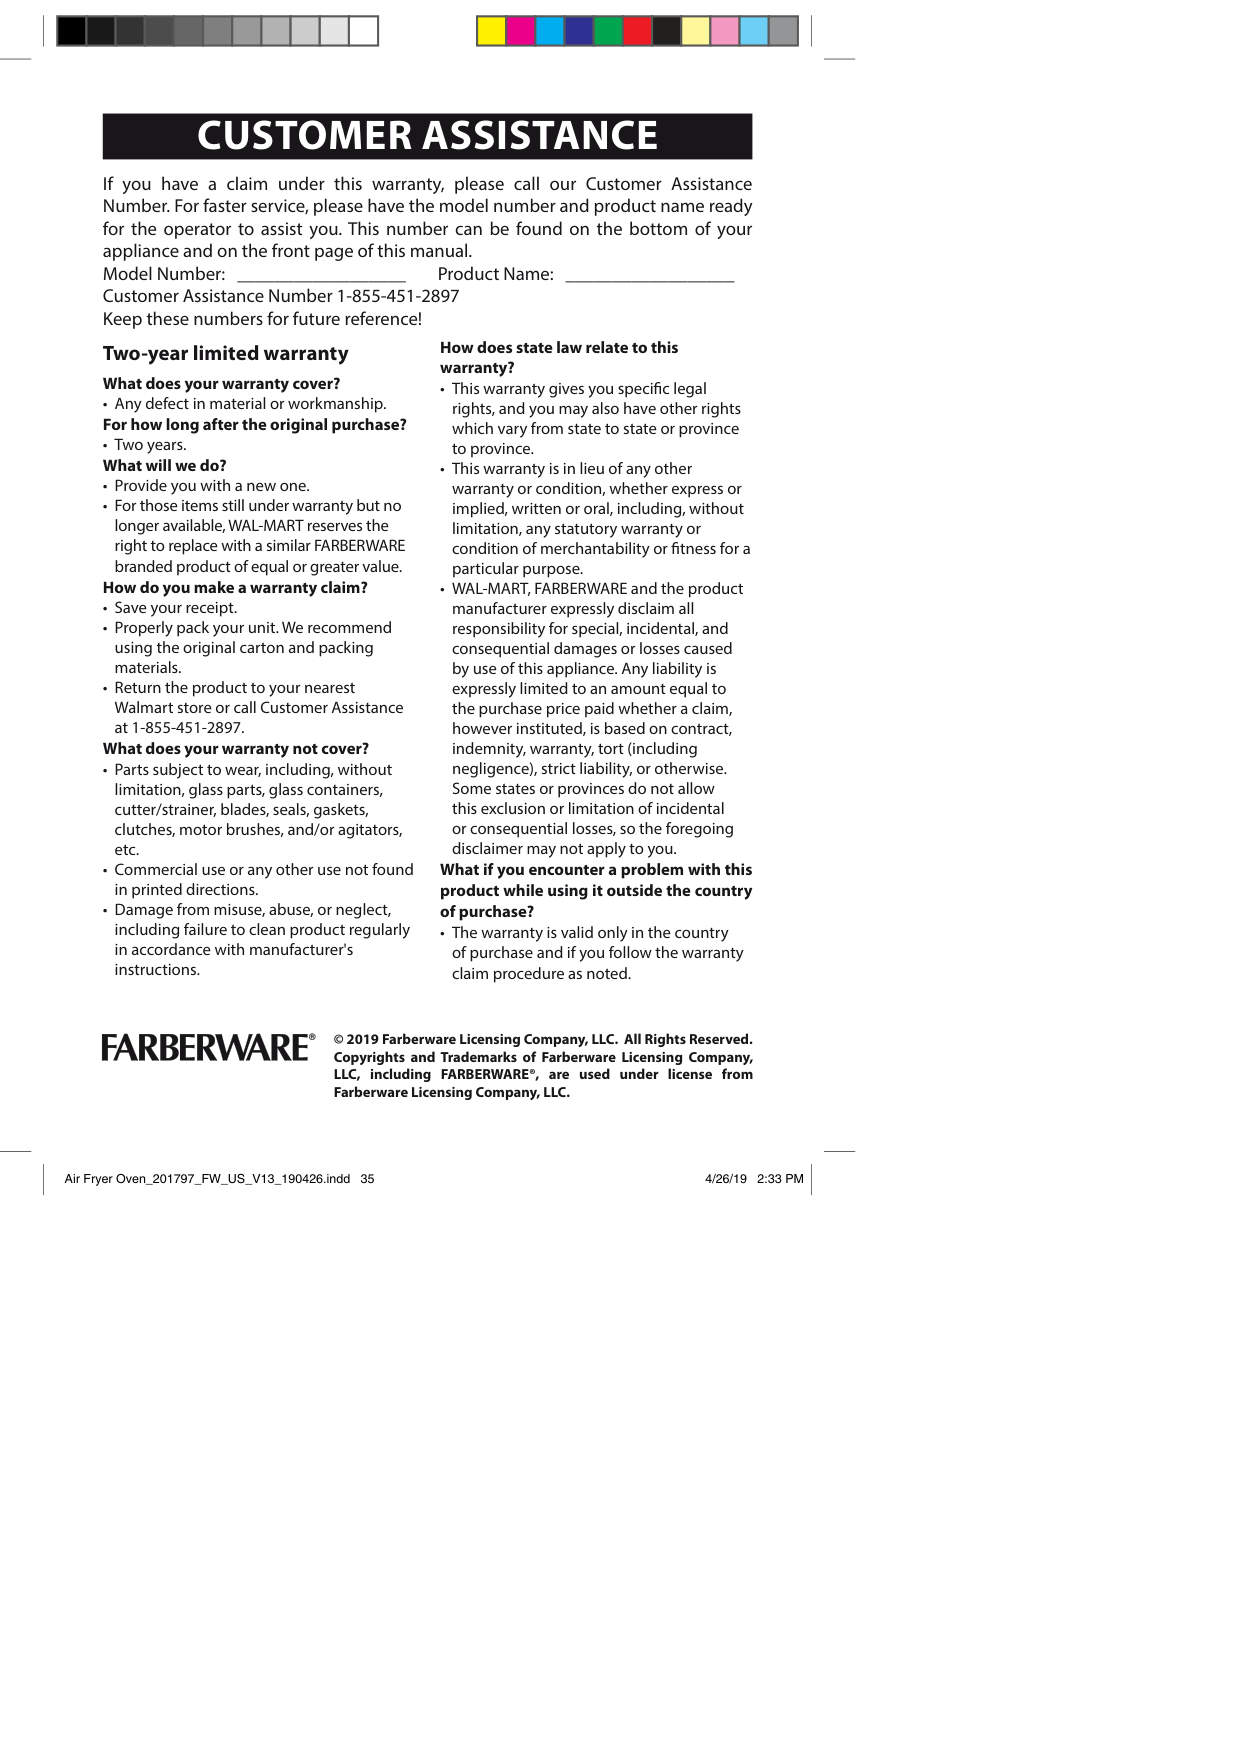
If you have a claim under this warranty, please call our Customer Assistance Number. For faster service, please have the model number and product name ready for the operator to assist you. This number can be found on the bottom of your appliance and on the front page of this manual. Model Number: __________________ Product Name: __________________ Customer Assistance Number 1-855-451-2897 Keep these numbers for future reference!
How does state law relate to this warranty?
########## Two-year limited warranty What does your warranty cover?
How do you make a warranty claim?
############ What does your warranty not cover?
What if you encounter a problem with this product while using it outside the country of purchase?
• The warranty is valid only in the country of purchase and if you follow the warranty claim procedure as noted.
© 2019 Farberware Licensing Company, LLC. All Rights Reserved. Copyrights and Trademarks of Farberware Licensing Company, LLC, including FARBERWARE®, are used under license from Farberware Licensing Company, LLC.