
Ask AI
— answers from the official manualAnswers from the official manual.
Common questions
Common Questions
9 totalHow do I install the batteries in the Voluas Vlr001 Automatic Cat Feeder?
To install batteries, open the battery compartment at the bottom of the feeder and place three D-cell batteries. (Page 1)
What types of pet food are recommended to use with this feeder?
Only dry pet food sizes within 5mm to 15mm is recommended for safe feeding in the automatic pet feeder. Wet and damp foods are strictly prohibited. (Page 3)
How do I set the time on my Voluas Vlr001 Automatic Cat Feeder?
Press the setting button for two seconds to enter into the time settings screen and use the up/down selection buttons to adjust hours and minutes. Press confirm after finishing the time adjustments. (Page 4)
How do I perform quick manual feeding on my Voluas Vlr001 Automatic Cat Feeder?
In standby mode, quickly press and hold the button for less than one second to feed a single portion manually. (Page 5)
What should I do if food gets stuck in my Voluas Vlr001 Automatic Cat Feeder?
If the food is blocked, manually clean the stuck food and reboot the feeder. If it still does not work properly contact customer support for further assistance. (Page 9)
How many scheduled meals can be set up per day on my Voluas Vlr001 Automatic Cat Feeder?
The feeder supports up to six automatic meals per day. You must enter schedule for each meal after pressing the button twice. (Page 7)
Full Manual
12 pages
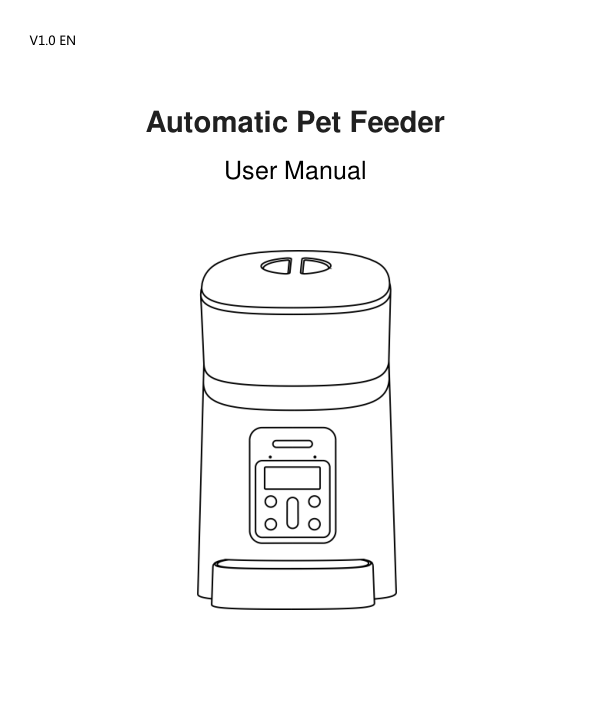
V1.0 EN
Automatic Pet Feeder User Manual

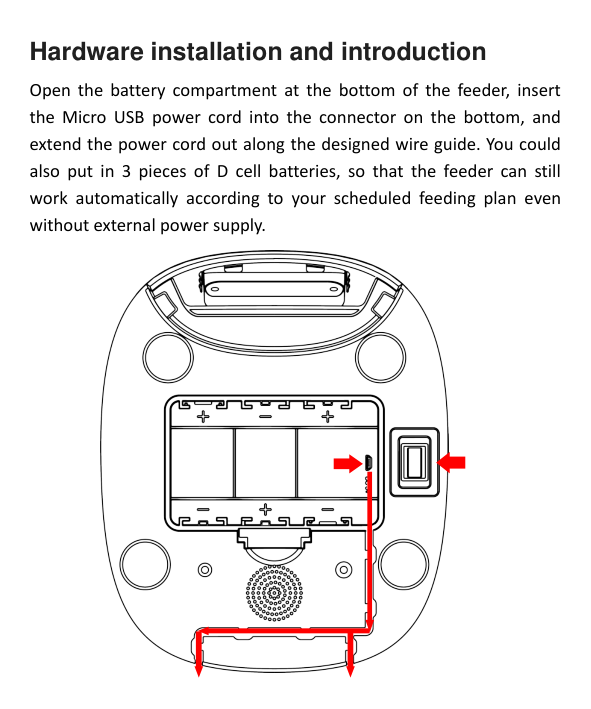
Hardware installation and introduction
Open the battery compartment at the bottom of the feeder, insert the Micro USB power cord into the connector on the bottom, and extend the power cord out along the designed wire guide. You could also put in 3 pieces of D cell batteries, so that the feeder can still work automatically according to your scheduled feeding plan even without external power supply.

Open the top cover, then place the feeding tray into the feeder from the front.

For your pet's health, please wash the grain bucket and feeding tray regularly. The feeder body should not be filled with water. Please use a wring-able wet cloth to wipe.


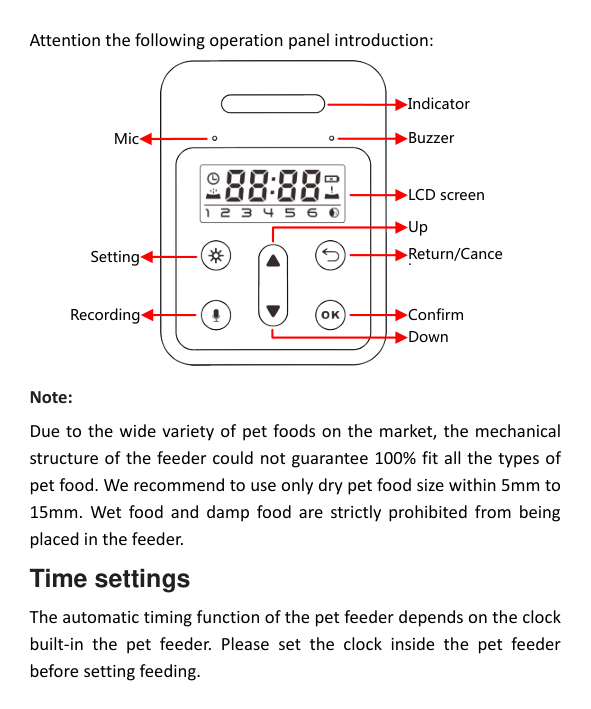
Attention the following operation panel introduction:

Indicator BuzzerMic
LCD screen Up
Return/Cance l
Setting
Recording
Confirm

Down
Note:
Due to the wide variety of pet foods on the market, the mechanical structure of the feeder could not guarantee 100% fit all the types of pet food. We recommend to use only dry pet food size within 5mm to 15mm. Wet food and damp food are strictly prohibited from being placed in the feeder.
Time settings
The automatic timing function of the pet feeder depends on the clock built-in the pet feeder. Please set the clock inside the pet feeder before setting feeding.

Long press the setting button for 2 seconds, then enter the setting surface, as shown in Fig①. The clock icon is flashing.

Press to confirm to enter the time setting. The clock icon is flashing as shown in Fig②.

Use the up/down selection buttons to set the clock (Time 24-hour clock). You can long press the up/down selection button for fast setting. Press to confirm the time, as shown in Fig③.

Then the minute start to flash, as shown in Fig④, You can press the up/down selection button for setting. Then press to save.


① ②


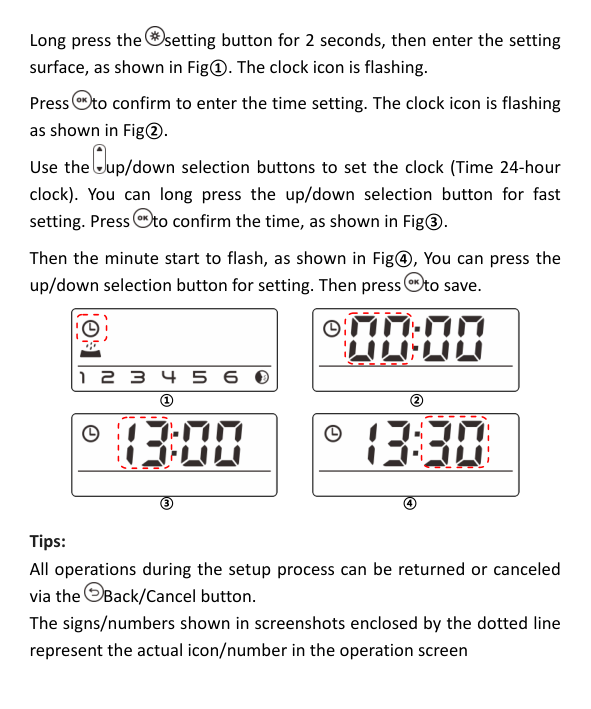
③ ④
Tips: All operations during the setup process can be returned or canceled via the Back/Cancel button. The signs/numbers shown in screenshots enclosed by the dotted line represent the actual icon/number in the operation screen

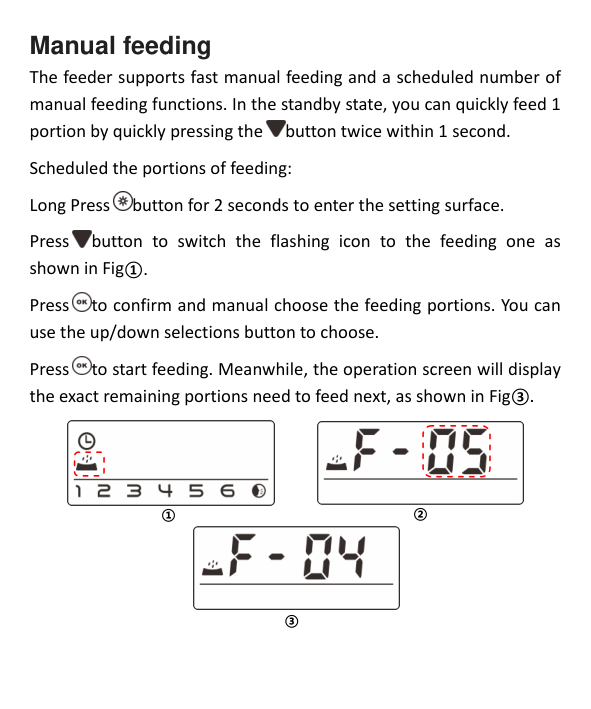
Manual feeding
The feeder supports fast manual feeding and a scheduled number of manual feeding functions. In the standby state, you can quickly feed 1 portion by quickly pressing the button twice within 1 second.

Scheduled the portions of feeding: Long Press button for 2 seconds to enter the setting surface. Press button to switch the flashing icon to the feeding one as shown in Fig①. Press to confirm and manual choose the feeding portions. You can use the up/down selections button to choose. Press to start feeding. Meanwhile, the operation screen will display the exact remaining portions need to feed next, as shown in Fig③.


① ②

③
Scheduled feeding The pet feeder support the scheduled feeding exact portions at exact time. It support up to 6 meals per day.

Press button for 2 seconds, enter the setting surface. Press button to switch the flashing icon to Digital 1 icon. As show in Fig①. Press to select the feeding portions, press up/down button to set portions as shown in Fig③.
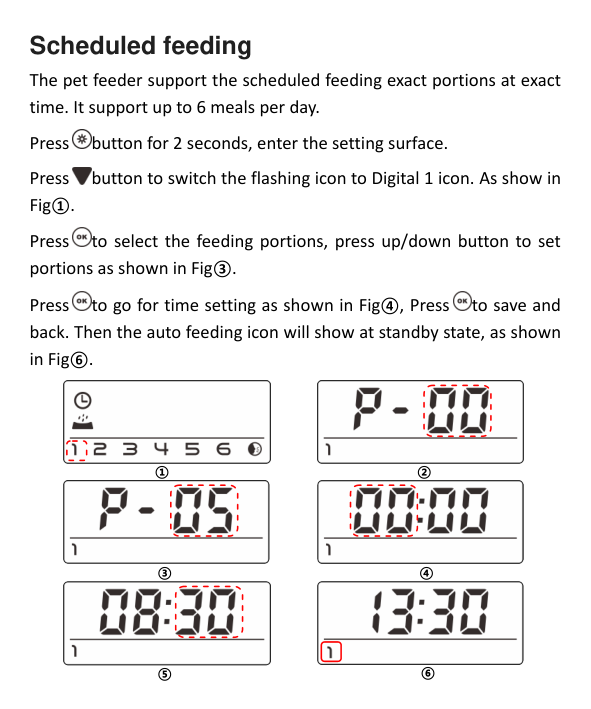


Press to go for time setting as shown in Fig④, Press to save and back. Then the auto feeding icon will show at standby state, as shown in Fig⑥.


① ②


③ ④


⑤ ⑥
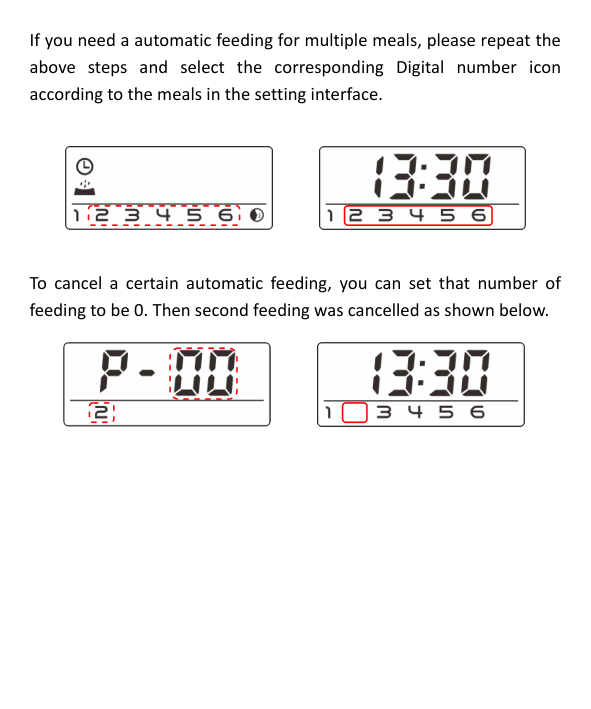
If you need a automatic feeding for multiple meals, please repeat the above steps and select the corresponding Digital number icon according to the meals in the setting interface.


To cancel a certain automatic feeding, you can set that number of feeding to be 0. Then second feeding was cancelled as shown below.


Feeding voice recording
To develop the good feeding habits for pets, the feeder supports pre-recording a maximum of 10 seconds of audio, which is played during feeding.

In standby state, press and hold the record button for 3 seconds until the feeder makes a “Drip” sound, and you can start recording at the microphone position. Note that the recording button should always be pressed continually 10 seconds during recording. After the recording is completed. the feeder will make two “Drip” sound.
After recording done, you can preview the recorded audio by short pressing the record button . If you need to change the recording, please re-record it. The closer to the microphone, the louder voice can be recorded.

The default of voice recording playback is 3 times. It can be customized 5 times max at the setting:

Press and hold the setting button for 2 seconds to enter the setting interface.
Select the down button to switch the flashing icon to recording button as shown in below.

Press to confirm play times of recording playback by using the up/down buttons. Press button to save and exit.

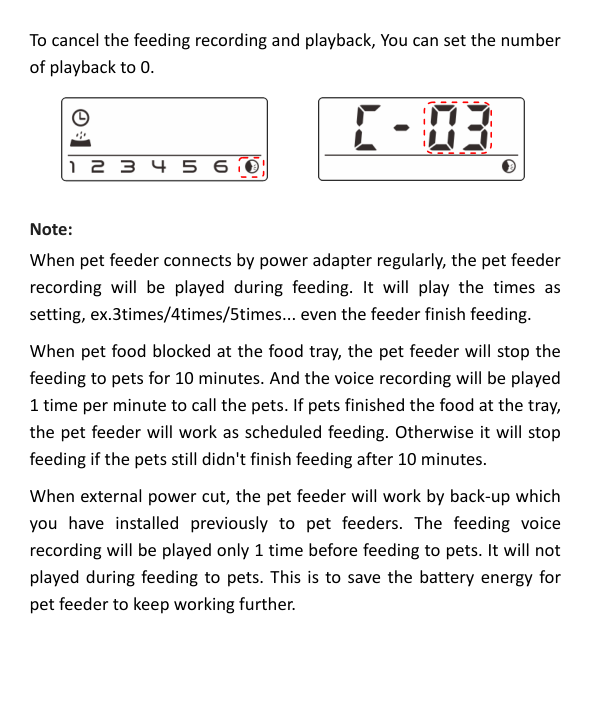
To cancel the feeding recording and playback, You can set the number of playback to 0.


Note:
When pet feeder connects by power adapter regularly, the pet feeder recording will be played during feeding. It will play the times as setting, ex.3times/4times/5times... even the feeder finish feeding.
When pet food blocked at the food tray, the pet feeder will stop the feeding to pets for 10 minutes. And the voice recording will be played 1 time per minute to call the pets. If pets finished the food at the tray, the pet feeder will work as scheduled feeding. Otherwise it will stop feeding if the pets still didn't finish feeding after 10 minutes.
When external power cut, the pet feeder will work by back-up which you have installed previously to pet feeders. The feeding voice recording will be played only 1 time before feeding to pets. It will not played during feeding to pets. This is to save the battery energy for pet feeder to keep working further.
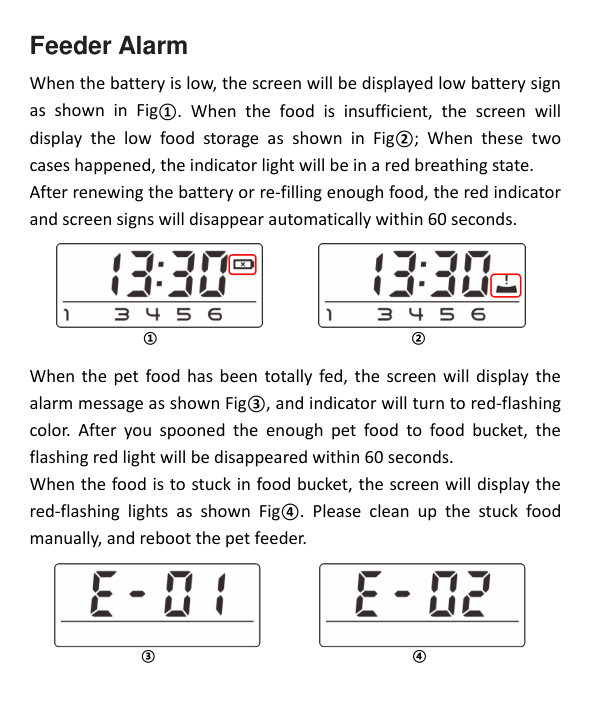
Feeder Alarm
When the battery is low, the screen will be displayed low battery sign as shown in Fig①. When the food is insufficient, the screen will display the low food storage as shown in Fig②; When these two cases happened, the indicator light will be in a red breathing state. After renewing the battery or re-filling enough food, the red indicator and screen signs will disappear automatically within 60 seconds.


① ②
When the pet food has been totally fed, the screen will display the alarm message as shown Fig③, and indicator will turn to red-flashing color. After you spooned the enough pet food to food bucket, the flashing red light will be disappeared within 60 seconds. When the food is to stuck in food bucket, the screen will display the red-flashing lights as shown Fig④. Please clean up the stuck food manually, and reboot the pet feeder.


③ ④
Others
Whenever the pet feeder released any of red indicator light, it means that the feeder has a notification message. Please follow the screen signs remind and cope with them in time according to manual book illustrated.
The back-up battery is designed for short-term alternative when the external power supply is cut. Attention!When the pet feeder works with battery back-up, it will go to sleep mode and some of functions will be limited:
If want to delete all previous setting, you can reset the feeder to factory default. In the standby state, press and hold the setting button and button for 3 seconds until the feeder makes a short beep.

