
World Dryer S Xxxas Xxxce Sanitize Dry Hand Dryer
Ask AI
— answers from the official manualAnswers from the official manual.
Common questions
Common Questions
7 totalWhat should I do if there is no air blowing when my hands are inserted into the dryer?
Check if any display indicators light up. Ensure that the power switch and speed settings are correct, then turn on the circuit breaker or RCD if necessary.
How can I address the issue of low airflow in the dryer?
Check if the speed button is set to a lower level; adjust it to the higher level setting for better performance according to the troubleshooting guide.
What causes error code E1 and how do I resolve it?
Error code E1 indicates a motor fault. Check the motor’s connecting wires or impeller for foreign material, then restart the dryer to see if the issue persists.
What should I do when displaying error message E2?
Ensure that no dust or dirt blocks the sensor. Clean any obstructing particles around it, turn off and then on again to reset.
How often should the drain tank be cleaned in this hand dryer?
Drain tanks must be emptied at least once a week and washed out as necessary; also perform cleaning checks by pouring water through the drain hole weekly to prevent clogging.
How can I clean the air filter properly?
Open the air inlet cover and remove the air filter. Use a vacuum cleaner or wash it in cold/warm water, then dry it thoroughly before reinserting.
Show 1 more questions
Full Manual
12 pages
Hand Dryer Installation & User Manual


Please read instructions in conjunction with the illustrations Please save these instructions.

Safety & Guidance notes Important:- Read all these instructions before commencing the installation.
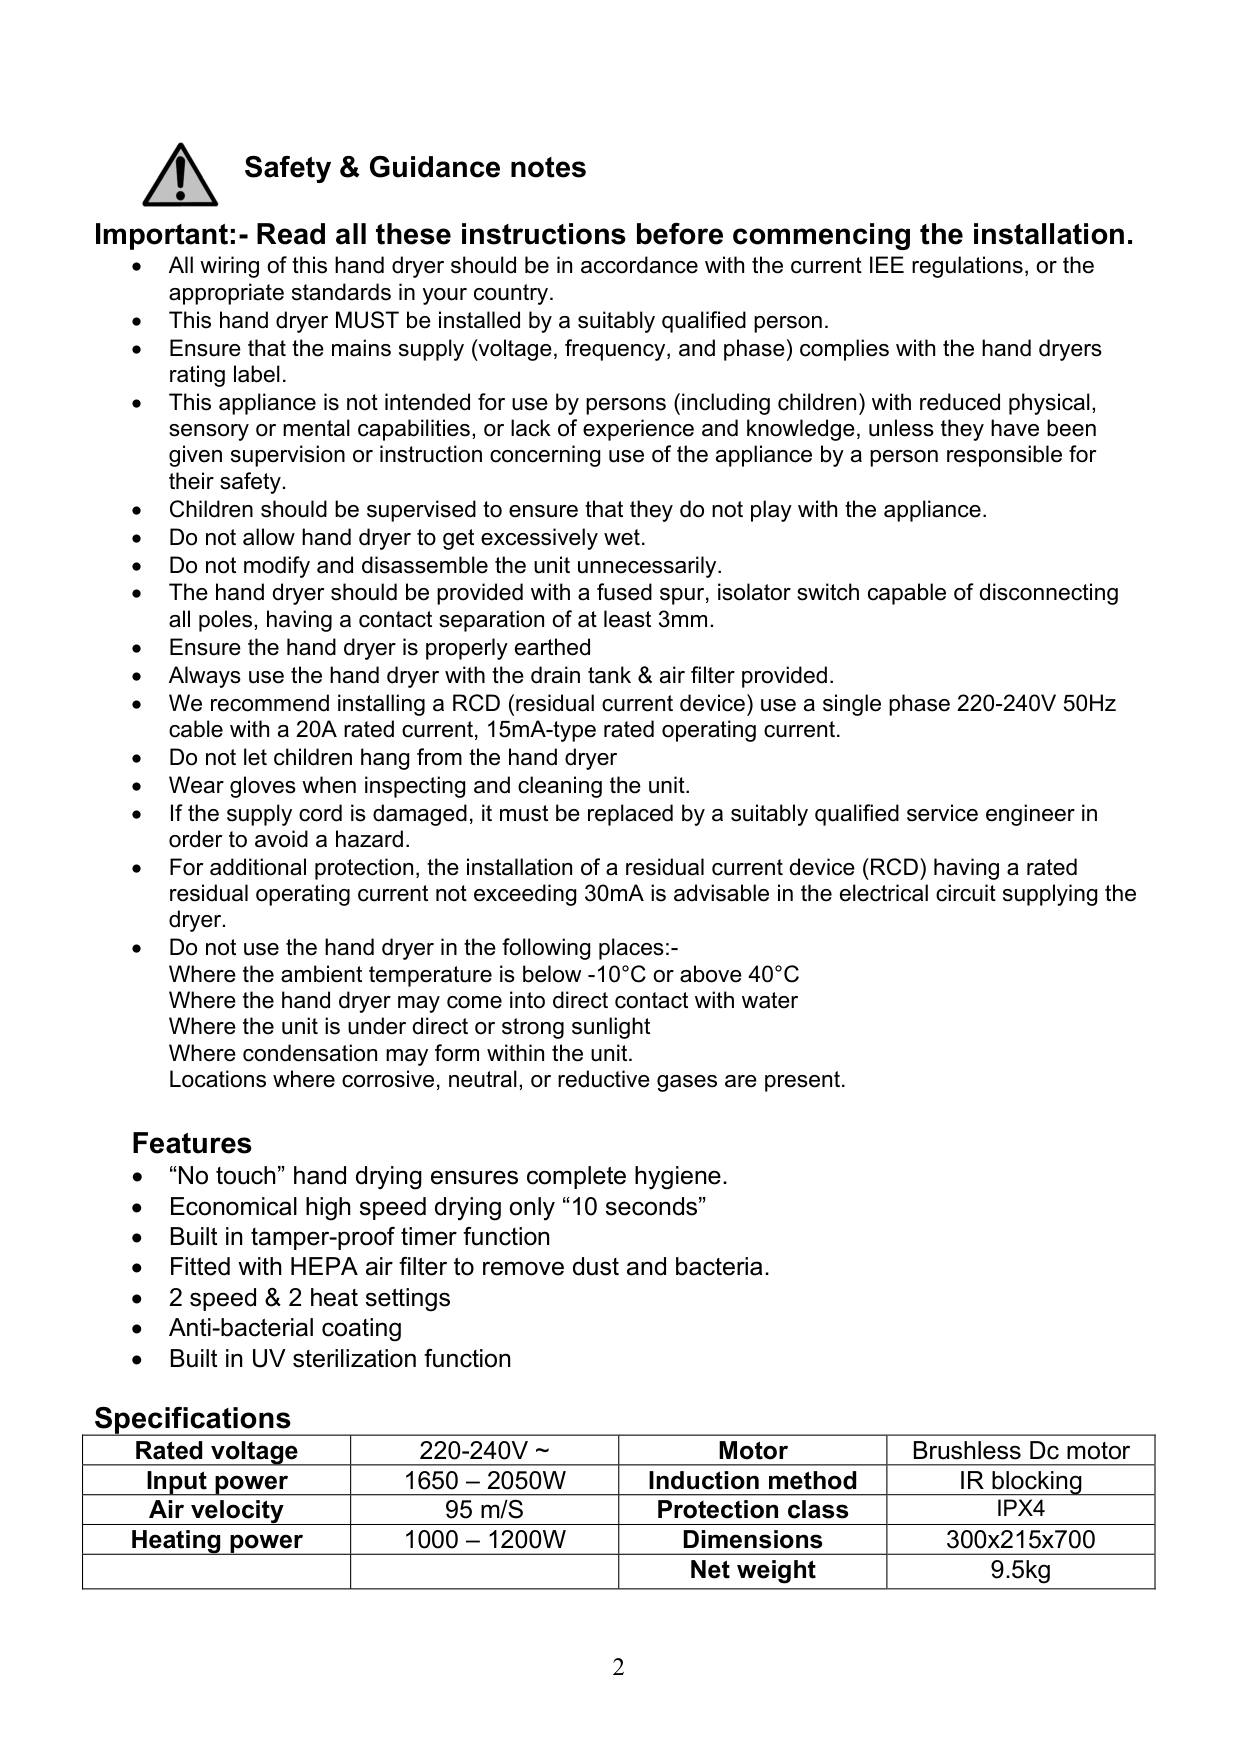
Specifications
|Rated voltage|220-240V ~|Motor|Brushless Dc motor| |---|---|---|---| |Input power|1650 – 2050W|Induction method|IR blocking| |Air velocity|95 m/S|Protection class|IPX4| |Heating power|1000 – 1200W|Dimensions|300x215x700| | | |Net weight|9.5kg|
Hand dryer Features & functions

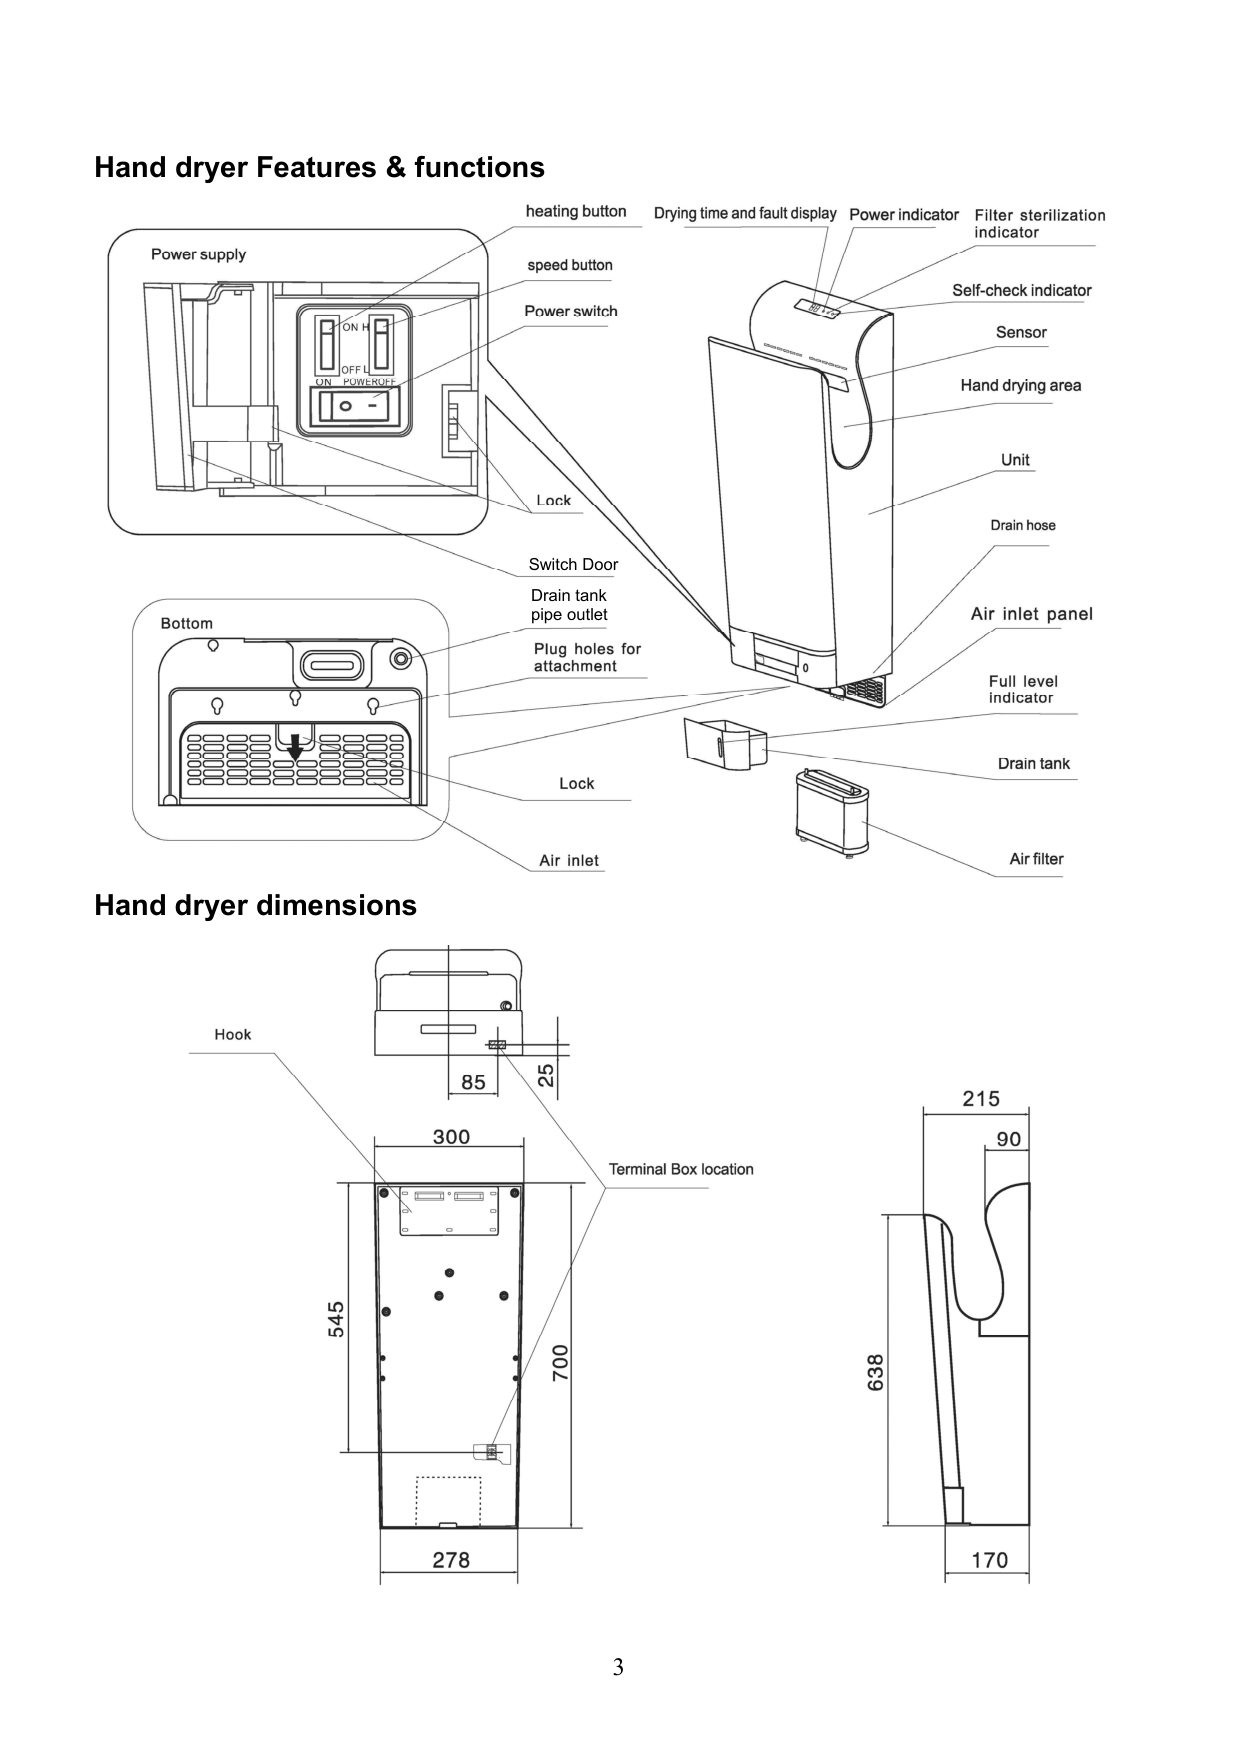


Switch Door

Drain tank pipe outlet


Hand dryer dimensions


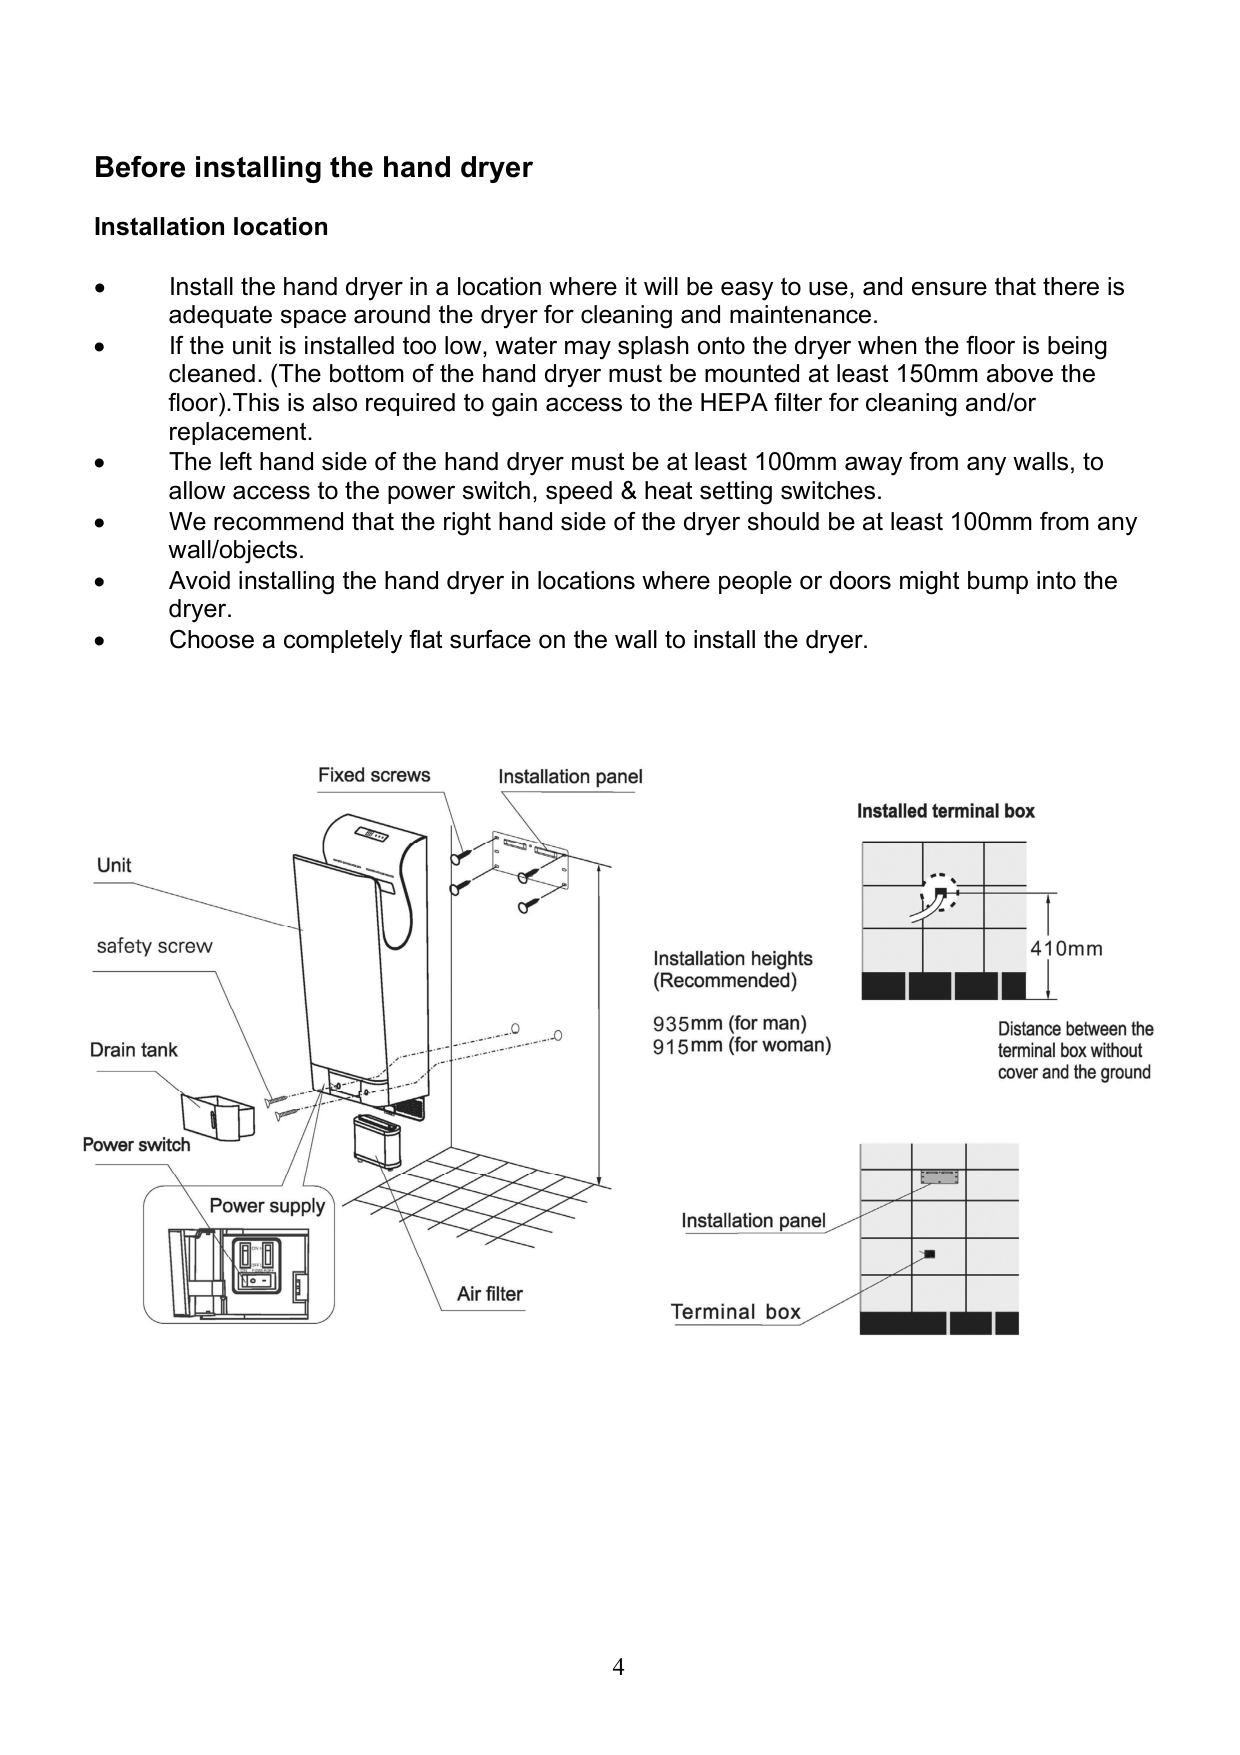
Before installing the hand dryer Installation location
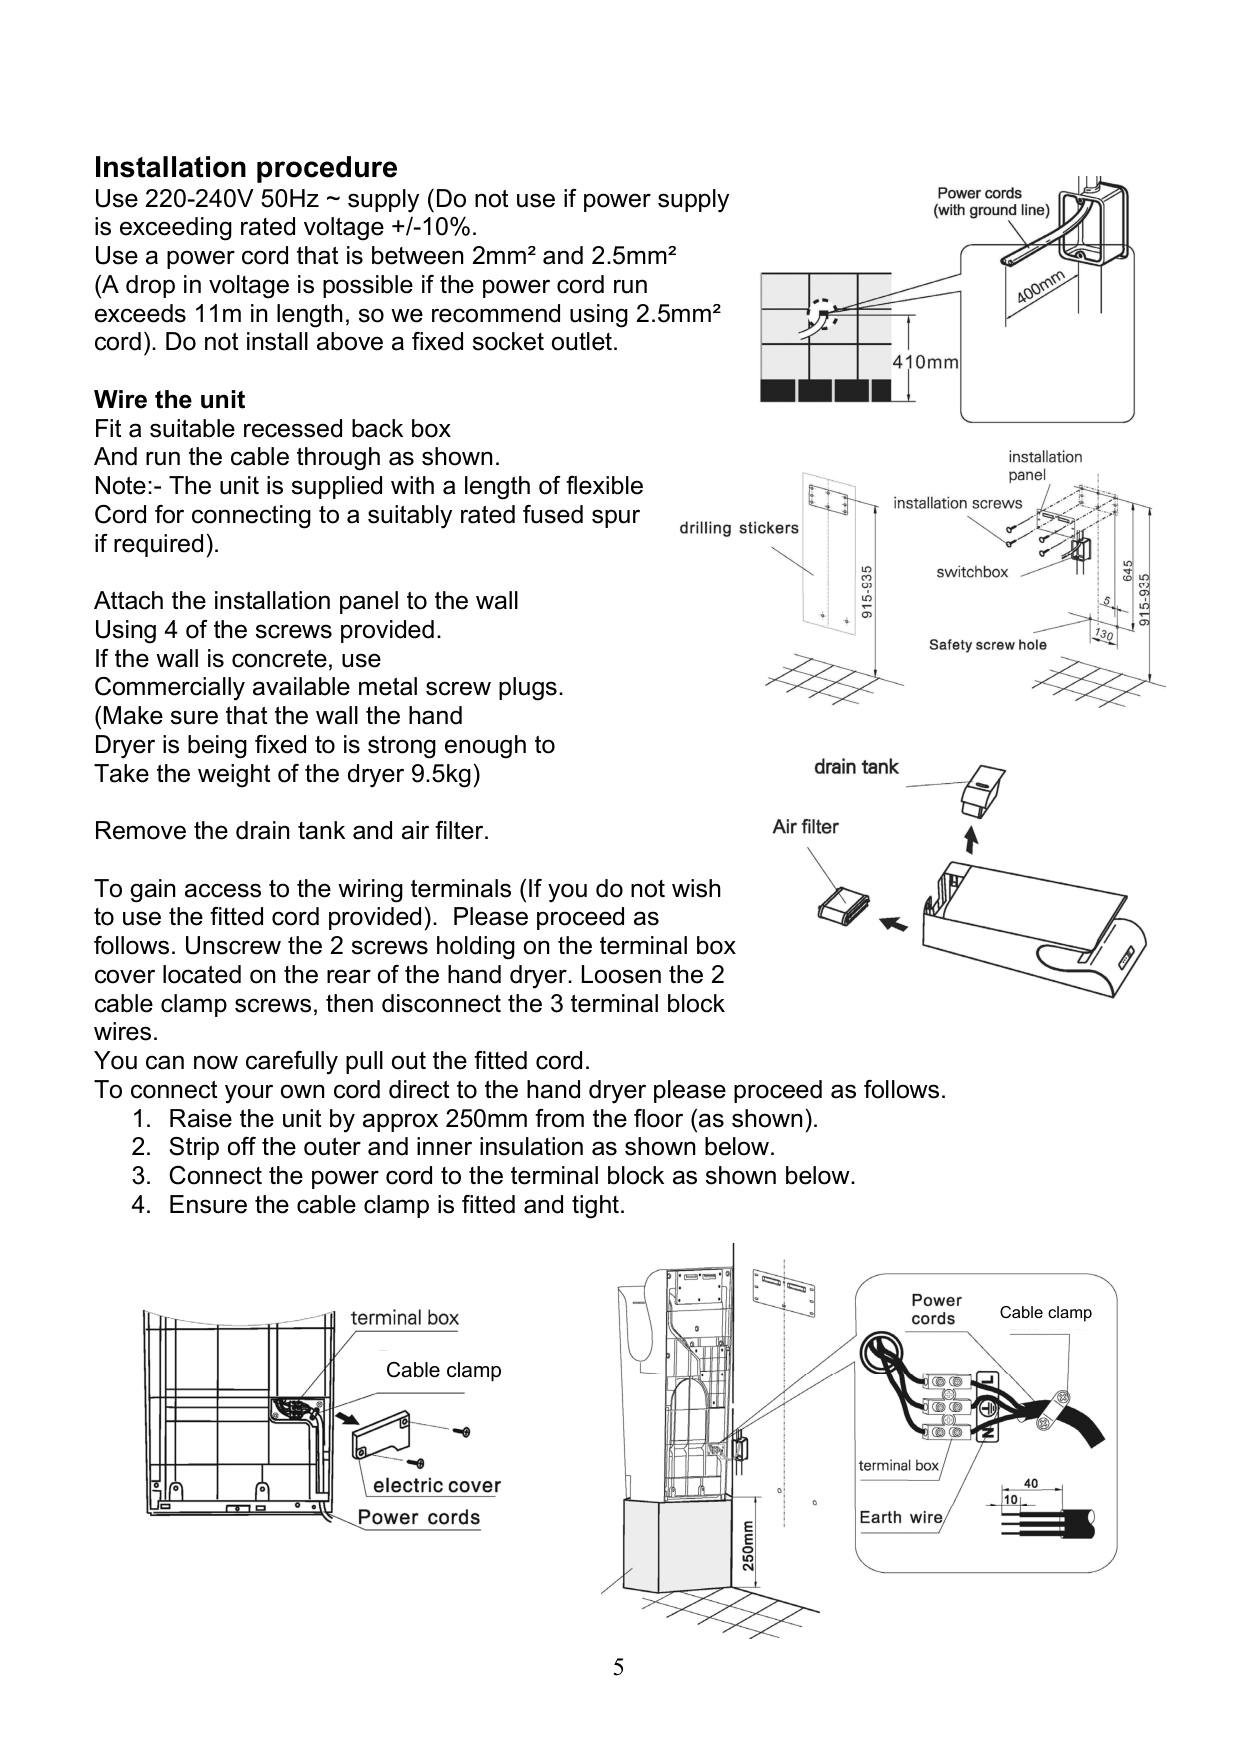


Installation procedure Use 220-240V 50Hz ~ supply (Do not use if power supply is exceeding rated voltage +/-10%. Use a power cord that is between 2mm² and 2.5mm² (A drop in voltage is possible if the power cord run exceeds 11m in length, so we recommend using 2.5mm² cord). Do not install above a fixed socket outlet.

Wire the unit Fit a suitable recessed back box And run the cable through as shown. Note:- The unit is supplied with a length of flexible Cord for connecting to a suitably rated fused spur if required).


Attach the installation panel to the wall Using 4 of the screws provided. If the wall is concrete, use Commercially available metal screw plugs. (Make sure that the wall the hand Dryer is being fixed to is strong enough to Take the weight of the dryer 9.5kg)

Remove the drain tank and air filter. To gain access to the wiring terminals (If you do not wish to use the fitted cord provided). Please proceed as follows. Unscrew the 2 screws holding on the terminal box cover located on the rear of the hand dryer. Loosen the 2 cable clamp screws, then disconnect the 3 terminal block wires. You can now carefully pull out the fitted cord. To connect your own cord direct to the hand dryer please proceed as follows.

Cable clamp

Cable clamp


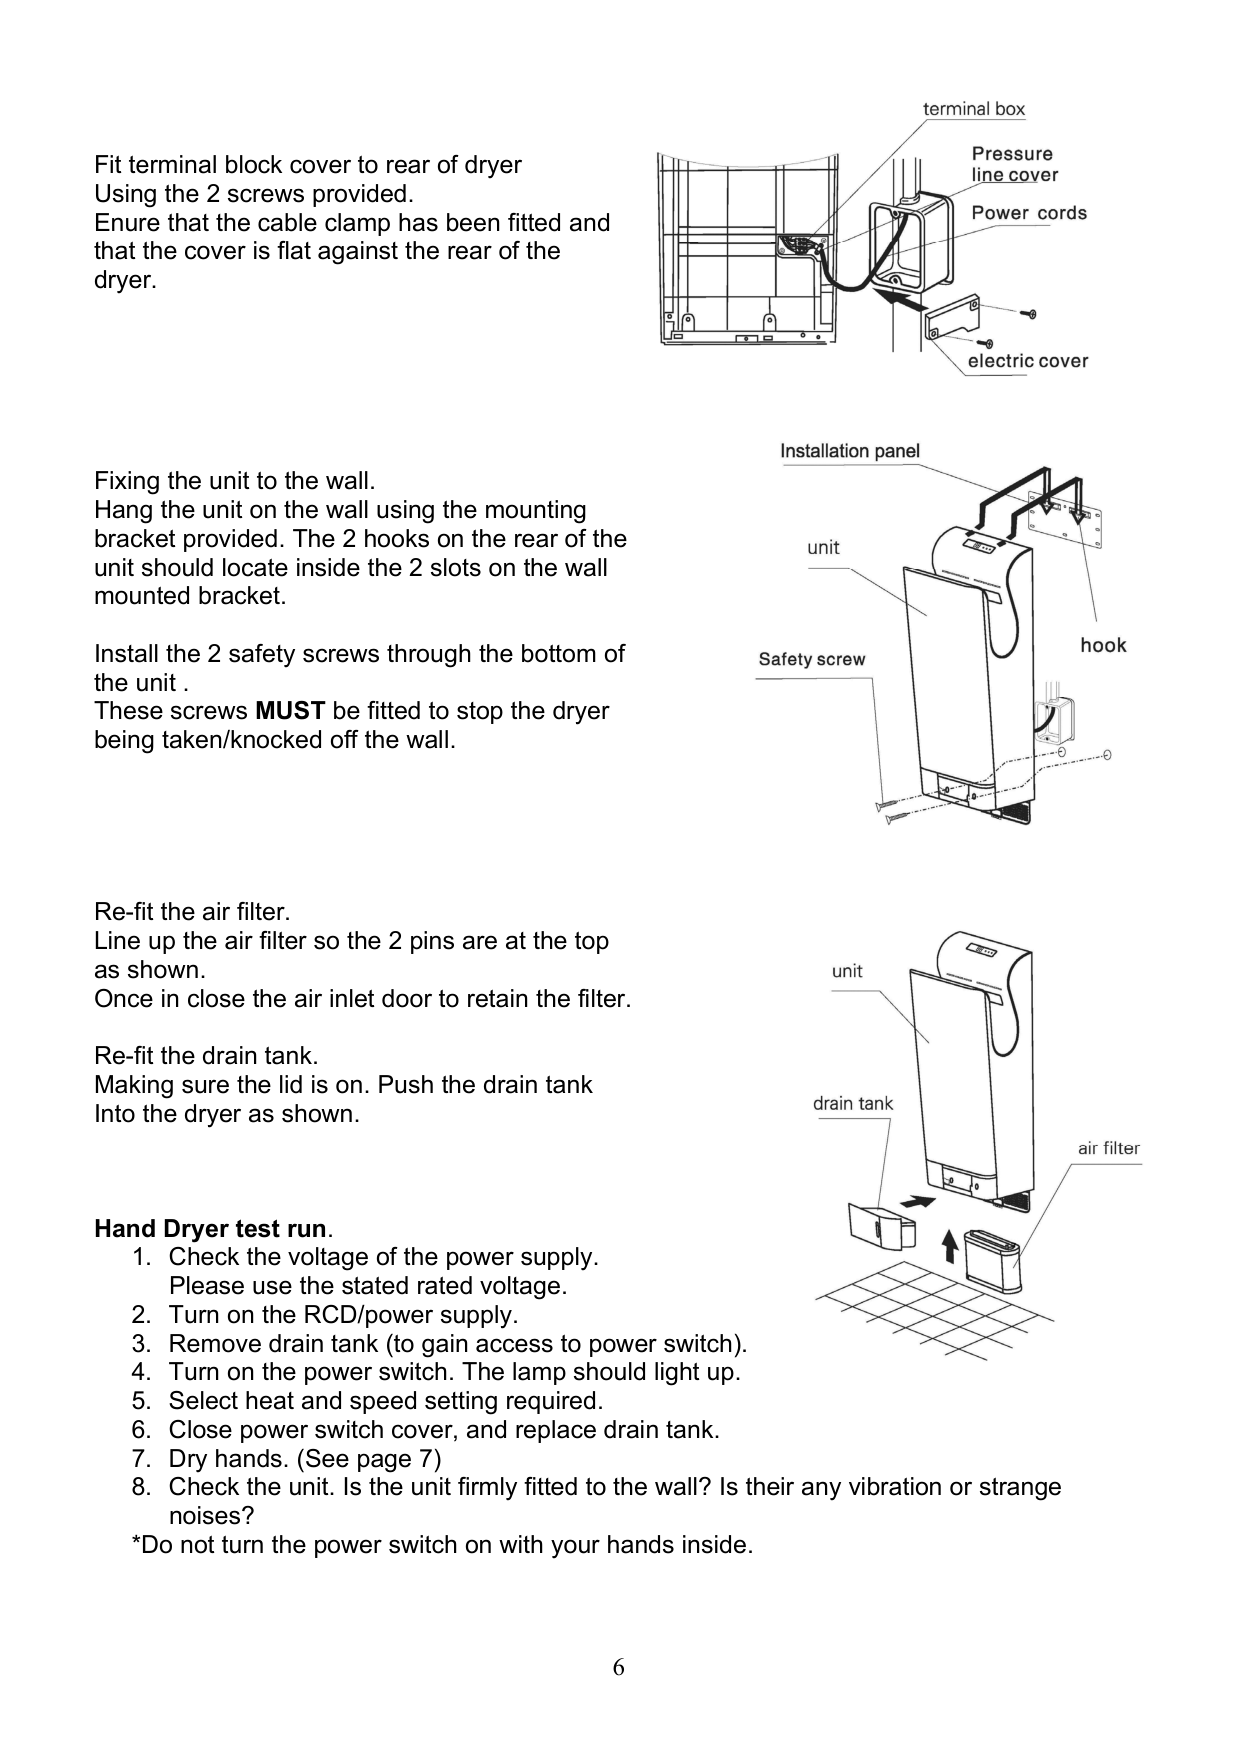
Fit terminal block cover to rear of dryer Using the 2 screws provided. Enure that the cable clamp has been fitted and that the cover is flat against the rear of the dryer.


Fixing the unit to the wall. Hang the unit on the wall using the mounting bracket provided. The 2 hooks on the rear of the unit should locate inside the 2 slots on the wall mounted bracket.
Install the 2 safety screws through the bottom of the unit . These screws MUST be fitted to stop the dryer being taken/knocked off the wall.


Re-fit the air filter. Line up the air filter so the 2 pins are at the top as shown. Once in close the air inlet door to retain the filter.

Re-fit the drain tank. Making sure the lid is on. Push the drain tank Into the dryer as shown.

Hand Dryer test run.
*Do not turn the power switch on with your hands inside.
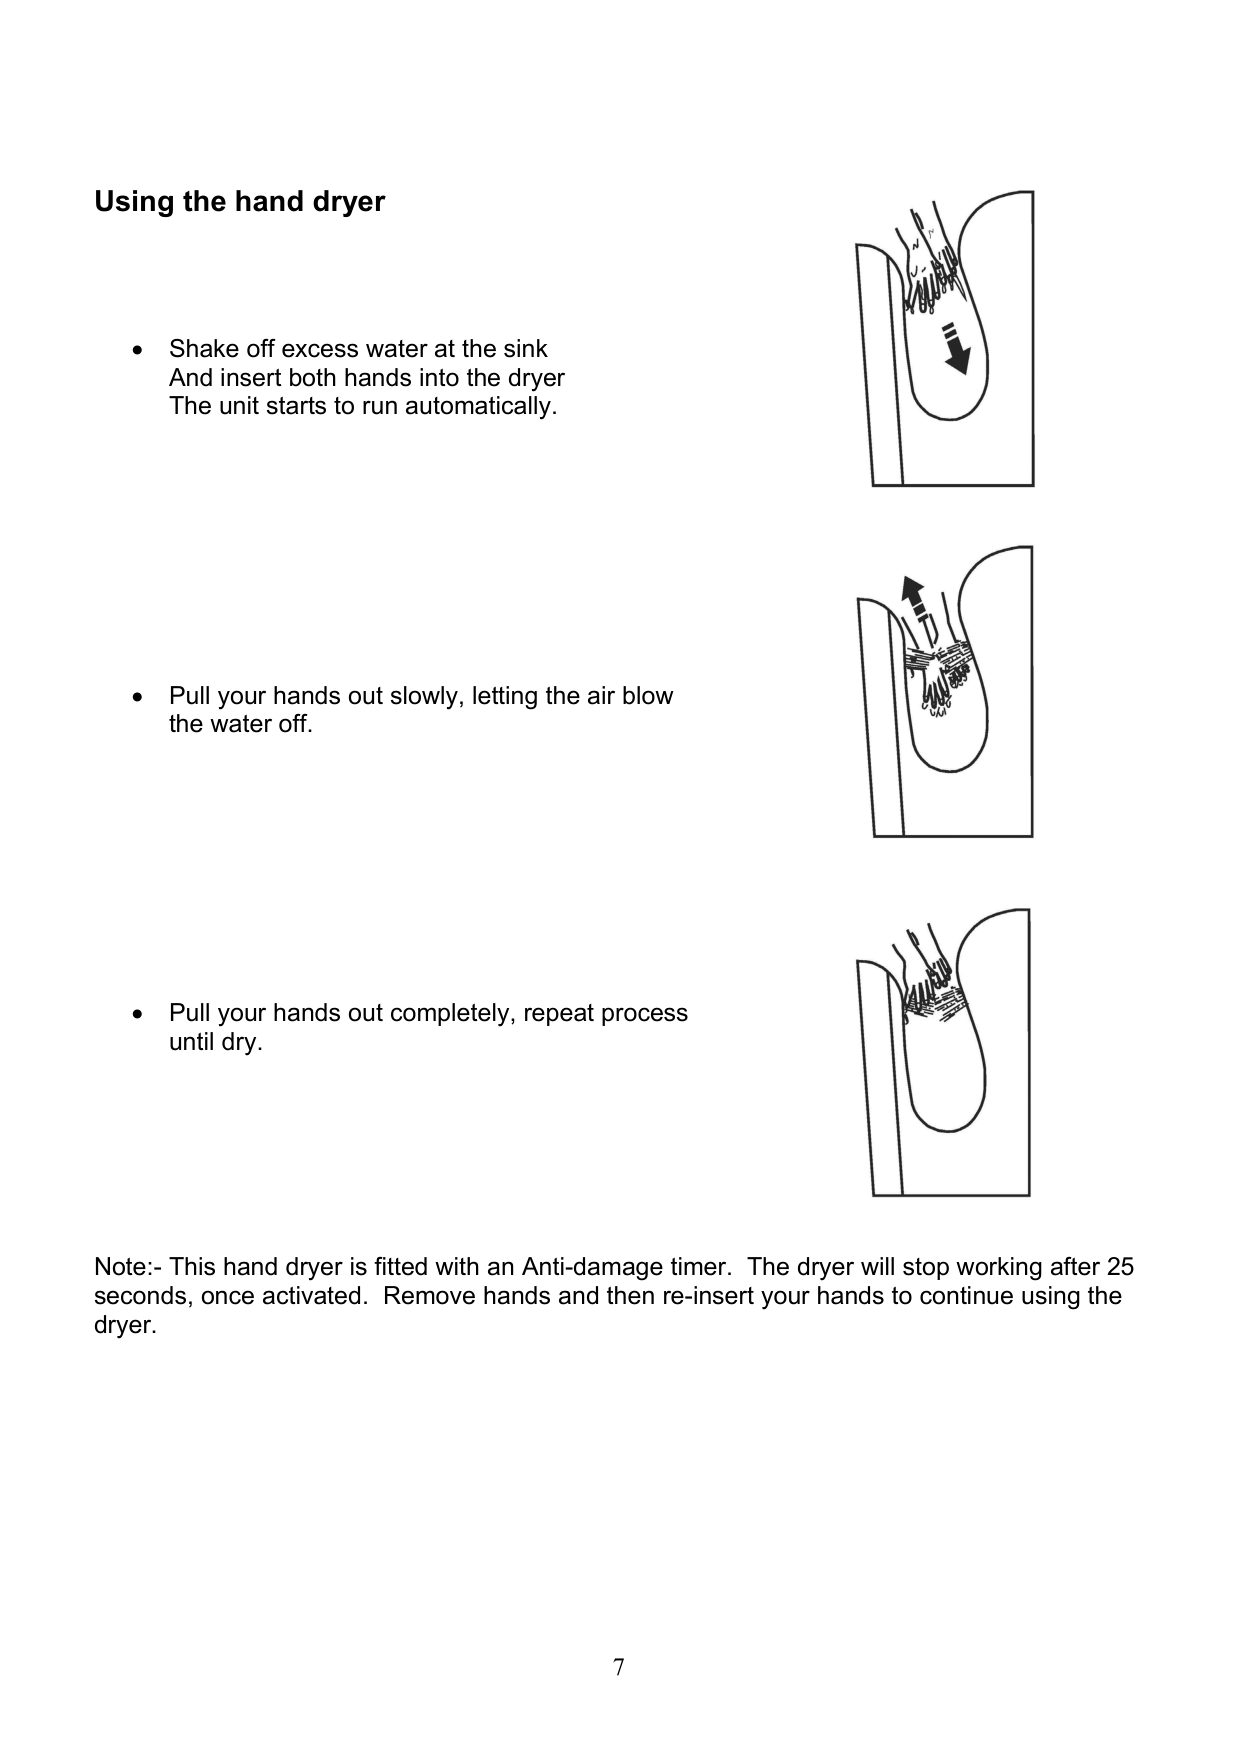
Using the hand dryer


Note:- This hand dryer is fitted with an Anti-damage timer. The dryer will stop working after 25 seconds, once activated. Remove hands and then re-insert your hands to continue using the dryer.
Self-check indicator
When a malfunction or error occurs, the self-check indicator located on the top of the dryer “check” will either light up or flash. Turn off the power switch, wait about 40 seconds until all the indicators go off, and then turn the dryer back on. If the indicator still lights up or flashes, turn off the unit, Isolate the dryer from the mains supply and contact a service engineer.
Routine Cleaning & Maintenance of the hand dryer
Warning:The Hand dryer must be isolated from the power supply before any cleaning and maintenance takes place. Cleaning the body of the hand dryer


Caution always wear suitable gloves when cleaning
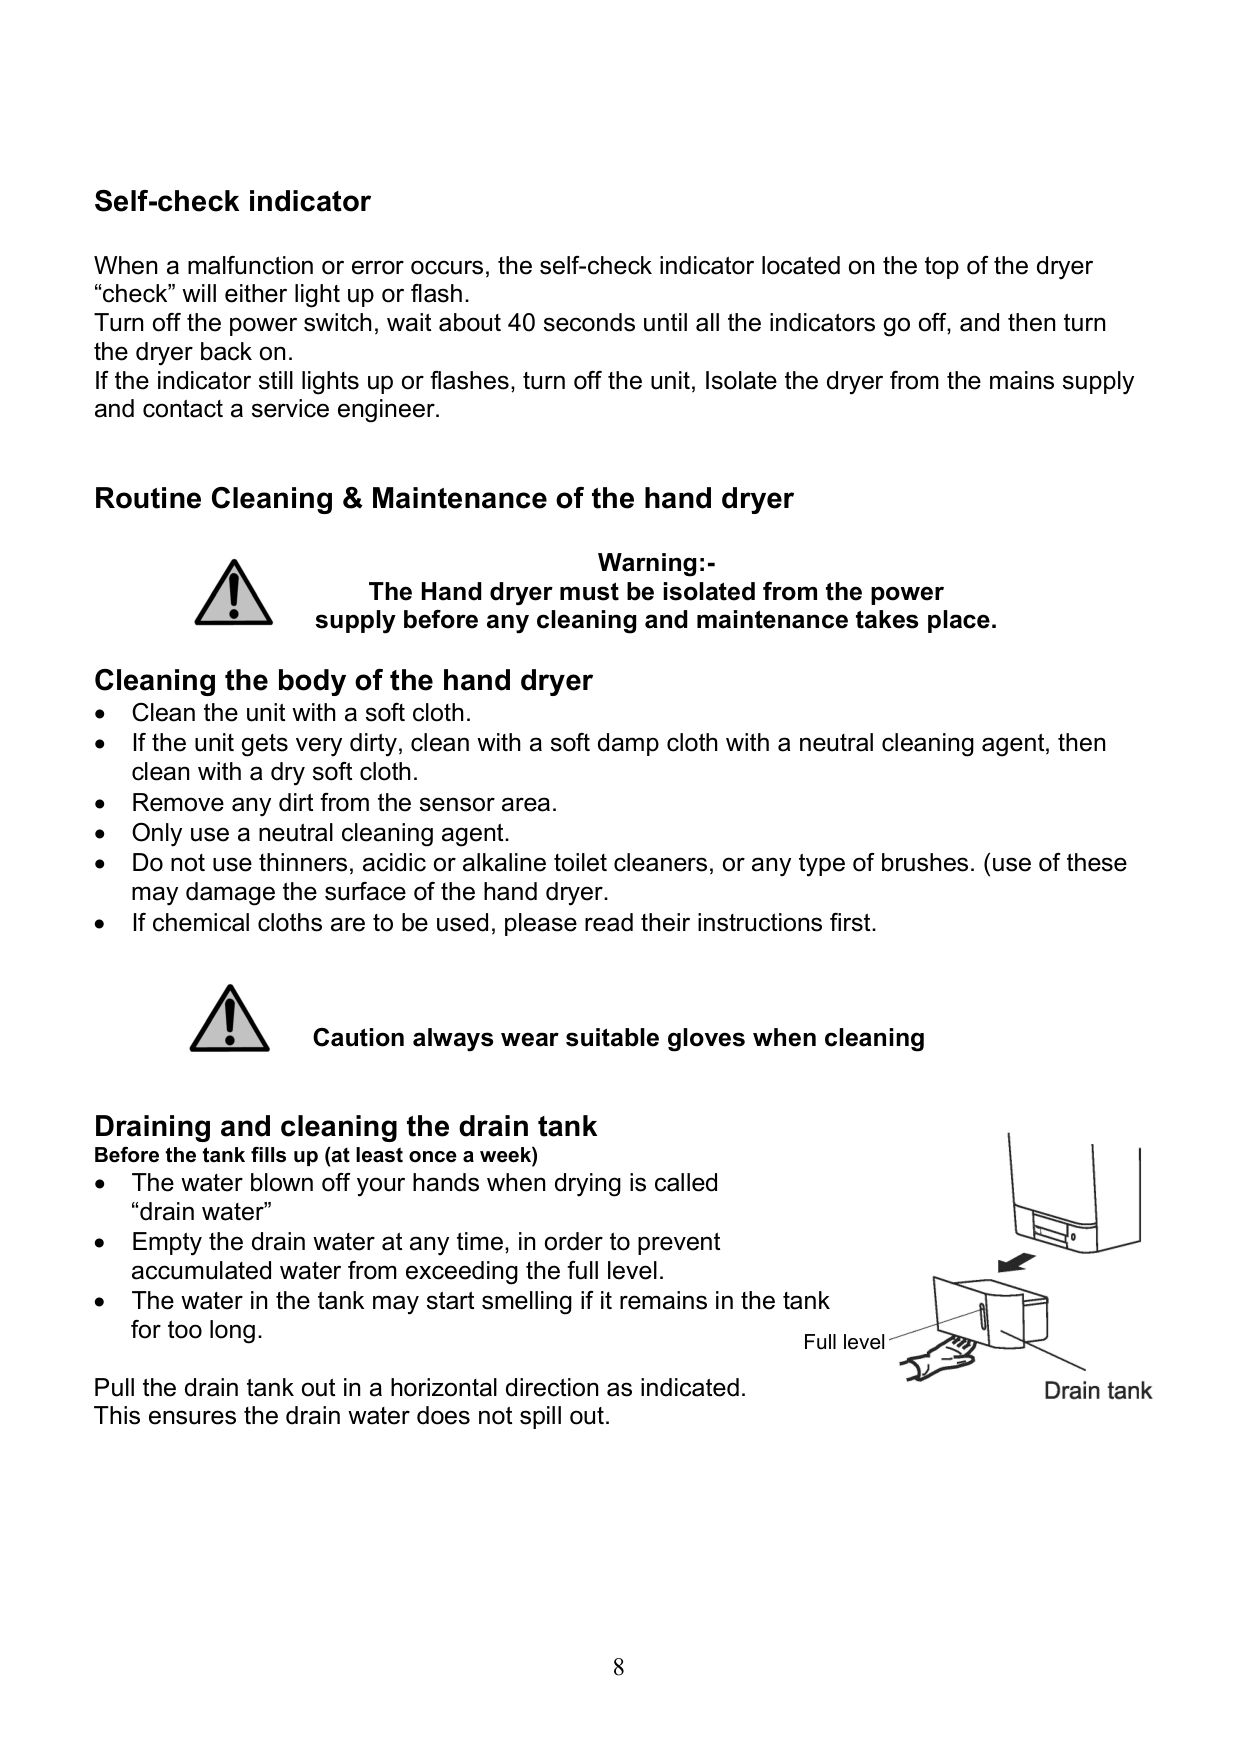
Draining and cleaning the drain tank Before the tank fills up (at least once a week)

Full level
Pull the drain tank out in a horizontal direction as indicated. This ensures the drain water does not spill out.
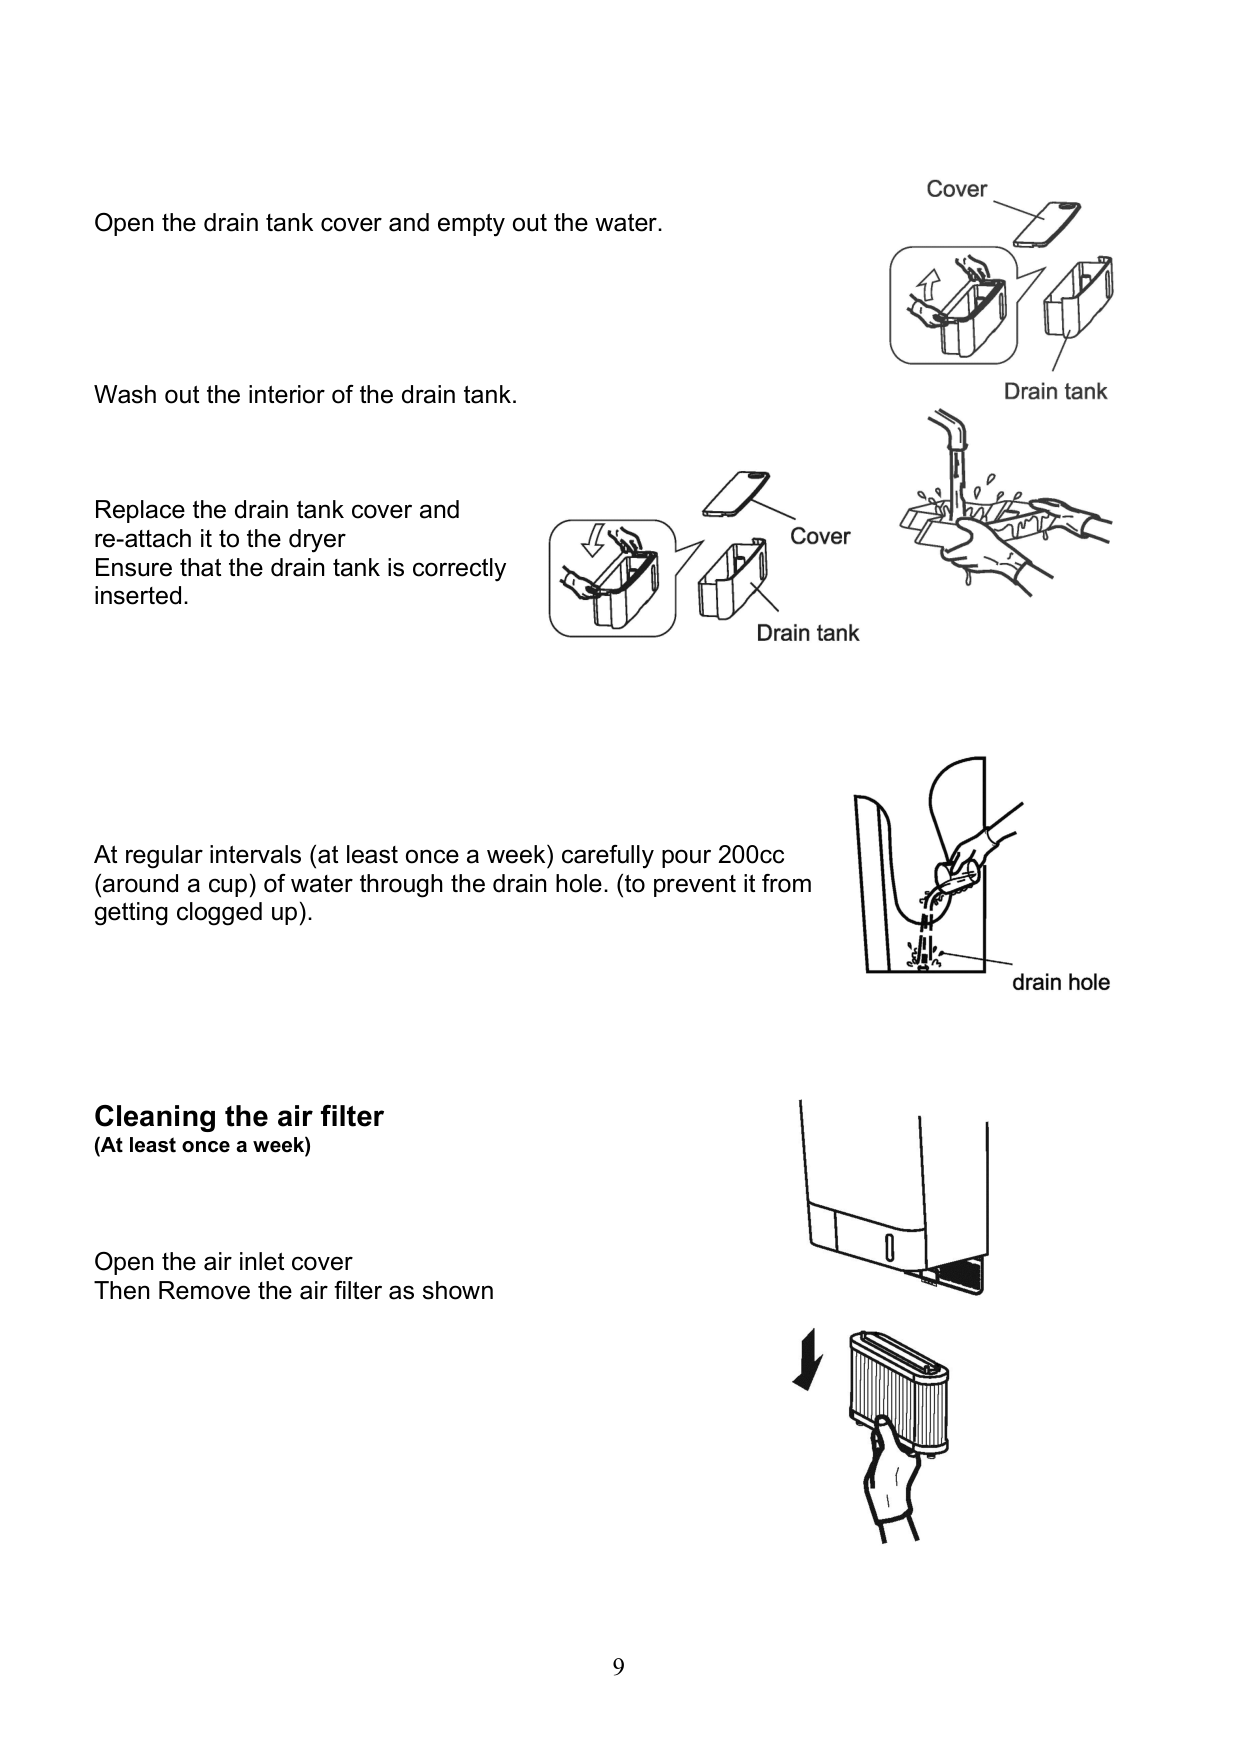
Open the drain tank cover and empty out the water.
Wash out the interior of the drain tank.
Replace the drain tank cover and re-attach it to the dryer Ensure that the drain tank is correctly inserted.


At regular intervals (at least once a week) carefully pour 200cc (around a cup) of water through the drain hole. (to prevent it from getting clogged up).

Cleaning the air filter (At least once a week)
Open the air inlet cover Then Remove the air filter as shown

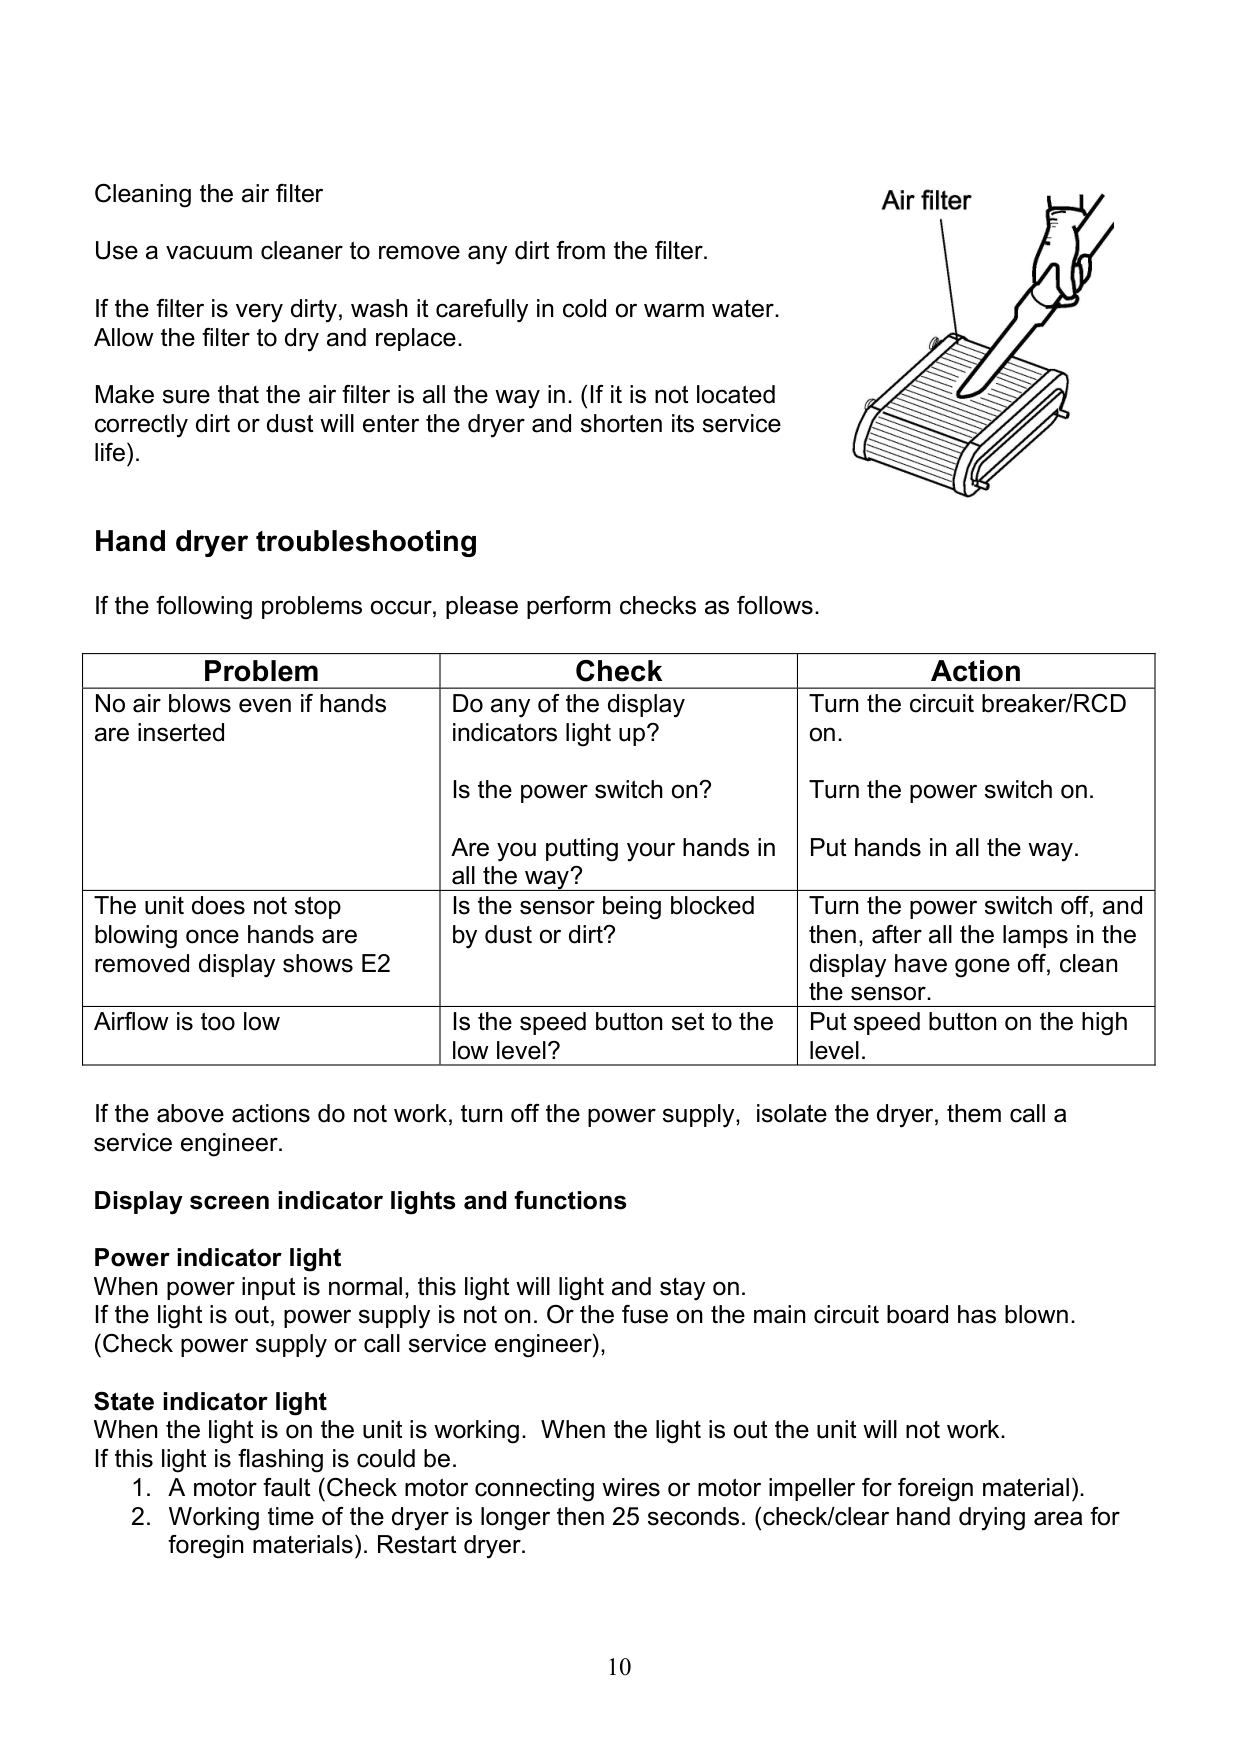
Cleaning the air filter Use a vacuum cleaner to remove any dirt from the filter. If the filter is very dirty, wash it carefully in cold or warm water. Allow the filter to dry and replace. Make sure that the air filter is all the way in. (If it is not located correctly dirt or dust will enter the dryer and shorten its service life).
Hand dryer troubleshooting

If the following problems occur, please perform checks as follows.
|Problem|Check|Action| |---|---|---| |No air blows even if hands are inserted|Do any of the display indicators light up?
Is the power switch on? Are you putting your hands in all the way?|Turn the circuit breaker/RCD on.
Turn the power switch on. Put hands in all the way.| |The unit does not stop blowing once hands are removed display shows E2|Is the sensor being blocked by dust or dirt?|Turn the power switch off, and then, after all the lamps in the display have gone off, clean the sensor.|
|Airflow is too low|Is the speed button set to the low level?|Put speed button on the high level.|
If the above actions do not work, turn off the power supply, isolate the dryer, them call a service engineer.
Display screen indicator lights and functions Power indicator light When power input is normal, this light will light and stay on. If the light is out, power supply is not on. Or the fuse on the main circuit board has blown. (Check power supply or call service engineer), State indicator light When the light is on the unit is working. When the light is out the unit will not work. If this light is flashing is could be.
Sterilization indicator light When this light is on the UV lamps within the dryer come on for one hour. (on first power up the lamps will come on for 1 hour, then once every day for an hour). When the light goes out the sterilization work has ended. If the lamp does not come on. The UV emission PCB will need to be checked. Switch off power supply and contact a service engineer.
LED display When the dryer is operating this display will count down to “00” once at “00” the display will flash to indicate that the drying time has finished.
The display may also show the following error messsages.

Disposal This product should not be disposed of with household waste. Please recycle where facilities exist. Check with your local authority for recycling advice.
Supplied by APL
408979 A 0415