HP Laserjet Pro Mfp M128fw
Printers · 10 Q&As

HP Laserjet Pro Mfp M128fw

Ask AI

— answers from the official manual

Answers from the official manual.

Common questions

Common Questions

10 total
Show 4 more questions

Full Manual

12 pages
Page 1

LaserJet Pro MFP M125, M126, M127, M128 入门指南 Getting Started Guide

2

ZHCN 4. 选择一种连接方式并准备安装软件 ......... 2

  • 5. 找到或下载软件安装文件 ........................ 2
  • 6. 安装软件 ................................................... 3
  • 7. 移动和无线打印(可选) ........................ 4
  • 8. 设置通过电子邮件的 HP ePrint(可选) .................................... 4
  • 9. 设置传真(仅限 fn、fp 和 fw 型号 可选) ....................................................... 5
  • 10. 使用扫描功能.......................................... 5 故障排除 ....................................................... 6
  • EN 4. Select a connection method and prepare for software installation ...................................................... 7

  • 5. Locate or download the software installation files ....... 7
  • 6. Install the software ......................................................... 8
  • 7. Mobile and wireless printing (optional) .......................... 9
  • 8. Set up HP ePrint via email (optional) .............................. 9
  • 9. Set up fax (fn, fp, and fw models only -optional) ........ 10
  • 10. Use the scan feature .................................................. 10 Troubleshooting ................................................................ 11
  • *CZ181-90973*
  • *CZ181-90973*
  • #### 重要信息:

    执行打印机硬件设置海报上的

    步骤 1 - 3,然后执行下方的

    ##### 步骤 4。

    |![image 1](c04598558_images/imageFile1.png)| |---|

    #### 4. 选择一种连接方式并准备安装软件

    无线网络连接(仅限 nw、rnw 和 fw 型号) fw 型号

    USB 直接连接打印机和计算机

    请使用 A 接 B 型的 USB 电缆。

  • 1. 要将打印机连接到无线 (Wi-Fi) 网络,请在打印机控制面板 上轻触“无线”按钮。
  • 2. 轻触无线菜单,然后轻触无线设置向导。从 SSID 列表中选 择该网络名称,如果未列出该网络名称,则输入它。
  • 3. 使用键盘输入通行短语,然后轻触确定按钮。
  • 4. 等待打印机建立网络连接。
  • 5. 在打印机控制面板上,轻触“网络”按钮。如果列出 IP 地 址,则已建立网络连接。如果未列出,请等待几分钟,然 后重试。请记下 IP 地址以备安装软件时使用。IP 地址示 例:192.168.0.1
  • 6. 要从计算机进行打印,请继续执行“5. 找到或下载软件 安装文件”。要仅从手机或平板电脑进行打印,请继续执 行“7. 移动和无线打印(可选)”。
  • Windows

  • 1. 对于 Windows 7 或更低版本,安装软件之前请勿连接 USB 电缆。安装过程将适时提示连接电缆。如果已连接电缆, 则安装过程提示连接电缆时,重新启动打印机。
  • 2. 继续执行“5. 找到或下载软件安装文件”。 注:在安装软件期间,选择使用 USB 电缆直接连接此计算 机选项。
  • Mac

  • 1. 对于 Mac,在安装软件之前使用 USB 电缆连接计算机和打 印机。
  • 2. 继续执行“5. 找到或下载软件安装文件”。
  • nw 和 rnw 型号

    Page 2

  • 1. 要将打印机连接到无线 (Wi-Fi) 网络,请务必开启打印机、 接入点和计算机,并将计算机连接到该无线网络。
  • 2. 需要使用 USB 电缆。
  • 3. 拔下连接到打印机的任何 USB 或以太网电缆。
  • 4. 要从计算机进行打印,请继续执行“5. 找到或下载软件安 装文件”。要仅从手机或平板电脑进行打印,请继续执 行“7. 移动和无线打印(可选)”。 注 : 在安装软件期间,选择帮助我首次设置无线连接选项。
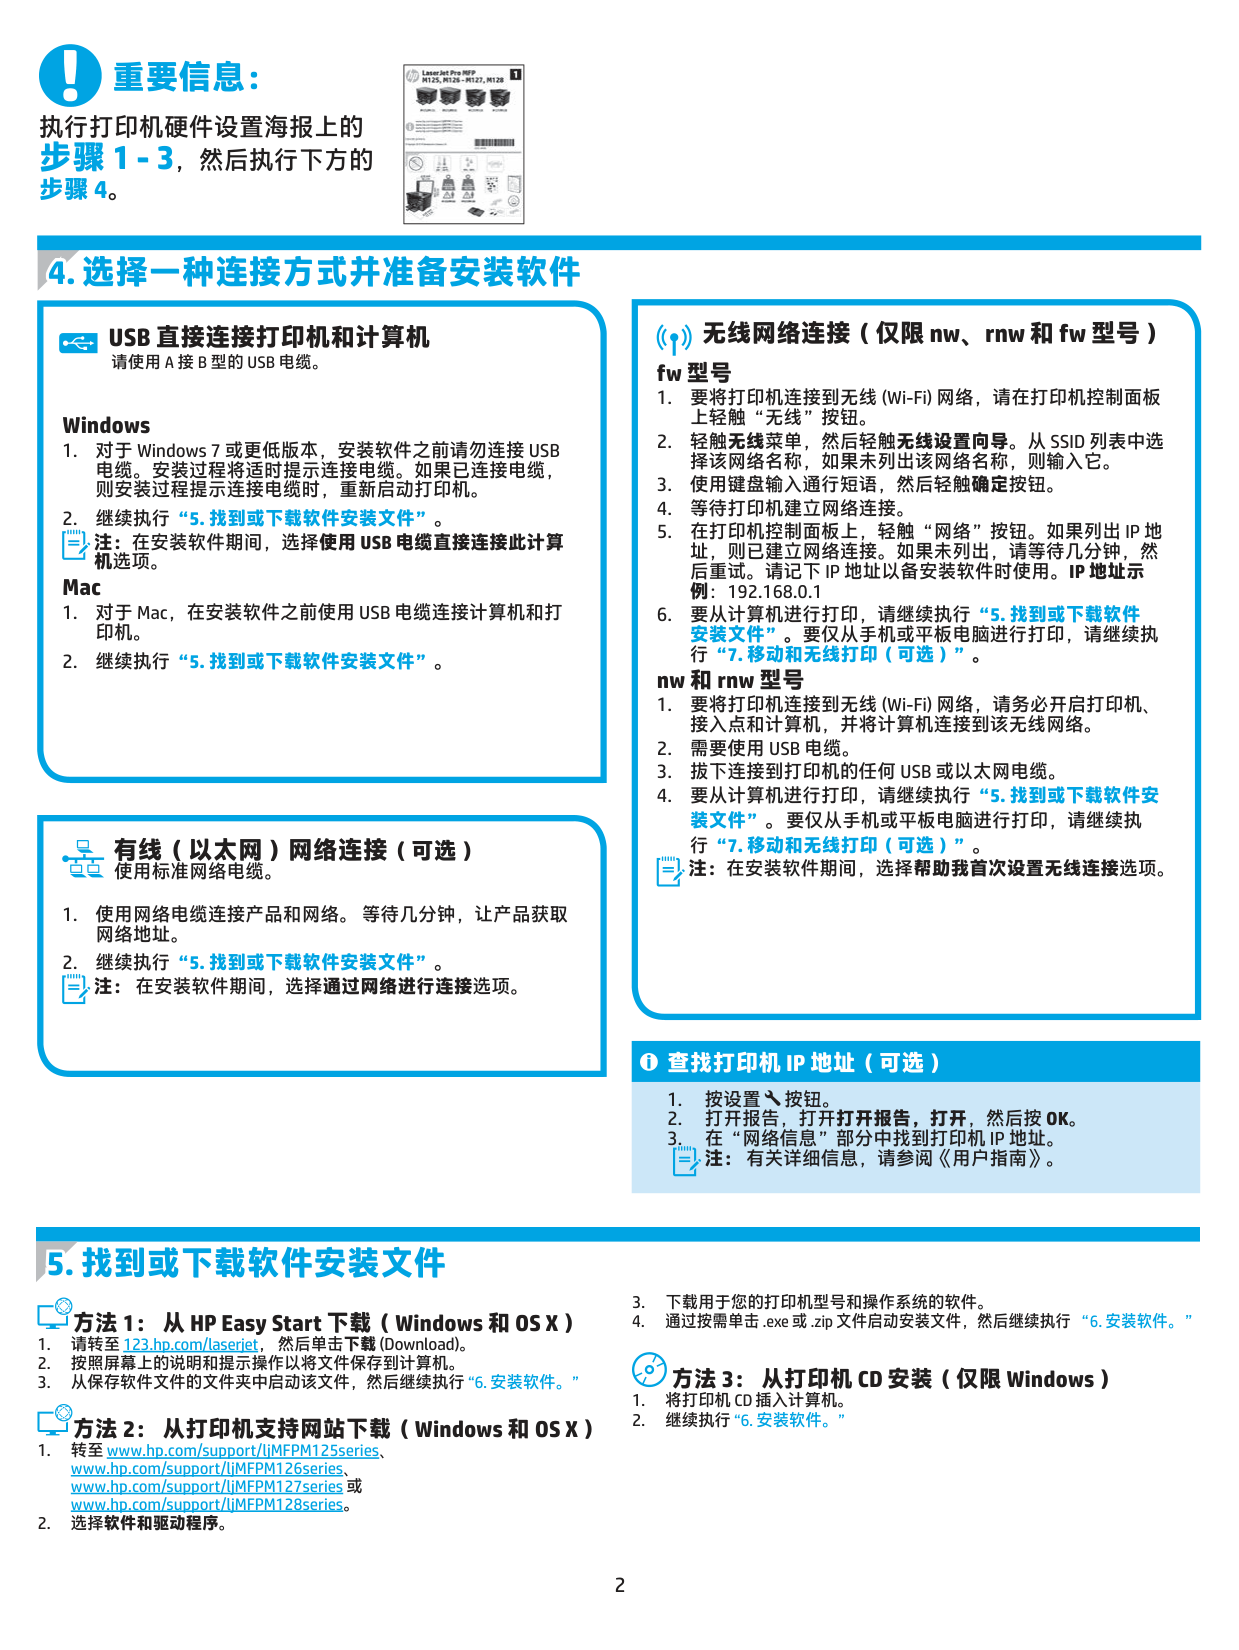
  • 有线(以太网)网络连接(可选) 使用标准网络电缆。

  • 1. 使用网络电缆连接产品和网络。 等待几分钟,让产品获取 网络地址。
  • 2. 继续执行“5. 找到或下载软件安装文件”。 注: 在安装软件期间,选择通过网络进行连接选项。
  • 查找打印机 IP 地址(可选)

  • 1. 按设置 按钮。
  • 2. 打开报告,打开打开报告,打开,然后按 OK。
  • 3. 在“网络信息”部分中找到打印机 IP 地址。 注: 有关详细信息,请参阅《用户指南》。
  • #### 5. 找到或下载软件安装文件

  • 3. 下载用于您的打印机型号和操作系统的软件。
  • 4. 通过按需单击 .exe 或 .zip 文件启动安装文件,然后继续执行 “6. 安装软件。”
  • ###### 方法 1: 从 HP Easy Start 下载(Windows 和 OS X)

  • 1. 请转至 123.hp.com/laserjet, 然后单击下载 (Download)。
  • 2. 按照屏幕上的说明和提示操作以将文件保存到计算机。
  • 3. 从保存软件文件的文件夹中启动该文件,然后继续执行 “6. 安装软件。”
  • ###### 方法 3: 从打印机 CD 安装(仅限 Windows)

  • 1. 将打印机 CD 插入计算机。
  • 2. 继续执行 “6. 安装软件。”
  • ###### 方法 2: 从打印机支持网站下载(Windows 和 OS X)

  • 1. 转至 www.hp.com/support/ljMFPM125series、
  • www.hp.com/support/ljMFPM126series、
  • www.hp.com/support/ljMFPM127series 或
  • www.hp.com/support/ljMFPM128series。
  • 2. 选择软件和驱动程序。
  • #### 6. 安装软件

    ###### Windows 完整解决方案

    ###### OS X 完整解决方案

  • 1. 将打印机 CD 插入计算机,或启动从 Web 下载的软件安装 文件。
  • 2. 软件安装程序检测操作系统语言,然后以相同语言显示 安装程序的主菜单。 从 CD 进行安装时,如果安装程序在 30 秒后未启动,则浏览计算机上的 CD 驱动器并启动名为 SETUP.EXE 的文件。
  • 3. 按照屏幕上的说明安装软件。
  • 4. 提示选择连接类型时,选择连接类型对应的选项:
  • 1. 启动从 Web 下载的软件安装 .dmg 文件。
  • 2. 软件安装程序检测操作系统语言,然后以相同语言显示安 装程序的主菜单。
  • 3. 出现“软件许可协议”屏幕之后,选择安装类型。
  • 4. 按照屏幕上的说明安装软件。
  • 5. 在安装软件过程结束时,使用 HP Utility 设置助手配置打印 机选项。
  • Page 3

  • • 使用 USB 电缆直接连接此计算机
  • • 通过网络进行连接
  • • 帮助我首次设置无线连接
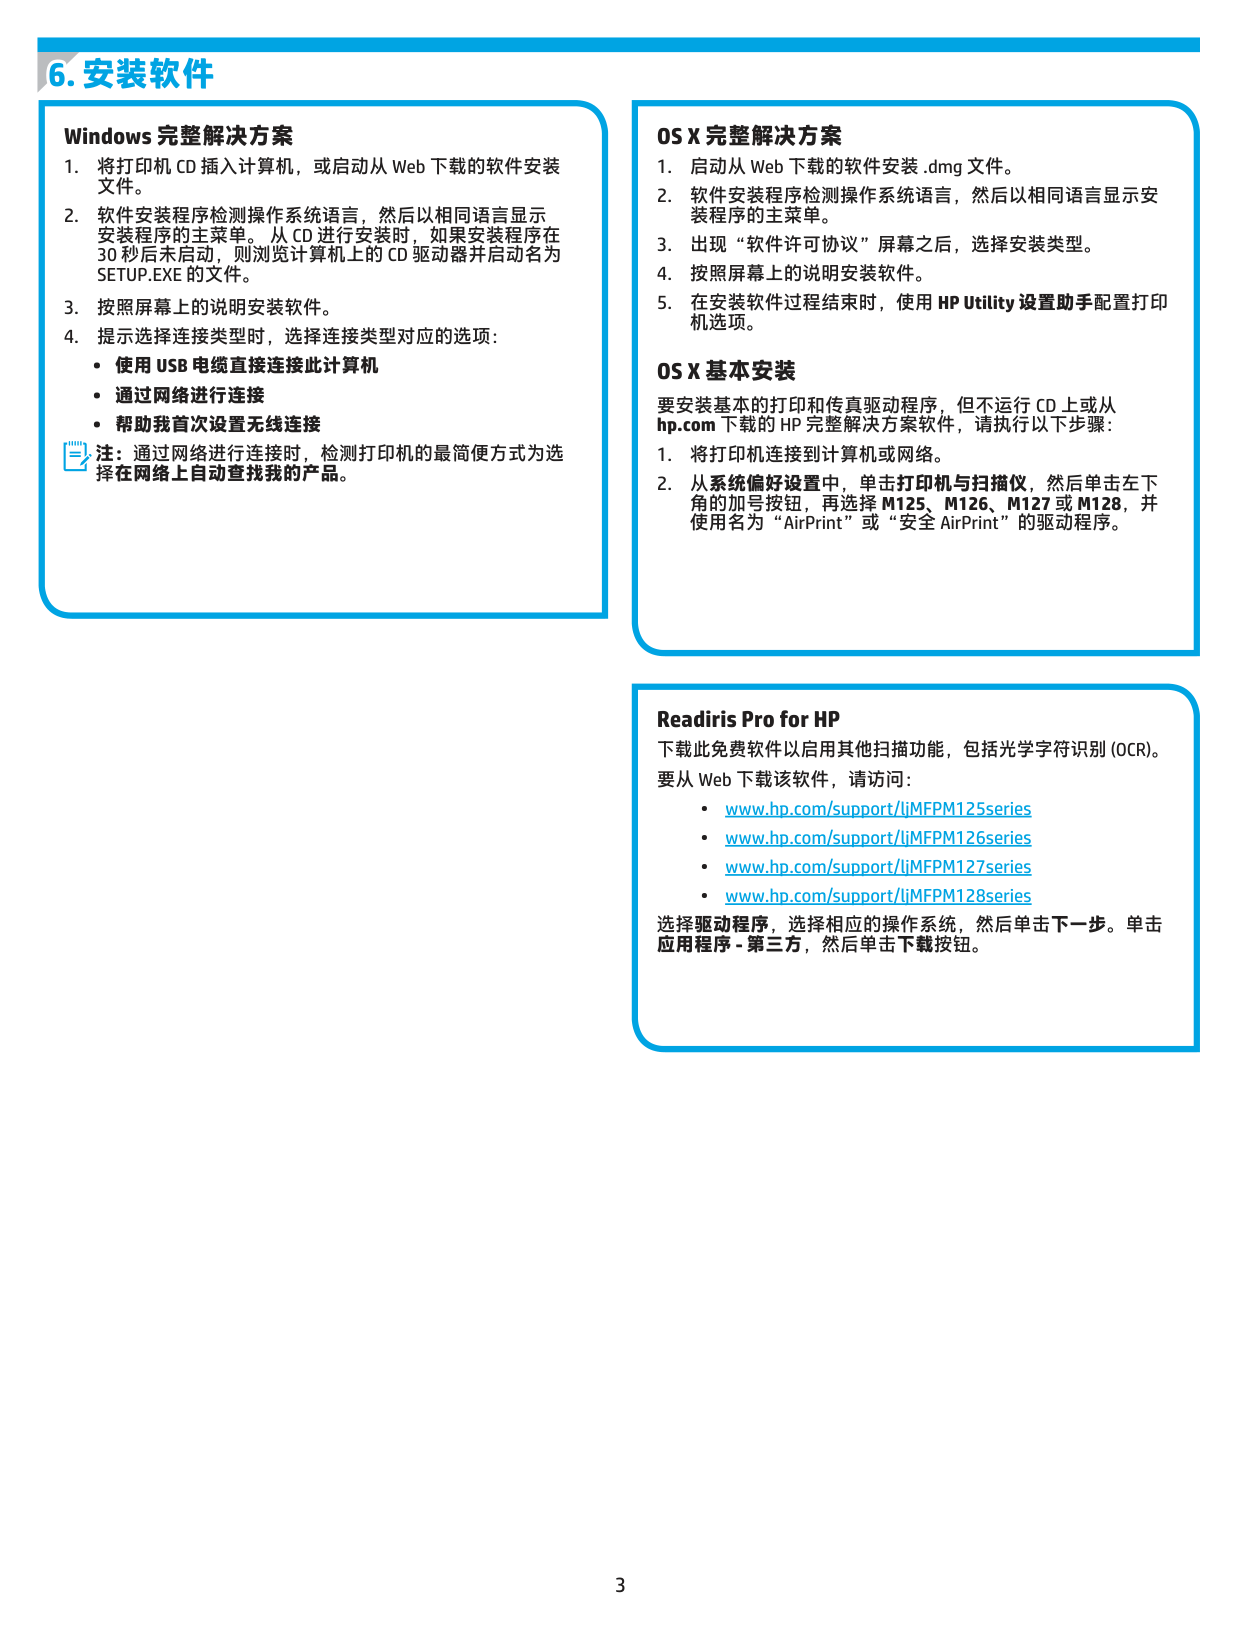
  • OS X 基本安装 要安装基本的打印和传真驱动程序,但不运行 CD 上或从 hp.com 下载的 HP 完整解决方案软件,请执行以下步骤:

    注:通过网络进行连接时,检测打印机的最简便方式为选 择在网络上自动查找我的产品。

  • 1. 将打印机连接到计算机或网络。
  • 2. 从系统偏好设置中,单击打印机与扫描仪,然后单击左下 角的加号按钮,再选择 M125、M126、M127 或 M128,并 使用名为“AirPrint”或“安全 AirPrint”的驱动程序。
  • Readiris Pro for HP 下载此免费软件以启用其他扫描功能,包括光学字符识别 (OCR)。 要从 Web 下载该软件,请访问:

  • • www.hp.com/support/ljMFPM125series
  • • www.hp.com/support/ljMFPM126series
  • • www.hp.com/support/ljMFPM127series
  • • www.hp.com/support/ljMFPM128series
  • 选择驱动程序,选择相应的操作系统,然后单击下一步。单击 应用程序 - 第三方,然后单击下载按钮。

  • 7. 移动和无线打印(可选)
  • 8. 设置通过电子邮件的 HP ePrint(可选)
  • #### 7.1将设备连接到无线网络

    7.2HPWirelessDirect(仅限nw、rnw和fw无线型号) 通过 HP Wireless Direct,无需连接到网络或 Internet,即可从无 线移动设备直接打印到支持 HP Wireless Direct 的打印机。

    要从手机或平板电脑进行打印,请将该设备与打印机连接到同 一无线网络。 Apple iOS 设备 (AirPrint)

    打开要打印的项,然后选择“操作”图标。 依次选择打印、本 打印机、打印。 较新的 Android 设备(4.4 或更高版本) 打开要打印的项,然后选择菜单按钮。 依次选择打印、本打印 机、打印。 某些设备需要从 Google Play 商店下载“HP Print Service 插件” 应用程序。 较旧的 Android 设备(4.3 或更低版本) 从 Google Play 商店下载“HP ePrint”应用程序。 Windows Phone 从 Windows 应用商店下载“HP AiO Remote”应用程序。

    启用 HP Wireless Direct 要从控制面板中设置 HP Wireless Direct,请完成以下步骤: LCD 控制面板

  • 1. 在打印机控制面板上,按设置按钮以打开以下菜单:
  • • 网络设置
  • • “无线”菜单
  • • Wireless Direct
  • 2. 选择开选项,然后按 OK 按钮。 打印机将保存设置,然后使 控制面板返回 Wireless Direct 设置菜单。
  • ######## 触摸屏控制面板

  • 1. 从产品控制面板的主屏幕中,轻触“无线” 按钮,然后打 开以下菜单。
  • • “无线”菜单
  • • Wireless Direct 设置
  • • 开/关
  • 2. 轻触开菜单项。 打印机将保存设置,然后使控制面板返回 Wireless Direct 设置菜单。
  • ##### 详细了解移动打印

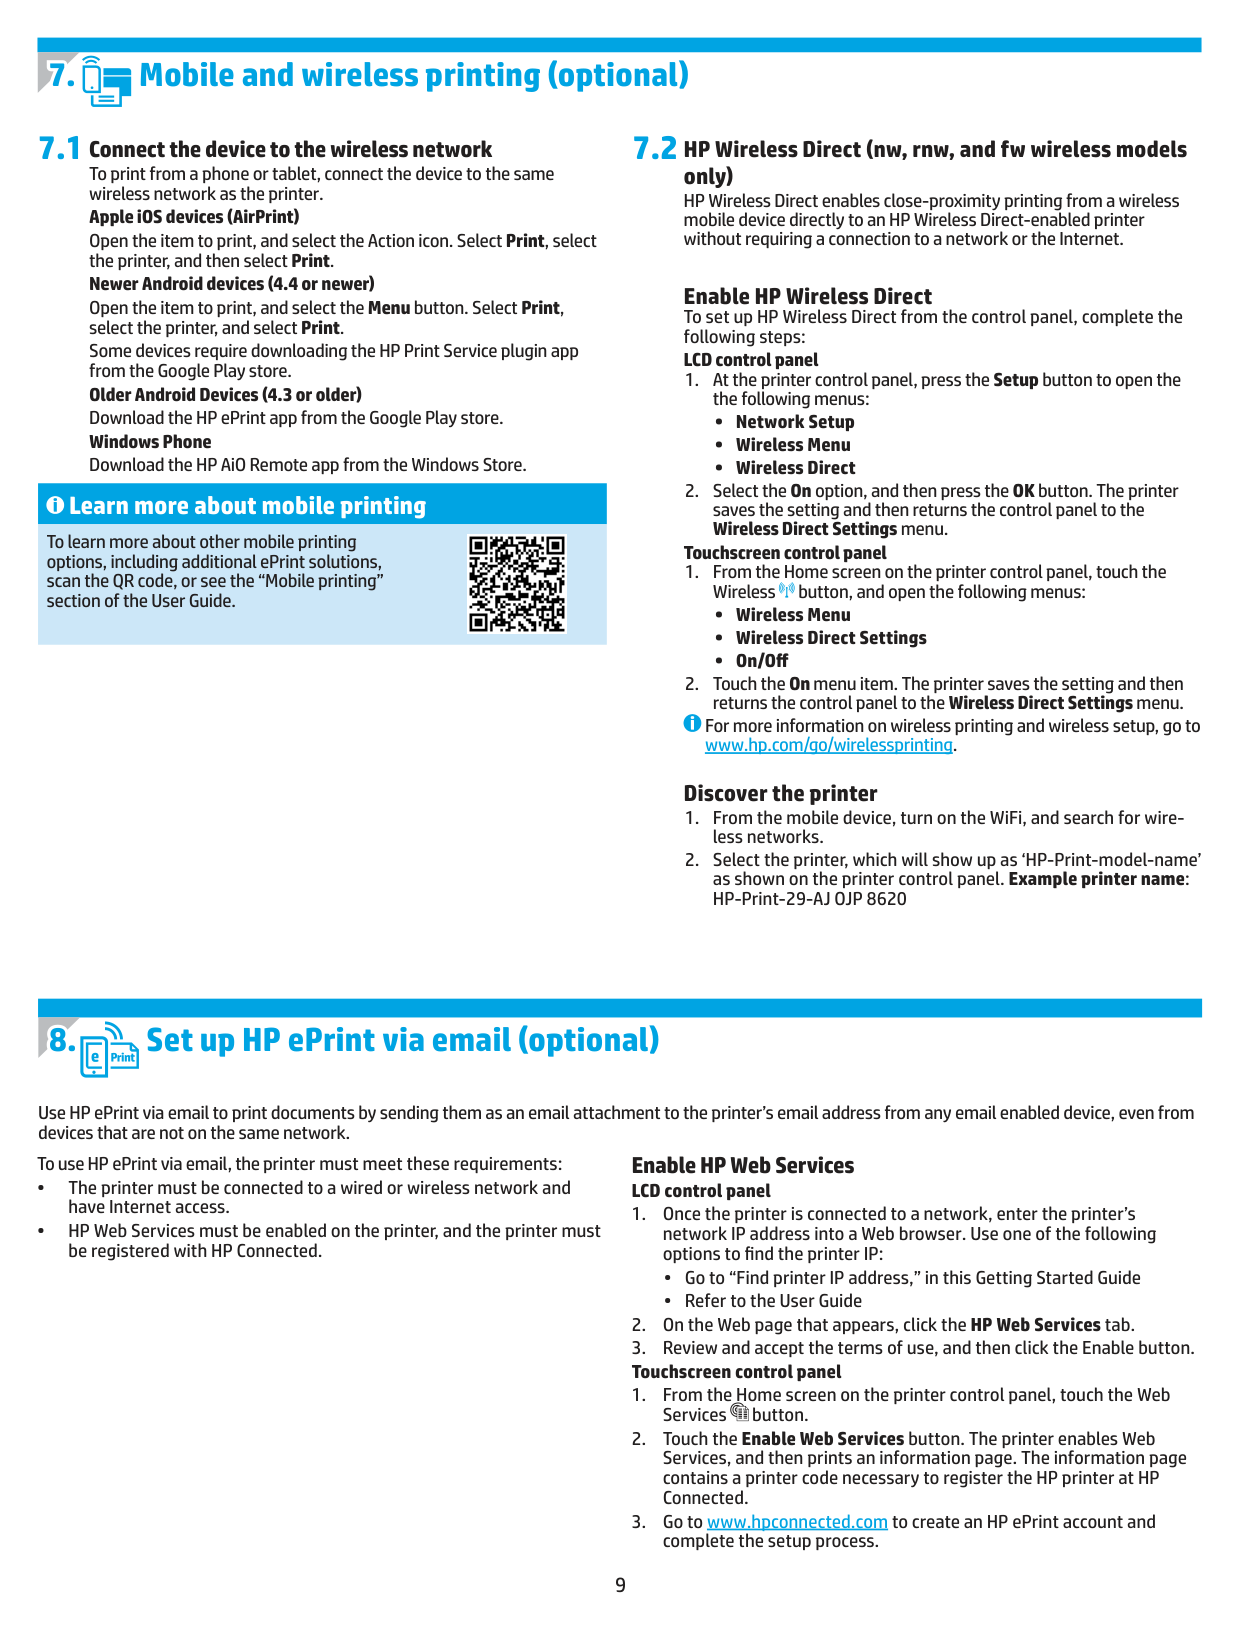
    要详细了解其他移动打印选项(包括其他 ePrint 解决方案),请扫描二维码或参阅 《用户指南》的“移动打印”一节。

    ![image 2](c04598558_images/imageFile2.png)

    有关无线打印和无线设置的详细信息,请访问 www.hp.com/go/wirelessprinting。

    ###### 发现打印机

    Page 4

  • 1. 从移动设备上开启 WiFi,然后搜索无线网络。
  • 2. 选择打印机,它将在打印机控制面板上显示为“HP-Print-型 号”。示例打印机名称:HP-Print-29-AJ OJP 8620
  • 使用通过电子邮件的 HP ePrint 打印文档只需从任何支持电子邮件的设备(甚至可从不在同一网络上的设备)将这些文档作为电子邮件附件发 送到产品的电子邮件地址即可。

    ###### 启用 HP Web 服务 LCD 控制面板

    要使用通过电子邮件的 HP ePrint,打印机必须满足以下这些要求:
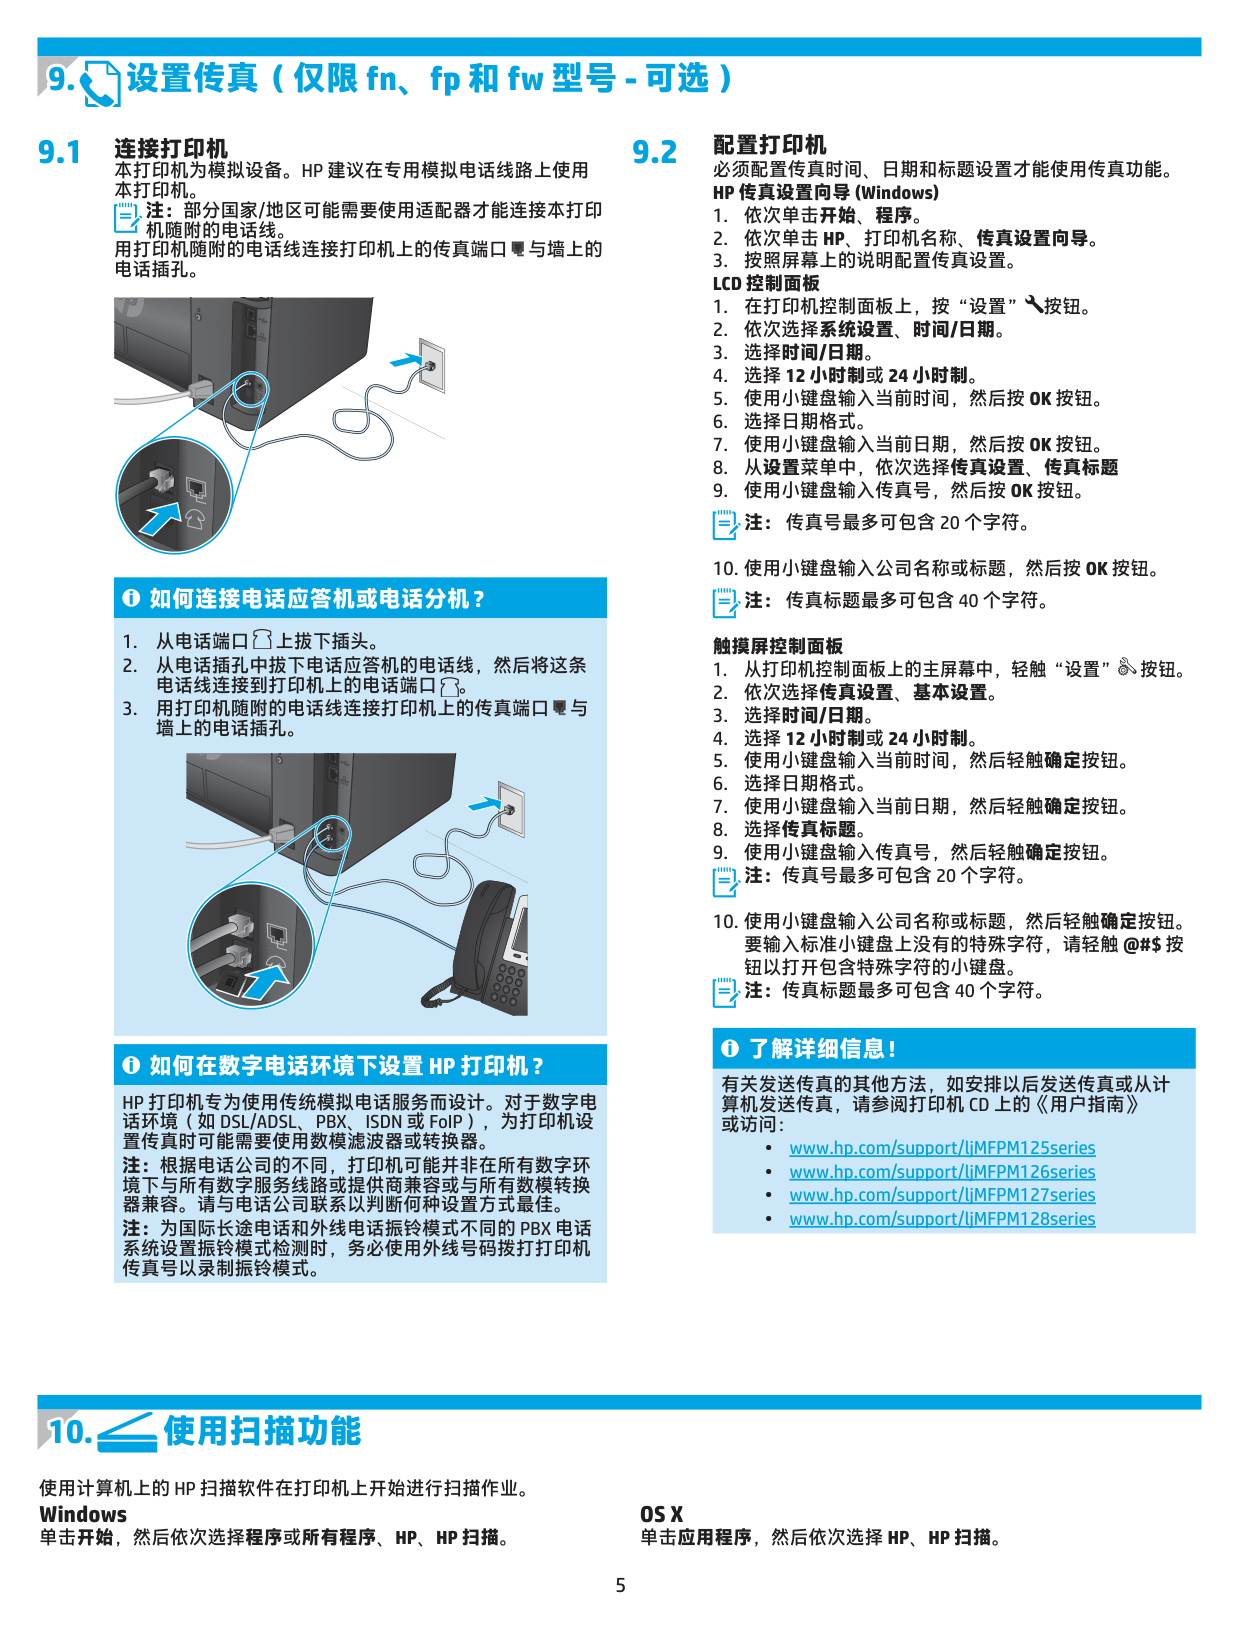
  • • 打印机必须连接到有线或无线网络并可访问 Internet。
  • • 打印机上必须启用 HP Web 服务,并且打印机必须注册到 HP Connected。
  • 1. 打印机连接到网络后,将打印机的网络 IP 地址输入扫 Web 浏览器 中。使用以下某种方式查找打印机 IP 地址:
  • • 转到本《用户指南》中的“查找打印机 IP 地址”。
  • • 参阅《用户指南》。
  • 2. 在随后显示的网页上,单击 HP Web 服务选项卡。
  • 3. 检查并接受使用条款,然后单击“启用”按钮。 触摸屏控制面板
  • 1. 从打印机控制面板上的主屏幕中,轻触“Web 服务” 按钮。
  • 2. 轻触启用 Web 服务按钮。 随后打印机将启用 Web 服务,然后打印 一张信息页。 该信息页包含在 HP Connected 注册 HP 打印机所需 的打印机代码。
  • 3. 访问 www.hpconnected.com 以创建 HP ePrint 帐户并完成设置过程。
  • 9. 设置传真(仅限 fn、fp 和 fw 型号 - 可选)
  • 10. 使用扫描功能
  • #### 9.1 9.2

    配置打印机 必须配置传真时间、日期和标题设置才能使用传真功能。 HP 传真设置向导 (Windows)

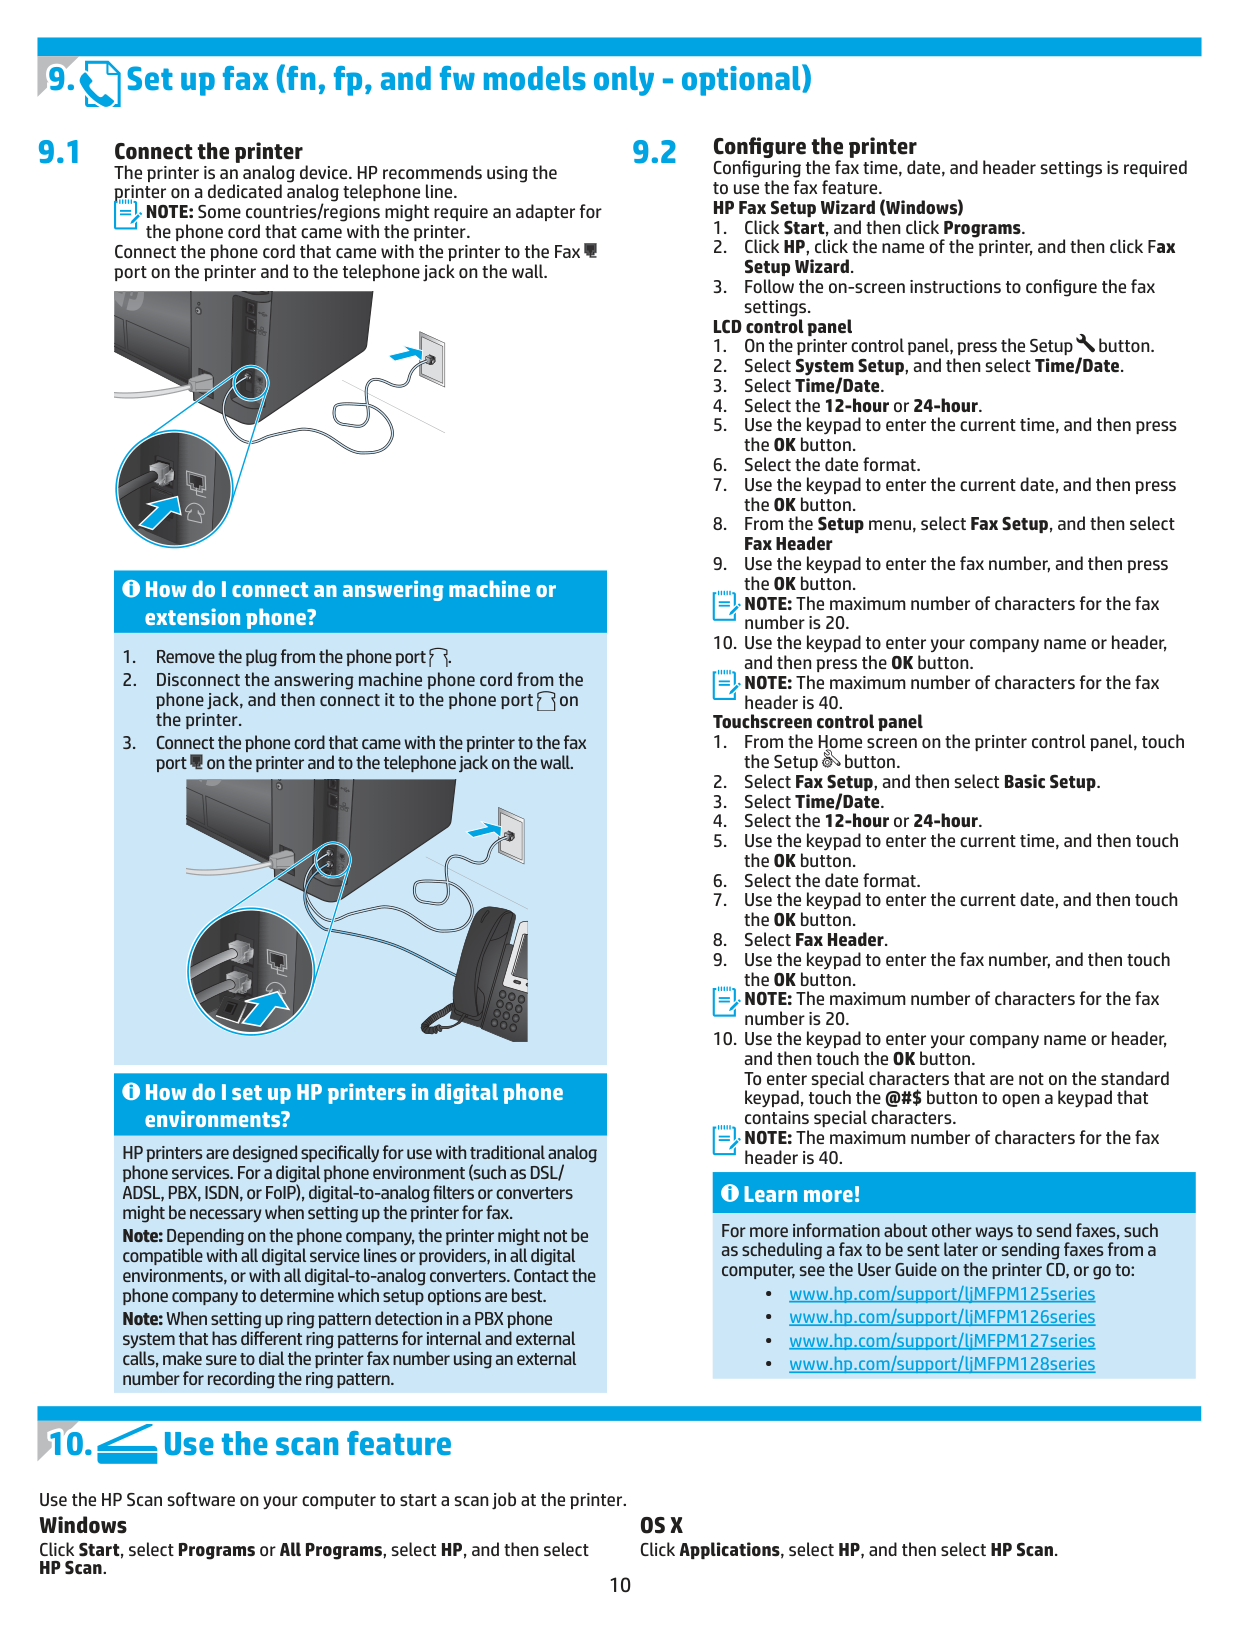
    连接打印机 本打印机为模拟设备。HP 建议在专用模拟电话线路上使用 本打印机。

    注:部分国家/地区可能需要使用适配器才能连接本打印 机随附的电话线。

  • 1. 依次单击开始、程序。
  • 2. 依次单击 HP、打印机名称、传真设置向导。
  • 3. 按照屏幕上的说明配置传真设置。 LCD 控制面板
  • 用打印机随附的电话线连接打印机上的传真端口 与墙上的 电话插孔。

  • 1. 在打印机控制面板上,按“设置” 按钮。
  • 2. 依次选择系统设置、时间/日期。
  • 3. 选择时间/日期。
  • 4. 选择 12 小时制或 24 小时制。
  • 5. 使用小键盘输入当前时间,然后按 OK 按钮。
  • 6. 选择日期格式。
  • 7. 使用小键盘输入当前日期,然后按 OK 按钮。
  • 8. 从设置菜单中,依次选择传真设置、传真标题
  • 9. 使用小键盘输入传真号,然后按 OK 按钮。
  • 注: 传真号最多可包含 20 个字符。

  • 10. 使用小键盘输入公司名称或标题,然后按 OK 按钮。
  • ###### 如何连接电话应答机或电话分机?

    注: 传真标题最多可包含 40 个字符。 触摸屏控制面板

    Page 5

  • 1. 从电话端口 上拔下插头。
  • 2. 从电话插孔中拔下电话应答机的电话线,然后将这条 电话线连接到打印机上的电话端口 。
  • 3. 用打印机随附的电话线连接打印机上的传真端口 与 墙上的电话插孔。
  • 1. 从打印机控制面板上的主屏幕中,轻触“设置” 按钮。
  • 2. 依次选择传真设置、基本设置。
  • 3. 选择时间/日期。
  • 4. 选择 12 小时制或 24 小时制。
  • 5. 使用小键盘输入当前时间,然后轻触确定按钮。
  • 6. 选择日期格式。
  • 7. 使用小键盘输入当前日期,然后轻触确定按钮。
  • 8. 选择传真标题。
  • 9. 使用小键盘输入传真号,然后轻触确定按钮。
  • 注:传真号最多可包含 20 个字符。

  • 10. 使用小键盘输入公司名称或标题,然后轻触确定按钮。 要输入标准小键盘上没有的特殊字符,请轻触 @#$ 按 钮以打开包含特殊字符的小键盘。
  • 注:传真标题最多可包含 40 个字符。

    ###### 了解详细信息!

    ###### 如何在数字电话环境下设置 HP 打印机?

    有关发送传真的其他方法,如安排以后发送传真或从计 算机发送传真,请参阅打印机 CD 上的《用户指南》 或访问:

    HP 打印机专为使用传统模拟电话服务而设计。对于数字电 话环境(如 DSL/ADSL、PBX、ISDN 或 FoIP),为打印机设 置传真时可能需要使用数模滤波器或转换器。

  • • www.hp.com/support/ljMFPM125series
  • • www.hp.com/support/ljMFPM126series
  • • www.hp.com/support/ljMFPM127series
  • • www.hp.com/support/ljMFPM128series
  • 注:根据电话公司的不同,打印机可能并非在所有数字环 境下与所有数字服务线路或提供商兼容或与所有数模转换 器兼容。请与电话公司联系以判断何种设置方式最佳。

    注:为国际长途电话和外线电话振铃模式不同的 PBX 电话 系统设置振铃模式检测时,务必使用外线号码拨打打印机 传真号以录制振铃模式。

    使用计算机上的 HP 扫描软件在打印机上开始进行扫描作业。 Windows 单击开始,然后依次选择程序或所有程序、HP、HP 扫描。

    OS X 单击应用程序,然后依次选择 HP、HP 扫描。

    故障排除

    用户指南 《用户指南》中含有打印机使用和故障排除信息。 可在打印机 CD 和 Web 上找到它: 从网上获得《用户指南》

  • 1. 请访问:
  • • www.hp.com/support/ljMFPM125series
  • • www.hp.com/support/ljMFPM126series
  • • www.hp.com/support/ljMFPM127series
  • • www.hp.com/support/ljMFPM128series
  • 2. 选择相应的语言,如果出现提示,则选择打印机,然后单击用 户指南。
  • 从打印机 CD 获得《用户指南》 对于 Windows,在安装推荐的软件期间,将《用户指南》复制到 计算机。 Windows® XP、Windows Vista® 和 Windows® 7 单击开始,依次选择程序或所有程序、HP、HP 打印机对应的文件 夹、帮助。 Windows® 8 在开始屏幕上,右键单击屏幕上的空白区域,在应用栏上单击所有 应用,单击具有打印机名称的图标,然后选择帮助。 检查固件更新

  • 1. 请访问:
  • • www.hp.com/support/ljMFPM125series
  • • www.hp.com/support/ljMFPM126series
  • • www.hp.com/support/ljMFPM127series
  • • www.hp.com/support/ljMFPM128series
  • Page 6

  • 2. 从列表中选择打印机或类别,然后单击驱动程序。
  • 3. 选择操作系统,然后单击下一步按钮。
  • 4. 选择固件,然后单击下载按钮。
  • 控制面板帮助(仅限 M127fw 和 M128fw 型号) 轻触打印机控制面板上的“帮助” 按钮以访问帮助主题。

    其他支持资源 有关打印机的 HP 全方位帮助,请访问:

  • • www.hp.com/support/ljMFPM125series
  • • www.hp.com/support/ljMFPM126series
  • • www.hp.com/support/ljMFPM127series
  • • www.hp.com/support/ljMFPM128series
  • • 解决问题
  • • 查找高级配置说明
  • • 下载软件更新
  • • 加入支持论坛
  • • 查找保修和监管信息
  • • 移动打印资源
  • ###### 有线(以太网)网络连接(可选)

  • • 确认打印机使用长度合适的电缆连接到正确的网络端口。
  • • 确认网络端口旁的指示灯点亮。
  • • 确认计算机上装有打印驱动程序。
  • • 通过 ping 网络,测试网络连接: Windows 单击开始 > 运行。键入 cmd,然后按 Enter。依次键入 ping、空 格、打印机 IP 地址,然后按 Enter。IP 地址示例:192.168.0.1。 要查找打印机 IP 地址,请参阅“查找打印机 IP 地址”。 OS X 打开“网络实用工具”,然后在 ping 窗格中键入 IP 地址。按 Enter。IP 地址示例:192.168.0.1。要查找打印机 IP 地址,请参 阅“查找打印机 IP 地址”。
  • • 如果窗口显示往返时间,则表明网络运行正常。
  • • 如果 ping 不起作用,则尝试重新启动打印机,然后重新检查所 有连接步骤。
  • ###### 无线网络连接(nw、rnw 和 fw 型号)

  • • 确认未连接网络电缆。 连接网络电缆时,打印机无法连接到无 线网络。
  • • 确认打印机和无线路由器均已开启且通电。 还要确保无线开关 已开启。
  • • 确认打印机在无线网络的覆盖范围内。 对于大多数网络, 打印机与无线接入点(无线路由器)的距离必须在 30 米 (100 英尺)以内。
  • • 确认计算机上装有打印驱动程序。
  • • 确认计算机与打印机连接到同一无线网络。
  • • 对于 Mac,确认无线路由器支持 Bonjour。
  • • 重新启动无线路由器。
  • ###### 传真故障排除(仅限 fn、fp 和 fw 型号) 确认实物连接

  • • 确认用电话线连接打印机背面的传真端口 与墙上的插孔。
  • • 对于外线电话或其他设备,确认用电话线连接打印机背面的电 话端口 与该设备。
  • • 如果外呼电话因检测不到拨号音或线路忙而失败,则连接到其 他电话线。
  • • 对于 IP 传真服务,从打印机控制面板上的传真设置菜单中降低 传真速度并关闭纠错模式。
  • ######## 确认打印机传真设置

  • • 要使用电话公司或服务提供商提供的语音信箱服务,请确保将 打印机的应答前振铃次数设置为少于电话应答机的振铃次数。
  • • 如果将多个电话号码分配给同一条实物电话线,并且这条线路 由多个设备共享,则确保正确设置打印机的特殊振铃。 使用打 印机应答传真但忽略其他振铃类型的设置。
  • • 将“传真速度”设置配置为中(V.17) 或慢(V.29) 也可提高发送传 真的能力。
  • #### IMPORTANT:

    Follow Steps 1 - 3on the printer hardware setup poster, then continue with Step 4 below.

    |![image 3](c04598558_images/imageFile3.png)| |---|

  • 4. Select a connection method and prepare for software installation
  • Page 7

  • 5. Locate or download the software installation files
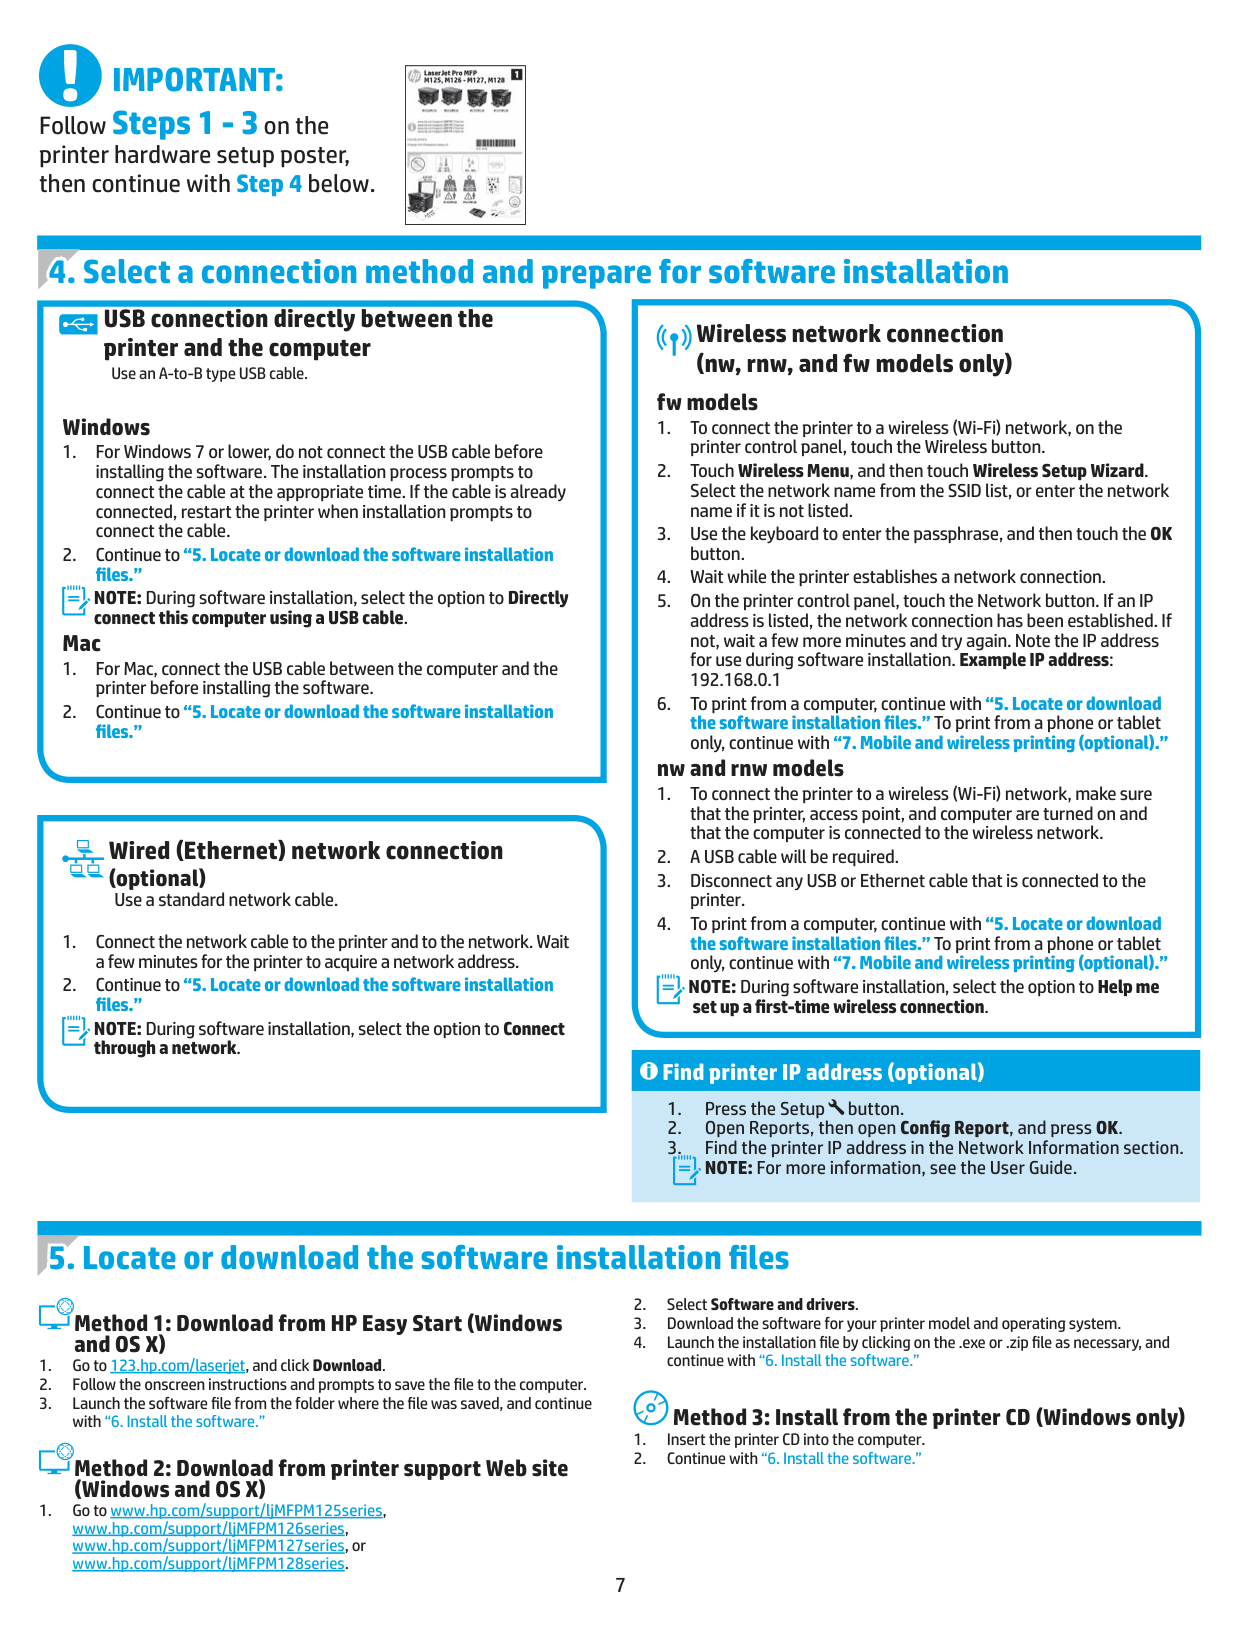
  • ##### USB connection directly between the printer and the computer

    ##### Wireless network connection (nw, rnw, and fw models only)

    Use an A-to-B type USB cable.

    ###### fw models

    ###### Windows

  • 1. To connect the printer to a wireless (Wi-Fi) network, on the printer control panel, touch the Wireless button.
  • 2. Touch Wireless Menu, and then touch Wireless Setup Wizard. Select the network name from the SSID list, or enter the network name if it is not listed.
  • 3. Use the keyboard to enter the passphrase, and then touch the OK button.
  • 4. Wait while the printer establishes a network connection.
  • 5. On the printer control panel, touch the Network button. If an IP address is listed, the network connection has been established. If not, wait a few more minutes and try again. Note the IP address for use during software installation. Example IP address: 192.168.0.1
  • 6. To print from a computer, continue with “5. Locate or download the software installation files.” To print from a phone or tablet only, continue with “7. Mobile and wireless printing (optional).”
  • 1. For Windows 7 or lower, do not connect the USB cable before installing the software. The installation process prompts to connect the cable at the appropriate time. If the cable is already connected, restart the printer when installation prompts to connect the cable.
  • 2. Continue to “5. Locate or download the software installation files.” NOTE: During software installation, select the option to Directly connect this computer using a USB cable.
  • ###### Mac

  • 1. For Mac, connect the USB cable between the computer and the printer before installing the software.
  • 2. Continue to “5. Locate or download the software installation files.”
  • ###### nw and rnw models

  • 1. To connect the printer to a wireless (Wi-Fi) network, make sure that the printer, access point, and computer are turned on and that the computer is connected to the wireless network.
  • 2. A USB cable will be required.
  • 3. Disconnect any USB or Ethernet cable that is connected to the printer.
  • 4. To print from a computer, continue with “5. Locate or download the software installation files.” To print from a phone or tablet only, continue with“7. Mobile and wireless printing (optional).” NOTE: During software installation, select the option to Help me
  • ##### Wired (Ethernet) network connection (optional)

    Use a standard network cable.

  • 1. Connect the network cable to the printer and to the network. Wait a few minutes for the printer to acquire a network address.
  • 2. Continue to “5. Locate or download the software installation files.” NOTE: During software installation, select the option to Connect through a network.
  • set up a first-time wireless connection.

    ###### Find printer IP address (optional)

  • 1. Press the Setup button.
  • 2. Open Reports, then open Config Report, and press OK.
  • 3. Find the printer IP address in the Network Information section. NOTE: For more information, see the User Guide.
  • ###### Method 1: Download from HP Easy Start (Windowsand OS X)

  • 1. Go to 123.hp.com/laserjet, and click Download.
  • 2. Follow the onscreen instructions and prompts to save the file to the computer.
  • 3. Launch the software file from the folder where the file was saved, and continue with “6. Install the software.”
  • ###### Method 2: Download from printer support Web site(Windows and OS X)

  • Go to www.hp.com/support/ljMFPM125series,
  • www.hp.com/support/ljMFPM126series,
  • Page 8

  • www.hp.com/support/ljMFPM127series, or
  • www.hp.com/support/ljMFPM128series.
  • 2. Select Software and drivers.
  • 3. Download the software for your printer model and operating system.
  • 4. Launch the installation file by clicking on the .exe or .zip file as necessary, and continue with “6. Install the software.”
  • ###### Method 3: Install from the printer CD (Windows only)

  • 1. Insert the printer CD into the computer.
  • 2. Continue with “6. Install the software.”
  • #### 6. Install the software

    ###### Windows full solution

    ###### OS X full solution

  • 1. Insert the printer CD into the computer, or launch the software installation file downloaded from the Web.
  • 2. The software installer detects the language of the operating system, and then it displays the main menu of the installation program in the same language. When installing from the CD, if the installer program does not start after 30 seconds, browse the CD drive on the computer and launch the file named SETUP.EXE.
  • 3. Follow the on-screen instructions to install the software.
  • 4. When prompted to select a connection type, select the appropriate option for the type of connection:
  • 1. Launch the software installation .dmg file that you downloaded from the Web.
  • 2. The software installer detects the language of the operating system, and then it displays the main menu of the installation program in the same language.
  • 3. After the Software License Agreement screen, select the installation type.
  • 4. Follow the on-screen instructions to install the software.
  • 5. At the end of the software installation process, use the HP Utility Setup Assistant to configure printer options.
  • • Directly connect this computer using a USB cable
  • • Connect through a network
  • • Help me set up a first-time wireless connection
  • ###### OS X basic installation

    To install basic print and fax drivers without running the HP full solution software from CD or hp.com download, follow these steps:

    NOTE: When connecting through a network, the easiest way to detect the printer is to select Automatically find my product on the network.

  • 1. Connect the printer to the computer or network.
  • 2. From System Preferences, click Printers and Scanners, then the plus button on the bottom left, and select M125, M126, M127, or M128 using the driver named either AirPrint or Secure AirPrint.
  • ###### Readiris Pro for HP

    Download this free software to enable extra scanning features, including Optical Character Recognition (OCR).

    To download the software from the Web, go to:

  • • www.hp.com/support/ljMFPM125series
  • • www.hp.com/support/ljMFPM126series
  • • www.hp.com/support/ljMFPM127series
  • • www.hp.com/support/ljMFPM128series
  • Select Drivers, select the appropriate operating system, and click Next. Click Application - 3rd Party, and then click the Download button.

  • 7. Mobile and wireless printing (optional)
  • 8. Set up HP ePrint via email (optional)
  • #### 7.1Connect the device to the wireless network

    Page 9

    7.2HP Wireless Direct (nw, rnw, and fw wireless models only) HP Wireless Direct enables close-proximity printing from a wireless mobile device directly to an HP Wireless Direct-enabled printer without requiring a connection to a network or the Internet.

    To print from a phone or tablet, connect the device to the same wireless network as the printer. Apple iOS devices (AirPrint)

    Open the item to print, and select the Action icon. Select Print, select the printer, and then select Print. Newer Android devices (4.4 or newer) Open the item to print, and select the Menu button. Select Print, select the printer, and select Print. Some devices require downloading the HP Print Service plugin app from the Google Play store. Older Android Devices (4.3 or older) Download the HP ePrint app from the Google Play store. Windows Phone Download the HP AiO Remote app from the Windows Store.

    Enable HP Wireless Direct To set up HP Wireless Direct from the control panel, complete the following steps: LCD control panel

  • 1. At the printer control panel, press the Setup button to open the the following menus:
  • • Network Setup
  • • Wireless Menu
  • • Wireless Direct
  • 2. Select the On option, and then press the OK button. The printer saves the setting and then returns the control panel to the Wireless Direct Settings menu.
  • ##### Learn more about mobile printing

    To learn more about other mobile printing options, including additional ePrint solutions, scan the QR code, or see the “Mobile printing” section of the User Guide.

    ![image 4](c04598558_images/imageFile4.png)

    ######## Touchscreen control panel

  • 1. From the Home screen on the printer control panel, touch the Wireless button, and open the following menus:
  • • Wireless Menu
  • • Wireless Direct Settings
  • • On/Off
  • 2. Touch the On menu item. The printer saves the setting and then returns the control panel to the Wireless Direct Settings menu.
  • For more information on wireless printing and wireless setup, go to www.hp.com/go/wirelessprinting.

    ###### Discover the printer

  • 1. From the mobile device, turn on the WiFi, and search for wireless networks.
  • 2. Select the printer, which will show up as ‘HP-Print-model-name’ as shown on the printer control panel. Example printer name: HP-Print-29-AJ OJP 8620
  • Use HP ePrint via email to print documents by sending them as an email attachment to the printer’s email address from any email enabled device, even from devices that are not on the same network.

    ###### Enable HP Web Services LCD control panel

    To use HP ePrint via email, the printer must meet these requirements:

  • • The printer must be connected to a wired or wireless network and have Internet access.
  • • HP Web Services must be enabled on the printer, and the printer must be registered with HP Connected.
  • 1. Once the printer is connected to a network, enter the printer’s network IP address into a Web browser. Use one of the following options to find the printer IP:
  • • Go to “Find printer IP address,” in this Getting Started Guide
  • • Refer to the User Guide
  • 2. On the Web page that appears, click the HP Web Services tab.
  • 3. Review and accept the terms of use, and then click the Enable button. Touchscreen control panel
  • 1. From the Home screen on the printer control panel, touch the Web Services button.
  • 2. Touch the Enable Web Services button. The printer enables Web Services, and then prints an information page. The information page contains a printer code necessary to register the HP printer at HP Connected.
  • 3. Go to www.hpconnected.com to create an HP ePrint account and complete the setup process.
  • Page 10

  • 9. Set up fax (fn, fp, and fw models only - optional)
  • 10. Use the scan feature
  • #### 9.1 9.2

    Configure the printer Configuring the fax time, date, and header settings is required to use the fax feature. HP Fax Setup Wizard (Windows)

    Connect the printer The printer is an analog device. HP recommends using the printer on a dedicated analog telephone line.

    NOTE: Some countries/regions might require an adapter for the phone cord that came with the printer.

  • 1. Click Start, and then click Programs.
  • 2. Click HP, click the name of the printer, and then click Fax Setup Wizard.
  • 3. Follow the on-screen instructions to configure the fax settings.
  • Connect the phone cord that came with the printer to the Fax port on the printer and to the telephone jack on the wall.

    ######## LCD control panel

  • 1. On the printer control panel, press the Setup button.
  • 2. Select System Setup, and then select Time/Date.
  • 3. Select Time/Date.
  • 4. Select the 12-hour or 24-hour.
  • 5. Use the keypad to enter the current time, and then press the OK button.
  • 6. Select the date format.
  • 7. Use the keypad to enter the current date, and then press the OK button.
  • 8. From the Setup menu, select Fax Setup, and then select Fax Header
  • 9. Use the keypad to enter the fax number, and then press the OK button.
  • NOTE: The maximum number of characters for the fax number is 20.

  • 10. Use the keypad to enter your company name or header, and then press the OK button.
  • ###### How do I connect an answering machine or extension phone?

  • 1. Remove the plug from the phone port .
  • 2. Disconnect the answering machine phone cord from the phone jack, and then connect it to the phone port on the printer.
  • 3. Connect the phone cord that came with the printer to the fax port on the printer and to the telephone jack on the wall.
  • NOTE: The maximum number of characters for the fax header is 40.

    ######## Touchscreen control panel

  • 1. From the Home screen on the printer control panel, touch the Setup button.
  • 2. Select Fax Setup, and then select Basic Setup.
  • 3. Select Time/Date.
  • 4. Select the 12-hour or 24-hour.
  • 5. Use the keypad to enter the current time, and then touch the OK button.
  • 6. Select the date format.
  • 7. Use the keypad to enter the current date, and then touch the OK button.
  • 8. Select Fax Header.
  • 9. Use the keypad to enter the fax number, and then touch the OK button.
  • NOTE: The maximum number of characters for the fax number is 20.

  • 10. Use the keypad to enter your company name or header, and then touch the OK button. To enter special characters that are not on the standard keypad, touch the @#$ button to open a keypad that contains special characters.
  • ###### How do I set up HP printers in digital phone environments?

    NOTE: The maximum number of characters for the fax header is 40.

    Page 11

    HP printers are designed specifically for use with traditional analog phone services. For a digital phone environment (such as DSL/ ADSL, PBX, ISDN, or FoIP), digital-to-analog filters or converters might be necessary when setting up the printer for fax. Note:Depending on the phone company, the printer might not be compatible with all digital service lines or providers, in all digital environments, or with all digital-to-analog converters. Contact the phone company to determine which setup options are best. Note:When setting up ring pattern detection in a PBX phone

    ###### Learn more!

    For more information about other ways to send faxes, such as scheduling a fax to be sent later or sending faxes from a computer, see the User Guide on the printer CD, or go to:

  • • www.hp.com/support/ljMFPM125series
  • • www.hp.com/support/ljMFPM126series
  • • www.hp.com/support/ljMFPM127series
  • • www.hp.com/support/ljMFPM128series
  • system that has different ring patterns for internal and external calls, make sure to dial the printer fax number using an external number for recording the ring pattern.

    Use the HP Scan software on your computer to start a scan job at the printer. Windows Click Start, select Programs or All Programs, select HP, and then select HP Scan.

    OS X Click Applications, select HP, and then select HP Scan.

    Troubleshooting

    User Guide The User Guide includes printer usage and troubleshooting information. It is available on the printer CD and on the Web: User Guide on the Web

  • 1. Go to:
  • • www.hp.com/support/ljMFPM125series
  • • www.hp.com/support/ljMFPM126series
  • • www.hp.com/support/ljMFPM127series
  • • www.hp.com/support/ljMFPM128series
  • 2. Select the appropriate language, and then select the printer if prompted to, and then click User guides.
  • User Guide from the printer CD For Windows, the User Guide is copied to the computer during the recommended software installation. Windows® XP, Windows Vista®, and Windows® 7 Click Start, select Programs or All Programs, select HP, select the folder for the HP printer, and then select Help. Windows® 8 On the Start screen, right-click an empty area on the screen, click All Apps on the app bar, click the icon with the printer’s name, and then select Help. Check for firmware updates

  • 1. Go to:
  • • www.hp.com/support/ljMFPM125series
  • • www.hp.com/support/ljMFPM126series
  • • www.hp.com/support/ljMFPM127series
  • • www.hp.com/support/ljMFPM128series
  • 2. Select a printer or category from the list, and then click Drivers.
  • 3. Select the operating system, and click the Next button.
  • 4. Select Firmware, and click the Download button.
  • ###### Control panel help (M127fw and M128fw models only) Touch the Help button on the printer control panel to access help topics.

    Additional support resources For HP’s all-inclusive help for the printer, go to:

  • • www.hp.com/support/ljMFPM125series
  • • www.hp.com/support/ljMFPM126series
  • • www.hp.com/support/ljMFPM127series
  • • www.hp.com/support/ljMFPM128series
  • • Solve problems
  • • Find advanced configuration instructions
  • • Download software updates
  • • Join support forums
  • • Find warranty and regulatory information
  • • Mobile printing resources
  • ###### Wired (Ethernet) network connection (optional)

  • • Verify that the printer is attached to the correct network port using a cable of the correct length.
  • • Verify the lights next to the network port are lit.
  • • Verify the print driver is installed on the computer.
  • Page 12

  • • Test the network connection by pinging the network: Windows Click Start > Run. Type cmd, and press Enter. Type ping, type a space, type the printer IP address, and then press Enter. Example IP address: 192.168.0.1. To find the printer IP, see “Find the printer IP address.” OS X Open the Network Utility, and type the IP address in the ping pane. Press Enter. Example IP address: 192.168.0.1. To find the printer IP, see “Find the printer IP address.”
  • • If the window displays round-trip times, the network is working.
  • • If the ping does not work, try restarting the printer and recheck all of the connection steps.
  • ###### Wireless network connection (nw, rnw, and fw models)

  • • Verify that the network cable is not connected. The printer cannot connect to a wireless network when a network cable is connected.
  • • Verify that the printer and wireless router are turned on and have power. Also make sure the wireless switch is turned on.
  • • Verify that the printer is within the range of the wireless network. For most networks, the printer must be within 30 m (100 ft) of the wireless access point (wireless router).
  • • Verify the print driver is installed on the computer.
  • • Verify that the computer and printer connect to the same wireless network.
  • • For Mac, verify that the wireless router supports Bonjour.
  • • Restart the wireless router.
  • ###### Fax troubleshooting (fn, fp, and fw models only) Verify the physical connection

  • • Verify that the phone cord is connected to the fax port on the back of the printer and to the wall jack.
  • • For an extension phone or other additional device, verify the phone cord is connected to the telephone port on the back of the printer and to the device.
  • • If outgoing phone calls fail because no dial tone is detected or the line is busy, connect to a different phone line.
  • • For Fax over IP service, reduce the Fax Speed, and turn off Error Correction Mode from the Fax Settings menu on the printer control panel.
  • ######## Verify the printer fax settings

  • • To use a voice-mail service from the phone company or service provider, make sure that the printer Rings to Answer setting is set to be fewer rings than the telephone answering machine.
  • • If multiple phone numbers are assigned to the same physical phone line and the line is shared by multiple devices, make sure that the printer is set to the correct distinctive ring setting. Use a setting in which the printer answers faxes and ignores other ring types.
  • • Configuring the Fax Speed setting to Medium(V.17) or Slow(V.29) can also improve your ability to send a fax.
  • © Copyright 2015 HP Development Company, L.P.

    未经事先书面许可,严禁进行任何形式的复制、改编 或翻译,除非版权法另有规定。

    此处包含的信息如有更改,恕不另行通知。 此类产品和服务附带的保修声明中明确规定了 HP 产品 和服务的所有保修事项。 不得将本文的任何内容视为 构成附加保修。 HP 不对本文档中的技术错误、编辑错 误或遗漏承担责任。 商标说明 Windows® 是 Microsoft Corporation 在美国的注册商标。 FCC 规则 本设备经测试,确认符合 FCC 规则第 15 部分有关 B 级 数字设备的限制规定。这些限制旨在为防止住宅安装 中的有害干扰提供合理保护。本设备会产生、使用并 可能辐射射频能量。如果不按照说明进行安装和使 用,可能会对无线电通信造成有害干扰。但也不能保 证在特定的安装中不会产生干扰的问题。如果本设备 确实对无线电或电视接收造成干扰(可以通过开关设 备来确定),可通过以下一种或多种措施排除干扰:

  • • 重新调整接收天线的方向或位置。
  • • 增加设备和接收器之间的距离。
  • • 将设备连接到与接收器不在同一电路上的插座。
  • • 咨询代理商或经验丰富的无线电/电视技术人员。
  • 未经 HP 公司的明确同意而擅自更改或改动本产品, 用户可能会失去使用此设备的权利。根据 FCC 规则第 15 部分有关 B 级数字设备的限制规定,用户必须使用

    屏蔽的接口电缆。有关更多管制信息,请参阅电子版 《用户指南》。对于由提供或使用本信息所引起的任 何直接、间接、偶然、继发性或其它损失,

    HP 概不负责。

    © Copyright 2015 HP Development Company, L.P.

    Reproduction, adaptation or translation without prior written permission is prohibited, except as allowed under the copyright laws.

    The information contained herein is subject to change without notice. The only warranties for HP products and services are set forth in the express warranty statements accompanying such products and services. Nothing herein should be construed as constituting an additional warranty. HP shall not be liable for technical or editorial errors or omissions contained herein. Trademark Credits Windows® is a U.S. registered trademark of Microsoft Corporation. FCC Regulations This equipment has been tested and found to comply with the limits for a Class B digital device, pursuant to Part 15 of the FCC rules. These limits are designed to provide reasonable protection against harmful interference in a residential installation. This equipment generates, uses, and can radiate radio-frequency energy. If this equipment is not installed and used in accordance with the instructions, it may cause harmful interference to radio communications. However, there is no guarantee that interference will not occur in a particular installation. If this equipment does cause harmful interference to radio or television reception, which can be determined by turning the equipment off and on, correct the interference by one or more of the following measures:

  • • Reorient or relocate the receiving antenna.
  • • Increase separation between equipment and receiver.
  • • Connect equipment to an outlet on a circuit different from that to which the receiver is located.
  • • Consult your dealer or an experienced radio/TV technician.
  • Any changes or modifications to the product that are not expressly approved by HP could void the user’s authority to operate this equipment. Use of a shielded interface cable is required to comply with the Class B limits of Part 15 of FCC rules. For more regulatory information, see the electronic user guide. HP shall not be liable for any direct, indirect, incidental, consequential, or other damage alleged in connection with the furnishing or use of this information.

    © Copyright 2015 HP Development Company, L.P.

    www.hp.com

    ![image 5](c04598558_images/imageFile5.png)

    More from HP

    Similar Printers