
Ask AI
— answers from the official manualAnswers from the official manual.
Common questions
Common Questions
18 totalHow do I put my Shokz Earbuds into pairing mode after opening the case?
To enter pairing mode, place both earbuds in the charging case and press their touch areas simultaneously with two fingers until indicator lights flash orange and green. Once paired successfully, device will display completion status. (Page 16)
How can I clean my Shokz charging case?
Clean the exterior of the charging case with a soft dry cloth and use a clean, dry brush to remove debris from the interface; don't insert any liquid or abrasive material inside. (Page 35)
What happens when my earbuds disconnect automatically while in use?
If disconnected and out of range, the earbuds may attempt to auto-connect within three minutes but will issue prompts for re-pairing if they fail. Make sure both devices remain powered on and Bluetooth enabled for successful automatic connections. (Page 32)
How do I troubleshoot audio issues with my earbuds?
Verify that the earbuds are properly inserted, check the battery levels of both the earbuds and your connected device, and move closer to your device to ensure a strong Bluetooth signal.
What should I use to clean the Openfit Earbuds?
Use a soft, dry cloth to clean the earbuds and avoid using water or harsh chemicals that could damage the device.
How do I factory reset the Openfit Earbuds?
Place both earbuds in the charging case and press and hold the button on the charging case for 15 seconds until the indicator flashes orange, then turns off. The earbuds will then enter pairing mode and be reset to factory defaults.
Show 12 more questions
What does a flashing red light mean on my earbuds?
How do I clean my Shokz Earbuds?
What is the IP rating for my Shokz Earbuds?
How do I charge my Shokz Earbuds?
How do I ensure my earbuds are fully charged?
What should I do if my Shokz Earbud gets wet?
How long does it take to fully charge the Openfit Earbuds?
How do I pair the Openfit Earbuds to my device for the first time?
Can I use just one earbud instead of both?
What does a flashing orange and green light indicate?
How do I properly wear and position the Openfit Earbuds?
Are the Openfit Earbuds suitable for swimming?
Full Manual
37 pages

OPENFIT
User Guide
T910
Catalogue
CATALOGUE
APP
IN THE BOX
03
##### WEAR & USE
Earbud Diagram
############ Earbud Case 06 07 09
Pairing
Wearing
TOUCH CONTROL
Music Control
Call Control Single Earbud Control

INDICATOR LED
Charging Case Internal Indicator LED
Charging Case External Indicator LED
##### POWER SOURCE
On/Off and Standby
Charging the Earbuds Charging the Charging Case

ADDITIONAL FEATURES
Auto Connect
Resetting
16 18

14 15
##### MAINTENANCE
Cleaning
IP Rating
##### AFTER-SALES SERVICE
Serial Number Location
Warranty

APP
#### APP
APP
Download the Shokz App The Shokz App supports customized EQ modes, custom touch functions, firmware updates, and other functions! Define your sound the way you want. Download the Shokz App now to enjoy the best experience. Android users: Please use your mobile browser to scan the QR code and download the app.

03
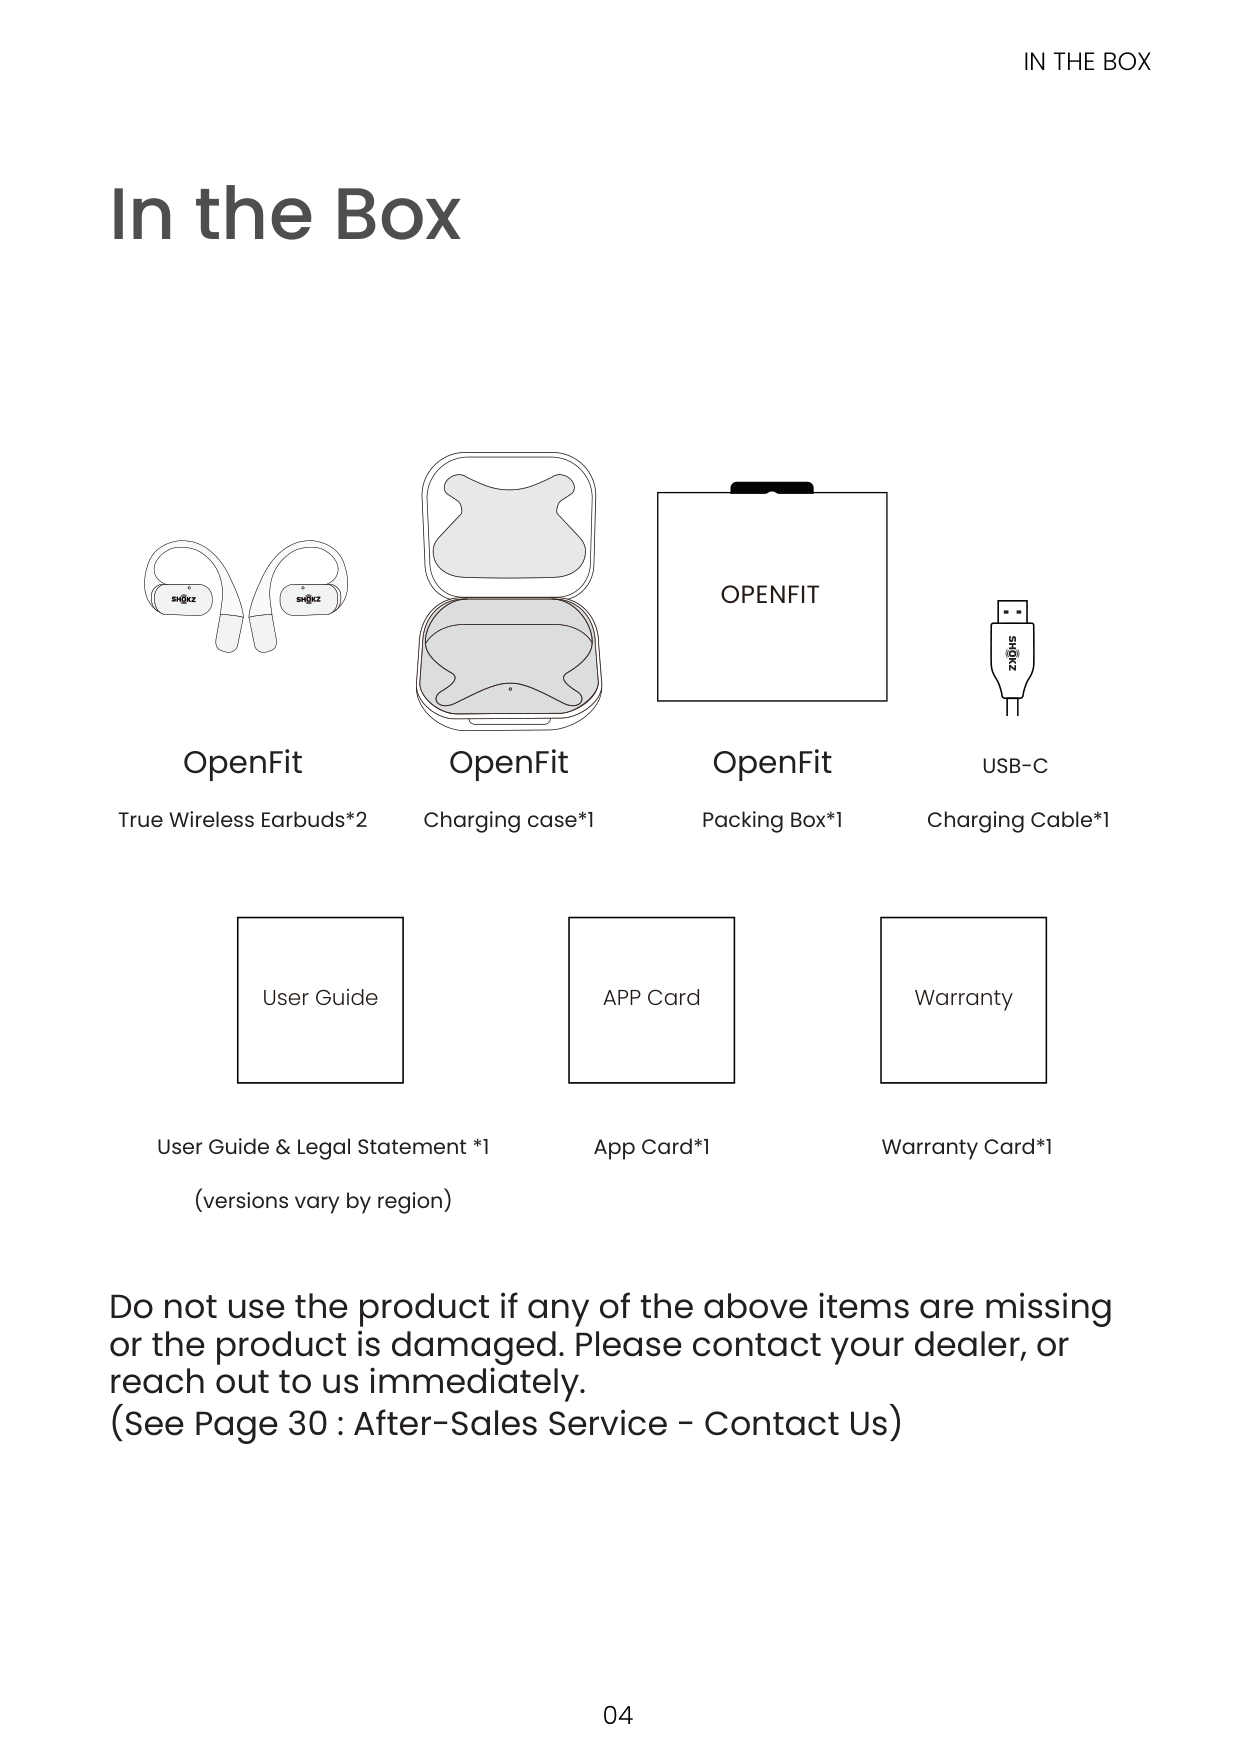
In the Box
#### In the Box
IN THE BOX
OpenFit
True Wireless Earbuds*2
############# OpenFit
Charging case*1
################ OPENFIT
############# OpenFit
Packing Box*1
USB-C
Charging Cable*1
|User Guide| |---|
User Guide & Legal Statement *1
(versions vary by region)
|APP Card| |---|
App Card*1
|Warranty| |---|
Warranty Card*1
Do not use the product if any of the above items are missing or the product is damaged. Please contact your dealer, or reach out to us immediately. (See Page 30 : After-Sales Service - Contact Us)
04
Wear & Use
Earbud Diagram
EARBUD DIAGRAM
Touch area
Ear hooks
Microphone
Battery compartment
############## *The protrusion of the touch area is the effective position of the touch button.
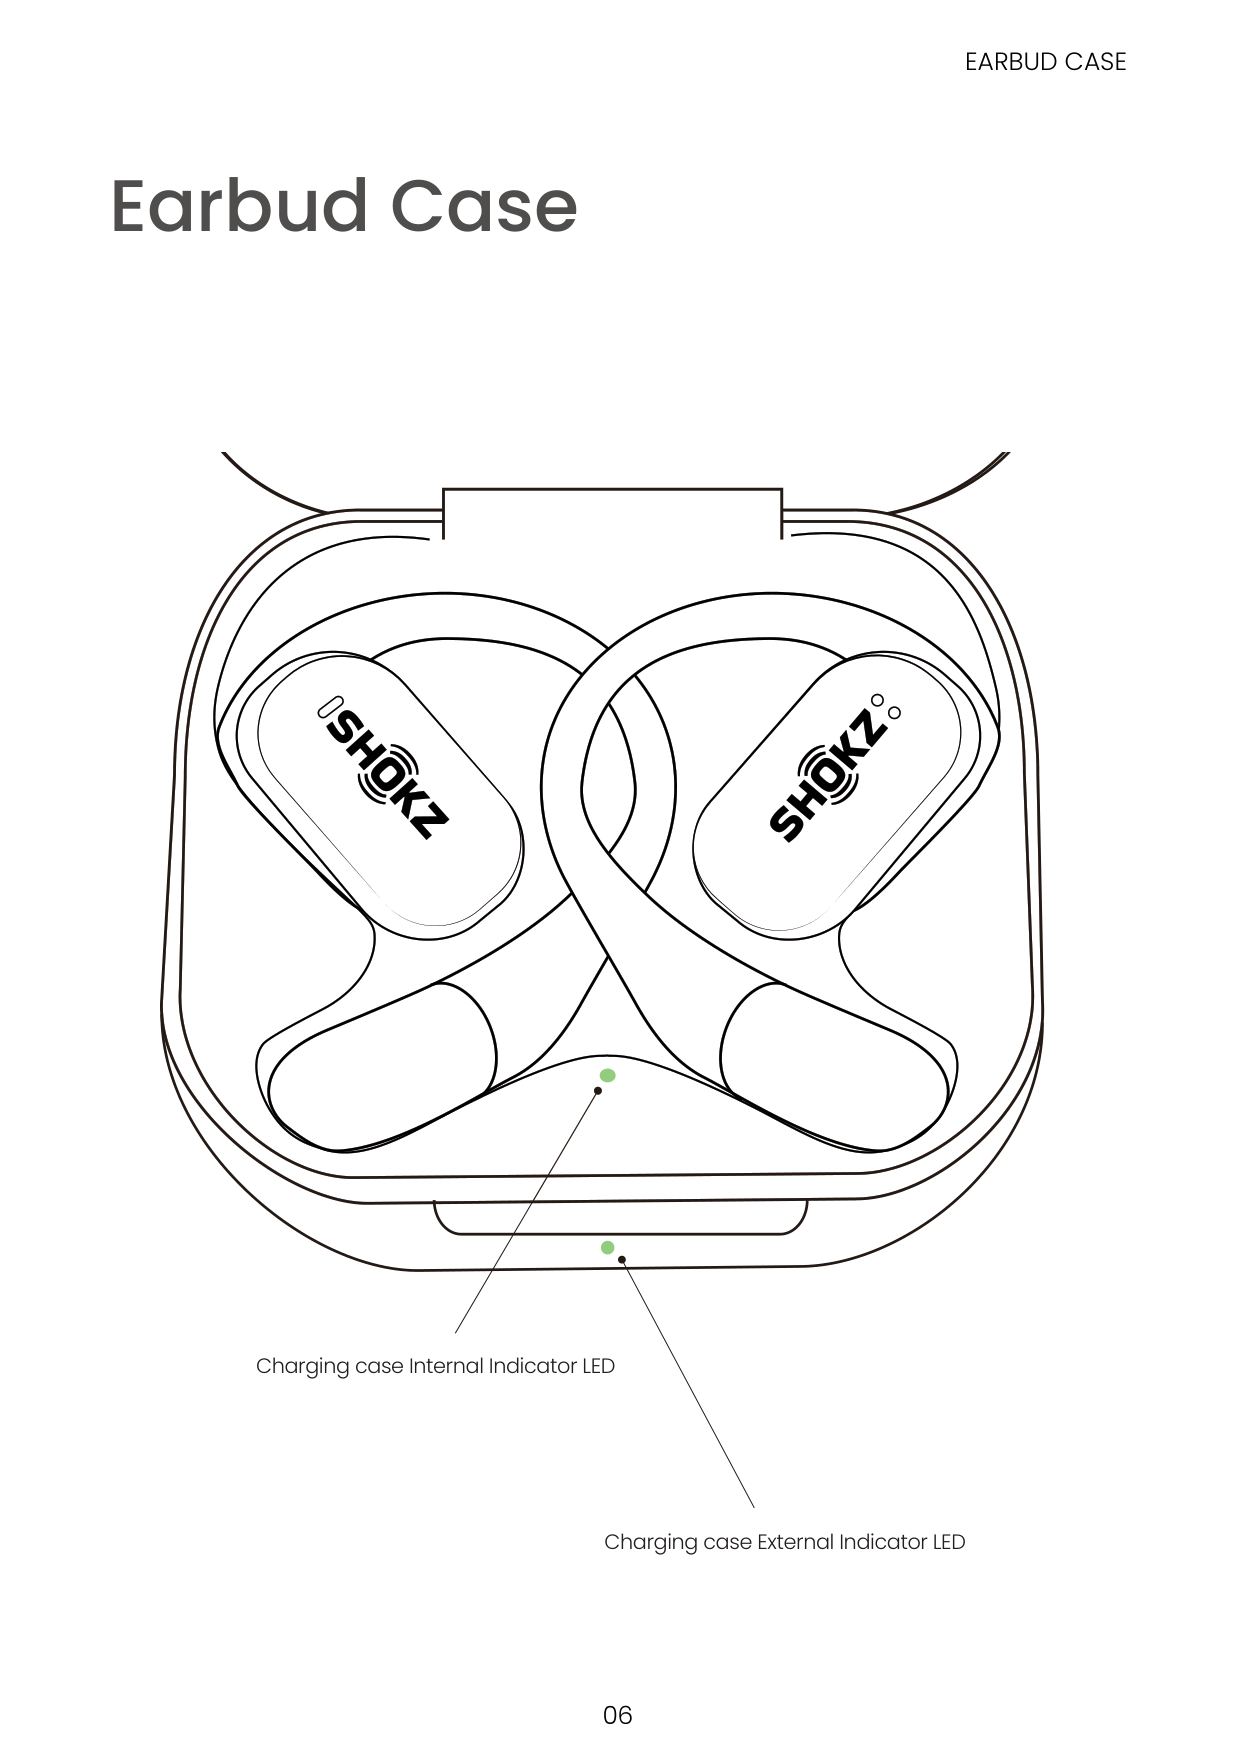
#### Earbud Case
############### EARBUD CASE

| | | | |---|---|---| | | | |
Charging case Internal Indicator LED
Charging case External Indicator LED
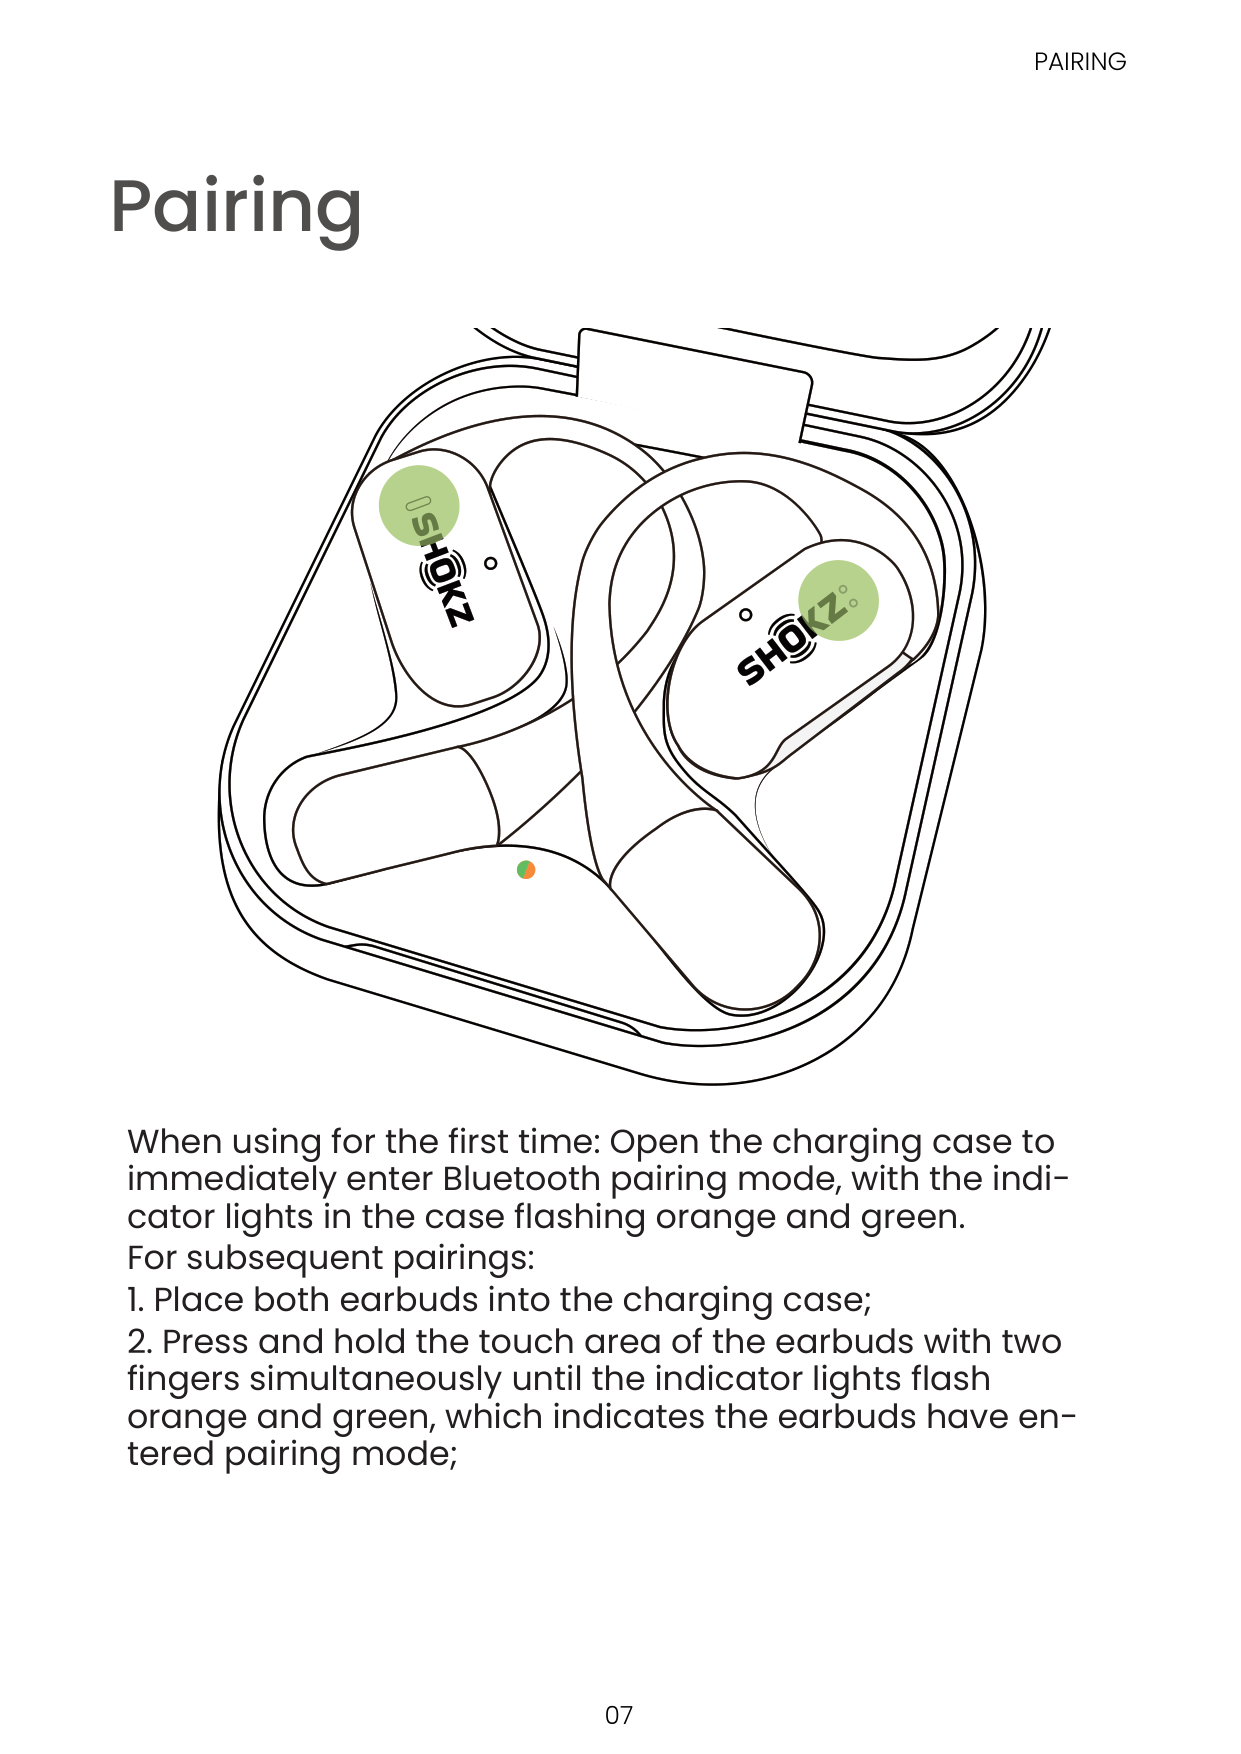
#### Pairing
When using for the first time: Open the charging case to immediately enter Bluetooth pairing mode, with the indicator lights in the case flashing orange and green. For subsequent pairings:
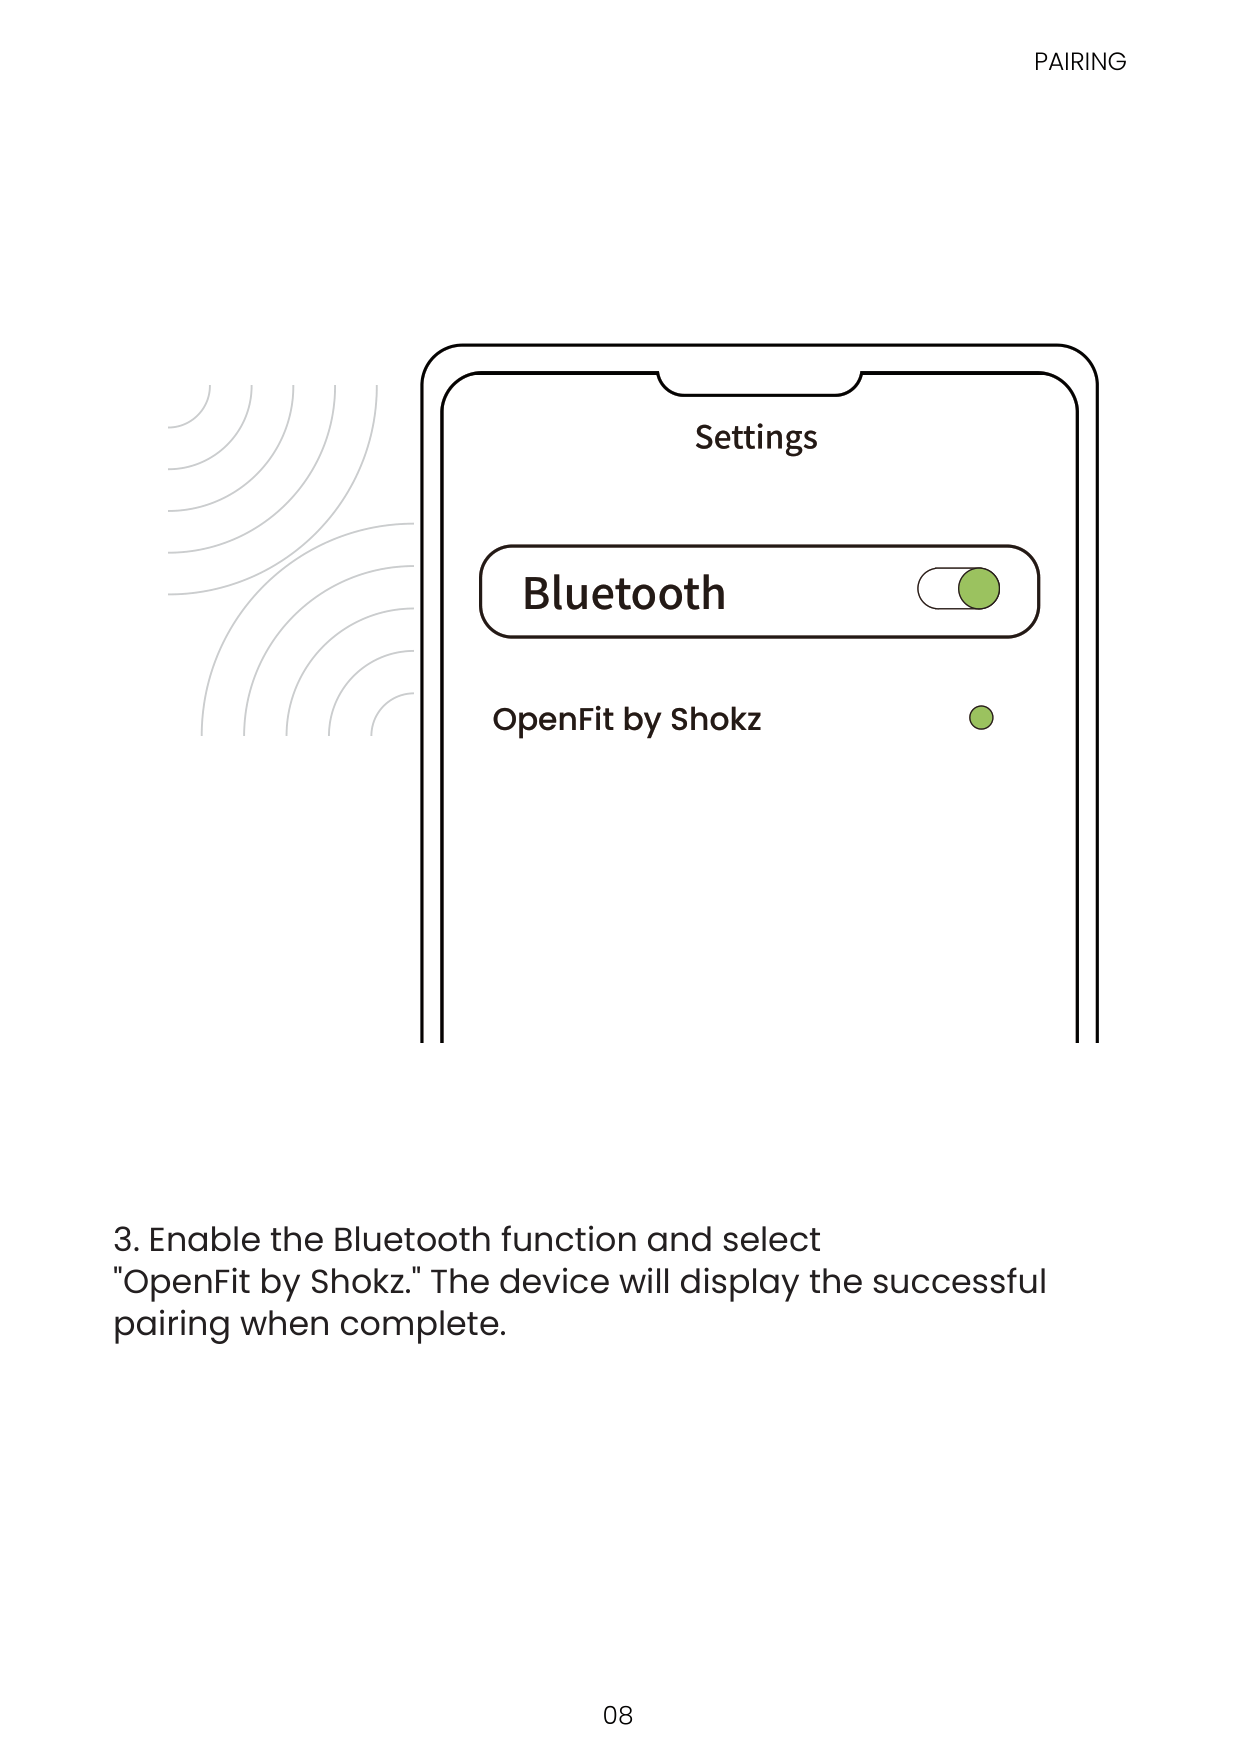
####### Bluetooth
OpenFit by Shokz
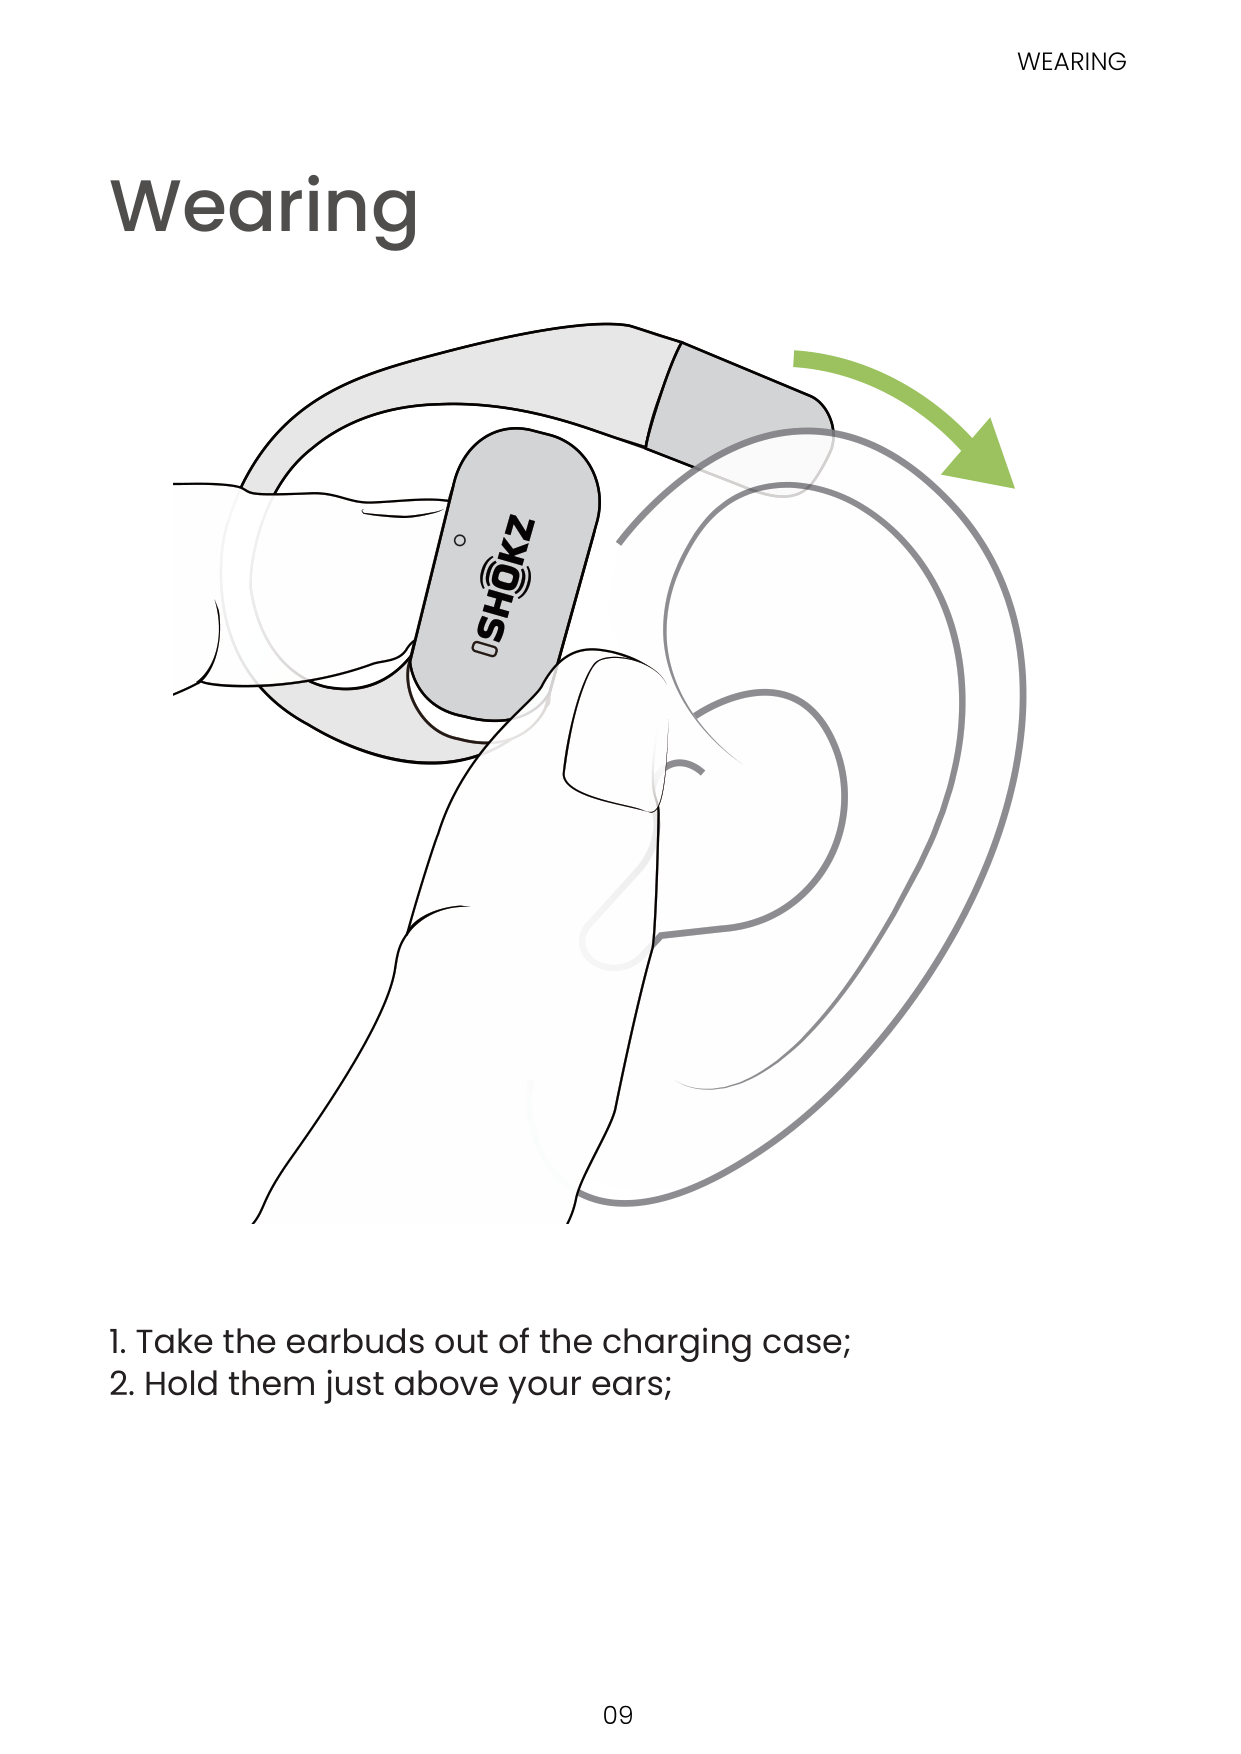
#### Wearing
Touch Control
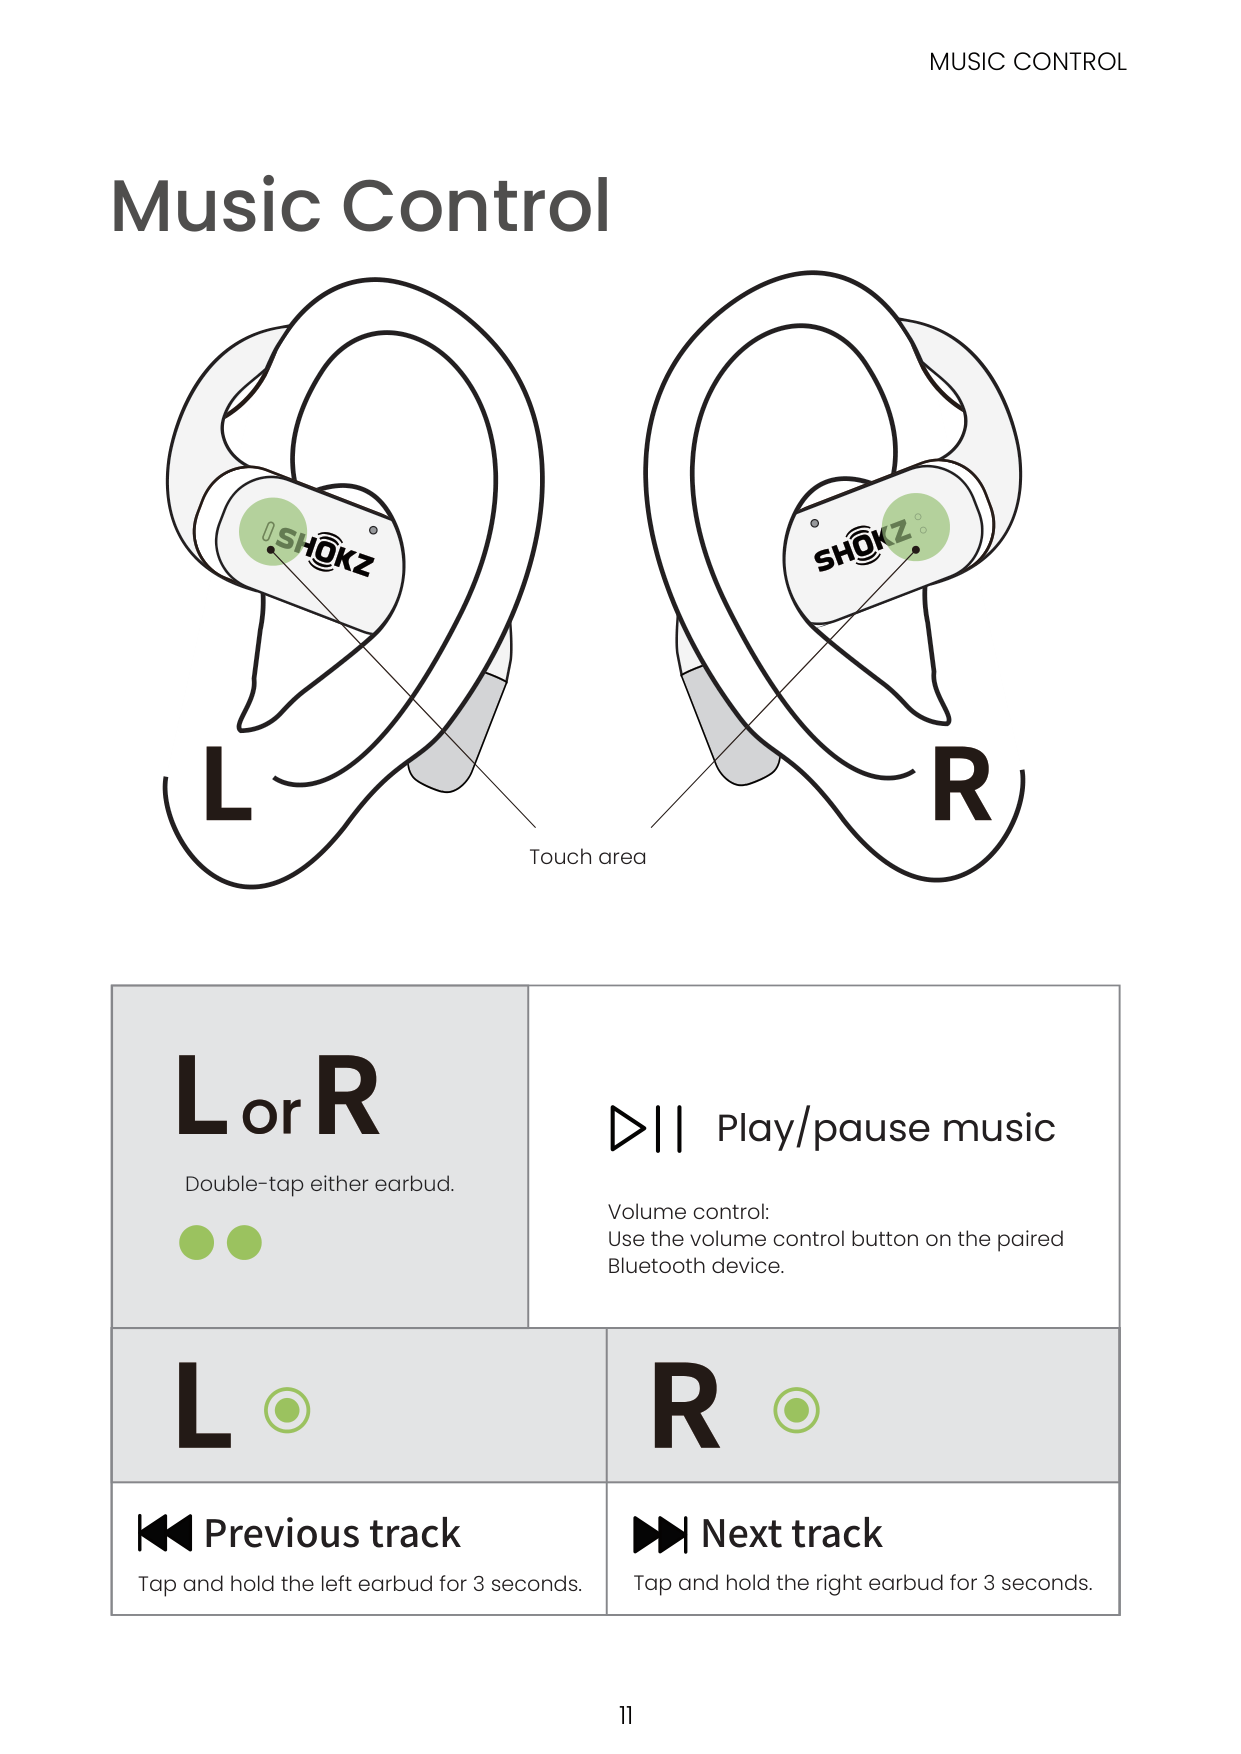
#### Music Control
MUSIC CONTROL
Touch area
Double-tap either earbud.
Play/pause music
Volume control: Use the volume control button on the paired Bluetooth device.

######## Previous track Next track
Tap and hold the left earbud for 3 seconds. Tap and hold the right earbud for 3 seconds.
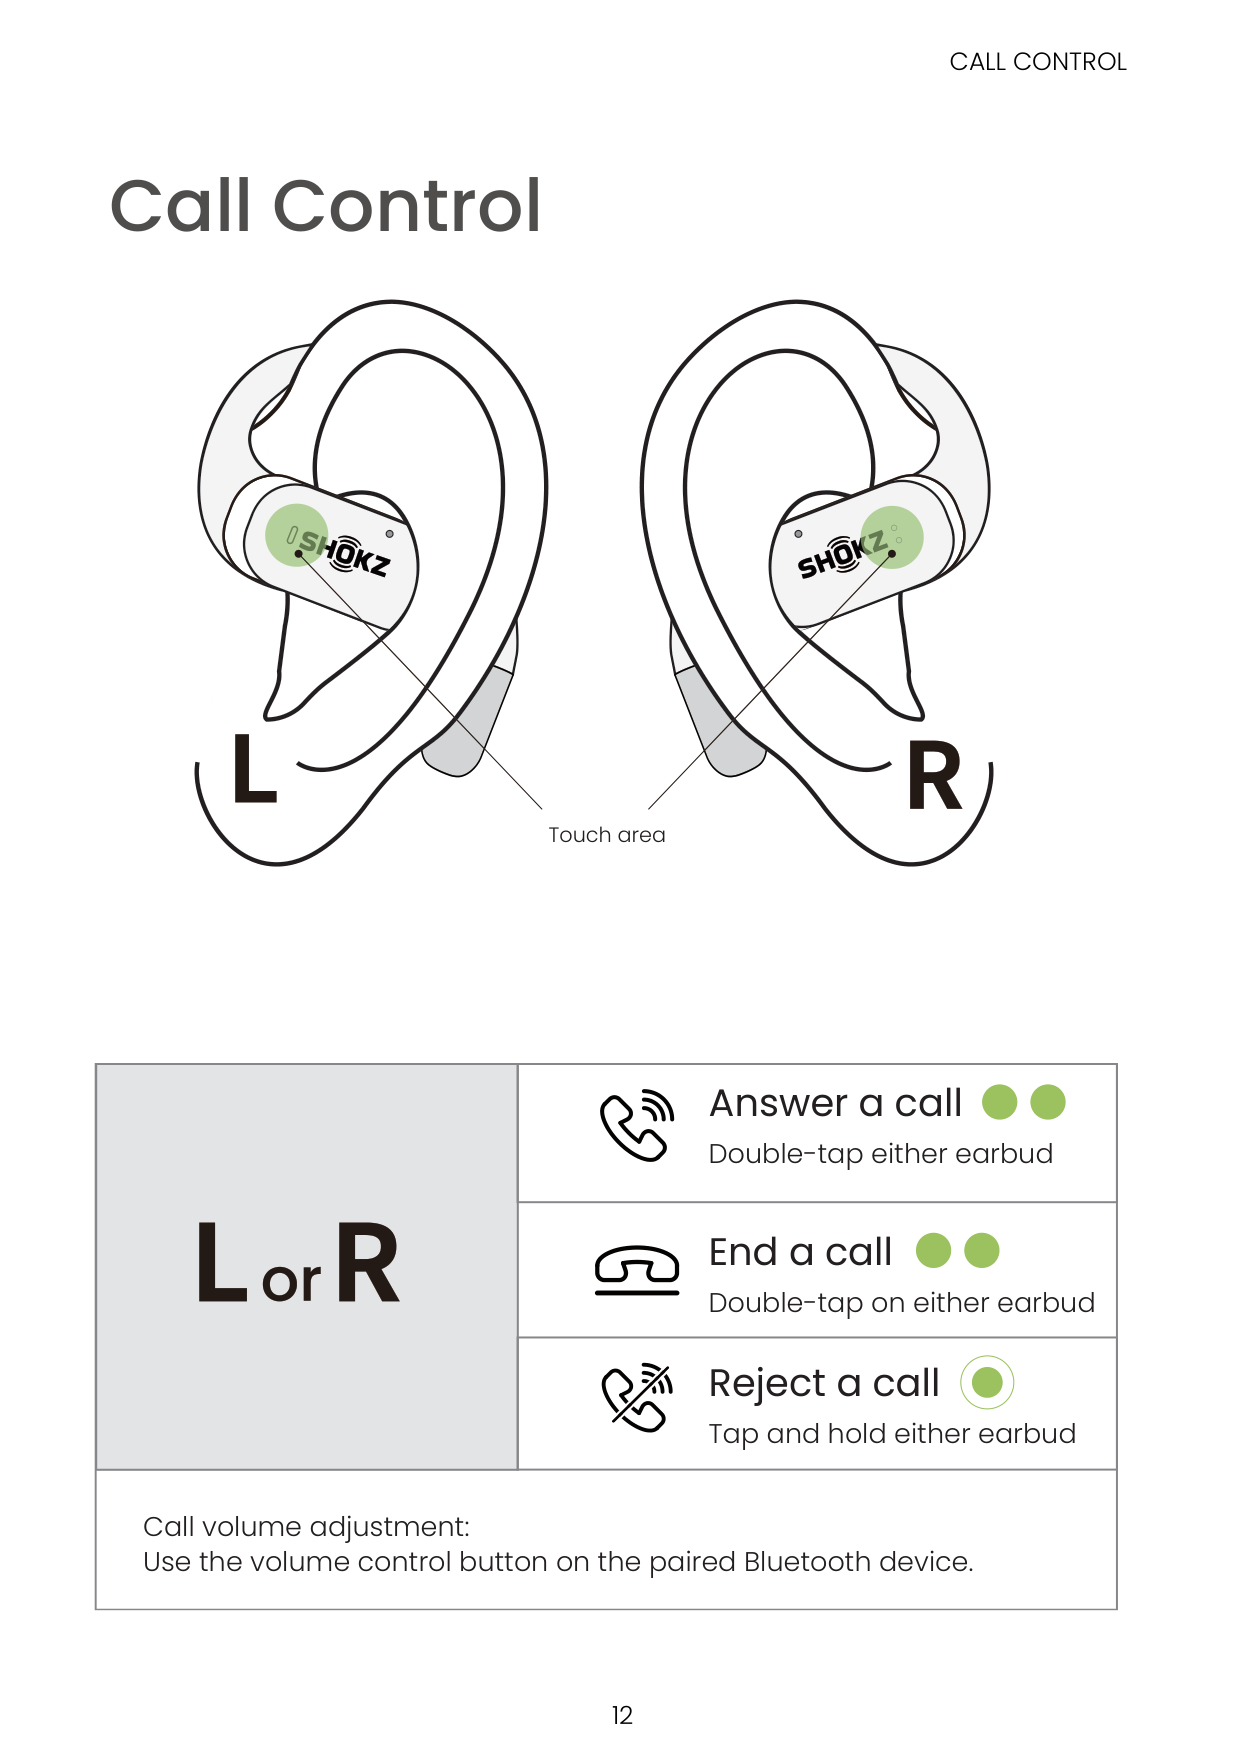
#### Call Control
Touch area
CALL CONTROL
Answer a call
Double-tap either earbud
End a call
Double-tap on either earbud
Reject a call
Tap and hold either earbud
Call volume adjustment: Use the volume control button on the paired Bluetooth device.
SINGLE EARBUD CONTROL
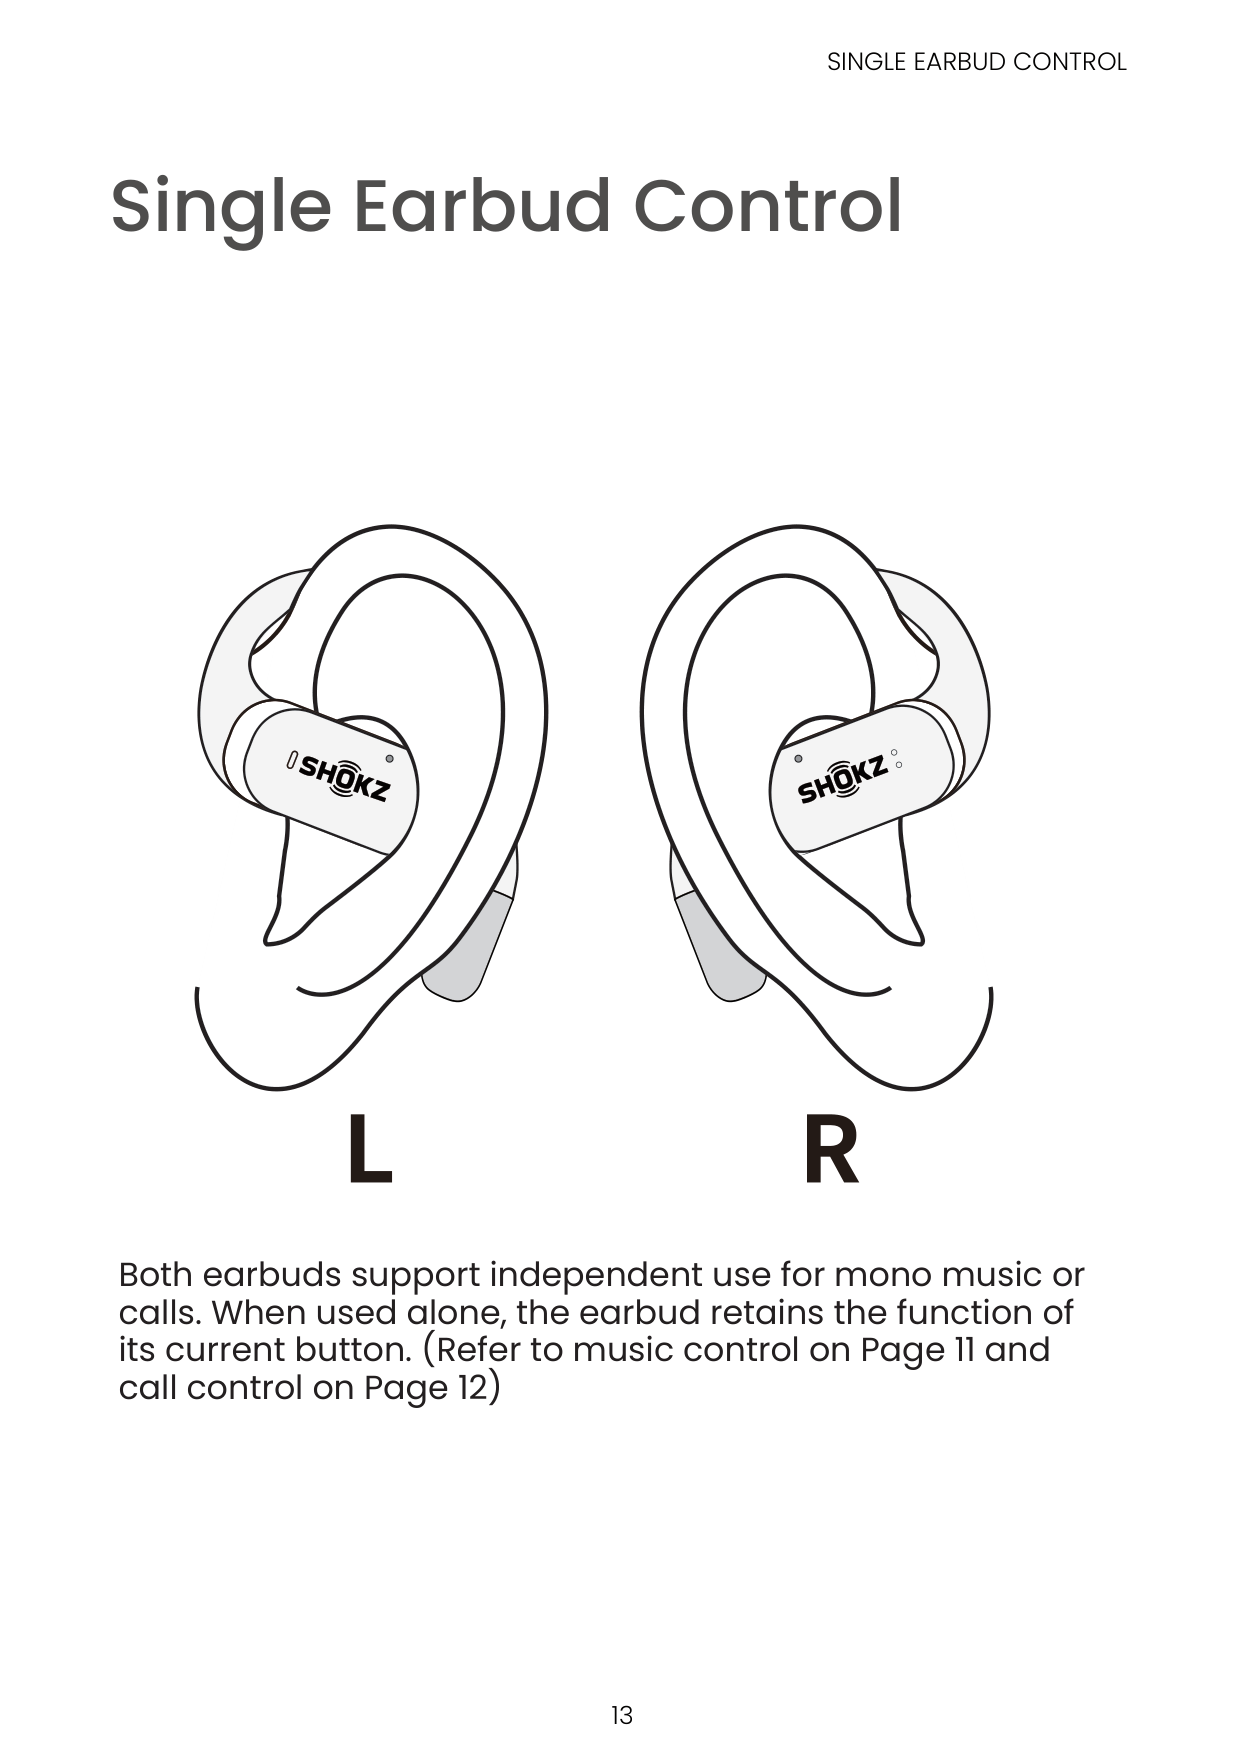
#### Single Earbud Control
Both earbuds support independent use for mono music or calls. When used alone, the earbud retains the function of its current button. (Refer to music control on Page 11 and call control on Page 12)
Indicator LED
CHARGING CASE INTERNAL INDICATOR LED
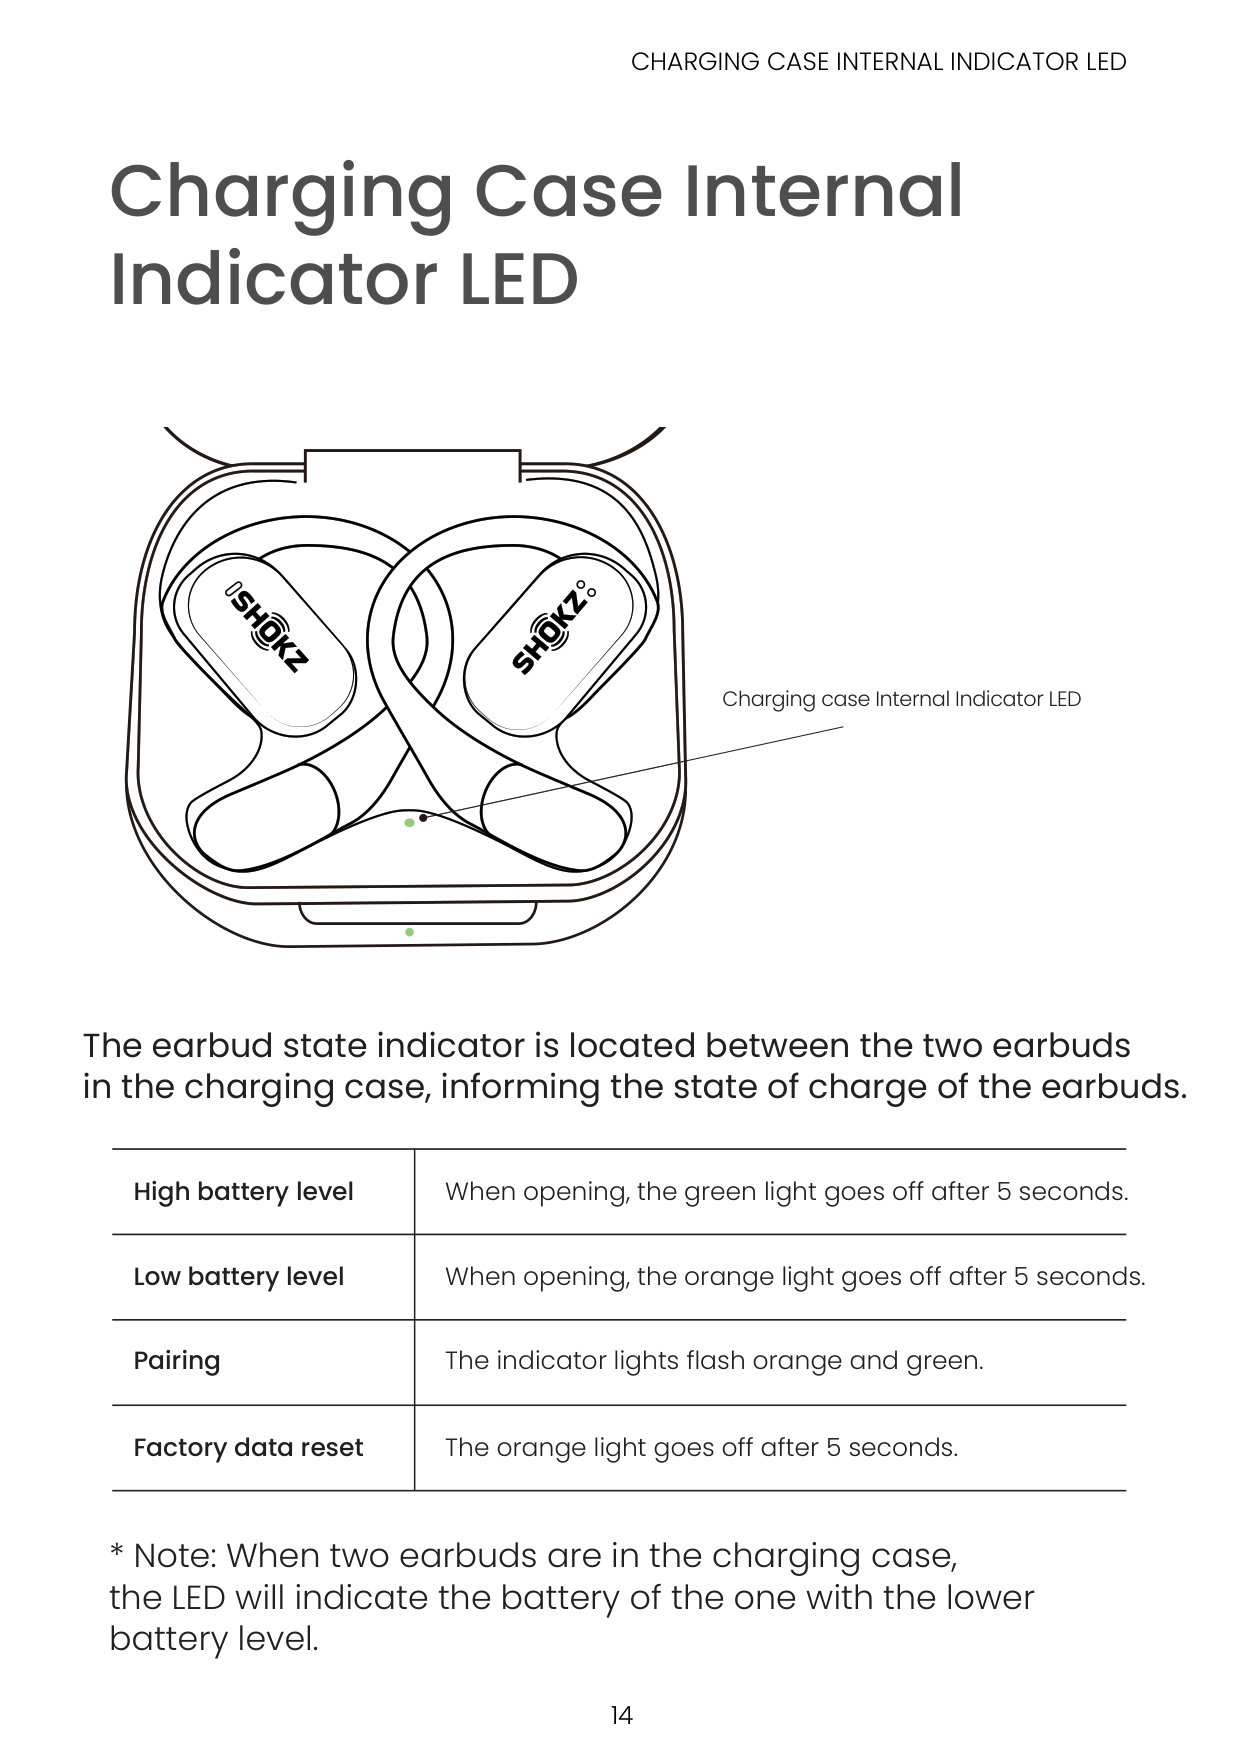
Charging Case Internal Indicator LED

| | | | |---|---|---| | | | |
Charging case Internal Indicator LED
############ The earbud state indicator is located between the two earbuds in the charging case, informing the state of charge of the earbuds.
|High battery level|When opening, the green light goes off after 5 seconds.| |---|---|
|Low battery level|When opening, the orange light goes off after 5 seconds.| |Pairing|The indicator lights flash orange and green.| |Factory data reset|The orange light goes off after 5 seconds.|
CHARGING CASE EXTERNAL INDICATOR LED
Charging Case External Indicator LED
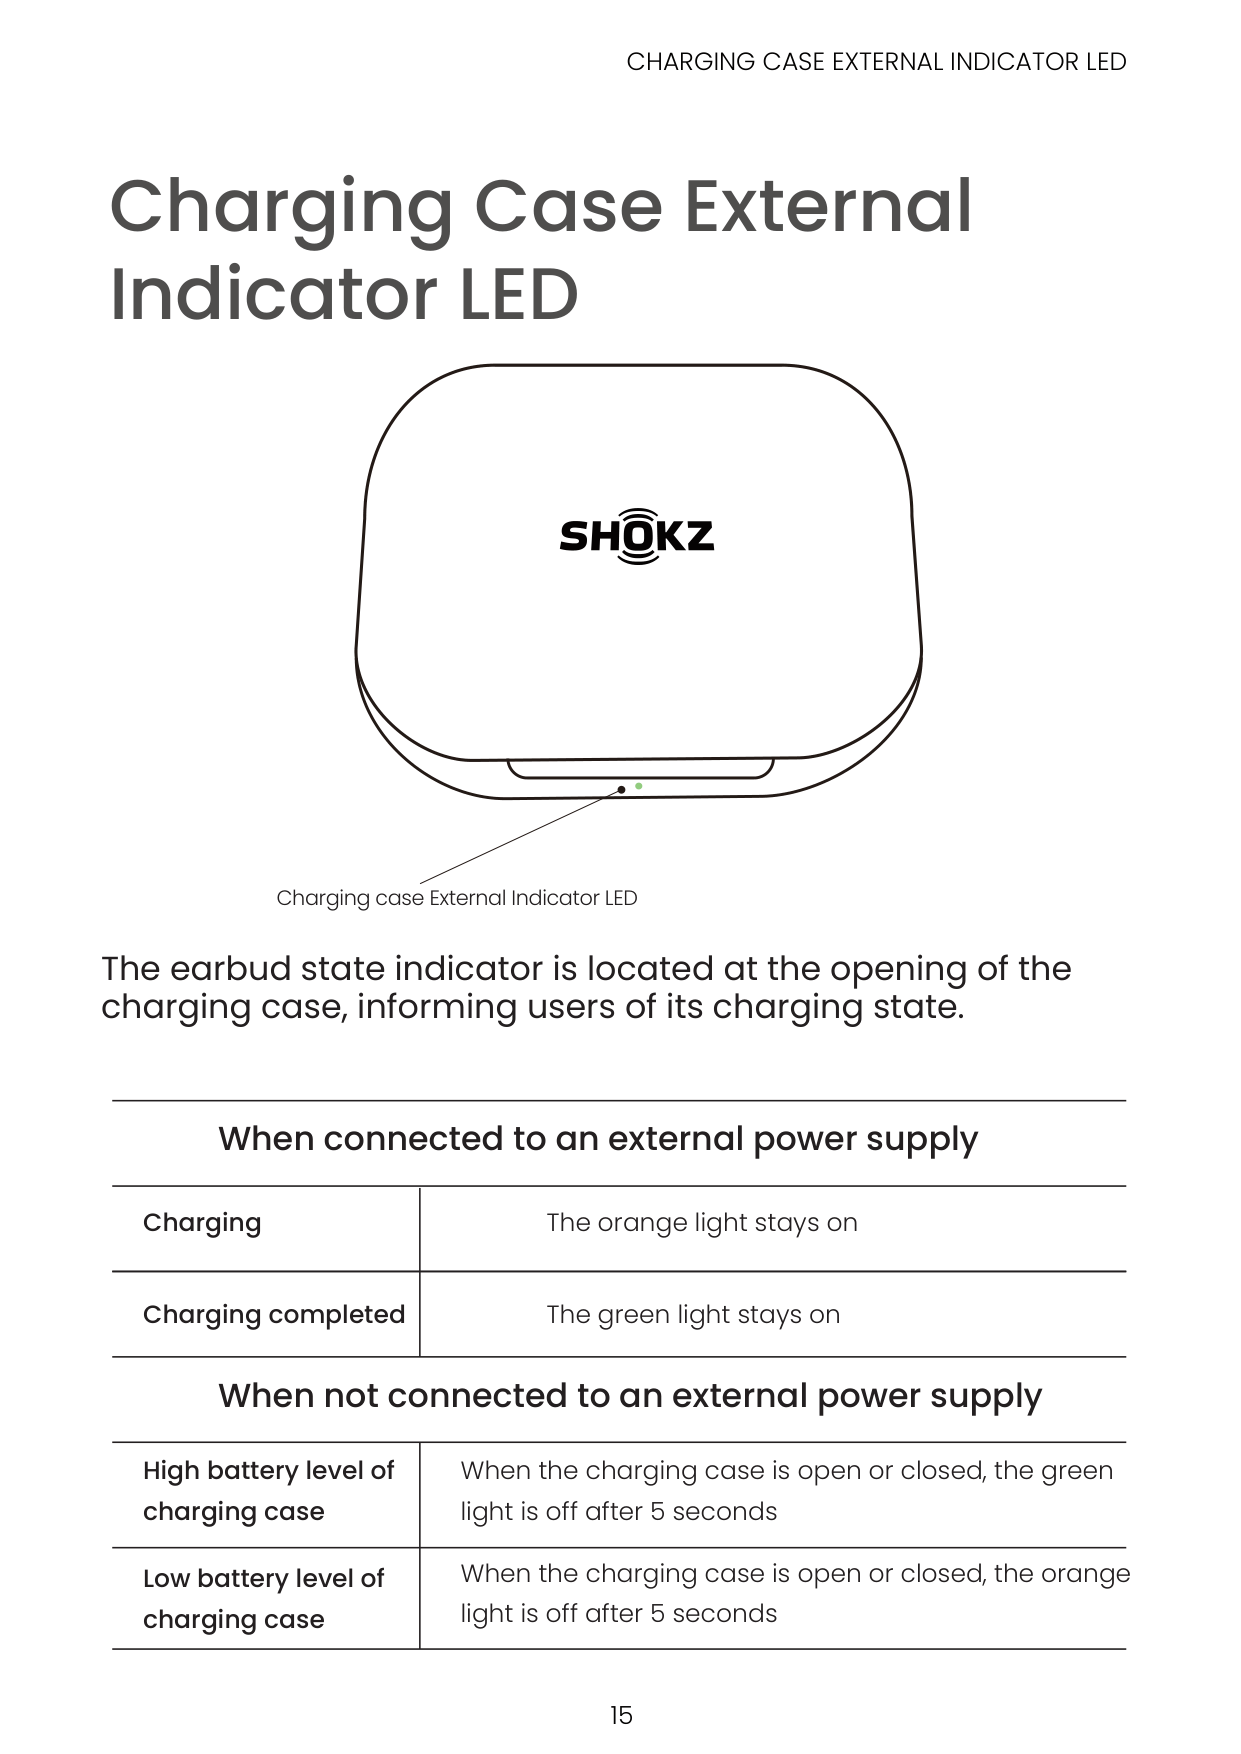
Charging case External Indicator LED
############ The earbud state indicator is located at the opening of the charging case, informing users of its charging state.
########### When connected to an external power supply
Charging
The orange light stays on
Charging completed The green light stays on

########### When not connected to an external power supply
|High battery level of charging case|When the charging case is open or closed, the green light is off after 5 seconds| |---|---| |Low battery level of charging case|When the charging case is open or closed, the orange light is off after 5 seconds|
Power Source
#### On/Off and Standby
| | | |
|---|---|---| | | | |
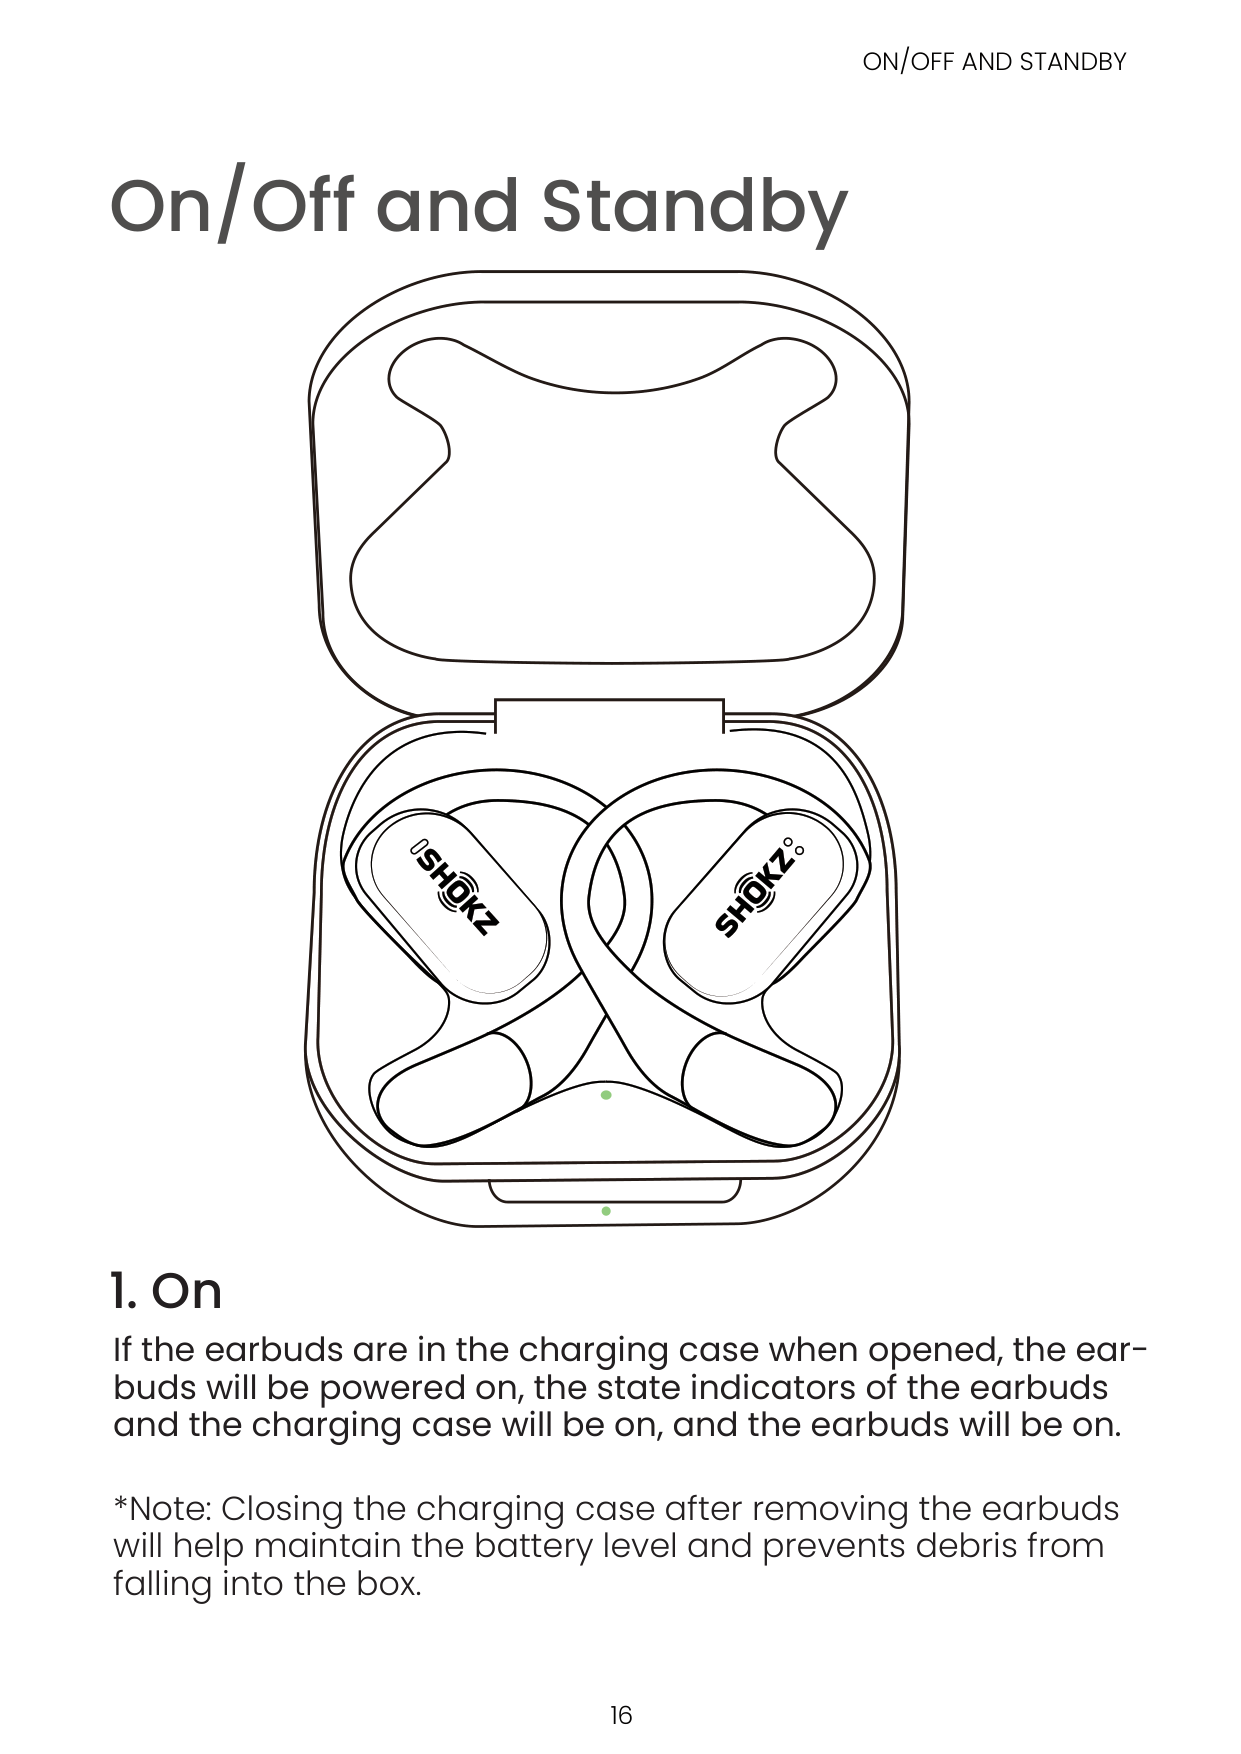
###### 1. On
If the earbuds are in the charging case when opened, the earbuds will be powered on, the state indicators of the earbuds and the charging case will be on, and the earbuds will be on.
*Note: Closing the charging case after removing the earbuds will help maintain the battery level and prevents debris from falling into the box.
| | | |---|---|
| | |
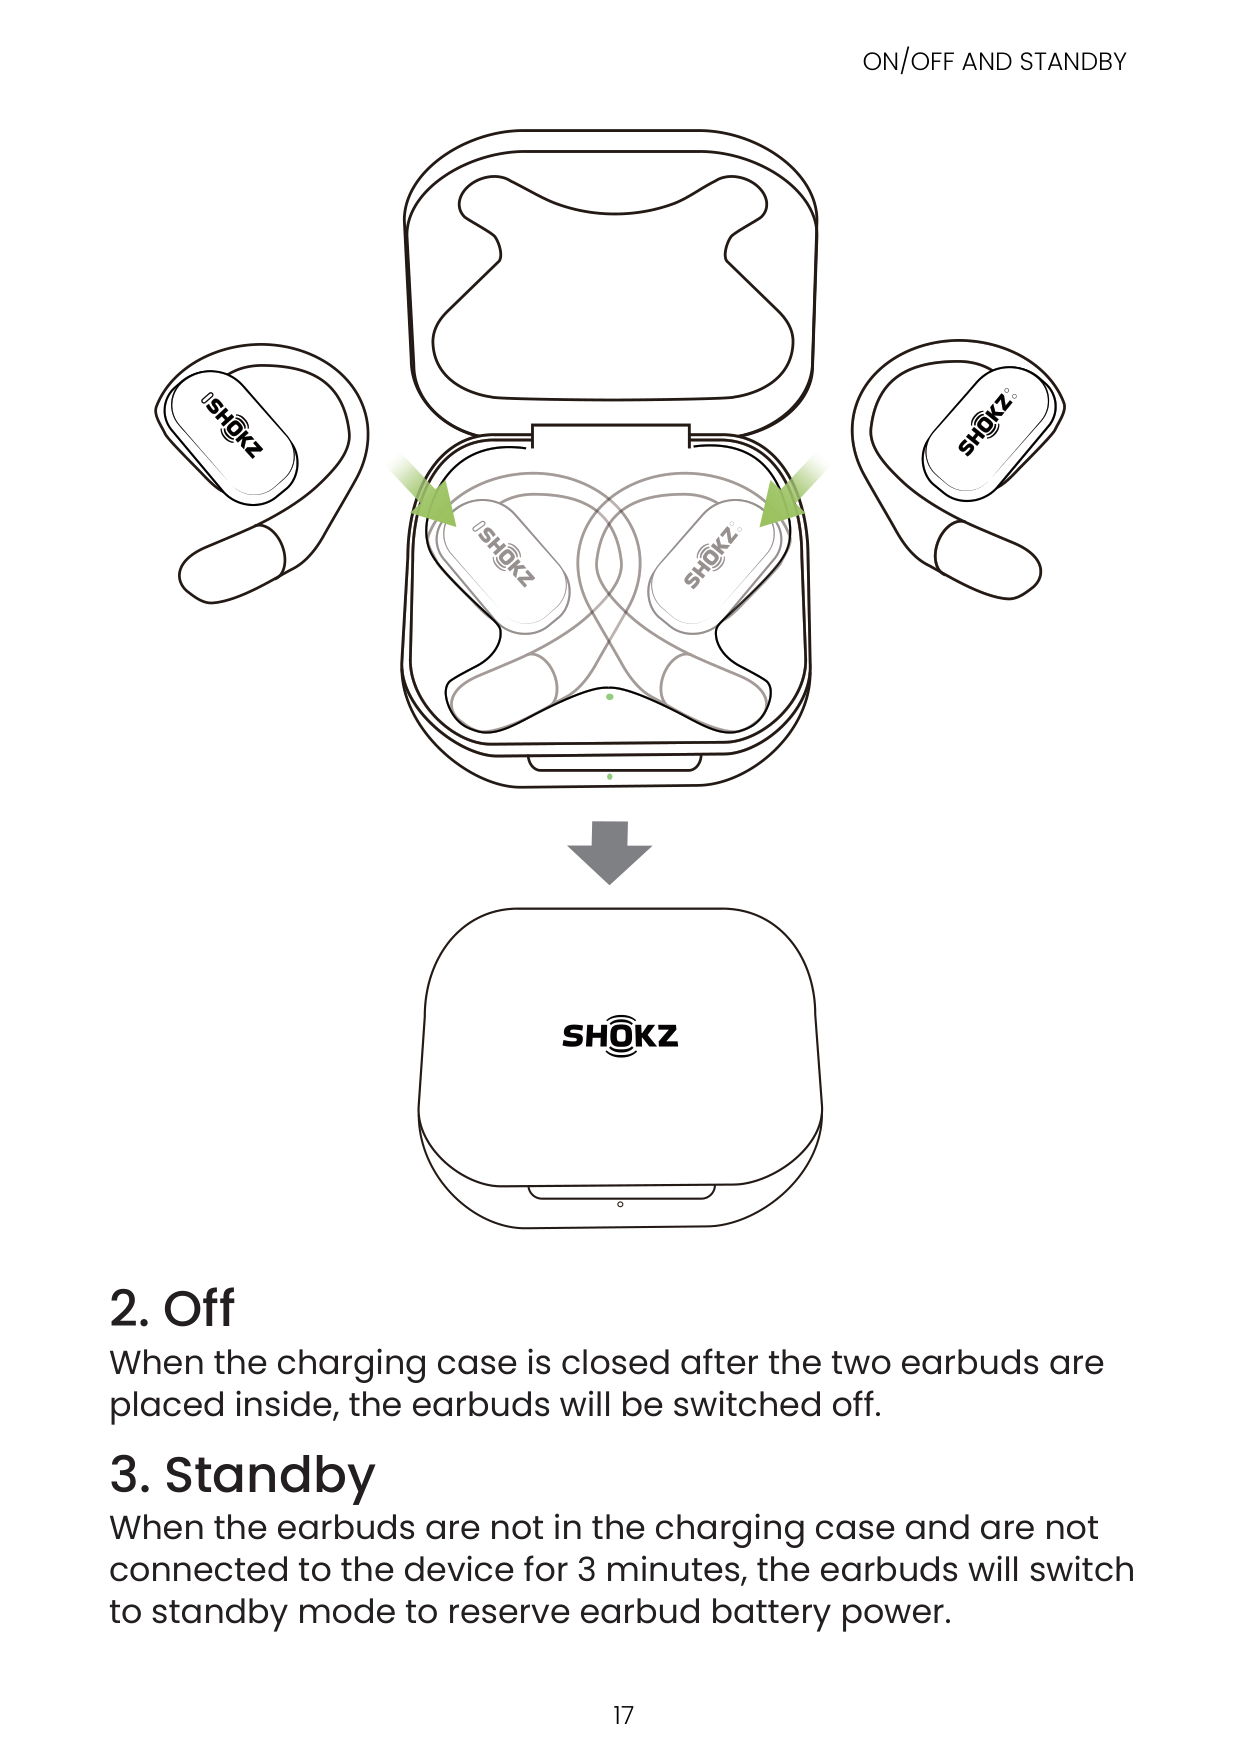
###### 2. Off
When the charging case is closed after the two earbuds are placed inside, the earbuds will be switched off.
###### 3. Standby
When the earbuds are not in the charging case and are not connected to the device for 3 minutes, the earbuds will switch to standby mode to reserve earbud battery power.
#### Charging the Earbuds

| | | |---|---| | | |
Green light indicates a high battery level
Orange light indicates a low battery level
############ Place the earbuds in the charging case until they are magnetically attached. The charging case can be closed when the indicator light of the earbuds is on.
| | | | |---|---|---| | | | |
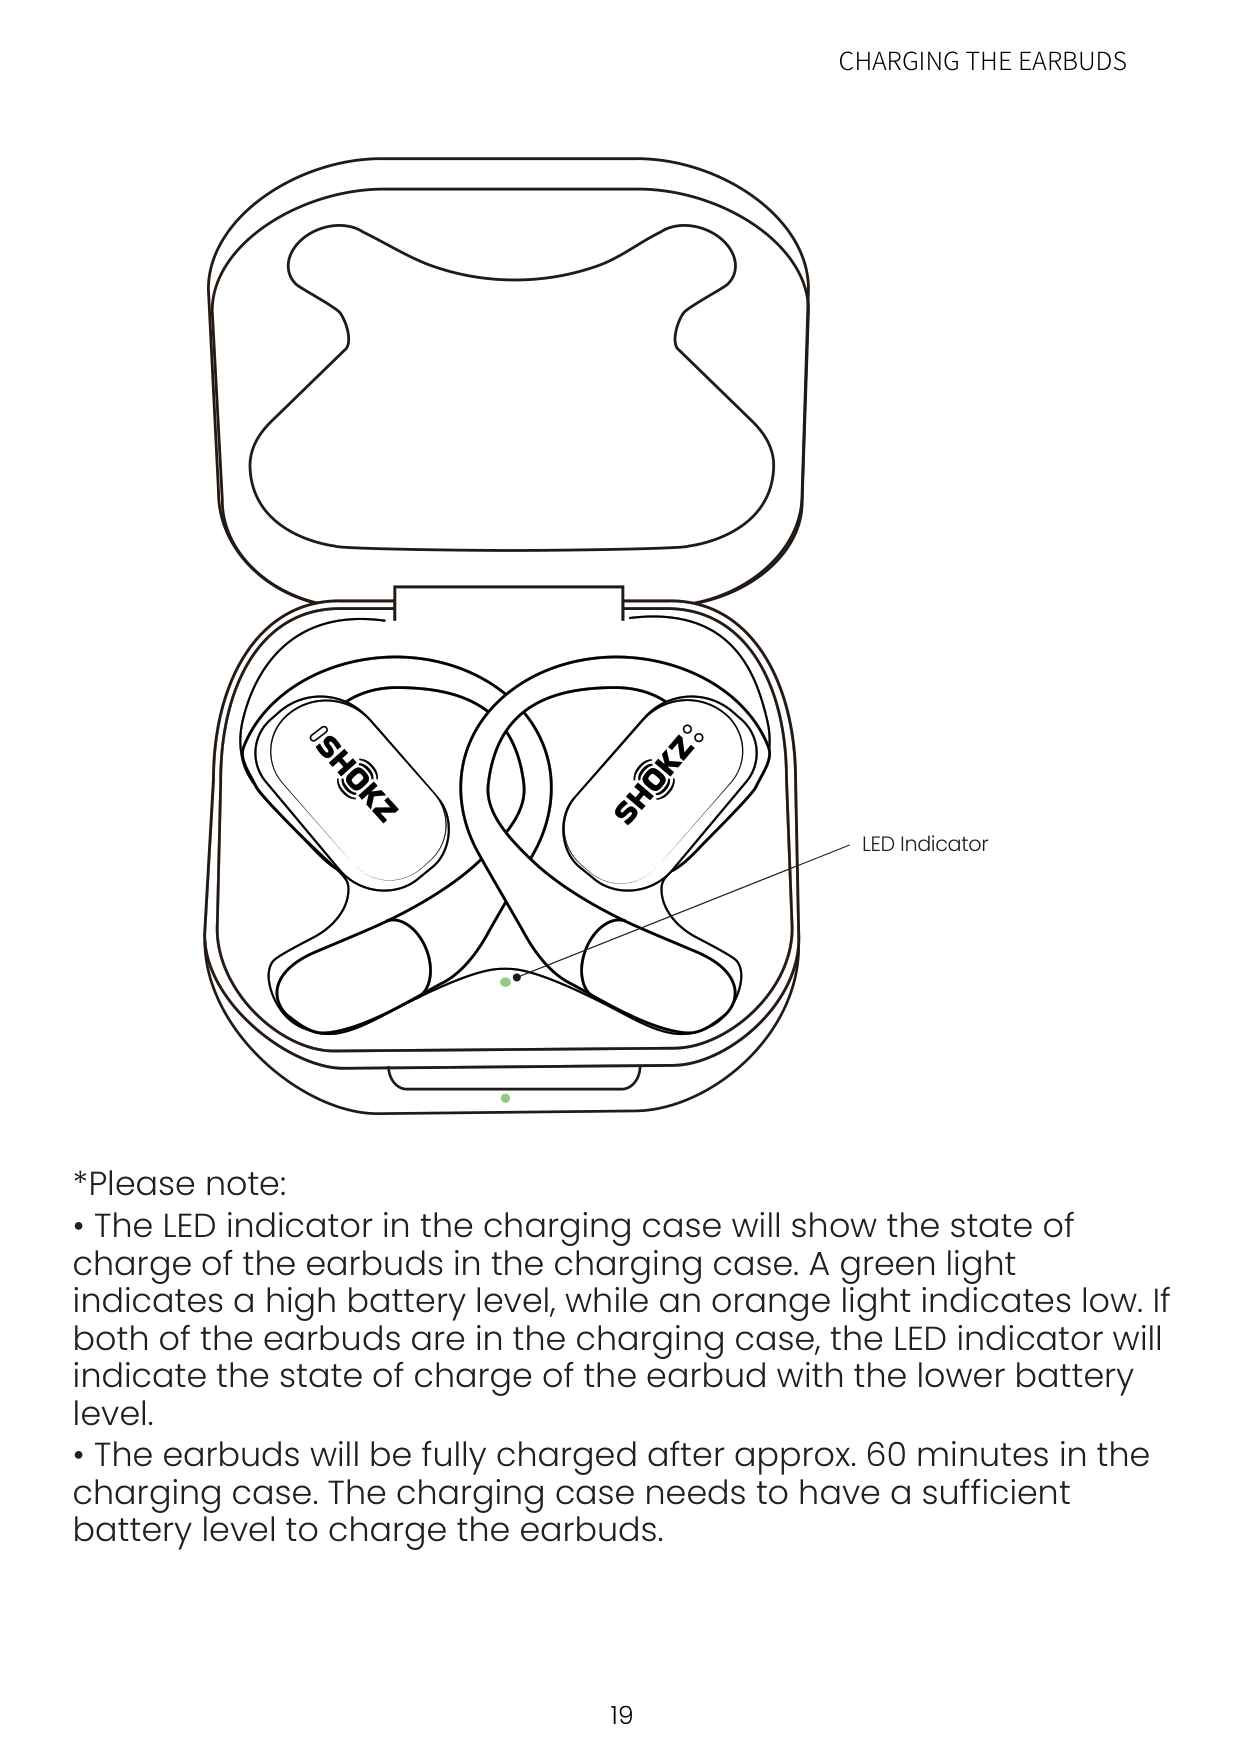
LED Indicator
CHARGING THE CHARGING CASE
#### Charging the Charging Case
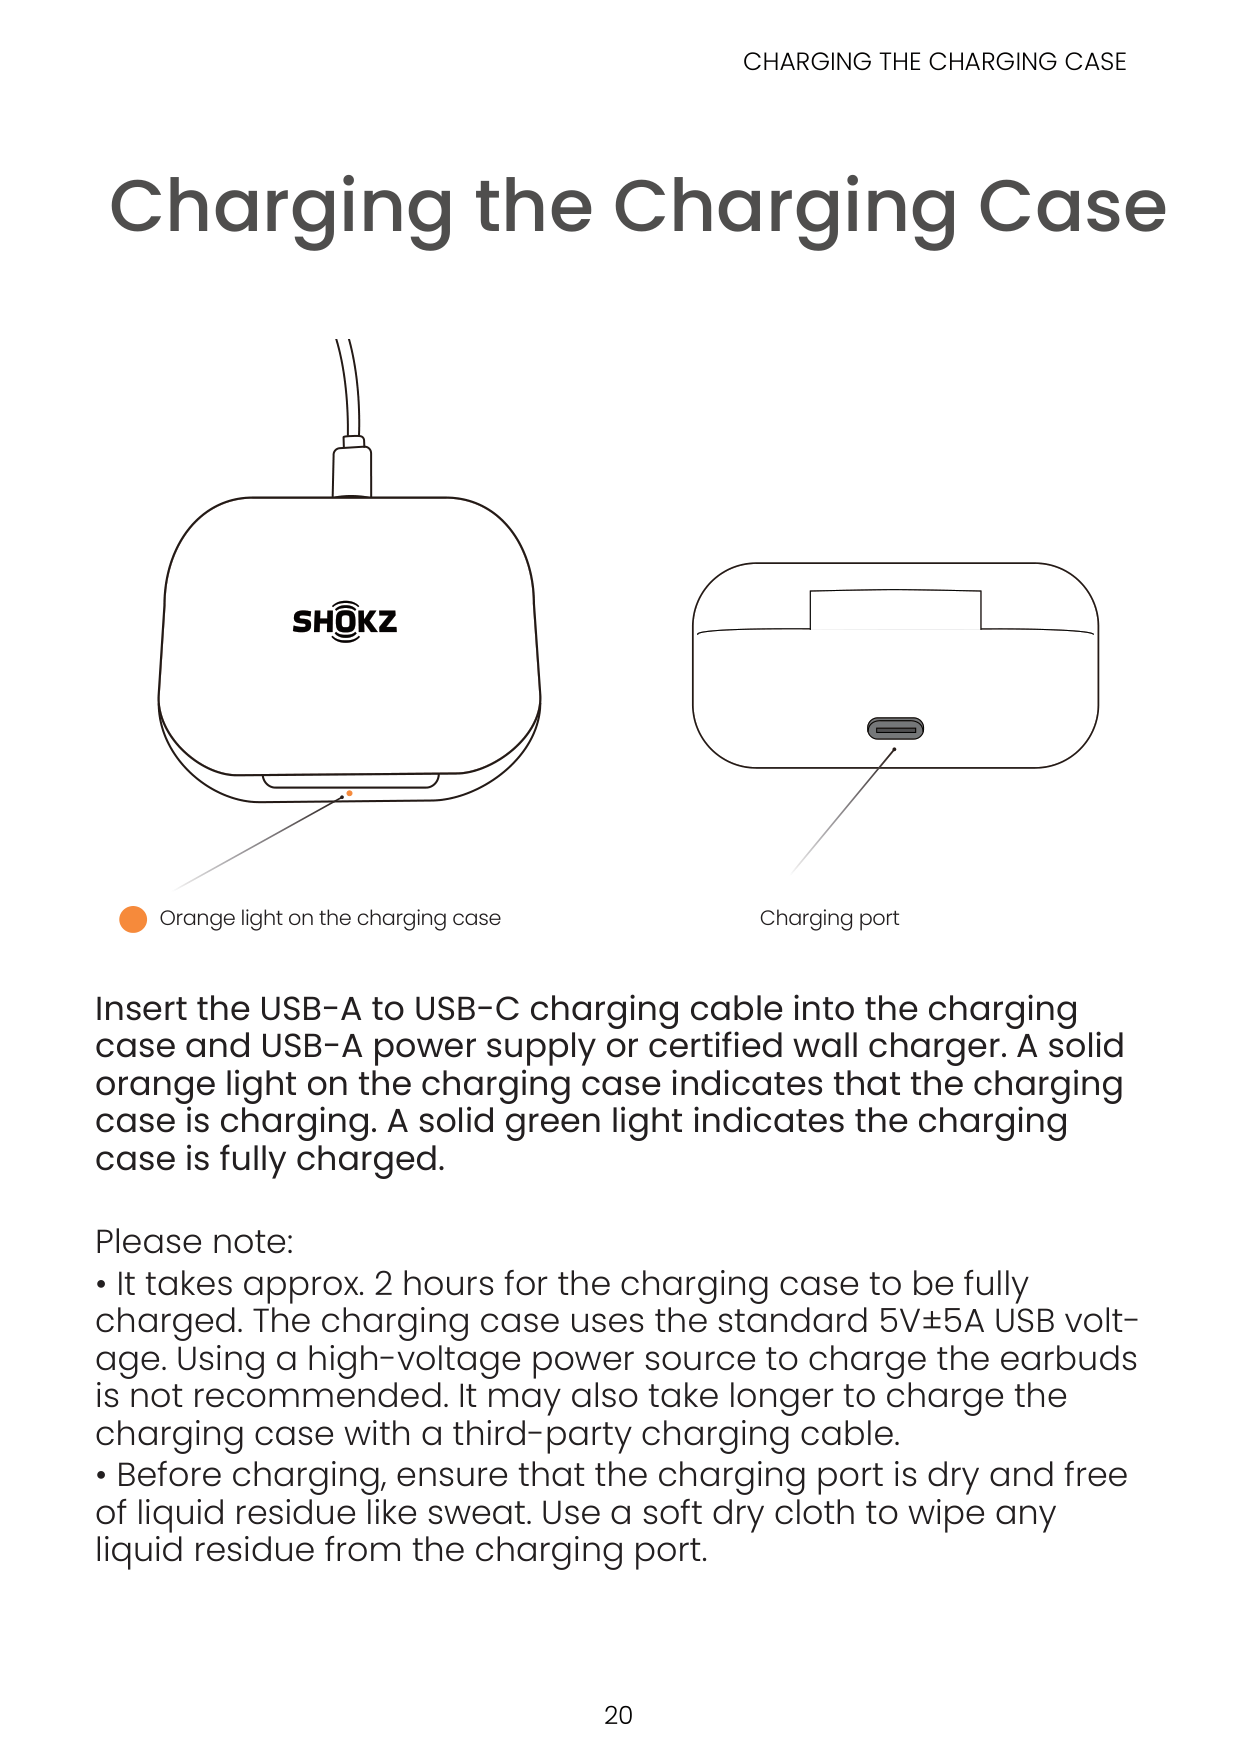
Orange light on the charging case Charging port
Insert the USB-A to USB-C charging cable into the charging case and USB-A power supply or certified wall charger. A solid orange light on the charging case indicates that the charging case is charging. A solid green light indicates the charging case is fully charged.
Please note:

Additional Features
Auto Connect
AUTO CONNECT
| | | | |---|---|---|
| | | |
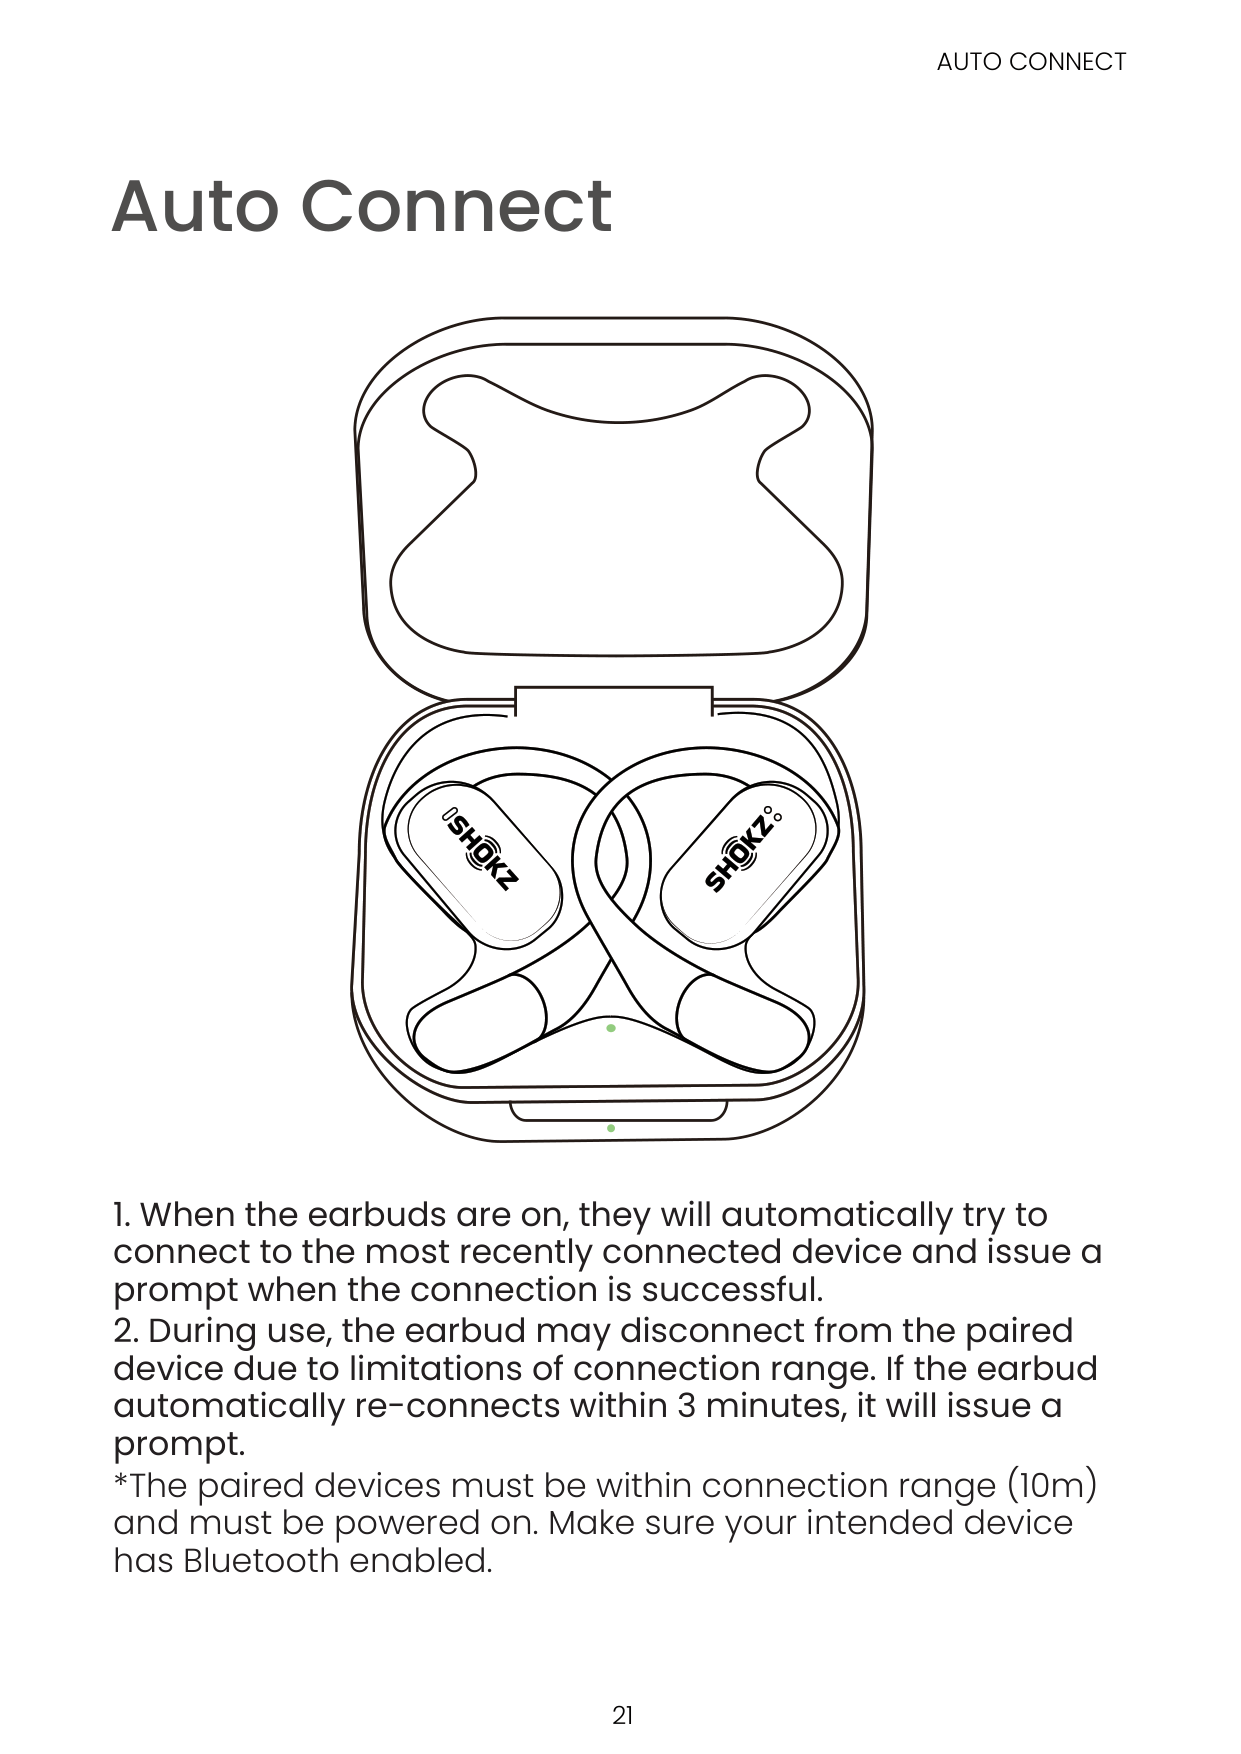
*The paired devices must be within connection range (10m) and must be powered on. Make sure your intended device has Bluetooth enabled.
Resetting
RESETTING
| | | | |---|---|---| | | | |
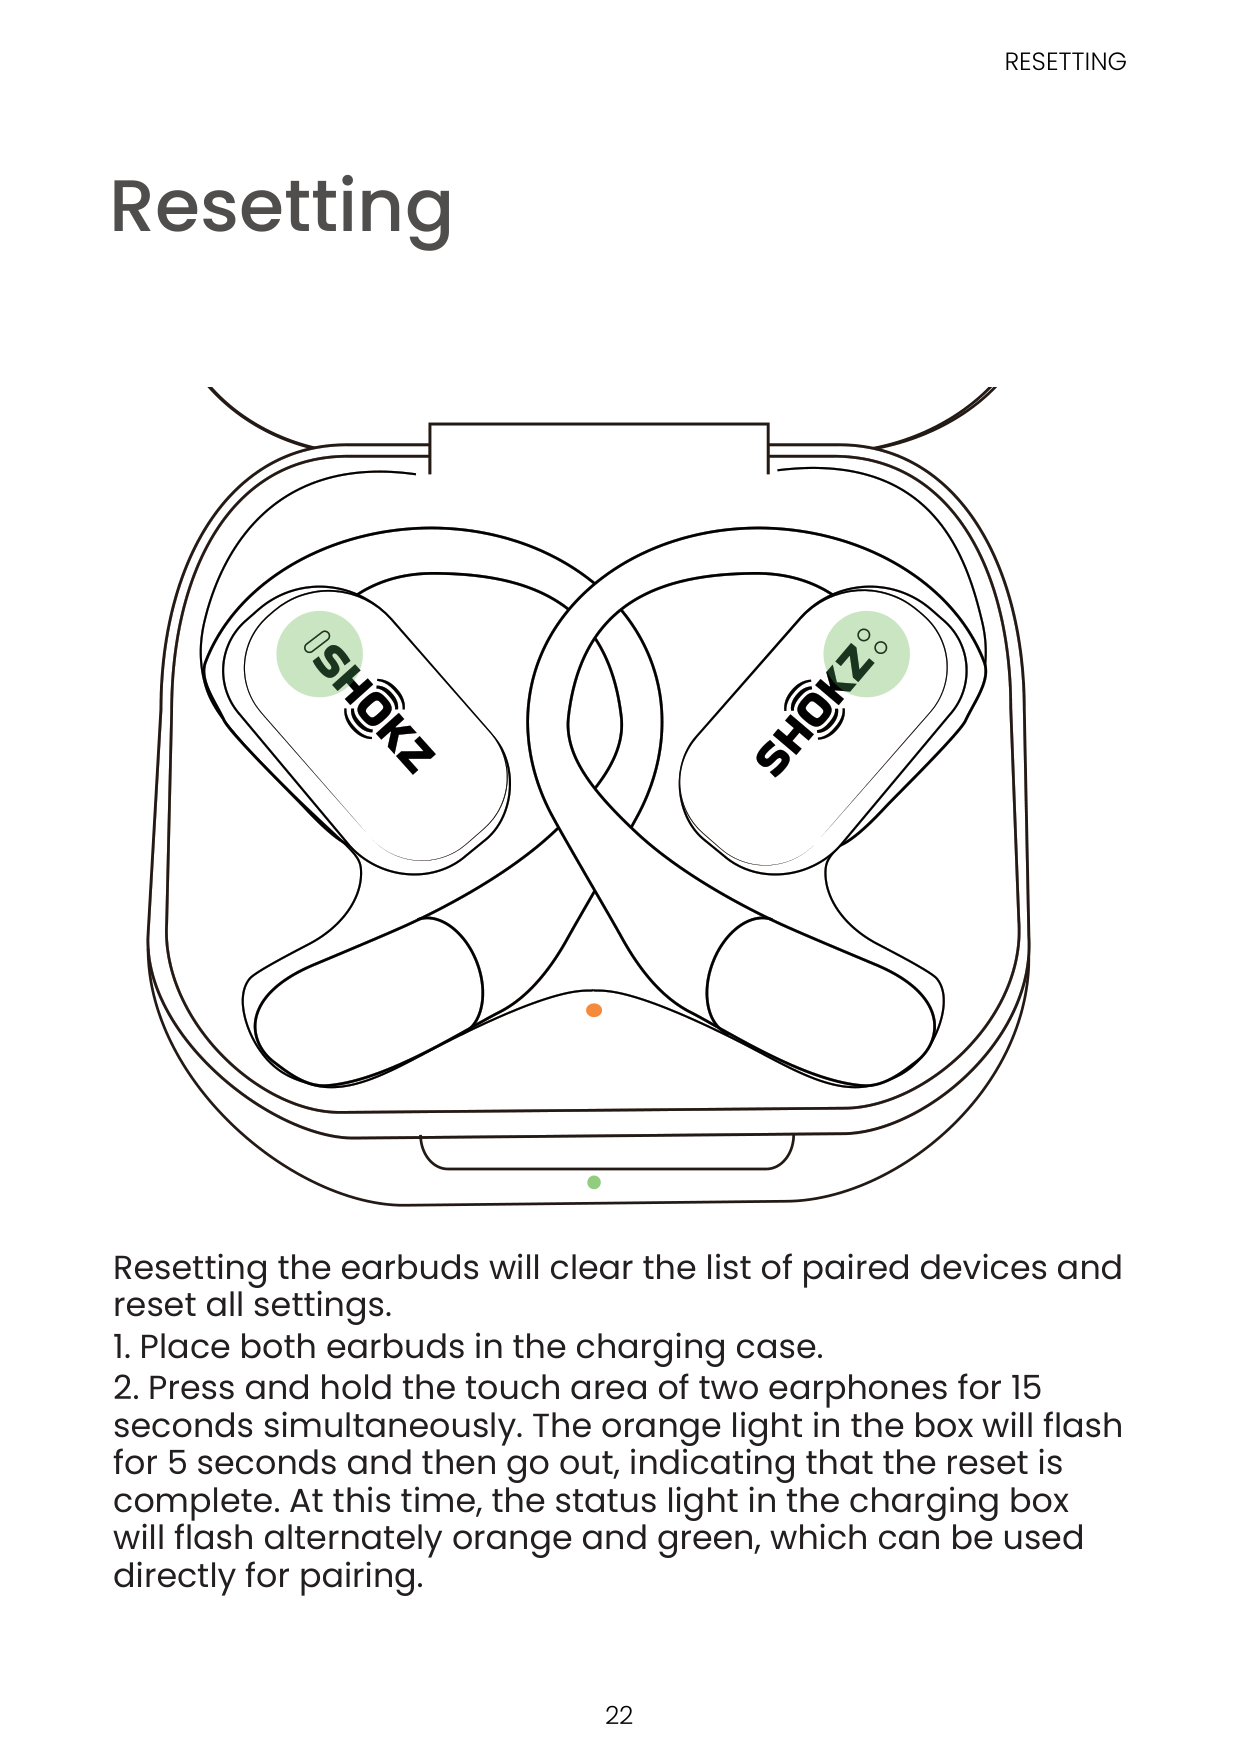
Resetting the earbuds will clear the list of paired devices and reset all settings.

Maintenance
CLEANING
#### Cleaning
###### 1. Earbuds:
It is recommended to use a soft and clean dry cloth to clean the earbuds. When cleaning the earphone mesh, gently brush away dirt and earwax with a clean and dry cotton swab, then wipe with a soft cloth.
*Please note:
###### 2. Charging Case:
It is recommended to clean the charging case with a soft and clean, dry cloth. Use a clean, dry, soft brush to remove debris from the charging interface. Use a clean and dry cotton swab to wipe the charging contact surface of the charging box gently.

IP Rating
IP RATING
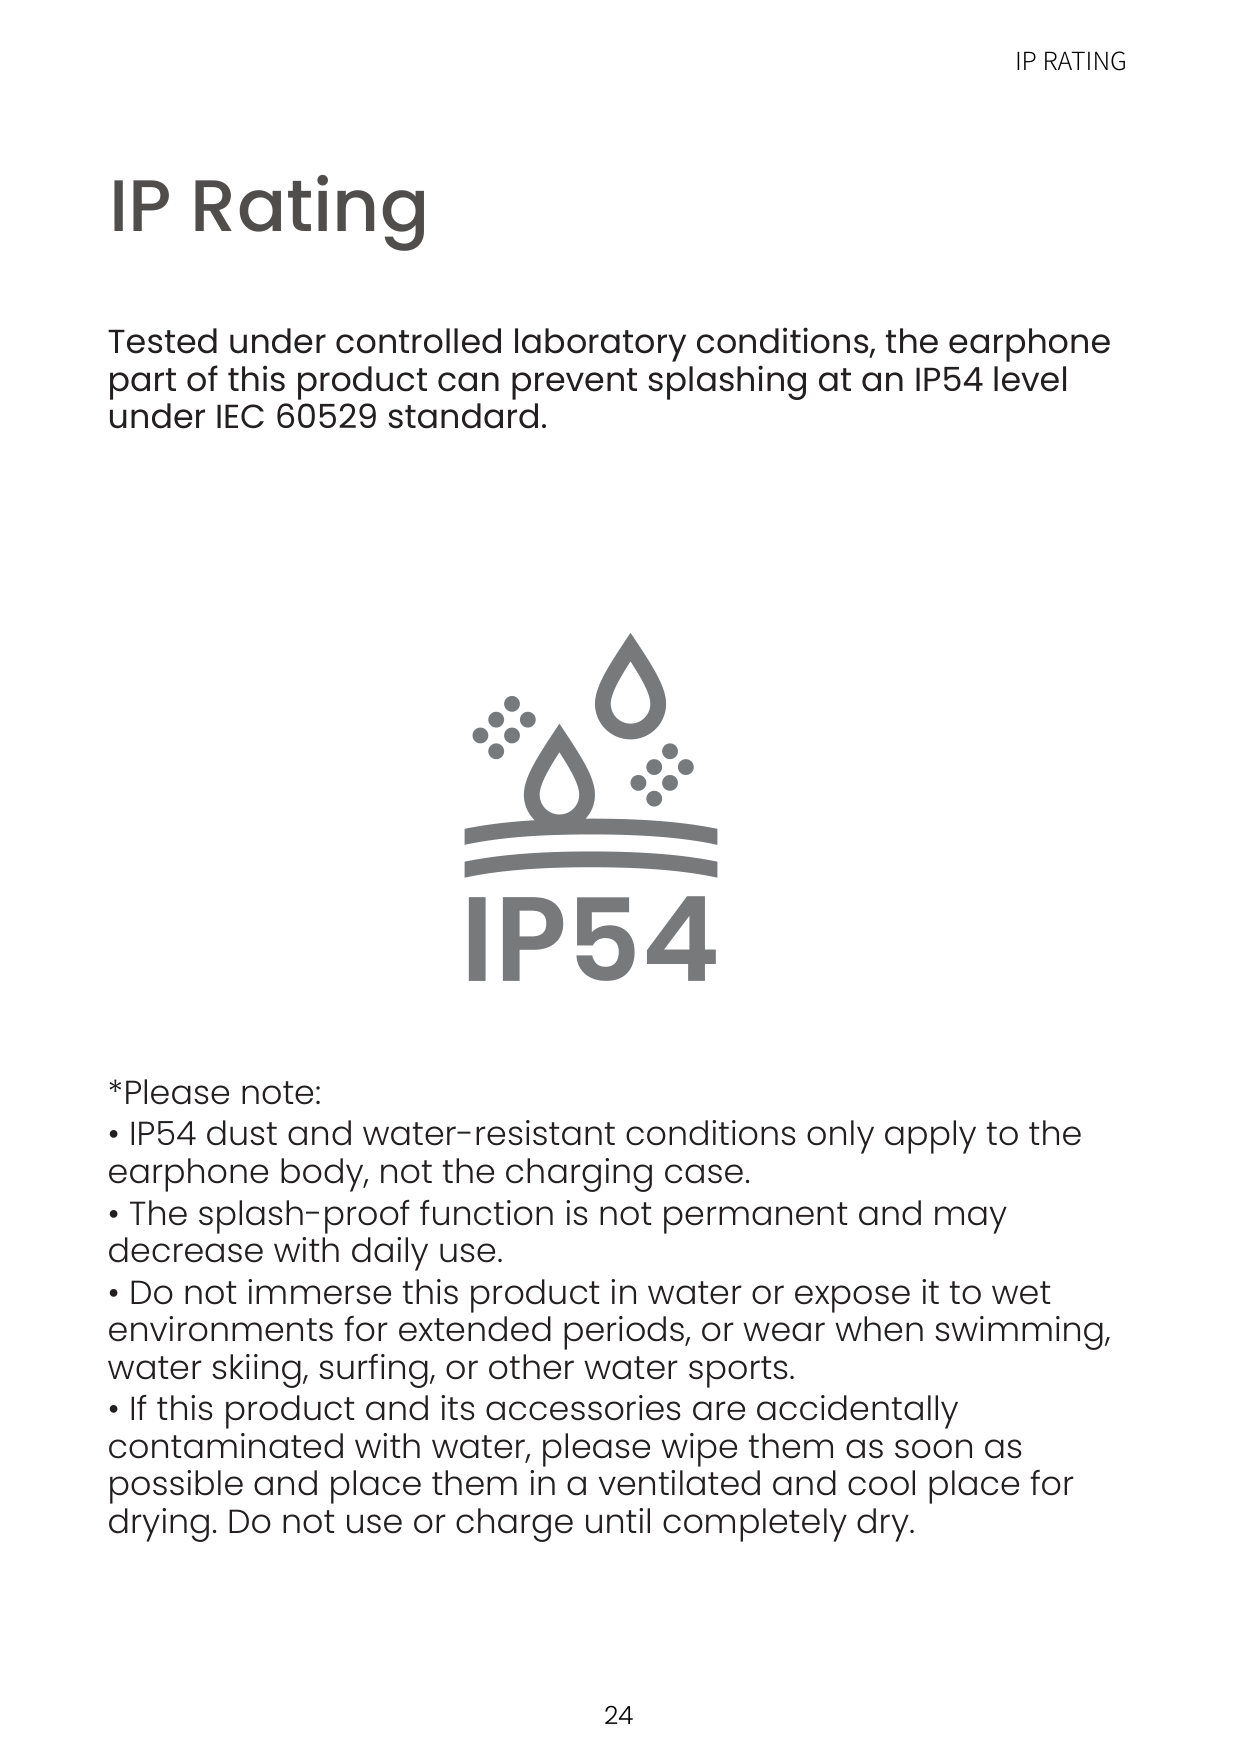
############ Tested under controlled laboratory conditions, the earphone part of this product can prevent splashing at an IP54 level under IEC 60529 standard.

After-Sales Service
SERIAL NUMBER LOCATION
#### Serial Number Location
########## sxxxxxxxxxxxxx
sxxxxxxxxxxxxx
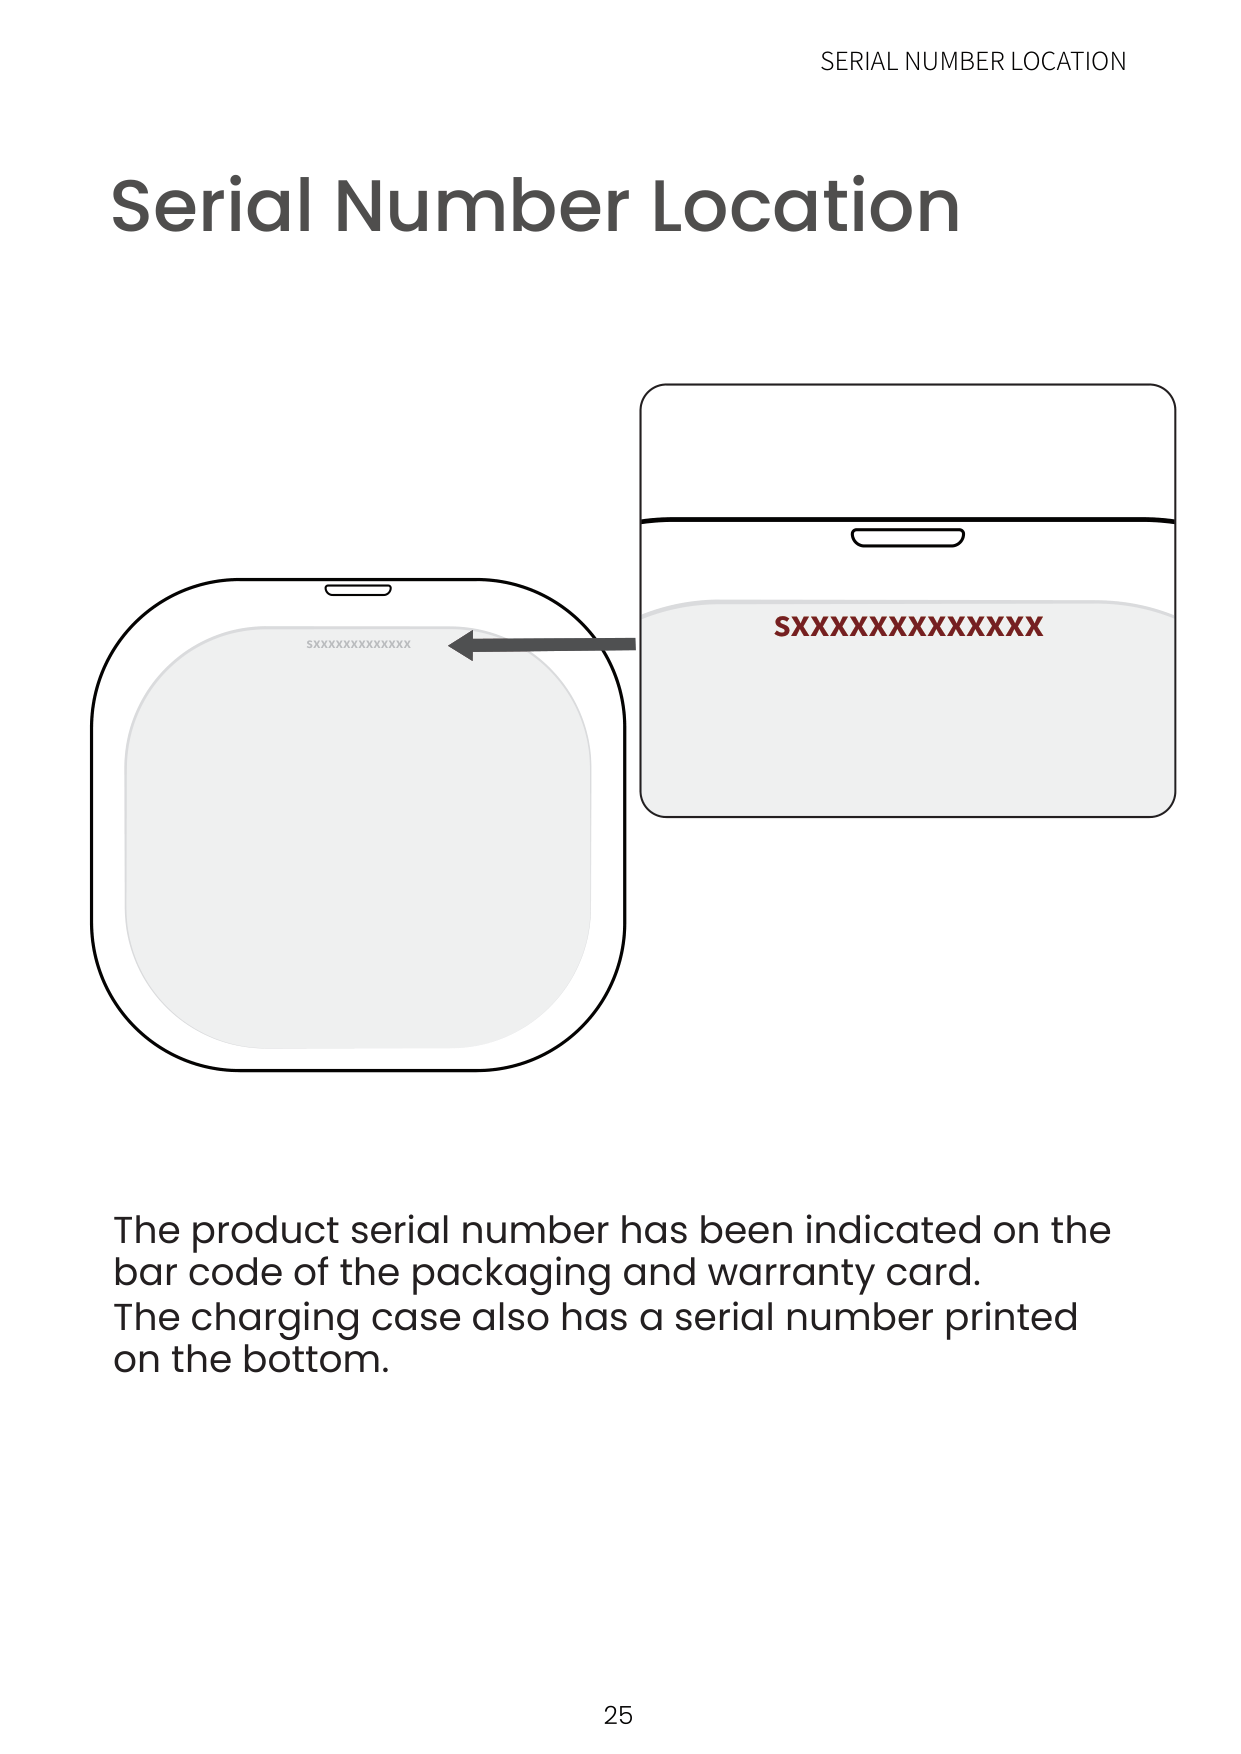
The product serial number has been indicated on the bar code of the packaging and warranty card. The charging case also has a serial number printed on the bottom.
Warranty
WARRANTY
######### Your headphones are covered by a warrantyVisit our website at https://shokz.com/pages/warranty-landing for details of the limited warranty.