
Ask AI
— answers from the official manualAnswers from the official manual.
Common questions
Common Questions
17 totalWhat should I do if all the lights on my HP Deskjet F4100 are blinking at the same time?
All lights blinking simultaneously indicates the HP All-in-One has a fatal error. Turn the device off, unplug the power cord, wait a minute, plug the power cord back in, and turn the HP All-in-One back on. If the problem persists, contact HP Support. (Page 7)
How do I make a color or black-and-white copy using the control panel?
Make sure paper is loaded in the input tray and place your original face down on the left front corner of the glass. Press the Paper Type button to set the paper type, then press Start Copy Black or Start Copy Color. You can press the copy button multiple times to specify up to 9 copies, and the printer will start shortly after the number is selected. (Page 8)
Why is my HP Deskjet F4100 not turning on?
The most common cause is that the HP All-in-One is not properly connected to a power supply — ensure the power cord is firmly connected to both the device and power adapter and that the outlet is working. Another cause is pressing the On button too quickly; press it once and wait a few seconds as it may take a moment to power on. If it still does not turn on, it may have a mechanical failure and you should unplug it and contact HP at www.hp.com/support. (Page 10)
What does it mean when the Check Print Cartridge light is blinking?
A blinking Check Print Cartridge light indicates one of several issues, such as an open print cartridge door, missing or incorrectly seated cartridges, tape still on the print cartridge, an incorrect model, or a potential defective cartridge (Page 7).
How do I properly install the HP All-in-One software to avoid USB connection errors?
You must install the software before connecting the USB cable to your computer. If you connected the USB cable before being prompted by the software installation screen, disconnect the cable, uninstall any partially installed software, restart your computer, and then reinstall the software from the CD-ROM. Do not plug in the USB cable until the software installation screen prompts you to do so. (Page 9)
How do I troubleshoot print cartridge problems on the HP Deskjet F4100?
Remove the black print cartridge from the right slot, being careful not to touch the ink nozzles or copper-colored contacts, and check for damage. Also confirm that the plastic tape covering the ink nozzles has been removed using the pink pull tab if still present. Reinsert the cartridge by sliding it forward until it clicks into the socket, then repeat the process for the tri-color cartridge on the left. If the problem persists, you may need to print a self-test report or clean the print cartridges using the onscreen Help. (Page 12)
Show 11 more questions
How do I uninstall and reinstall the HP All-in-One software on a Windows computer?
What do I need to prepare before calling HP Support?
What are the power and environmental specifications for the HP Deskjet F4100?
How do I scan a document or photo to my computer using the HP Deskjet F4100?
How do I clear a paper jam on my HP Deskjet F4100?
How do I scan a document using my HP Deskjet F4100?
What should I do if my setup is incomplete or if the USB cable was connected prematurely?
What are the paper specifications for my HP Deskjet F4100?
How do I install the software for my HP Deskjet F4100 without causing issues?
What is the recommended operating temperature range for my HP Deskjet F4100?
How do I troubleshoot if the HP All-in-One does not print?
Full Manual
16 pages
HP Deskjet F4100 All-in-One series Basics Guide

Hewlett-Packard Company notices The information contained in this document is subject to change without notice. All rights reserved. Reproduction, adaptation, or translation of this material is prohibited without prior written permission of Hewlett-Packard, except as allowed under copyright laws. The only warranties for HP products and services are set forth in the express warranty statements accompanying such products and services. Nothing herein should be construed as constituting an additional warranty. HP shall not be liable for technical or editorial errors or omissions contained herein. © 2007 Hewlett-Packard Development Company, L.P. Windows, Windows 2000, and Windows XP are U.S. registered trademarks of Microsoft Corporation. Windows Vista is either a registered trademark or trademark of Microsoft Corporation in the United States and/or other countries. Intel and Pentium are trademarks or registered trademarks of Intel Corporation or its subsidiaries in the United States and other countries.

Contents 1 HP All-in-One overview The HP All-in-One at a glance....................................................................................................2 Control panel buttons.................................................................................................................3 Status light overview...................................................................................................................4 Load originals for scanning and copying....................................................................................5 Make a copy...............................................................................................................................6 Scan an original..........................................................................................................................6 2 Troubleshooting and support Uninstall and reinstall the software.............................................................................................7 Hardware setup troubleshooting.................................................................................................8 Clear paper jams......................................................................................................................10 Print cartridge troubleshooting..................................................................................................10 Find more information...............................................................................................................10 Setup Guide........................................................................................................................11 Onscreen Help....................................................................................................................11 HP Web site........................................................................................................................11 Ink usage............................................................................................................................11 HP support................................................................................................................................11 HP support by phone..........................................................................................................11 Phone support period...................................................................................................11 After the phone support period.....................................................................................11 Before calling HP Support..................................................................................................11 3 Technical information System requirements................................................................................................................13 Paper specifications.................................................................................................................13 Physical specifications..............................................................................................................13 Power specifications.................................................................................................................13 Environmental specifications....................................................................................................13 Regulatory notices....................................................................................................................13 Regulatory model identification number.............................................................................13 Warranty...................................................................................................................................14 1 Contents
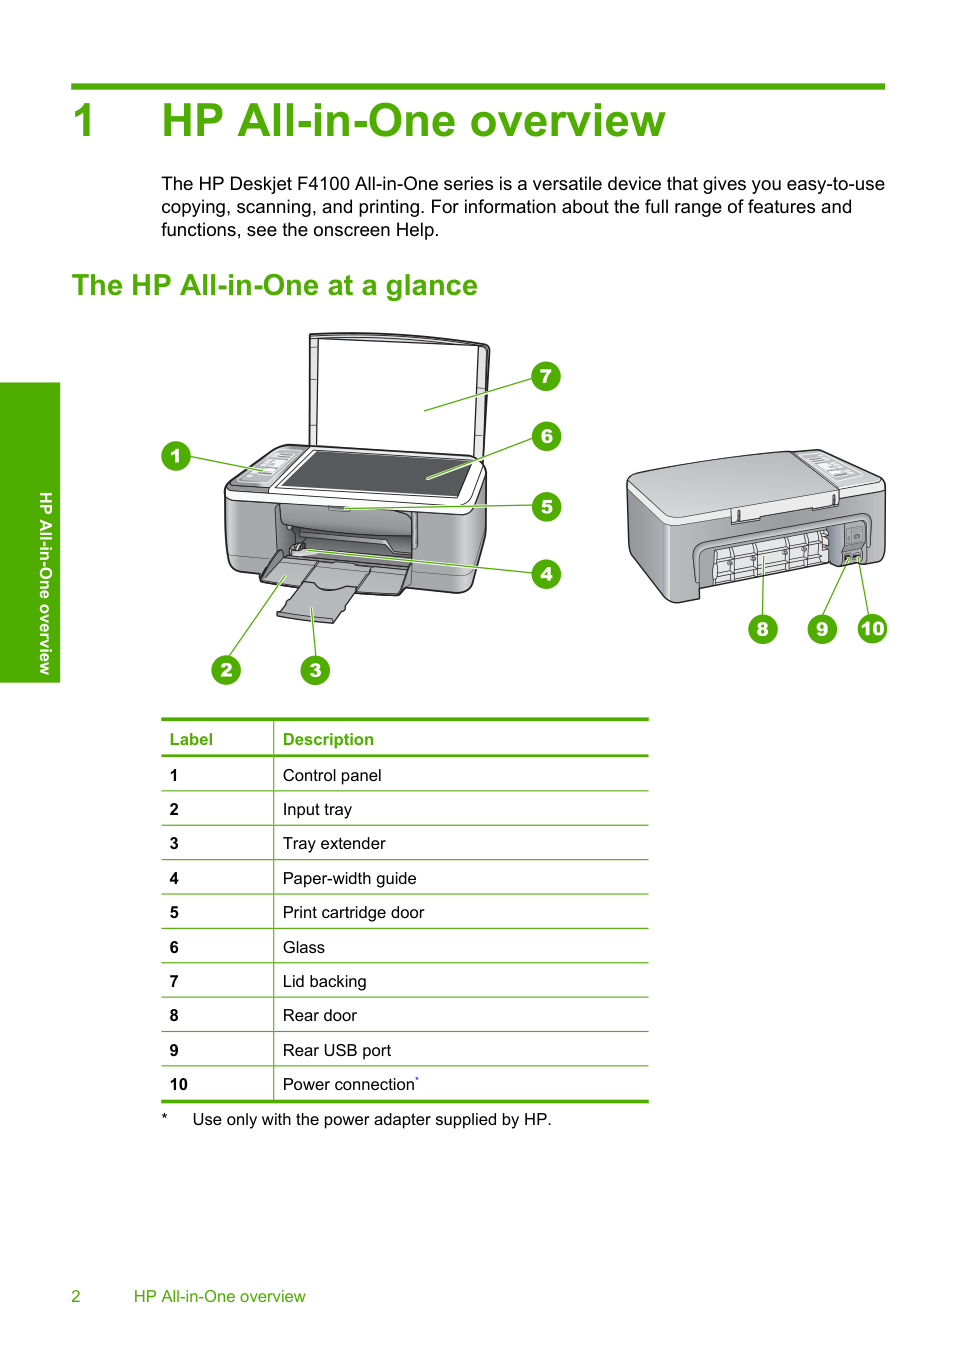
1 HP All-in-One overview The HP Deskjet F4100 All-in-One series is a versatile device that gives you easy-to-use copying, scanning, and printing. For information about the full range of features and functions, see the onscreen Help. The HP All-in-One at a glance Label Description 1 Control panel 2 Input tray 3 Tray extender 4 Paper-width guide 5 Print cartridge door 6 Glass 7 Lid backing 8 Rear door 9 Rear USB port 10 Power connection*

Control panel buttons Label Icon Name and Description 1 Scan: Starts scanning the original currently on the glass. The Scan command is ignored if the HP All-in-One is busy with any other job. The Scan command functions only when the computer is on. 2 Photosmart Essential button: Launches the HP Photosmart Software for printing, editing, and sharing photos.
Note:
If the HP Photosmart Software is not installed on your computer, the Photosmart Essential button will not do anything. 3 Paper Type: Changes the paper type setting to either plain or photo paper. Make sure the appropriate paper type is loaded in the input tray. The default paper type setting is Plain. The Paper Type lights indicate the currently selected paper type, Plain or Photo. 4 Start Copy Black: Starts a black-and-white copy job. Press this button multiple times to specify multiple black copies. The printer will start printing shortly after the number of copies have been selected. The number of copies to be printed is shown to the right of this button.Tip:
You can make up to 9 copies using the control panel (varies by model). 5 Start Copy Color: Starts a color copy job. Press this button multiple times to specify multiple color copies. The printer will start printing shortly after the number of copies have been selected. The number of copies to be printed is shown to the right of this button. Control panel buttons 3 HP All-in-One overview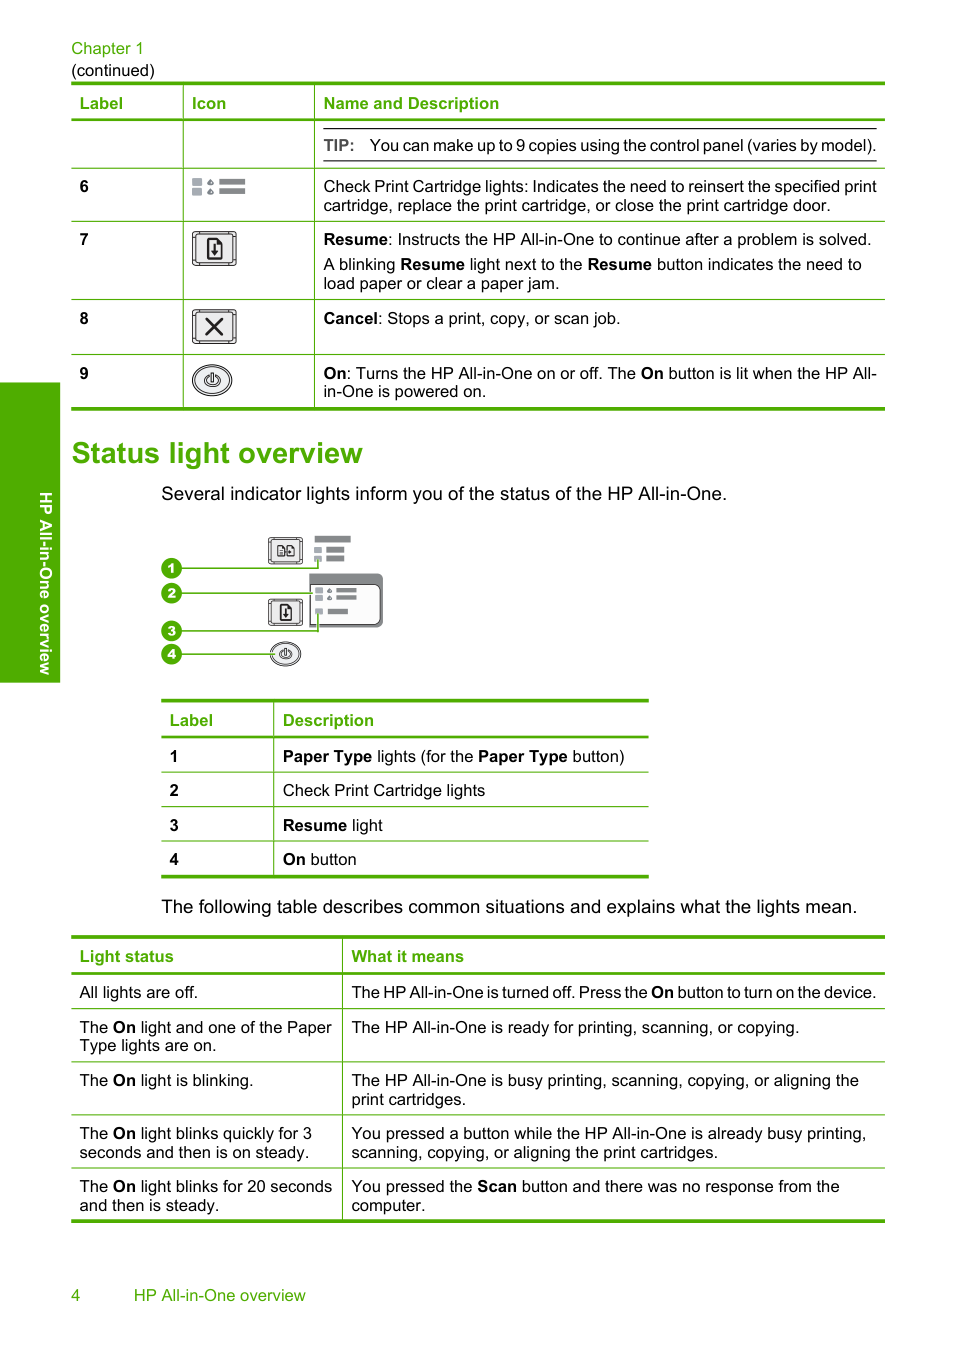
Label Icon Name and Description
Tip:
You can make up to 9 copies using the control panel (varies by model). 6 Check Print Cartridge lights: Indicates the need to reinsert the specified print cartridge, replace the print cartridge, or close the print cartridge door. 7 Resume: Instructs the HP All-in-One to continue after a problem is solved. A blinking Resume light next to the Resume button indicates the need to load paper or clear a paper jam. 8 Cancel: Stops a print, copy, or scan job. 9 On: Turns the HP All-in-One on or off. The On button is lit when the HP All- in-One is powered on. Status light overview Several indicator lights inform you of the status of the HP All-in-One. Label Description 1 Paper Type lights (for the Paper Type button) 2 Check Print Cartridge lights 3 Resume light 4 On button The following table describes common situations and explains what the lights mean. Light status What it means All lights are off. The HP All-in-One is turned off. Press the On button to turn on the device. The On light and one of the Paper Type lights are on. The HP All-in-One is ready for printing, scanning, or copying. The On light is blinking. The HP All-in-One is busy printing, scanning, copying, or aligning the print cartridges. The On light blinks quickly for 3 seconds and then is on steady. You pressed a button while the HP All-in-One is already busy printing, scanning, copying, or aligning the print cartridges. The On light blinks for 20 seconds and then is steady. You pressed the Scan button and there was no response from the computer. Chapter 1 (continued) 4 HP All-in-One overview HP All-in-One overview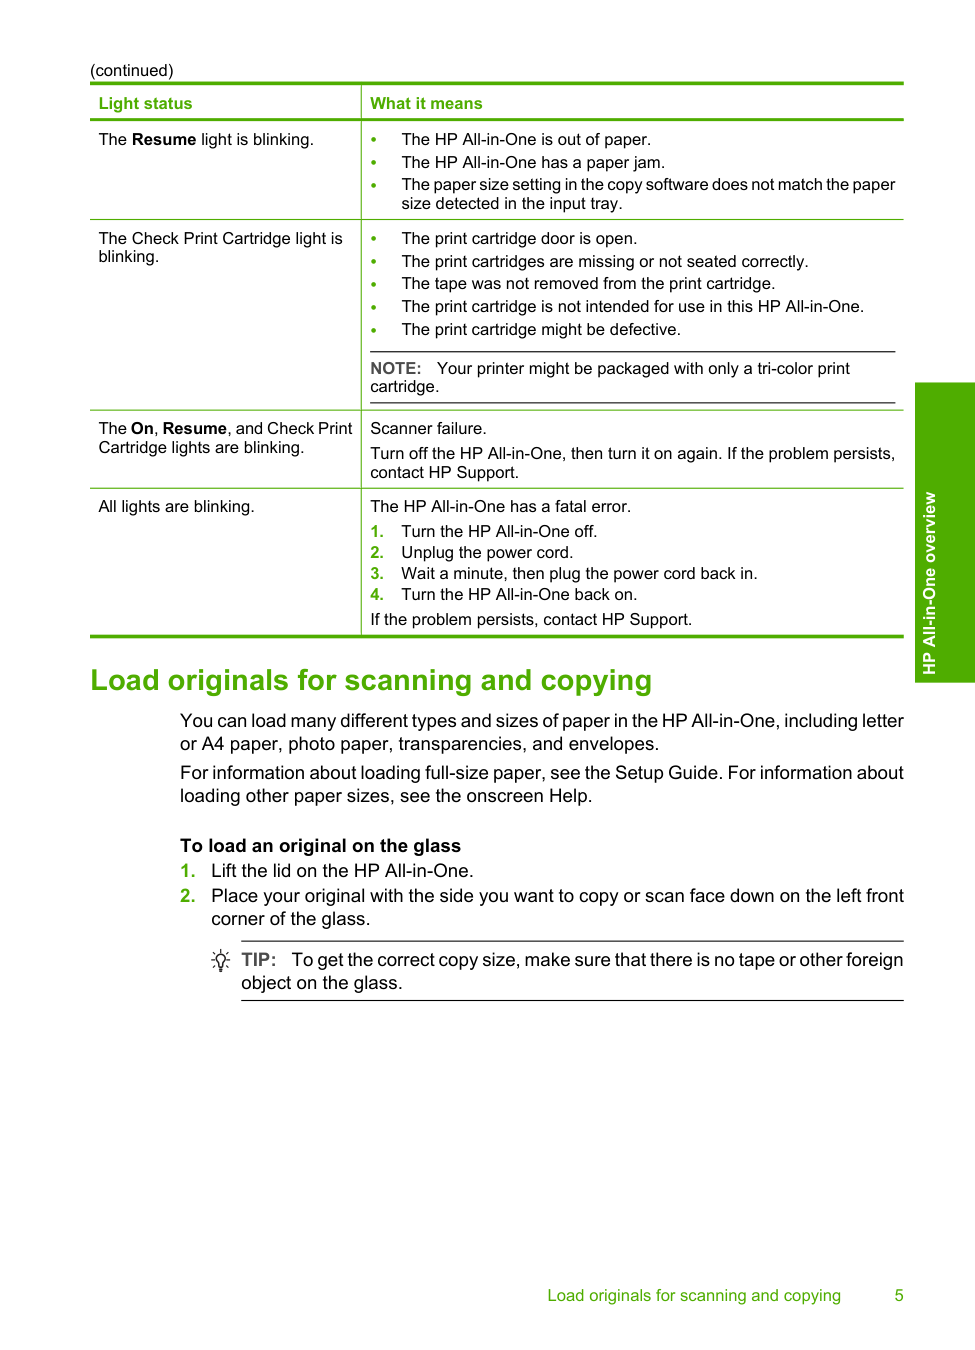
Light status What it means The Resume light is blinking. • The HP All-in-One is out of paper. • The HP All-in-One has a paper jam. • The paper size setting in the copy software does not match the paper size detected in the input tray. The Check Print Cartridge light is blinking. • The print cartridge door is open. • The print cartridges are missing or not seated correctly. • The tape was not removed from the print cartridge. • The print cartridge is not intended for use in this HP All-in-One. • The print cartridge might be defective.
Note:
Your printer might be packaged with only a tri-color print cartridge. The On, Resume, and Check Print Cartridge lights are blinking. Scanner failure. Turn off the HP All-in-One, then turn it on again. If the problem persists, contact HP Support. All lights are blinking. The HP All-in-One has a fatal error.Tip:
To get the correct copy size, make sure that there is no tape or other foreign object on the glass. (continued) Load originals for scanning and copying 5 HP All-in-One overview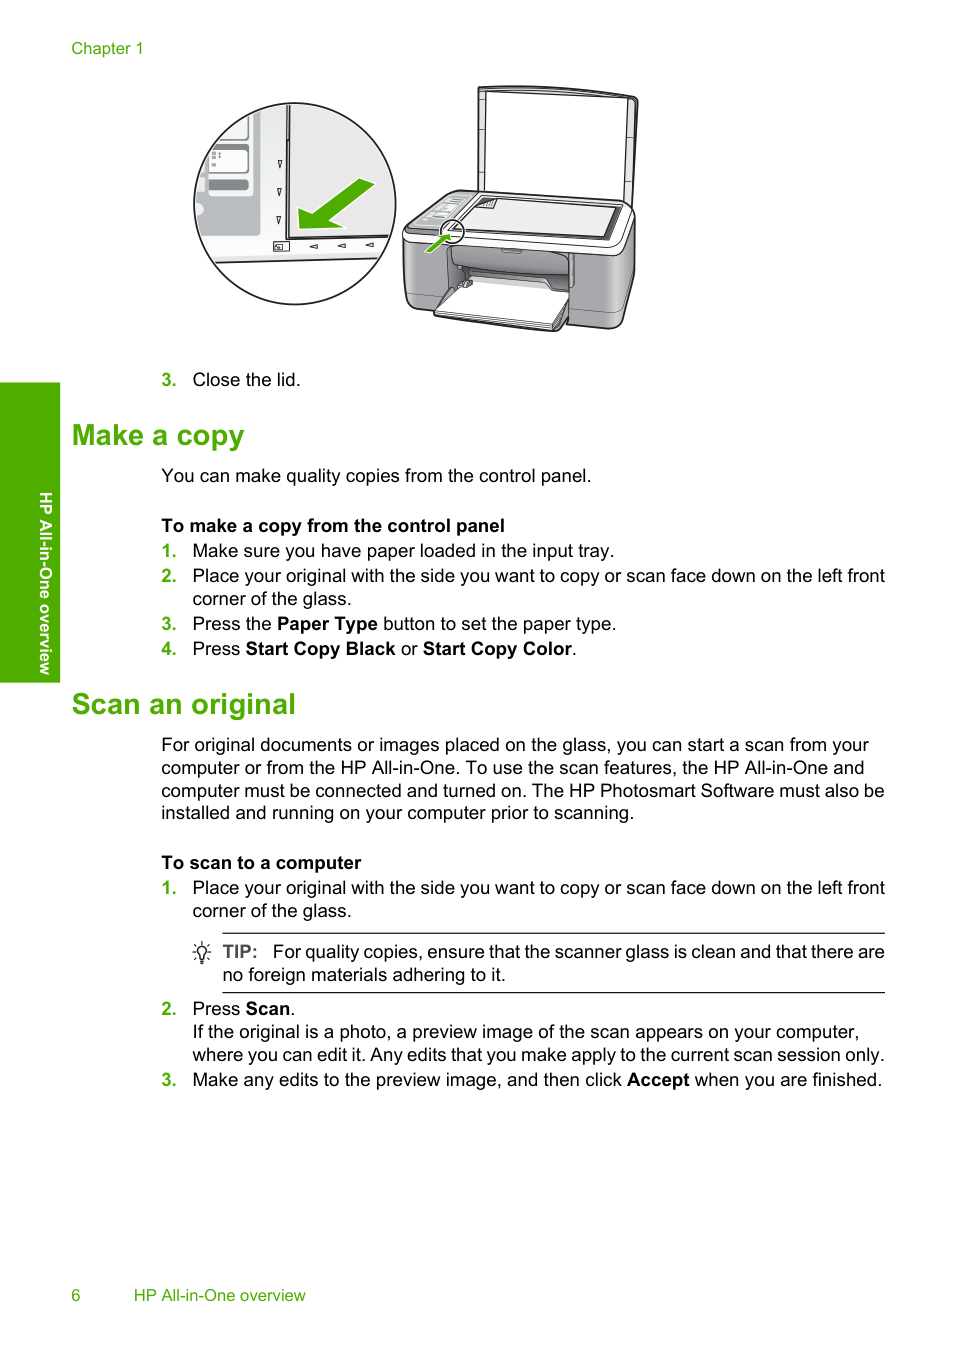
Tip:
For quality copies, ensure that the scanner glass is clean and that there are no foreign materials adhering to it.
2 Troubleshooting and support This chapter contains troubleshooting information for installation and configuration issues and some operational topics. For more troubleshooting information, see the onscreen Help. Many issues are caused when the HP All-in-One is connected to the computer using a USB cable before the HP All-in-One software is installed on the computer. If you connected the HP All-in-One to your computer before the software installation screen prompts you to do so, you must follow these steps: Troubleshooting common setup issues
Caution:
Do not connect the USB cable to the computer until prompted by the software installation screen. For support contact information, see the inside back cover of this guide. Uninstall and reinstall the software If your installation is incomplete, or if you connected the USB cable to the computer before prompted by the software installation screen, you might need to uninstall and then reinstall the software. Do not simply delete the HP All-in-One application files from your computer. Make sure to remove them properly using the uninstall utility provided when you installed the software that came with the HP All- in-One. To uninstall from a Windows computer and then reinstallNote:
It is important that you disconnect the HP All-in-One before restarting your computer. Do not connect the HP All-in-One to your computer until after you have reinstalled the software.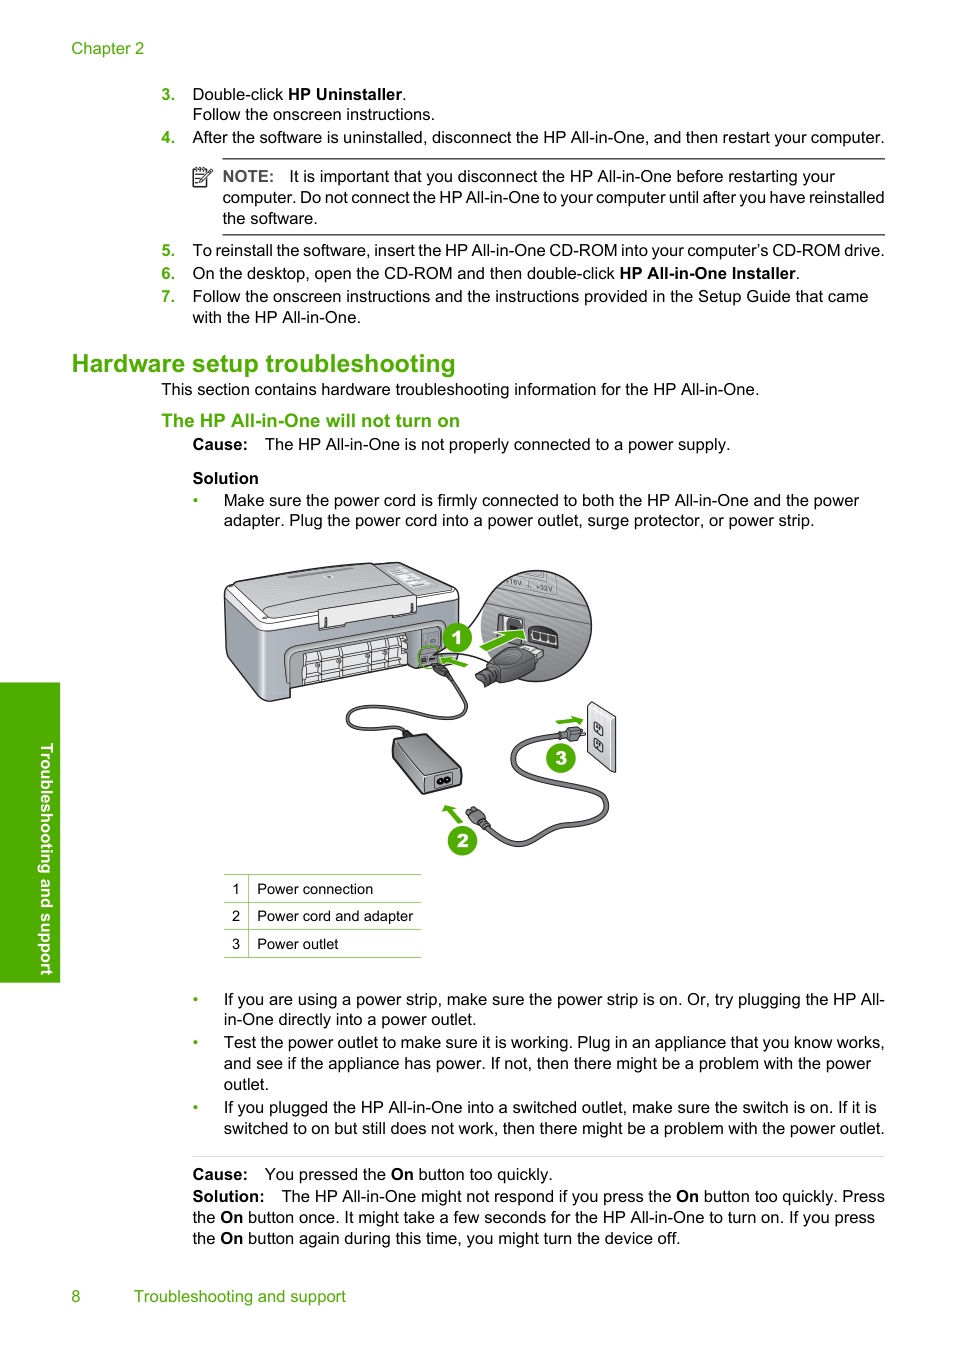
Note:
It is important that you disconnect the HP All-in-One before restarting your computer. Do not connect the HP All-in-One to your computer until after you have reinstalled the software.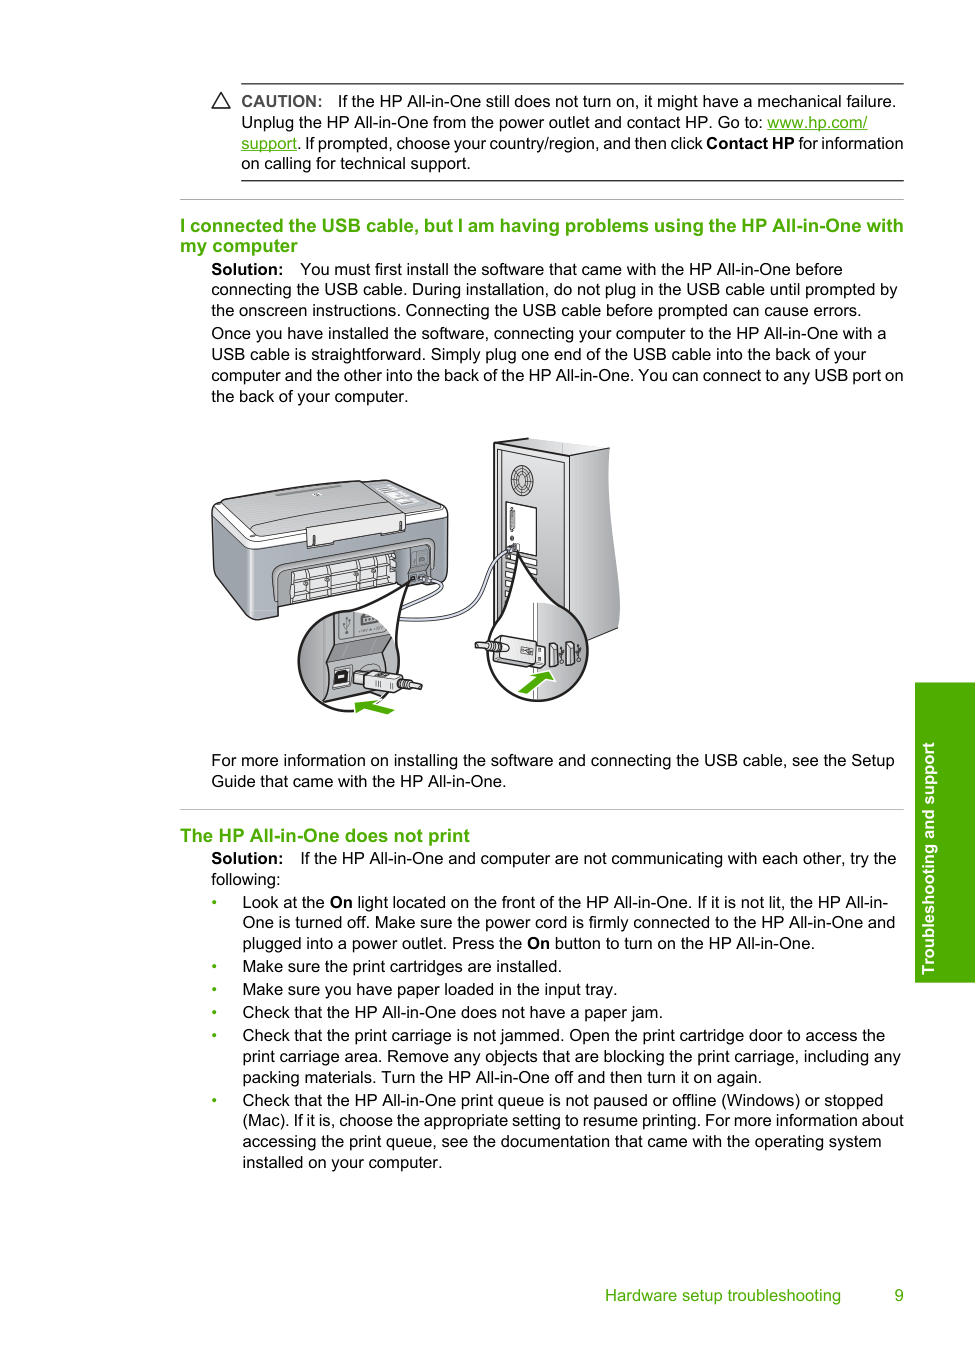
Caution:
If the HP All-in-One still does not turn on, it might have a mechanical failure. Unplug the HP All-in-One from the power outlet and contact HP. Go to: www.hp.com/ support. If prompted, choose your country/region, and then click Contact HP for information on calling for technical support. I connected the USB cable, but I am having problems using the HP All-in-One with my computer Solution: You must first install the software that came with the HP All-in-One before connecting the USB cable. During installation, do not plug in the USB cable until prompted by the onscreen instructions. Connecting the USB cable before prompted can cause errors. Once you have installed the software, connecting your computer to the HP All-in-One with a USB cable is straightforward. Simply plug one end of the USB cable into the back of your computer and the other into the back of the HP All-in-One. You can connect to any USB port on the back of your computer. For more information on installing the software and connecting the USB cable, see the Setup Guide that came with the HP All-in-One. The HP All-in-One does not print Solution: If the HP All-in-One and computer are not communicating with each other, try the following: • Look at the On light located on the front of the HP All-in-One. If it is not lit, the HP All-in- One is turned off. Make sure the power cord is firmly connected to the HP All-in-One and plugged into a power outlet. Press the On button to turn on the HP All-in-One. • Make sure the print cartridges are installed. • Make sure you have paper loaded in the input tray. • Check that the HP All-in-One does not have a paper jam. • Check that the print carriage is not jammed. Open the print cartridge door to access the print carriage area. Remove any objects that are blocking the print carriage, including any packing materials. Turn the HP All-in-One off and then turn it on again. • Check that the HP All-in-One print queue is not paused or offline (Windows) or stopped (Mac). If it is, choose the appropriate setting to resume printing. For more information about accessing the print queue, see the documentation that came with the operating system installed on your computer. Hardware setup troubleshooting 9 Troubleshooting and support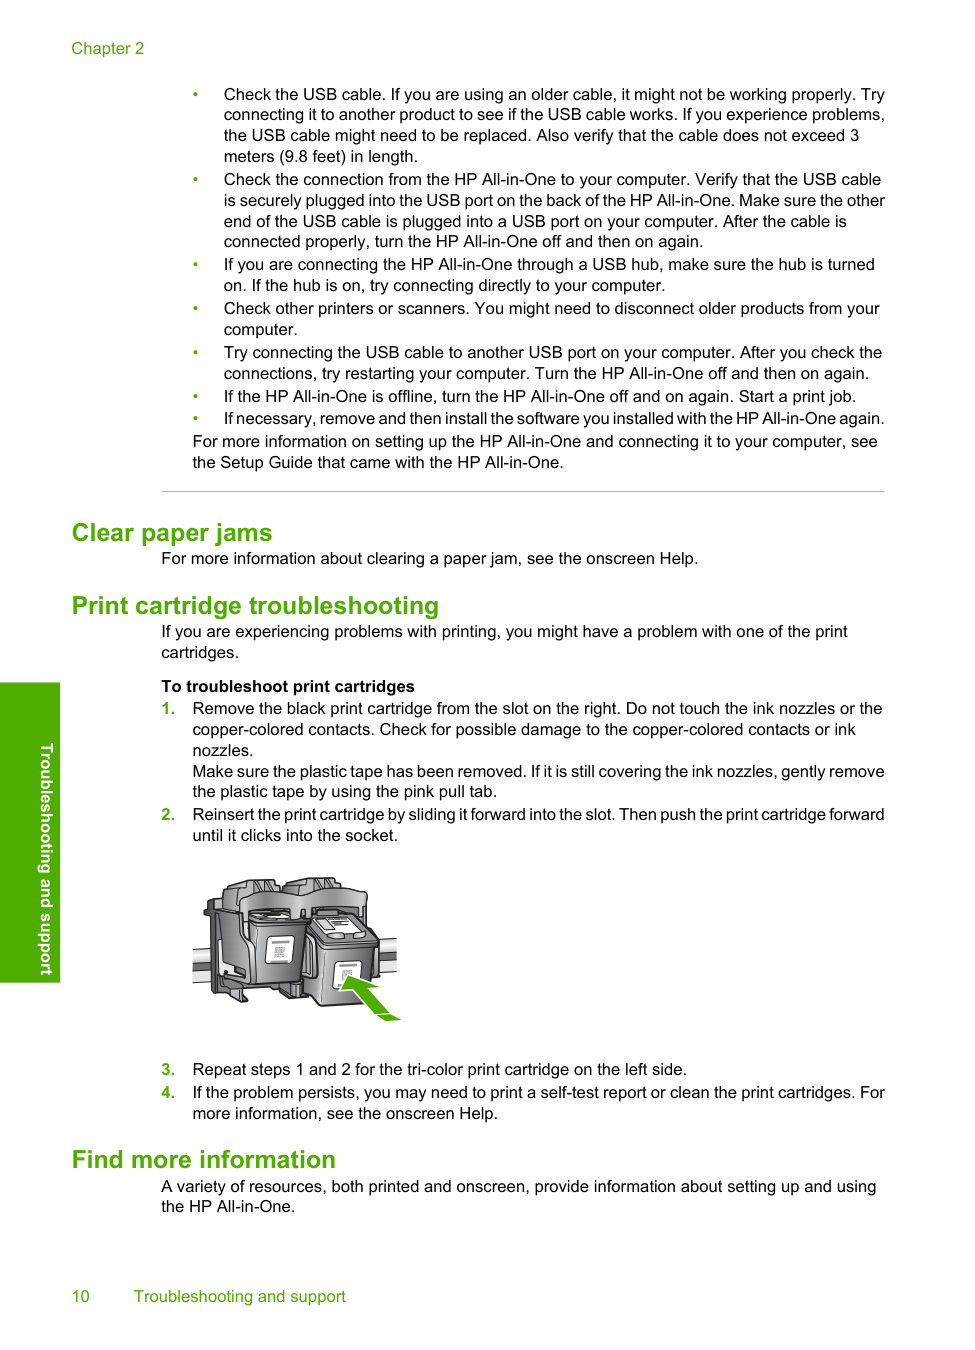
• Check the USB cable. If you are using an older cable, it might not be working properly. Try connecting it to another product to see if the USB cable works. If you experience problems, the USB cable might need to be replaced. Also verify that the cable does not exceed 3 meters (9.8 feet) in length. • Check the connection from the HP All-in-One to your computer. Verify that the USB cable is securely plugged into the USB port on the back of the HP All-in-One. Make sure the other end of the USB cable is plugged into a USB port on your computer. After the cable is connected properly, turn the HP All-in-One off and then on again. • If you are connecting the HP All-in-One through a USB hub, make sure the hub is turned on. If the hub is on, try connecting directly to your computer. • Check other printers or scanners. You might need to disconnect older products from your computer. • Try connecting the USB cable to another USB port on your computer. After you check the connections, try restarting your computer. Turn the HP All-in-One off and then on again. • If the HP All-in-One is offline, turn the HP All-in-One off and on again. Start a print job. • If necessary, remove and then install the software you installed with the HP All-in-One again. For more information on setting up the HP All-in-One and connecting it to your computer, see the Setup Guide that came with the HP All-in-One. Clear paper jams For more information about clearing a paper jam, see the onscreen Help. Print cartridge troubleshooting If you are experiencing problems with printing, you might have a problem with one of the print cartridges. To troubleshoot print cartridges

Setup Guide The Setup Guide provides instructions for setting up your HP All-in-One and installing software. Make sure you follow the steps in the Setup Guide in order. If you have problems during setup, see Troubleshooting in the last section of the Setup Guide, or see “Troubleshooting and support” on page 7 in this guide. Onscreen Help The onscreen Help provides detailed instructions on features of your HP All-in-One that are not described in this guide, including features that are only available using the software you installed with your HP All-in-One. To access the HP Photosmart Software Help on a Windows computer
c. Plug the power cord back into the HP All-in-One. d. Turn on the HP All-in-One by pressing the On button.
3 Technical information The technical specifications and international regulatory information for the HP All-in-One are provided in this section. System requirements Software system requirements are located in the Readme file. Paper specifications • Input tray capacity: Plain paper sheets: Up to 100 (20 lb. paper) • Output tray capacity: Plain paper sheets: Up to 50 (20 lb. paper)
Note:
For a complete list of supported media sizes, see the printer software. For a complete list of paper weights, see the onscreen Help. Physical specifications • Height: 18.05 cm (7.11 inches) • Width: 42.57 cm (16.76 inches) • Depth: 26.74 cm (10.53 inches) • Weight: 4.26 kg (9.39 pounds) Power specifications • Power consumption: 20 watts (average printing) • Input voltage: AC 100 to 240 V ~ 1 A 50–60 Hz • Output voltage: DC 32 V===375 mA, 16 V===500mA • Power supply: 0957-2231, AC 100 to 240 V ~ 1 A 50–60 HzNote:
Use only with the power adapter supplied by HP. Environmental specifications • Recommended operating temperature range: 15º to 30º C (59º to 86º F) • Allowable operating temperature range: 10º to 35º C (50º to 95º F) • Humidity: 15% to 80% RH non-condensing • Non-operating (Storage) temperature range: –20º to 50º C (–4º to 122º F) • In the presence of high electromagnetic fields, it is possible the output from the HP All-in-One may be slightly distorted • HP recommends using a USB cable less than or equal to 3 m (10 feet) in length to minimize injected noise due to potential high electromagnetic fields Regulatory notices The HP All-in-One meets product requirements from regulatory agencies in your country/region. For a complete listing of regulatory notices, see the onscreen Help. Regulatory model identification number For regulatory identification purposes, your product is assigned a Regulatory Model Number. The Regulatory Model Number for your product is VCVRA-0706. This regulatory number should not be confused with the marketing name (HP Deskjet F4100 All-in-One series, etc.) or product numbers (CB580A, etc.). Technical information 13 Technical information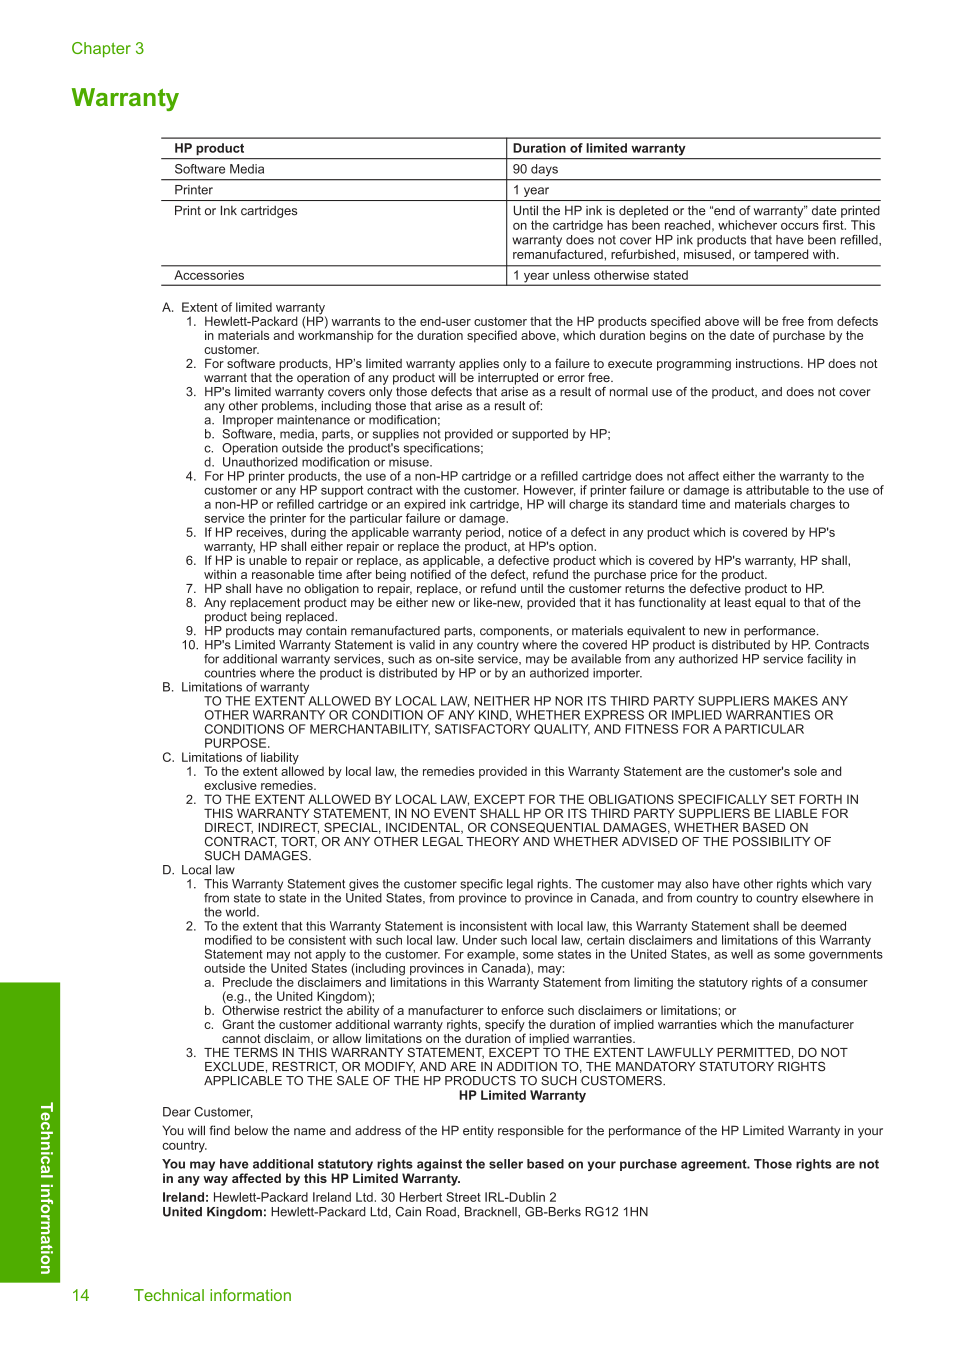
Warranty Chapter 3 14 Technical information Technical information