
Ask AI
— answers from the official manualAnswers from the official manual.
Common questions
Common Questions
19 totalWhat should I do if the HP Photosmart D110 won't turn on?
First, check that the power cord is firmly connected to both the printer and the power adapter — an LED on the power supply will be lit if the power cord is working. Try turning off the printer, unplugging the power cord, then plugging it back in and pressing the power button only once, as pressing it multiple times may turn the printer back off. If the problem persists after all these steps, contact HP support at www.hp.com/support. (Page 10)
How do I check the ink levels on the HP Photosmart D110?
To check estimated ink levels, select Settings on the printer display, then select Tools, and then select Display Estimated Levels. This feature is accessible directly from the printer's menu without needing a connected computer. (Page 12)
How do I set up a wireless connection on the HP Photosmart D110 using WPS?
During the initial setup, if you are prompted for WPS on the printer display and you have a WPS-compatible router, simply press the WPS button on the router. The wireless LED on the printer will turn on if the connection is successful. If WPS is not available, follow the setup wizard on the printer display instead. (Page 9)
How do I switch the HP Photosmart D110 from a USB connection to a wireless connection on Windows?
On Windows, click Start, then HP, then Photosmart D110 series, then USB to Wireless, and keep the USB cable connected until prompted to disconnect it. Follow the on-screen instructions, clicking Next to advance through each screen. For Mac, press the Wireless button on the printer front panel, select Wireless Settings, then run the Wireless Setup Wizard. (Page 14)
How do I run a Wireless Network Test to check if my printer is connected to the network?
Press the Wireless button on the HP Photosmart front panel to display the Wireless menu, then select Run Wireless Network Test on the display. The Wireless Network Test Report will print automatically, showing any failures, a Diagnostics Summary of all tests performed, and a Configuration Summary with Network Name (SSID), Hardware Address (MAC), and IP Address. (Page 14)
What are the power specifications for the HP Photosmart D110?
The HP Photosmart D110 uses HP power adapter model 0957-2269 and should only be used with the power adapter supplied by HP. The input voltage is 100 to 240 Vac at 50-60 Hz, with a maximum power consumption of 70W and an average of 20W. (Page 13)
Show 13 more questions
How do I properly load originals for copying or scanning on the HP Photosmart D110?
What should I do if the printer software installation fails on Windows?
How does the HP ePrint service work, and how do I get started?
Does using a non-HP ink cartridge void the warranty on the HP Photosmart D110?
What should I do if I cannot print documents or photos?
How can I switch my printer from USB connection to wireless network usage?
How do I verify if my HP Photosmart is successfully connected to my home network?
How do I activate WiFi Protected Setup (WPS) feature?
What is the procedure to print directly from a memory card?
How do I start using ePrint service after setting up my printer online?
Where can I find specifications about power consumption of HP Photosmart D110?
How can I install and use apps for additional functionality on my printer?
What happens if the software installation does not complete properly?
Full Manual
16 pages
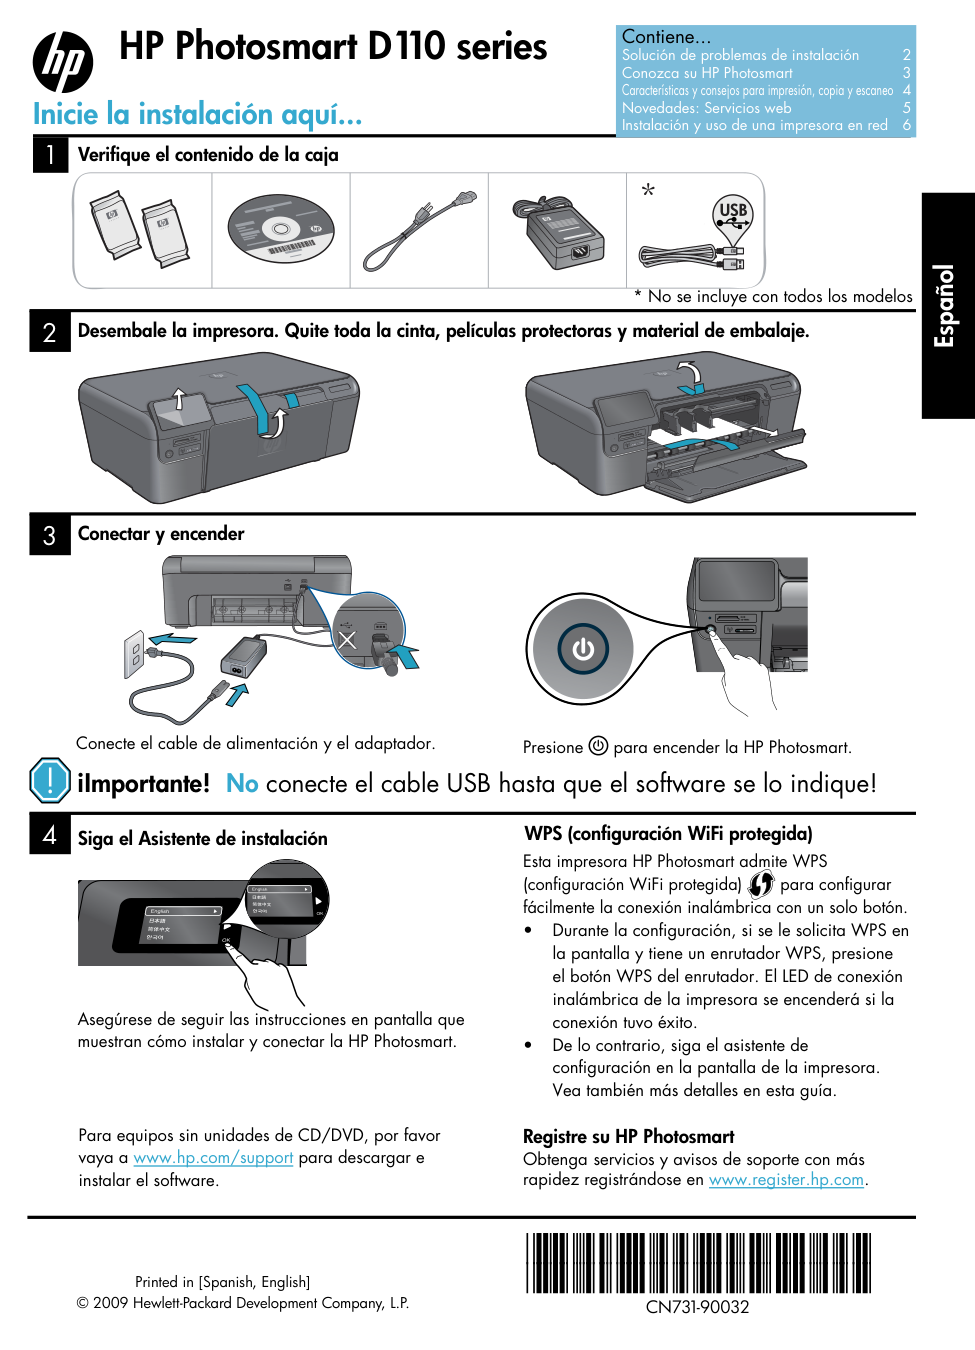
4 1 3 2 ¡Importante! No conecte el cable USB hasta que el software se lo indique! Desembale la impresora. Quite toda la cinta, películas protectoras y material de embalaje. Siga el Asistente de instalación Conectar y encender Conecte el cable de alimentación y el adaptador. Presione para encender la HP Photosmart. Asegúrese de seguir las instrucciones en pantalla que muestran cómo instalar y conectar la HP Photosmart. Para equipos sin unidades de CD/DVD, por favor vaya a www.hp.com/support para descargar e instalar el software. Verifique el contenido de la caja WPS (configuración WiFi protegida)
*Cn731-90032*
*Cn731-90032*
Cn731-90032
Español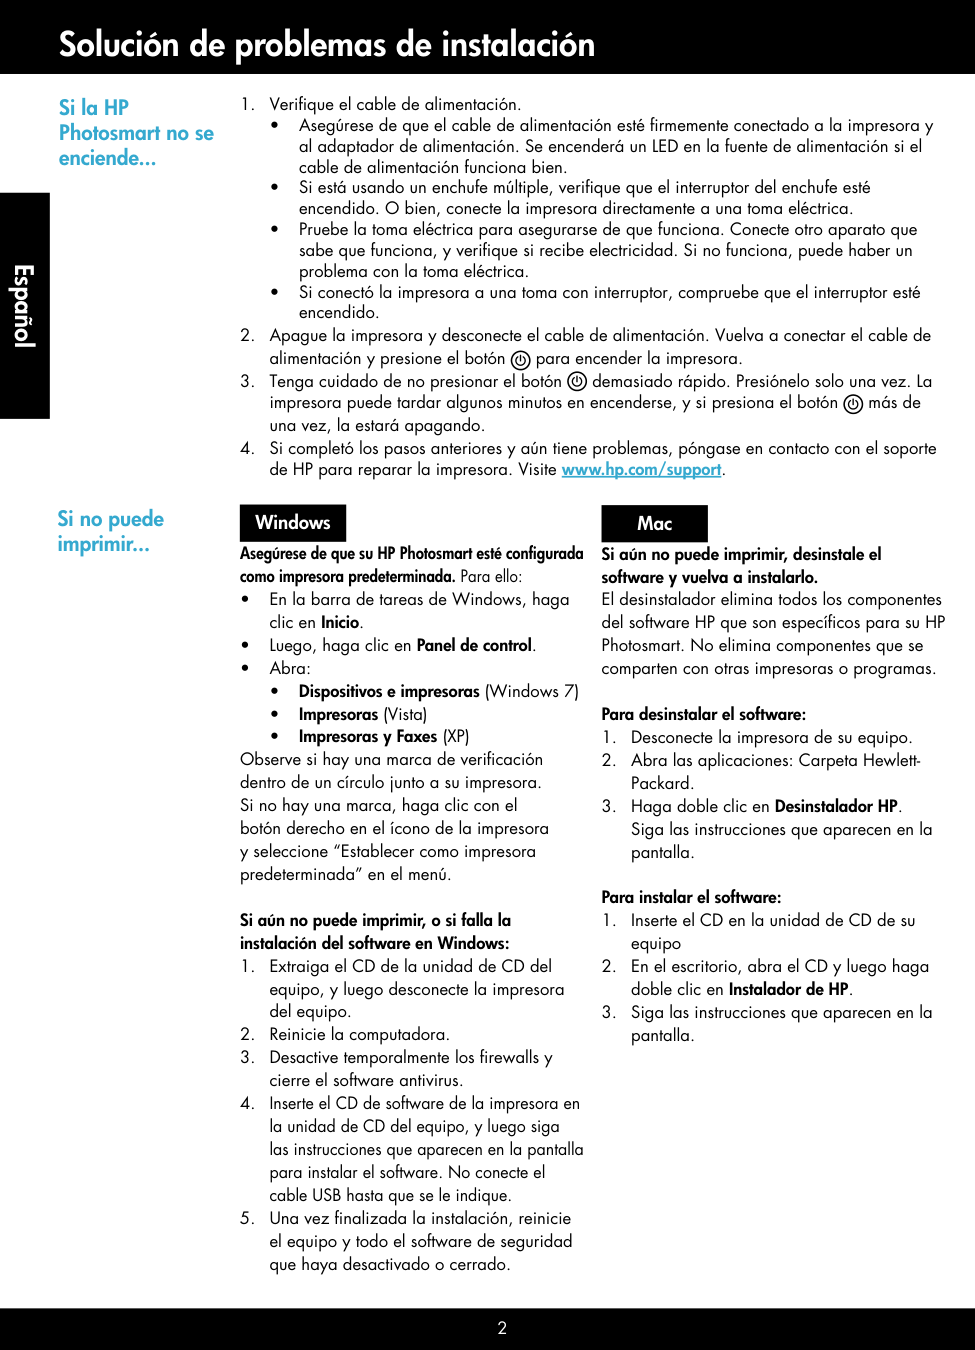
2 Solución de problemas de instalación Si la HP Photosmart no se enciende...
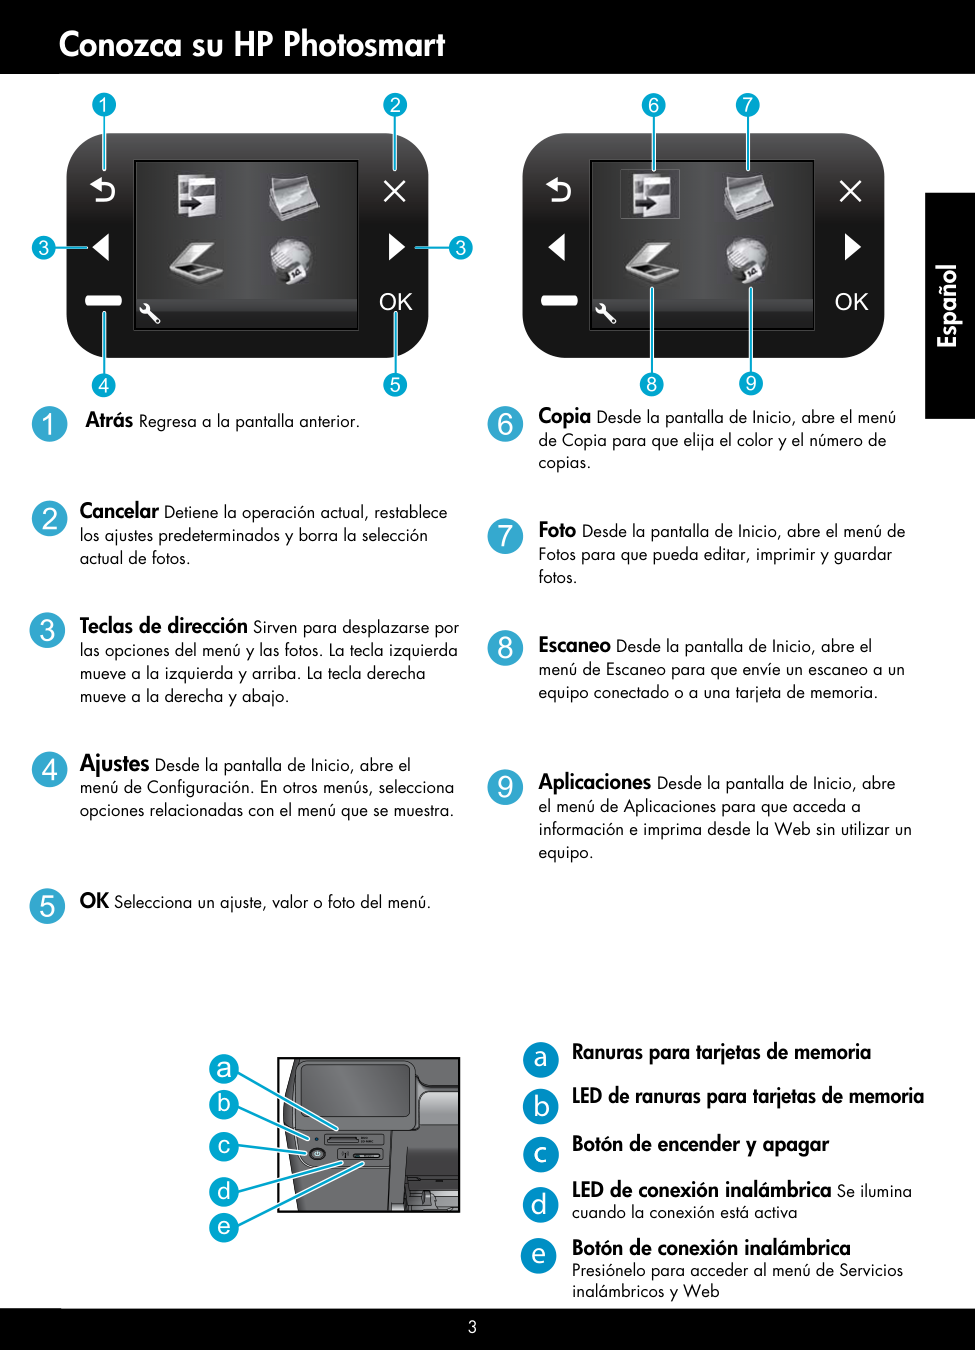
3 Conozca su HP Photosmart Atrás Regresa a la pantalla anterior. Cancelar Detiene la operación actual, restablece los ajustes predeterminados y borra la selección actual de fotos. Teclas de dirección Sirven para desplazarse por las opciones del menú y las fotos. La tecla izquierda mueve a la izquierda y arriba. La tecla derecha mueve a la derecha y abajo. Ajustes Desde la pantalla de Inicio, abre el menú de Configuración. En otros menús, selecciona opciones relacionadas con el menú que se muestra. OK Selecciona un ajuste, valor o foto del menú. Copia Desde la pantalla de Inicio, abre el menú de Copia para que elija el color y el número de copias. Foto Desde la pantalla de Inicio, abre el menú de Fotos para que pueda editar, imprimir y guardar fotos. Escaneo Desde la pantalla de Inicio, abre el menú de Escaneo para que envíe un escaneo a un equipo conectado o a una tarjeta de memoria. Aplicaciones Desde la pantalla de Inicio, abre el menú de Aplicaciones para que acceda a información e imprima desde la Web sin utilizar un equipo. Ranuras para tarjetas de memoria LED de ranuras para tarjetas de memoria Botón de encender y apagar LED de conexión inalámbrica Se ilumina cuando la conexión está activa Botón de conexión inalámbrica Presiónelo para acceder al menú de Servicios inalámbricos y Web a b c d e

4 Características y consejos Copiar Imprimir Escanear • Imprima fotos directamente desde una tarjeta de memoria en varios tamaños y tipos de papel. Use el menú Foto de la pantalla de la impresora para buscar fotos, aplicar correcciones automáticas y hacer selecciones. • Imprima documentos y fotos desde aplicaciones en un equipo conectado. • Asegúrese de que tiene tinta suficiente. Para verificar los niveles estimados de tinta, seleccione Ajustes en la pantalla de la impresora, seleccione Herramientas, y luego, Mostrar niveles estimados. • Al instalar cartuchos nuevos, asegúrese de quitar la cinta de plástico de protección antes de insertar el cartucho. • Haga copias en color o en blanco y negro. Use el menú Copia en la pantalla de la impresora para seleccionar color, tamaño real del original o ajustar tamaño a la página, ajustar la calidad (incluida rápida económica), tamaño del papel y número de copias. • Cargue originales finos o de una hoja con la cara impresa hacia abajo en la esquina frontal derecha del cristal. • Para originales gruesos, como una página de un libro, quite la tapa. Coloque el original con la cara impresa hacia abajo en la esquina frontal derecha del cristal. Si es posible, coloque la tapa sobre el original para proporcionar un fondo blanco. • Escanee fotografías o documentos. Use el menú Escaneo de la pantalla de la impresora para:
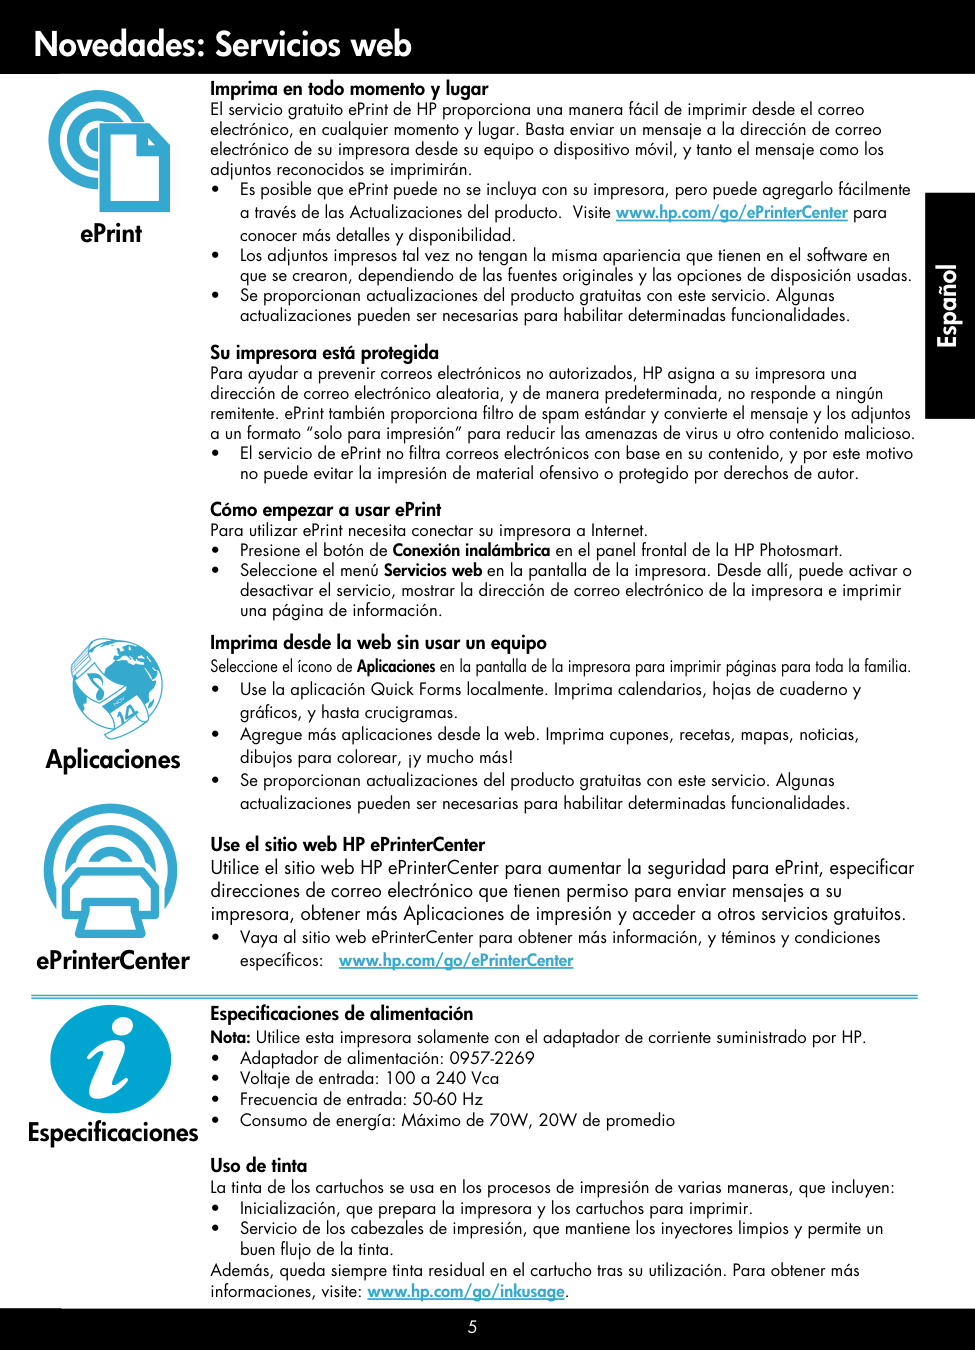
5 Especificaciones de alimentación Nota: Utilice esta impresora solamente con el adaptador de corriente suministrado por HP. • Adaptador de alimentación: 0957-2269 • Voltaje de entrada: 100 a 240 Vca • Frecuencia de entrada: 50-60 Hz • Consumo de energía: Máximo de 70W, 20W de promedio Uso de tinta La tinta de los cartuchos se usa en los procesos de impresión de varias maneras, que incluyen: • Inicialización, que prepara la impresora y los cartuchos para imprimir. • Servicio de los cabezales de impresión, que mantiene los inyectores limpios y permite un buen flujo de la tinta. Además, queda siempre tinta residual en el cartucho tras su utilización. Para obtener más informaciones, visite: www.hp.com/go/inkusage. Novedades: Servicios web Aplicaciones Imprima desde la web sin usar un equipo Seleccione el ícono de Aplicaciones en la pantalla de la impresora para imprimir páginas para toda la familia. • Use la aplicación Quick Forms localmente. Imprima calendarios, hojas de cuaderno y gráficos, y hasta crucigramas. • Agregue más aplicaciones desde la web. Imprima cupones, recetas, mapas, noticias, dibujos para colorear, ¡y mucho más! • Se proporcionan actualizaciones del producto gratuitas con este servicio. Algunas actualizaciones pueden ser necesarias para habilitar determinadas funcionalidades. ePrinterCenter Use el sitio web HP ePrinterCenter Utilice el sitio web HP ePrinterCenter para aumentar la seguridad para ePrint, especificar direcciones de correo electrónico que tienen permiso para enviar mensajes a su impresora, obtener más Aplicaciones de impresión y acceder a otros servicios gratuitos. • Vaya al sitio web ePrinterCenter para obtener más información, y téminos y condiciones específicos: www.hp.com/go/ePrinterCenter Imprima en todo momento y lugar El servicio gratuito ePrint de HP proporciona una manera fácil de imprimir desde el correo electrónico, en cualquier momento y lugar. Basta enviar un mensaje a la dirección de correo electrónico de su impresora desde su equipo o dispositivo móvil, y tanto el mensaje como los adjuntos reconocidos se imprimirán. • Es posible que ePrint puede no se incluya con su impresora, pero puede agregarlo fácilmente a través de las Actualizaciones del producto. Visite www.hp.com/go/ePrinterCenter para conocer más detalles y disponibilidad. • Los adjuntos impresos tal vez no tengan la misma apariencia que tienen en el software en que se crearon, dependiendo de las fuentes originales y las opciones de disposición usadas. • Se proporcionan actualizaciones del producto gratuitas con este servicio. Algunas actualizaciones pueden ser necesarias para habilitar determinadas funcionalidades. Su impresora está protegida Para ayudar a prevenir correos electrónicos no autorizados, HP asigna a su impresora una dirección de correo electrónico aleatoria, y de manera predeterminada, no responde a ningún remitente. ePrint también proporciona filtro de spam estándar y convierte el mensaje y los adjuntos a un formato “solo para impresión” para reducir las amenazas de virus u otro contenido malicioso. • El servicio de ePrint no filtra correos electrónicos con base en su contenido, y por este motivo no puede evitar la impresión de material ofensivo o protegido por derechos de autor. Cómo empezar a usar ePrint Para utilizar ePrint necesita conectar su impresora a Internet. • Presione el botón de Conexión inalámbrica en el panel frontal de la HP Photosmart. • Seleccione el menú Servicios web en la pantalla de la impresora. Desde allí, puede activar o desactivar el servicio, mostrar la dirección de correo electrónico de la impresora e imprimir una página de información. ePrint Especificaciones
Nov
Español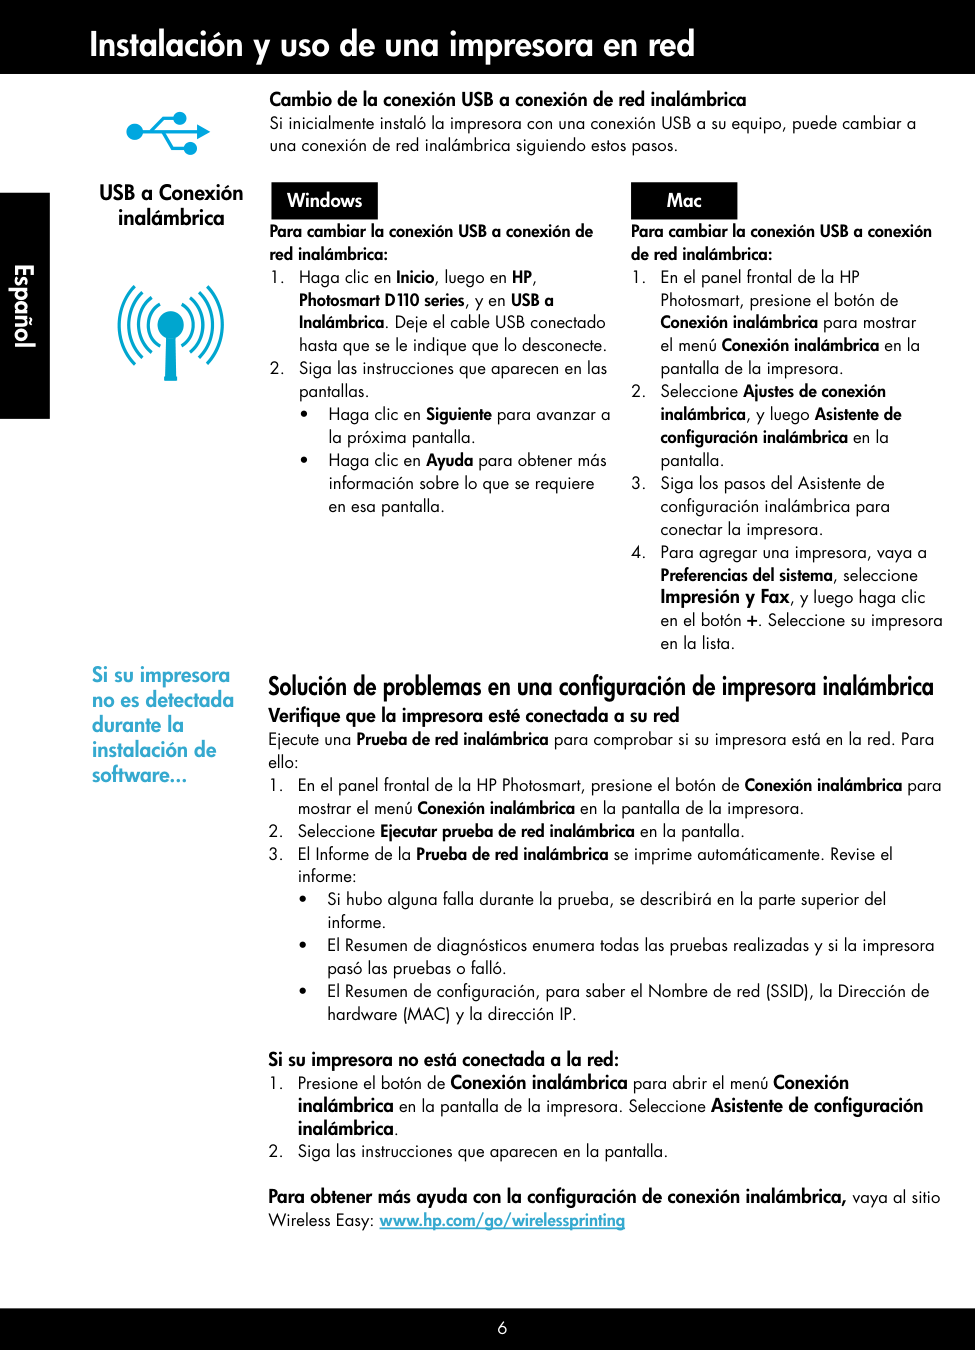
6 Instalación y uso de una impresora en red USB a Conexión inalámbrica Cambio de la conexión USB a conexión de red inalámbrica Si inicialmente instaló la impresora con una conexión USB a su equipo, puede cambiar a una conexión de red inalámbrica siguiendo estos pasos. Para cambiar la conexión USB a conexión de red inalámbrica:
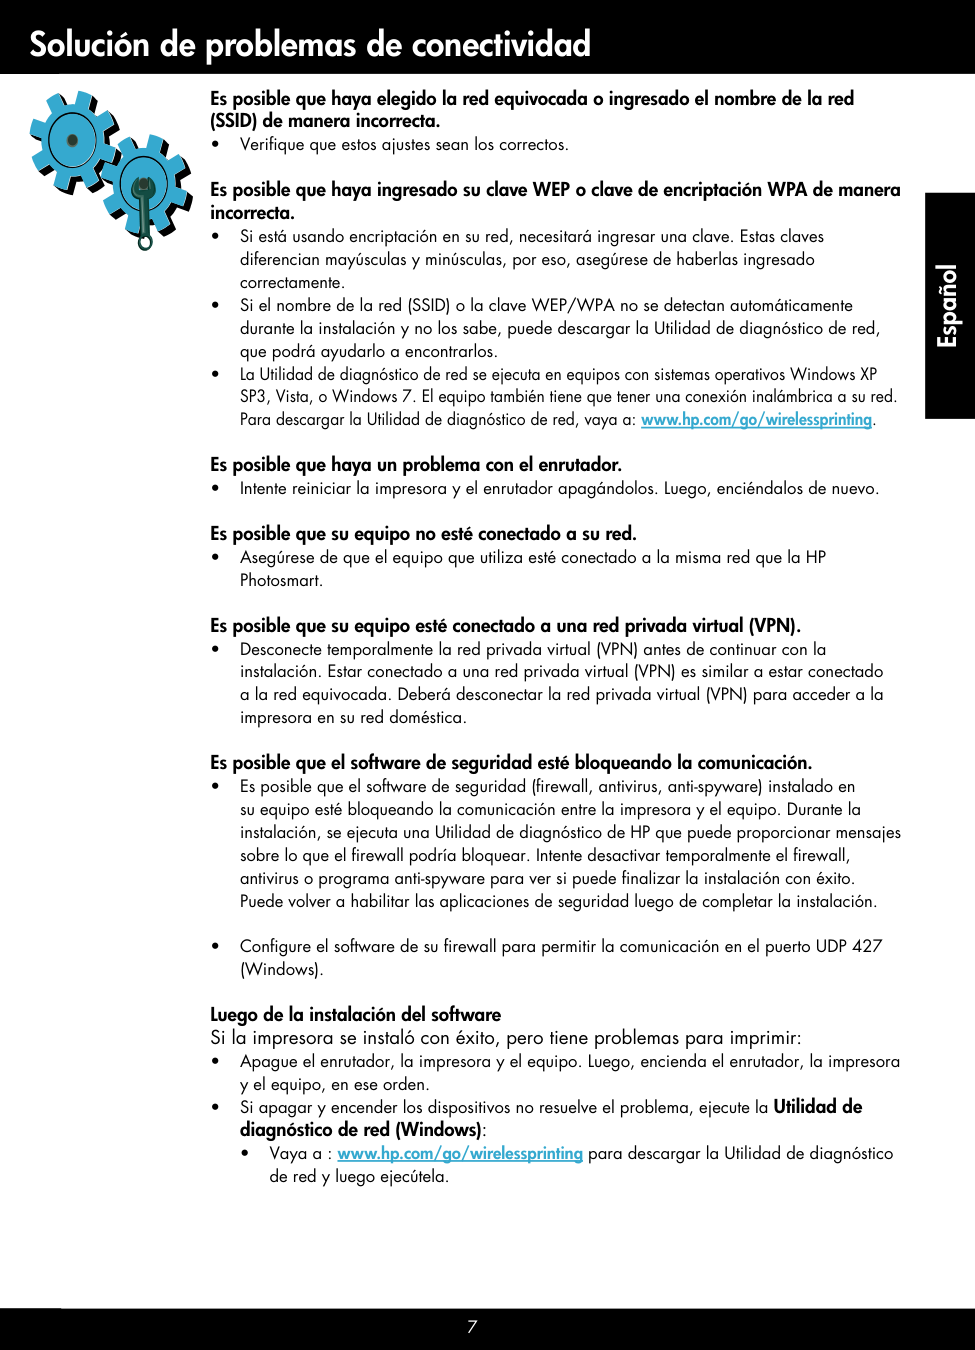
7 Solución de problemas de conectividad Es posible que haya elegido la red equivocada o ingresado el nombre de la red (SSID) de manera incorrecta. • Verifique que estos ajustes sean los correctos. Es posible que haya ingresado su clave WEP o clave de encriptación WPA de manera incorrecta. • Si está usando encriptación en su red, necesitará ingresar una clave. Estas claves diferencian mayúsculas y minúsculas, por eso, asegúrese de haberlas ingresado correctamente. • Si el nombre de la red (SSID) o la clave WEP/WPA no se detectan automáticamente durante la instalación y no los sabe, puede descargar la Utilidad de diagnóstico de red, que podrá ayudarlo a encontrarlos. • La Utilidad de diagnóstico de red se ejecuta en equipos con sistemas operativos Windows XP SP3, Vista, o Windows 7. El equipo también tiene que tener una conexión inalámbrica a su red. Para descargar la Utilidad de diagnóstico de red, vaya a: www.hp.com/go/wirelessprinting. Es posible que haya un problema con el enrutador. • Intente reiniciar la impresora y el enrutador apagándolos. Luego, enciéndalos de nuevo. Es posible que su equipo no esté conectado a su red. • Asegúrese de que el equipo que utiliza esté conectado a la misma red que la HP Photosmart. Es posible que su equipo esté conectado a una red privada virtual (VPN). • Desconecte temporalmente la red privada virtual (VPN) antes de continuar con la instalación. Estar conectado a una red privada virtual (VPN) es similar a estar conectado a la red equivocada. Deberá desconectar la red privada virtual (VPN) para acceder a la impresora en su red doméstica. Es posible que el software de seguridad esté bloqueando la comunicación. • Es posible que el software de seguridad (firewall, antivirus, anti-spyware) instalado en su equipo esté bloqueando la comunicación entre la impresora y el equipo. Durante la instalación, se ejecuta una Utilidad de diagnóstico de HP que puede proporcionar mensajes sobre lo que el firewall podría bloquear. Intente desactivar temporalmente el firewall, antivirus o programa anti-spyware para ver si puede finalizar la instalación con éxito. Puede volver a habilitar las aplicaciones de seguridad luego de completar la instalación. • Configure el software de su firewall para permitir la comunicación en el puerto UDP 427 (Windows). Luego de la instalación del software Si la impresora se instaló con éxito, pero tiene problemas para imprimir: • Apague el enrutador, la impresora y el equipo. Luego, encienda el enrutador, la impresora y el equipo, en ese orden. • Si apagar y encender los dispositivos no resuelve el problema, ejecute la Utilidad de diagnóstico de red (Windows): • Vaya a : www.hp.com/go/wirelessprinting para descargar la Utilidad de diagnóstico de red y luego ejecútela. Español
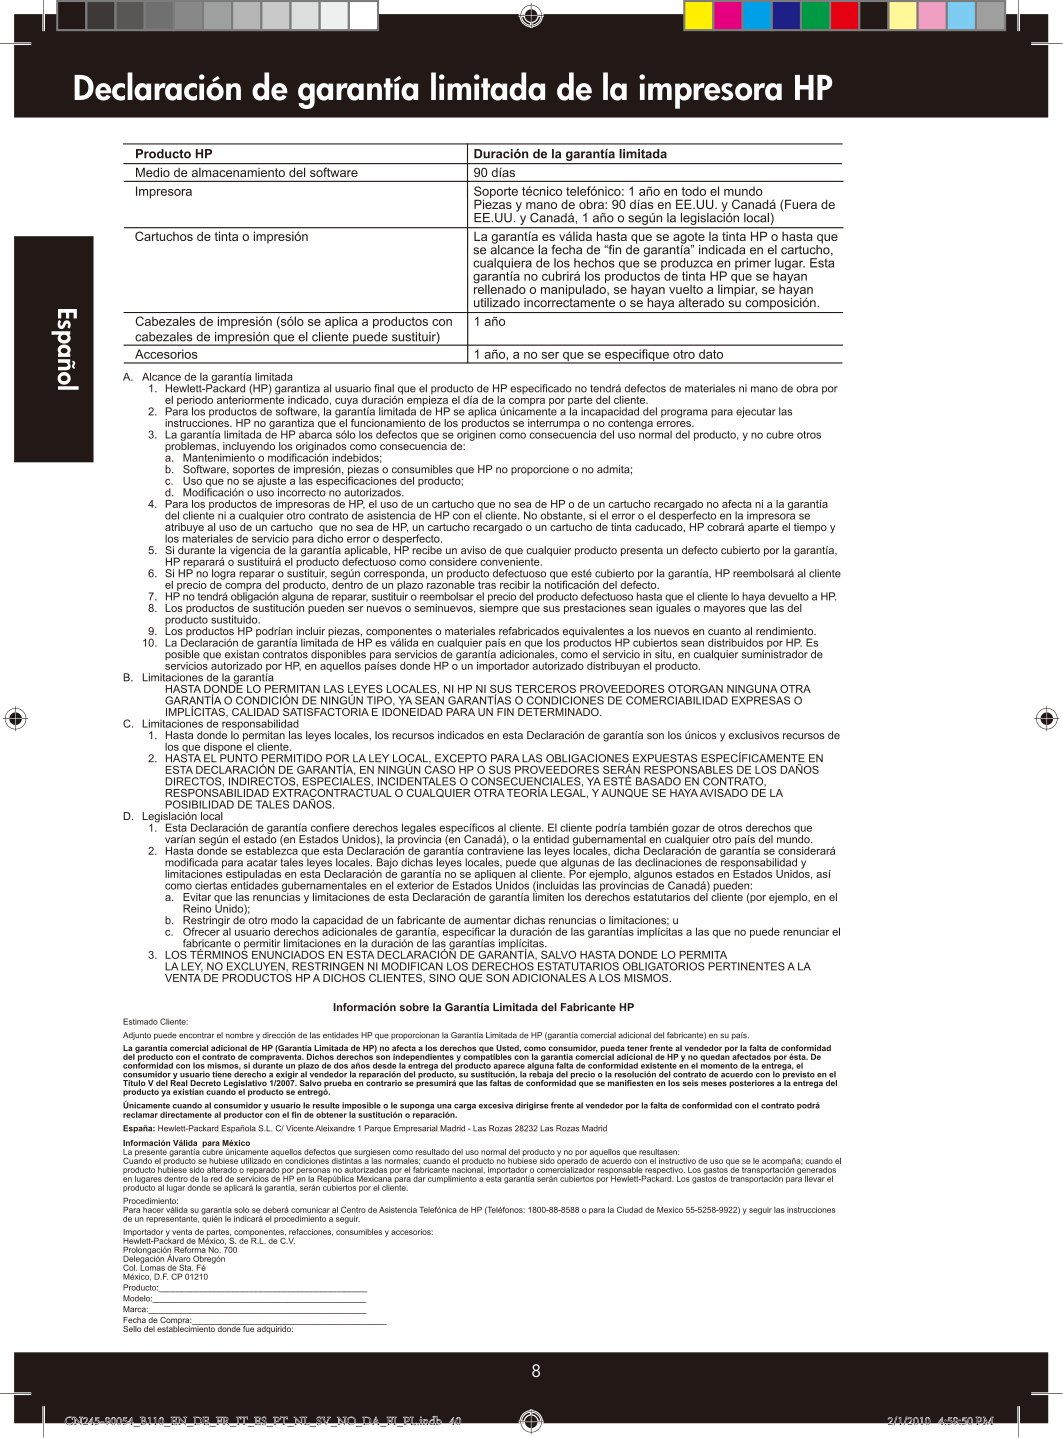
Declaración de garantía limitada de la impresora HP 8 Español CN245-90054_B110_EN_DE_FR_IT_ES_PT_NL_SV_NO_DA_FI_PL.indb 40 CN245-90054_B110_EN_DE_FR_IT_ES_PT_NL_SV_NO_DA_FI_PL.indb 40
2/1/2010 4:59:50 Pm
2/1/2010 4:59:50 Pm
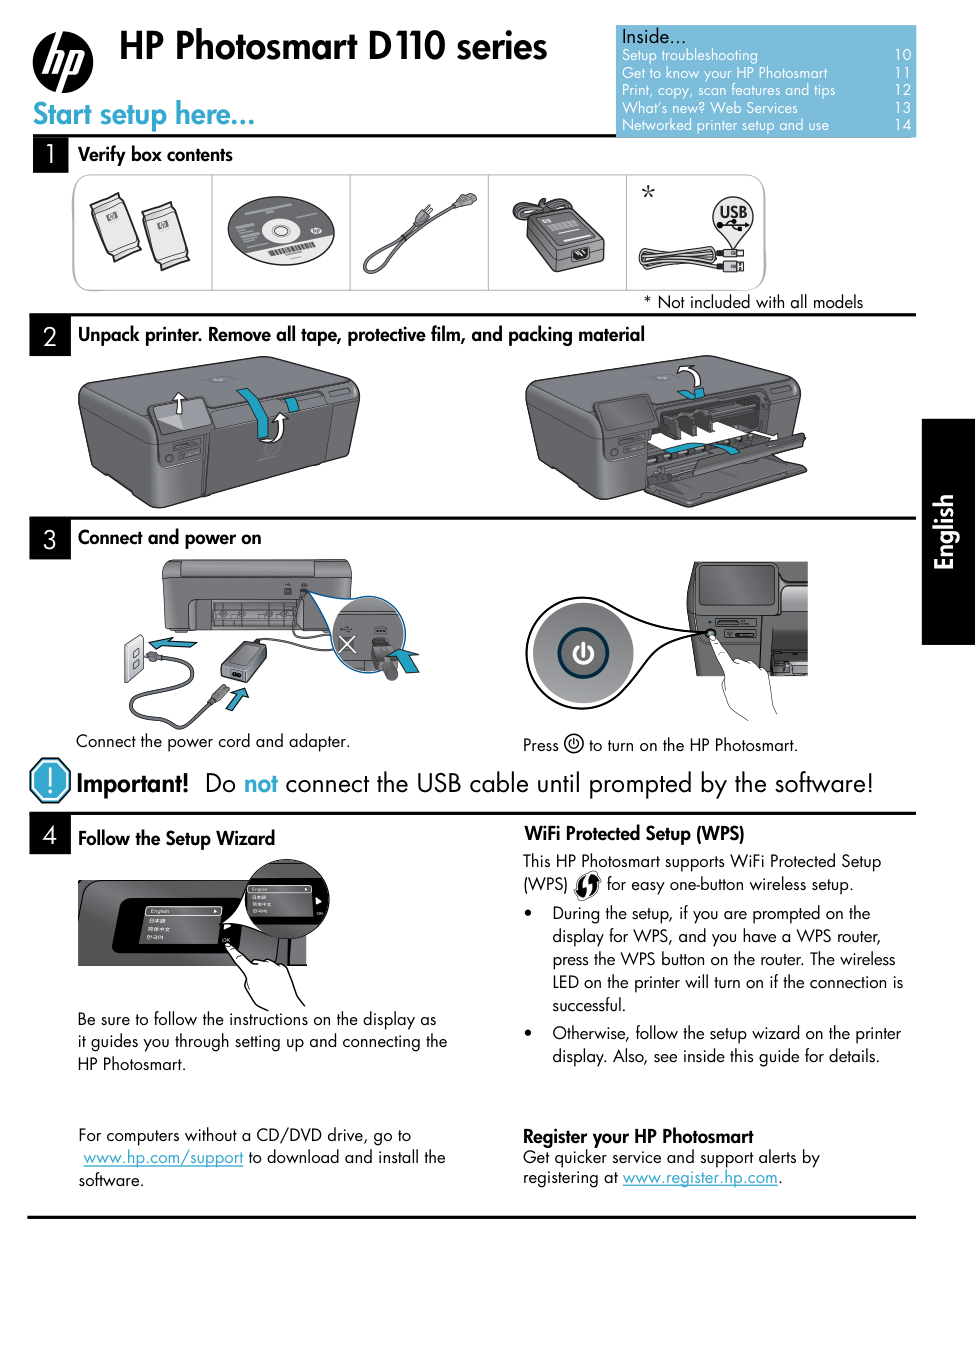
4 1 3 2 Important! Do not connect the USB cable until prompted by the software! Unpack printer. Remove all tape, protective film, and packing material Follow the Setup Wizard Connect and power on Connect the power cord and adapter. Press to turn on the HP Photosmart. Be sure to follow the instructions on the display as it guides you through setting up and connecting the HP Photosmart. For computers without a CD/DVD drive, go to www.hp.com/support to download and install the software. Verify box contents WiFi Protected Setup (WPS)
(Wps)
for easy one-button wireless setup. • During the setup, if you are prompted on the display for WPS, and you have a WPS router, press the WPS button on the router. The wireless LED on the printer will turn on if the connection is successful. • Otherwise, follow the setup wizard on the printer display. Also, see inside this guide for details. English
10 Setup troubleshooting If the HP Photosmart doesn’t turn on...
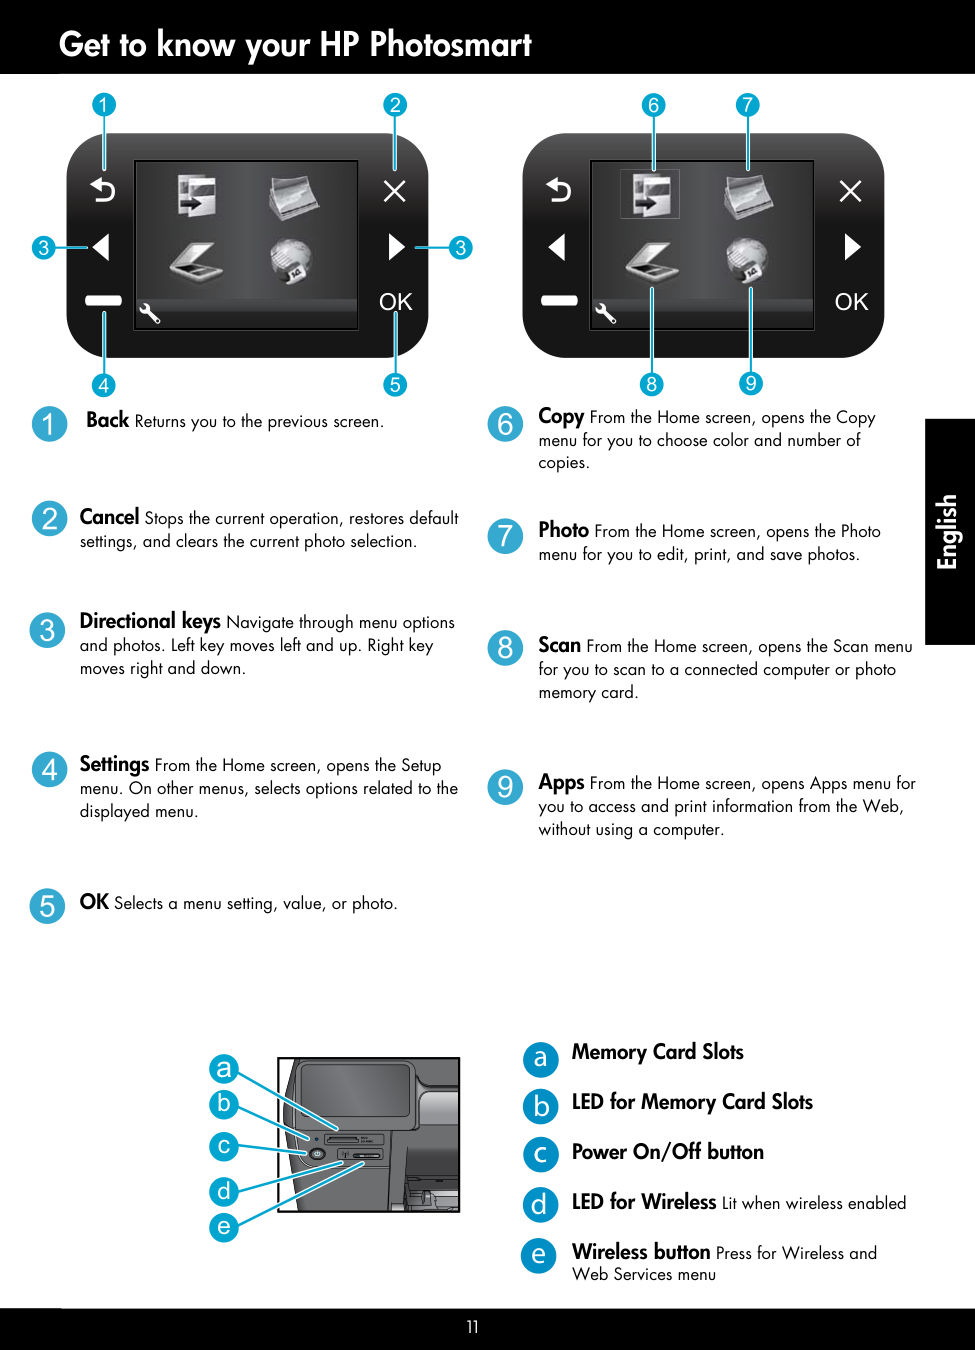
11 Get to know your HP Photosmart Back Returns you to the previous screen. Cancel Stops the current operation, restores default settings, and clears the current photo selection. Directional keys Navigate through menu options and photos. Left key moves left and up. Right key moves right and down. Settings From the Home screen, opens the Setup menu. On other menus, selects options related to the displayed menu. OK Selects a menu setting, value, or photo. Copy From the Home screen, opens the Copy menu for you to choose color and number of copies. Photo From the Home screen, opens the Photo menu for you to edit, print, and save photos. Scan From the Home screen, opens the Scan menu for you to scan to a connected computer or photo memory card. Apps From the Home screen, opens Apps menu for you to access and print information from the Web, without using a computer. Memory Card Slots LED for Memory Card Slots Power On/Off button LED for Wireless Lit when wireless enabled Wireless button Press for Wireless and Web Services menu a b c d e
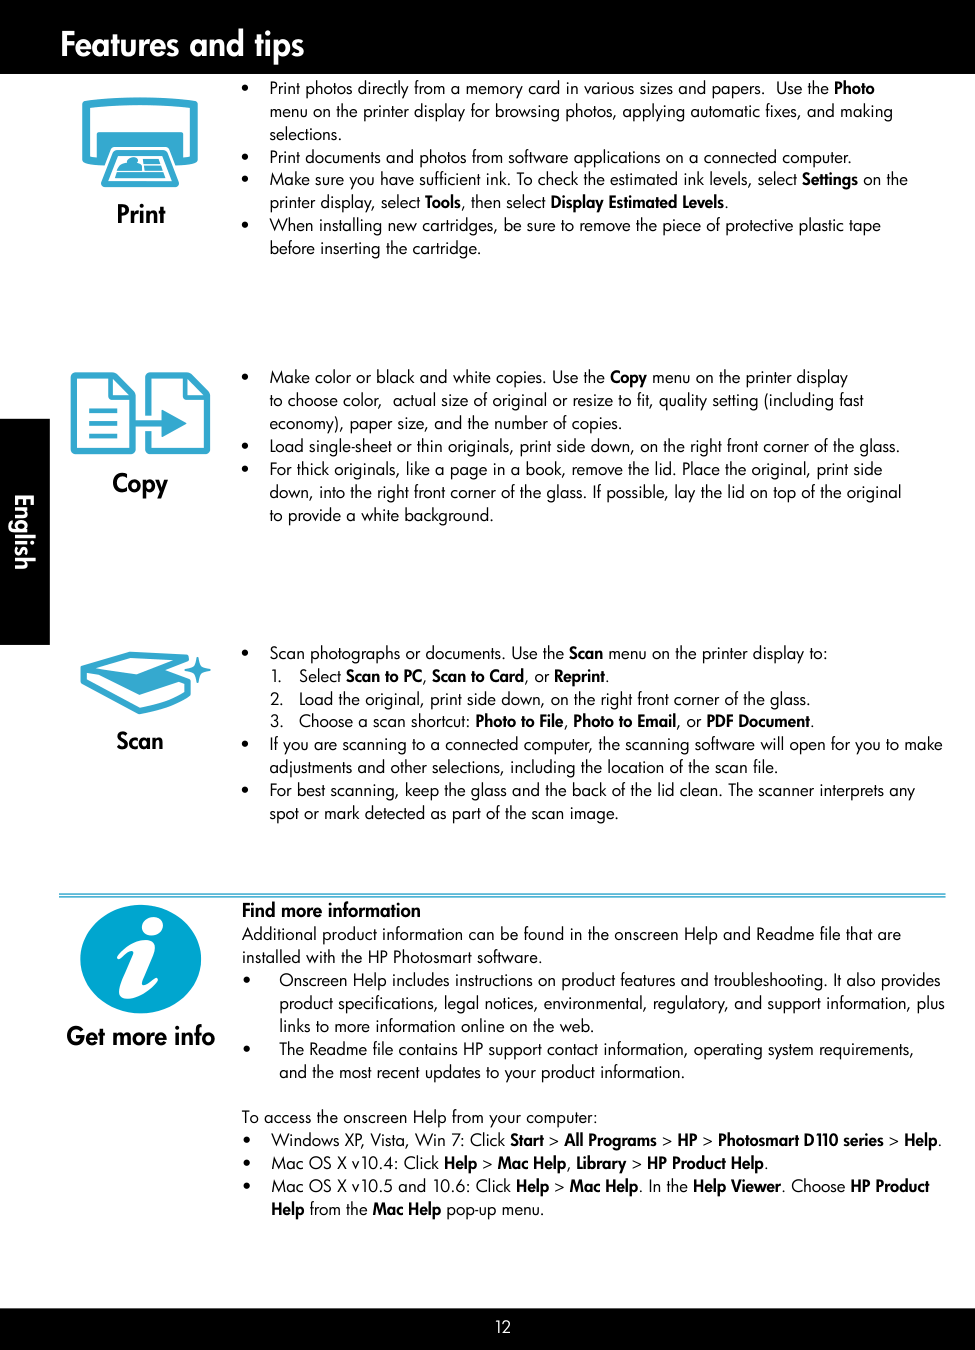
12 Features and tips Copy Print Scan • Print photos directly from a memory card in various sizes and papers. Use the Photo menu on the printer display for browsing photos, applying automatic fixes, and making selections. • Print documents and photos from software applications on a connected computer. • Make sure you have sufficient ink. To check the estimated ink levels, select Settings on the printer display, select Tools, then select Display Estimated Levels. • When installing new cartridges, be sure to remove the piece of protective plastic tape before inserting the cartridge. • Make color or black and white copies. Use the Copy menu on the printer display to choose color, actual size of original or resize to fit, quality setting (including fast economy), paper size, and the number of copies. • Load single-sheet or thin originals, print side down, on the right front corner of the glass. • For thick originals, like a page in a book, remove the lid. Place the original, print side down, into the right front corner of the glass. If possible, lay the lid on top of the original to provide a white background. • Scan photographs or documents. Use the Scan menu on the printer display to:
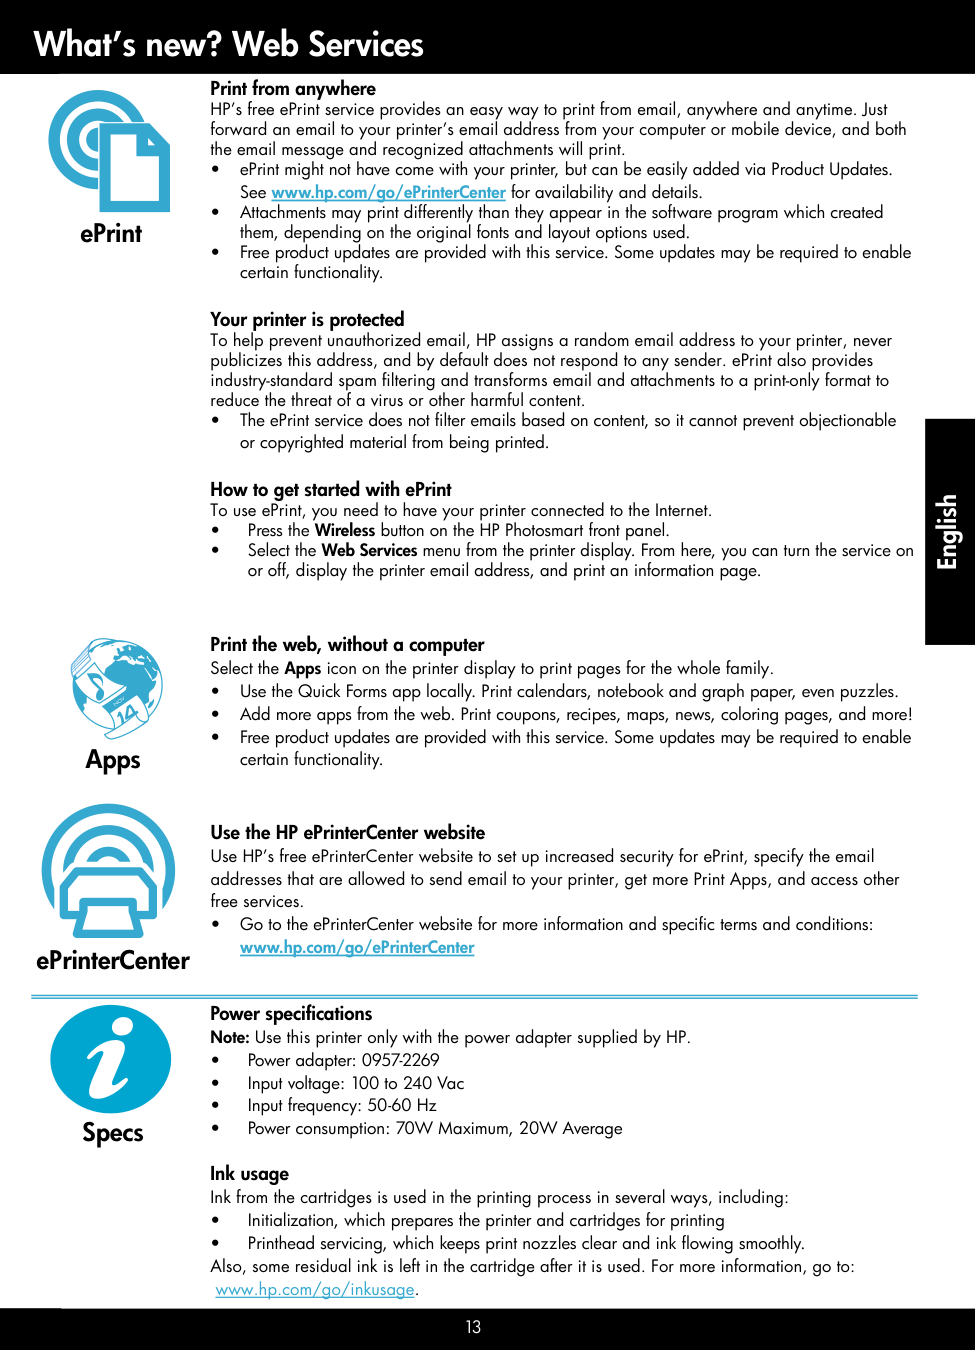
13 Power specifications Note: Use this printer only with the power adapter supplied by HP. • Power adapter: 0957-2269 • Input voltage: 100 to 240 Vac • Input frequency: 50-60 Hz • Power consumption: 70W Maximum, 20W Average Ink usage Ink from the cartridges is used in the printing process in several ways, including: • Initialization, which prepares the printer and cartridges for printing • Printhead servicing, which keeps print nozzles clear and ink flowing smoothly. Also, some residual ink is left in the cartridge after it is used. For more information, go to: www.hp.com/go/inkusage. What’s new? Web Services Apps Print the web, without a computer Select the Apps icon on the printer display to print pages for the whole family. • Use the Quick Forms app locally. Print calendars, notebook and graph paper, even puzzles. • Add more apps from the web. Print coupons, recipes, maps, news, coloring pages, and more! • Free product updates are provided with this service. Some updates may be required to enable certain functionality. ePrinterCenter Use the HP ePrinterCenter website Use HP’s free ePrinterCenter website to set up increased security for ePrint, specify the email addresses that are allowed to send email to your printer, get more Print Apps, and access other free services. • Go to the ePrinterCenter website for more information and specific terms and conditions: www.hp.com/go/ePrinterCenter Print from anywhere HP’s free ePrint service provides an easy way to print from email, anywhere and anytime. Just forward an email to your printer’s email address from your computer or mobile device, and both the email message and recognized attachments will print. • ePrint might not have come with your printer, but can be easily added via Product Updates. See www.hp.com/go/ePrinterCenter for availability and details. • Attachments may print differently than they appear in the software program which created them, depending on the original fonts and layout options used. • Free product updates are provided with this service. Some updates may be required to enable certain functionality. Your printer is protected To help prevent unauthorized email, HP assigns a random email address to your printer, never publicizes this address, and by default does not respond to any sender. ePrint also provides industry-standard spam filtering and transforms email and attachments to a print-only format to reduce the threat of a virus or other harmful content. • The ePrint service does not filter emails based on content, so it cannot prevent objectionable or copyrighted material from being printed. How to get started with ePrint To use ePrint, you need to have your printer connected to the Internet. • Press the Wireless button on the HP Photosmart front panel. • Select the Web Services menu from the printer display. From here, you can turn the service on or off, display the printer email address, and print an information page. ePrint Specs
Nov
English
14 Networked printer setup and use
Usb
to Wireless Changing from USB to wireless network connection If you initially set up your printer using a USB connection to your computer, you can switch the connection to a wireless network connection by following these steps. To change from USB to wireless connection:
15 Fixing connectivity issues You may have picked the wrong network or typed in your network name (SSID) incorrectly • Check these settings to ensure that they are correct. You may have typed in your WEP key or your WPA encryption key incorrectly. • If you are using encryption on your network, you’ll need to enter a key. These are case- sensitive so be sure that it has been entered correctly. • If the network name (SSID) or the WEP/WPA key are not found automatically during installation, and you don’t already know them, you can download the Network Diagnostic Utility, which can help you locate them. • The Network Diagnostic Utility runs on computers with Windows XP SP3, Vista, or Windows 7 OS. The computer should also be wirelessly connected to your network. To download the Network Diagnostic Utility, go to: www.hp.com/go/wirelessprinting. You may have a router problem. • Try restarting both the printer and the router by turning off the power on each. Then, turn them on again. Your computer may not be connected to your network. • Make sure that the computer is connect to the same network to which the HP Photosmart is connected. Your computer may be connected to a Virtual Private Network (VPN) • Temporarily disconnect from the VPN before proceeding with the installation. Being connected to a VPN is like being on a different network. You will need to disconnect from the VPN to access the printer over the home network. Security software may be blocking communication. • Security software (firewall, anti-virus, anti-spyware) installed on your computer may be blocking communication between the printer and the computer. An HP diagnostic utility runs automatically during installation and can provide messages about what might be blocked by a firewall. Try temporarily disconnecting your firewall, anti-virus, or anti-spyware applications to see if you can finish the installation successfully. You should re-enable the security applications after installation is complete. • Setup your firewall software to allow communication over UDP port 427 (Windows). After software installation If your printer has been successfully installed, but you are having trouble printing: • Turn off the router, printer, and computer. Then, turn on router, printer, and computer -- in that order. • If powering down and up doesn’t solve the problem, run the Network Diagnostic Utility (Windows): • Go to: www.hp.com/go/wirelessprinting to download the Network Diagnostic Utility, then run it. English

16 HP printer limited warranty statement A. Extent of limited warranty
a. Improper maintenance or modification;
b. Software, media, parts, or supplies not provided or supported by HP;
c. Operation outside the product's specifications;
d. Unauthorized modification or misuse.
Such Damages.
D. Local lawa. Preclude the disclaimers and limitations in this Warranty Statement from limiting the statutory rights of a consumer (e.g., the United Kingdom);
b. Otherwise restrict the ability of a manufacturer to enforce such disclaimers or limitations; or
c. Grant the customer additional warranty rights, specify the duration of implied warranties which the manufacturer cannot disclaim, or allow limitations on the duration of implied warranties.
Applicable To The Sale Of The Hp Products To Such Customers.
HP Limited Warranty Dear Customer, You will find below the name and address of the HP entity responsible for the performance of the HP Limited Warranty in your country. You may have additional statutory rights against the seller based on your purchase agreement. Those rights are not in any way affected by this HP Limited Warranty. Ireland: Hewlett-Packard Ireland Limited, 63-74 Sir John Rogerson's Quay, Dublin 2 United Kingdom: Hewlett-Packard Ltd, Cain Road, Bracknell, GB-Berks RG12 1HN Malta: Hewlett-Packard International Trade B.V., Malta Branch, 48, Amery Street, Sliema SLM 1701, MALTA South Africa: Hewlett-Packard South Africa Ltd, 12 Autumn Street, Rivonia, Sandton, 2128, Republic of South Africa HP product Duration of limited warranty Software Media 90 days Printer Technical support by phone: 1 year worldwideParts and labor: 90 days in US and Canada (outside the US
and Canada 1 year or as required by local law) Print or Ink cartridges Until the HP ink is depleted or the “end of warranty” date printed on the cartridge has been reached, whichever occurs first. This warranty does not cover HP ink products that have been refilled, remanufactured, refurbished, misused, or tampered with. Printheads (only applies to products with customer 1 year replaceable printheads) Accessories 1 year unless otherwise stated English