
Ask AI
— answers from the official manualAnswers from the official manual.
Common questions
Common Questions
9 totalHow do I set the time and date on my watch?
To set the time: Pull out crown to B position, turn crown either way to correct time, then push in crown to A position. To set the calendar: Pull out crown to C position, turn crown clockwise or counter-clockwise for date correction, then push back to A position (Pages 4-5).
How should I maintain my watch's chronograph function?
Before using the stopwatch, reset the hands at each starting point. Follow specific instructions on resetting based on your model’s design as detailed in sections like Standard Stopwatch Measurement or Resetting Stopwatch Hands (Pages 7-18).
What should I do if water gets inside my watch?
Immediately take your watch to a qualified watchmaker for service and testing the water resistance. Do not expose it further to moisture or chemicals which could cause corrosion (Page 2).
How often should I have my mechanical watch serviced?
For maintenance, manually wound watches need daily winding and automatics may stop if not worn for long periods. Have your chronograph watch cleaned when fitting each third battery or every three years as recommended in care instructions (Pages 2-3).
How do I use the countdown timer function?
Access the countdown mode from your selected watch’s main menu and set the target date accordingly before initiating the countdown. Follow specific sequence for timing events or deadlines as per model setup guide (Pages 41-42).
Can I adjust the alarm setting on my watch?
Yes, you can set your daily alarm by entering the Alarm mode from Real Time. Use D key to turn it On/Off and set hour and minute using C and B keys (Pages 37-41).
Full Manual
50 pages

|


| |---|
|Congratulations
YOU ARE NOW THE PROUD OWNER OF A “LOYAL” WATCH. FOR YOU TO OBTAIN COMPLETE SATISFACTION AND WEARING PLEASURE FROM YOUR HIGH PRECISION TIMEPIECE, WE ADVISE YOU READ THIS MANUAL.| |---|
Water and Watches Very few watches are 100% water resistant. Unless your watch is specifically designed for continuous work in water (e.g. a diver’s watch) it should not be subjected to conditions which can cause moisture or water penetration.
Water Resistant Watches On water resistant watches, special seals are used to exclude water and dust. As these seals deteriorate over time, the seals should be checked every 12 months and whenever a battery is fitted. (This includes scuba diving watches) The points of entry where moisture penetration can occur are:
All these aspects may not need to be changed but they should be checked by a qualified watchmaker to ensure maximum water resistance integrity is maintained.
When batteries are changed the seal is disturbed, therefore a water resistance test is a must. Manual Wind Watches
Manually wound watches must be fully wound once daily (preferably at a similar time). Do not be afraid as you cannot damage the watch by turning the winding button with normal finger pressure.
Automatic Watches Automatic watches are wound as the watches are worn by the constant movement of the wrist. If the watch is not worn for long periods it will stop. Most models have 30 hour reserve power.
Quartz Watches Your quartz (battery powered) watch will supply you with very accurate time keeping. When supply from the battery is exhausted the watch will merely stop. Different models will have varying battery life expectancies.
For battery replacement – return your watch to your nearest Wallace Bishop Store. Quartz watches require regular maintenance and your time piece should be serviced when fitting each third battery or every 3 years.
Attention to the following:
General Watch Care:
More watches are ruined by neglect of periodical cleaning and oiling than by any other means.
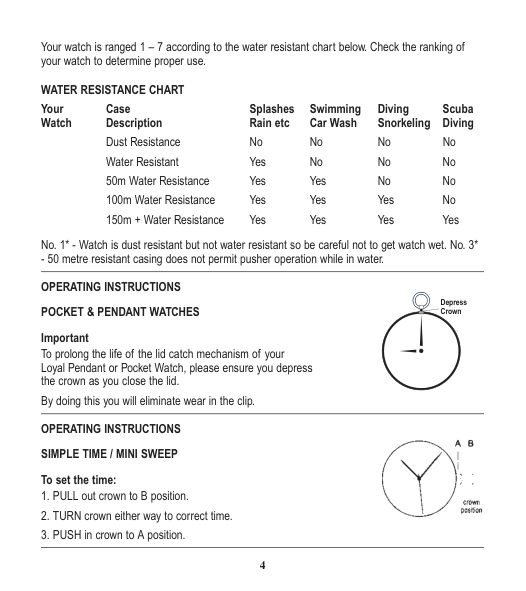
Your watch is ranged 1 – 7 according to the water resistant chart below. Check the ranking of your watch to determine proper use.
WATER RESISTANCE CHART
Your Case Splashes Swimming Diving Scuba Watch Description Rain etc Car Wash Snorkeling Diving
Dust Resistance No No No No Water Resistant Yes No No No 50m Water Resistance Yes Yes No No 100m Water Resistance Yes Yes Yes No 150m + Water Resistance Yes Yes Yes Yes
No. 1* - Watch is dust resistant but not water resistant so be careful not to get watch wet. No. 3*
Depress Crown
To prolong the life of the lid catch mechanism of your Loyal Pendant or Pocket Watch, please ensure you depress the crown as you close the lid.
By doing this you will eliminate wear in the clip. OPERATING INSTRUCTIONS SIMPLE TIME / MINI SWEEP To set the time:

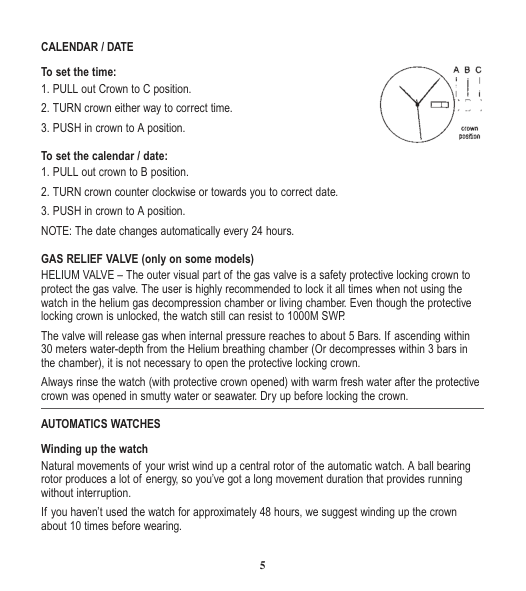
CALENDAR / DATE To set the time:

GAS RELIEF VALVE (only on some models) HELIUM VALVE – The outer visual part of the gas valve is a safety protective locking crown to protect the gas valve. The user is highly recommended to lock it all times when not using the watch in the helium gas decompression chamber or living chamber. Even though the protective locking crown is unlocked, the watch still can resist to 1000M SWP.
The valve will release gas when internal pressure reaches to about 5 Bars. If ascending within 30 meters water-depth from the Helium breathing chamber (Or decompresses within 3 bars in the chamber), it is not necessary to open the protective locking crown.
Always rinse the watch (with protective crown opened) with warm fresh water after the protective crown was opened in smutty water or seawater. Dry up before locking the crown.
AUTOMATICS WATCHES Winding up the watch
Natural movements of your wrist wind up a central rotor of the automatic watch. A ball bearing rotor produces a lot of energy, so you’ve got a long movement duration that provides running without interruption.
If you haven’t used the watch for approximately 48 hours, we suggest winding up the crown about 10 times before wearing.
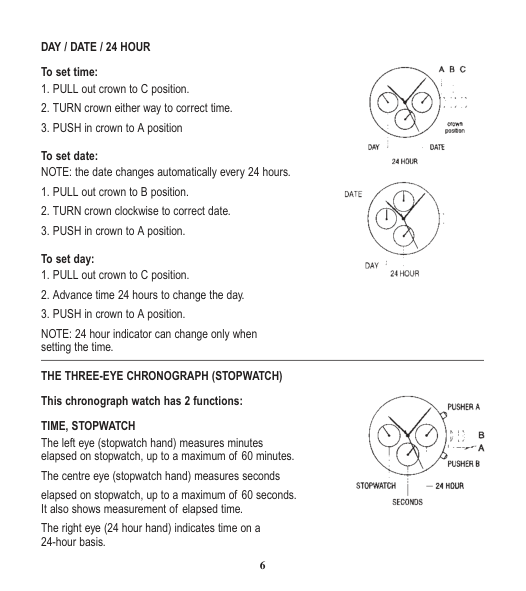
DAY / DATE / 24 HOUR To set time:

To set date: NOTE: the date changes automatically every 24 hours.

NOTE: 24 hour indicator can change only when setting the time.
THE THREE-EYE CHRONOGRAPH (STOPWATCH)

TIME, STOPWATCH The left eye (stopwatch hand) measures minutes elapsed on stopwatch, up to a maximum of 60 minutes.
The centre eye (stopwatch hand) measures seconds elapsed on stopwatch, up to a maximum of 60 seconds. It also shows measurement of elapsed time. The right eye (24 hour hand) indicates time on a 24-hour basis.
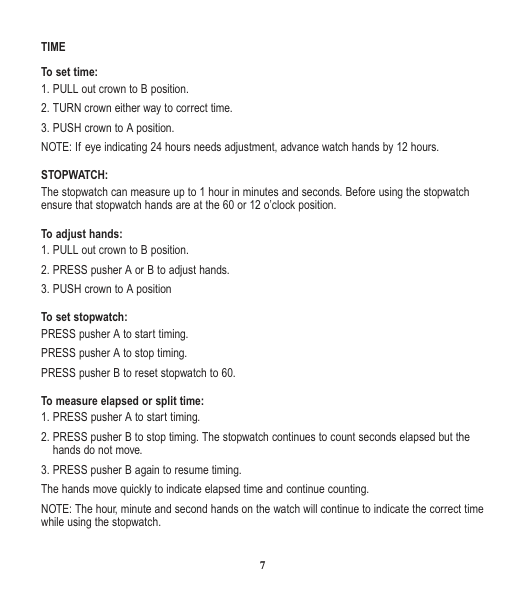
TIME To set time:
STOPWATCH: The stopwatch can measure up to 1 hour in minutes and seconds. Before using the stopwatch ensure that stopwatch hands are at the 60 or 12 o’clock position.
To adjust hands:
NOTE: The hour, minute and second hands on the watch will continue to indicate the correct time while using the stopwatch.
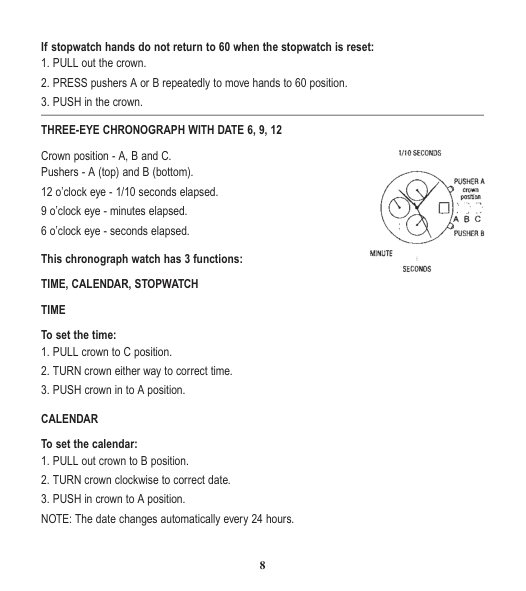
If stopwatch hands do not return to 60 when the stopwatch is reset:

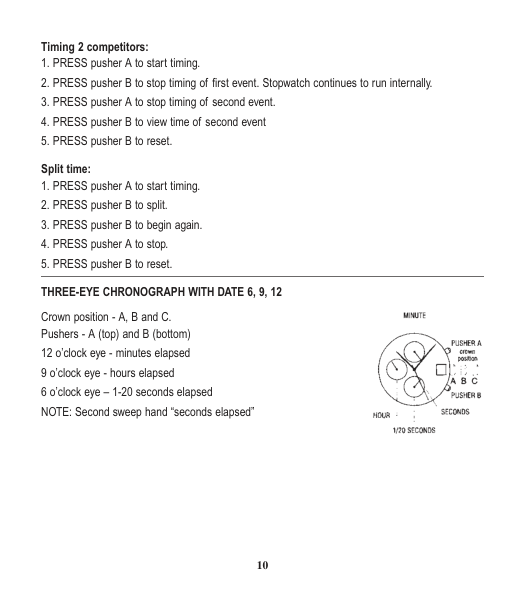
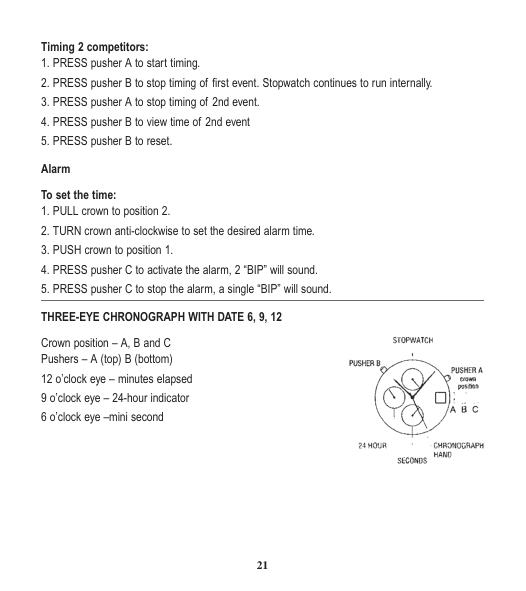
Crown position - A, B and C. Pushers - A (top) and B (bottom). 12 o’clock eye - 1/10 seconds elapsed. 9 o’clock eye - minutes elapsed. 6 o’clock eye - seconds elapsed.
STOPWATCH The stopwatch is capable of measuring: 1/10 seconds elapsed up to one second (top eye) Minutes elapsed up to one hour (middle eye) Seconds elapsed up to one minute (bottom eye) BEFORE USING THE STOPWATCH, reset the stopwatch hands to the 60 and O positions.
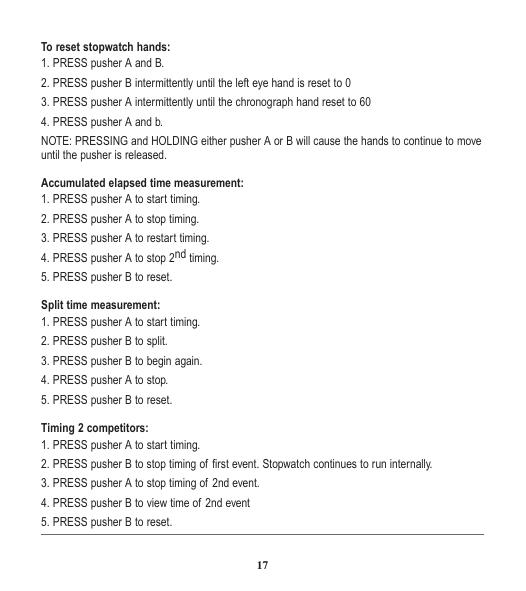
To reset stopwatch hands:
NOTE: PRESSING and HOLDING either pusher A or B will cause the hands to continue to move until the pusher is released.
If the stopwatch hands moves improperly:
Timing 2 competitors:
Crown position - A, B and C. Pushers - A (top) and B (bottom) 12 o’clock eye - minutes elapsed 9 o’clock eye - hours elapsed

This chronograph watch has 3 functions: TIME, CALENDAR, STOPWATCH TIME To set the time:
STOPWATCH The stopwatch is capable of measuring: 1/20 seconds elapsed up to second (bottom eye). Seconds elapsed up to one minute (second sweep hand). Minutes elapsed up to one hour (top eye). Hour elapsed up to twelve hours (middle eye). BEFORE USING THE STOPWATCH, reset the stopwatch hands (only the 1.20 second hand and second hand need to be reset) to the O and 12 positions.
To reset stopwatch hands:
NOTE: PRESSING and HOLDING either pusher A or B will cause the hands to continue to move until the pusher is released.
Standard stopwatch measurement:
Timing 2 competitors:
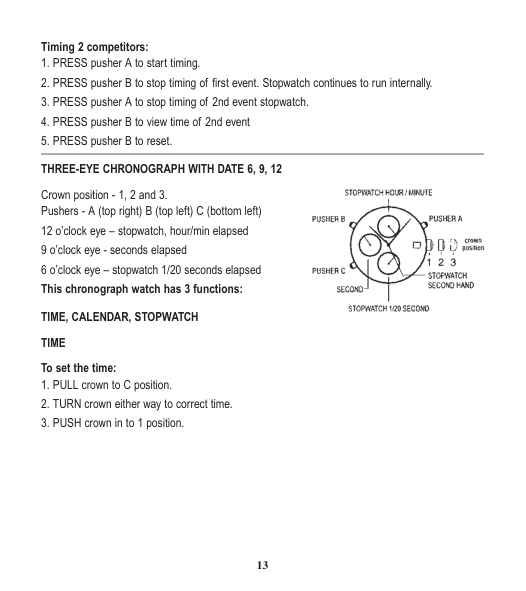
Crown position - 1, 2 and 3. Pushers - A (top right) B (top left) C (bottom left) 12 o’clock eye – stopwatch, hour/min elapsed 9 o’clock eye - seconds elapsed

CALENDAR To set the calendar:
STOPWATCH The stopwatch is capable of measuring: 1/20 seconds elapsed up to one second (bottom eye). Minutes elapsed up to 30 minutes (top eye). Hour elapsed up to 6 hours (top eye). Seconds elapsed up to one minute (middle eye). BEFORE USING THE STOPWATCH, reset the stopwatch hands (only the 60 and O position. To reset stopwatch hands:
NOTE: PRESSING and HOLDING either pusher A, B or C will cause the hands to continue to move until the pusher is released.
Standard stopwatch measurement:
Accumulated elapsed time measurement:

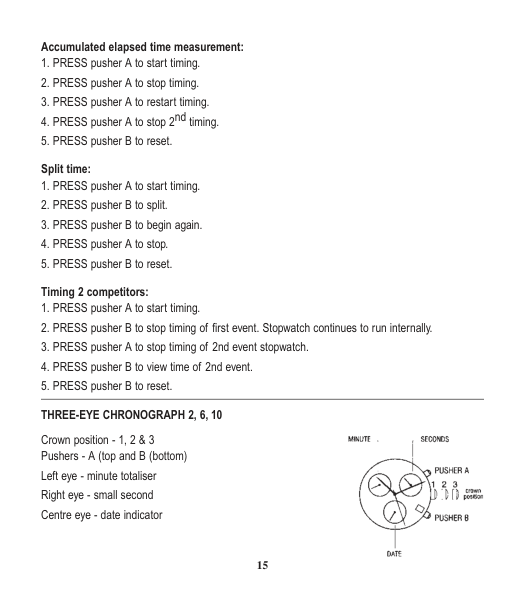
Crown position - 1, 2 & 3 Pushers - A (top and B (bottom) Left eye - minute totaliser Right eye - small second Centre eye - date indicator
To set the time:
BEFORE USING THE STOPWATCH, reset the stopwatch hands to the 60 position by mean of pusher B. If stopwatch hands move improperly, reset the hands as follow:
Standard stopwatch measurement:
To reset stopwatch hands:
NOTE: PRESSING and HOLDING either pusher A or B will cause the hands to continue to move until the pusher is released.
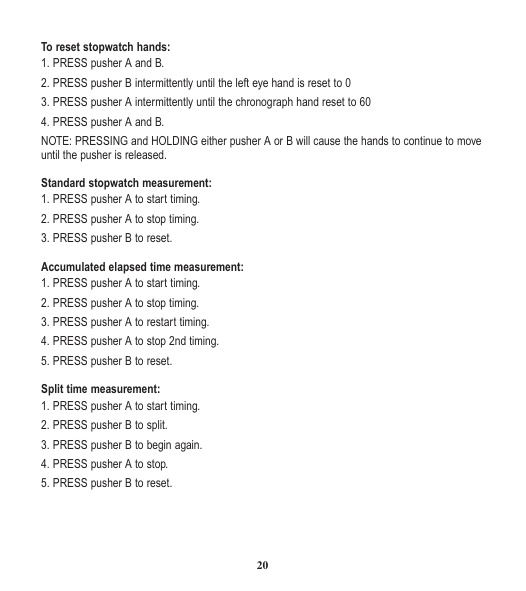
Accumulated elapsed time measurement:
Split time measurement:
DAY /DATE/ 24 HOUR To set the time:

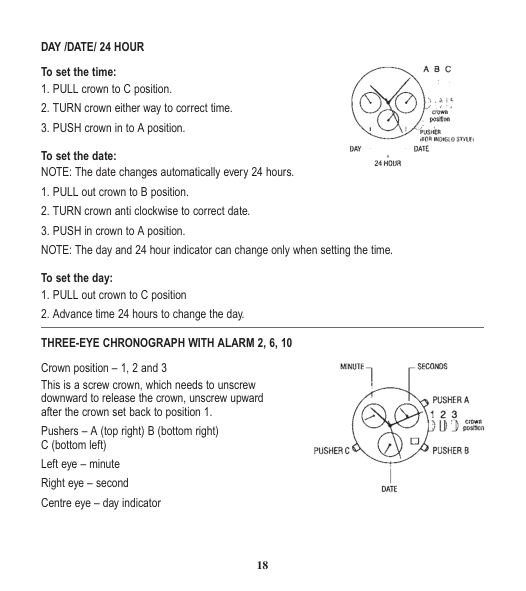
To set the day:

Crown position – 1, 2 and 3 This is a screw crown, which needs to unscrew downward to release the crown, unscrew upward after the crown set back to position 1. Pushers – A (top right) B (bottom right)
To set the time:
CALENDAR To set the calendar:
BEFORE USING THE STOPWATCH, reset the stopwatch hands to the 60 position by means of pusher B. If stopwatch hands move improperly, reset the hands as follow:
To reset stopwatch hands:
Standard stopwatch measurement:
Timing 2 competitors:
Crown position – A, B and C Pushers – A (top) B (bottom) 12 o’clock eye – minutes elapsed 9 o’clock eye – 24-hour indicator

This chronograph watch has 3 functions: TIME, CALENDAR, STOPWATCH TIME To set the time:
STOPWATCH The stopwatch is capable of measuring:
NOTE: PRESSING and HOLDING either pusher A or B will cause the hands to continue to move until the pusher is released.
Standard stopwatch measurement:
Timing 2 competitors:
Split time measurement:

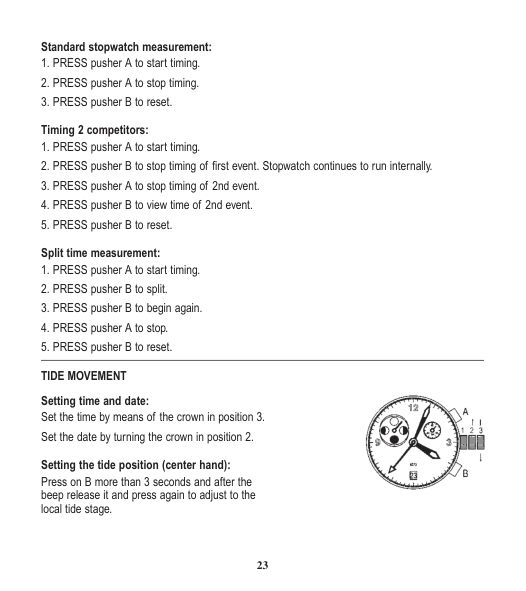
Press on B more than 3 seconds and after the beep release it and press again to adjust to the local tide stage.
Setting the tide range (counter at 10 o’clock) : Press on A more than 3 seconds and after the beep release it and press again to adjust to the moon phase.

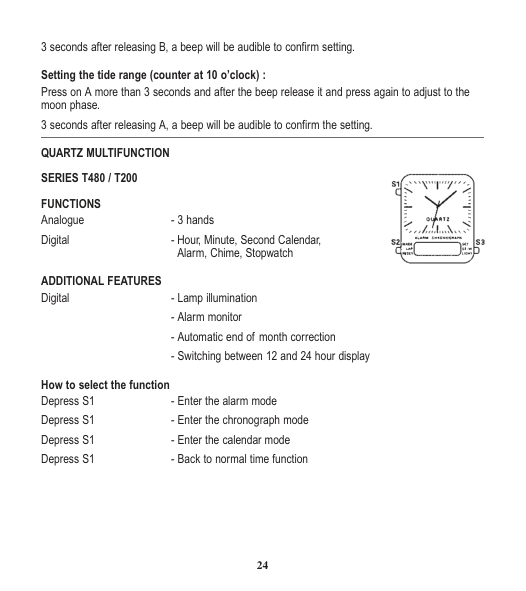
FUNCTIONS Analogue - 3 hands Digital - Hour, Minute, Second Calendar,
Alarm, Chime, Stopwatch
ADDITIONAL FEATURES Digital - Lamp illumination
How to select the function Depress S1 - Enter the alarm mode Depress S1 - Enter the chronograph mode Depress S1 - Enter the calendar mode
How to operate the stopwatch
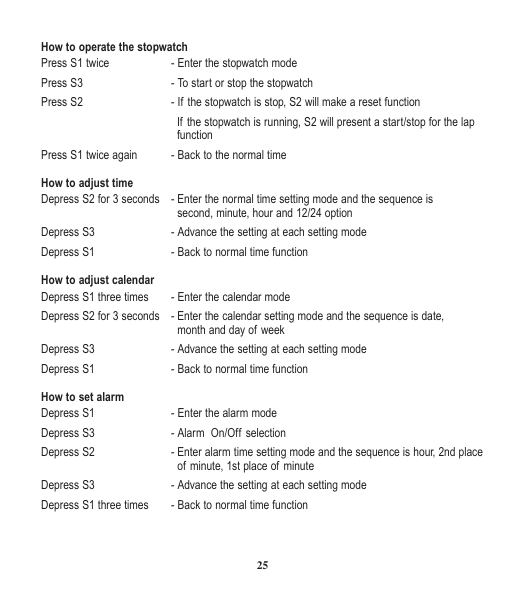
If the stopwatch is running, S2 will present a start/stop for the lap function
Press S1 twice again - Back to the normal time How to adjust time
How to set chime function
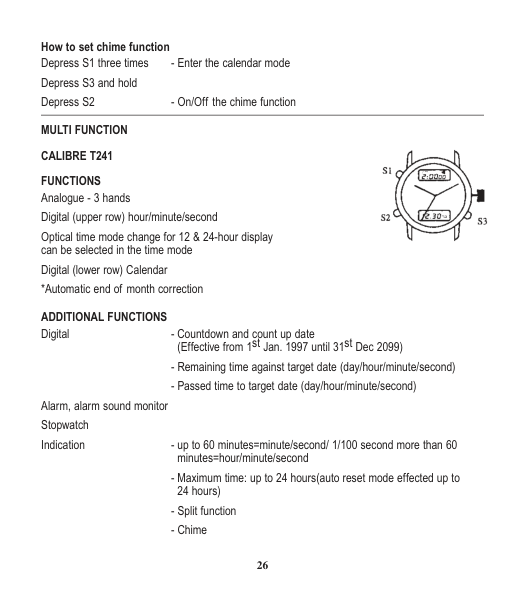

FUNCTIONS Analogue - 3 hands Digital (upper row) hour/minute/second Optical time mode change for 12 & 24-hour display can be selected in the time mode Digital (lower row) Calendar
*Automatic end of month correction ADDITIONAL FUNCTIONS Digital - Countdown and count up date
(Effective from 1st Jan. 1997 until 31st Dec 2099)
Alarm, alarm sound monitor Stopwatch Indication - up to 60 minutes=minute/second/ 1/100 second more than 60
minutes=hour/minute/second
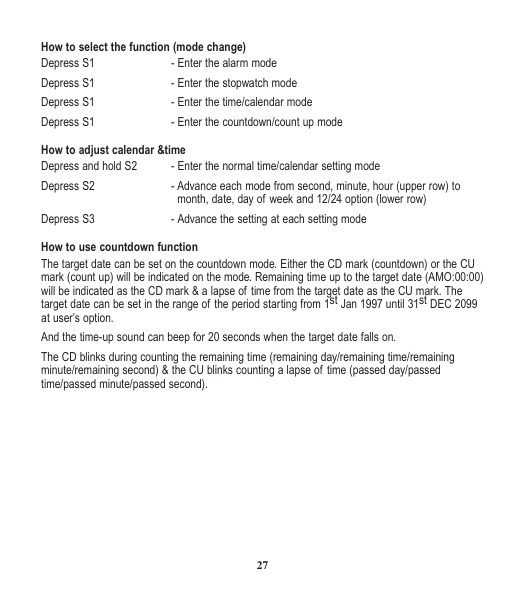
How to select the function (mode change) Depress S1 - Enter the alarm mode Depress S1 - Enter the stopwatch mode
How to adjust calendar &time Depress and hold S2 - Enter the normal time/calendar setting mode
How to use countdown function The target date can be set on the countdown mode. Either the CD mark (countdown) or the CU mark (count up) will be indicated on the mode. Remaining time up to the target date (AMO:00:00) will be indicated as the CD mark & a lapse of time from the target date as the CU mark. The target date can be set in the range of the period starting from 1st Jan 1997 until 31st DEC 2099 at user’s option.
And the time-up sound can beep for 20 seconds when the target date falls on. The CD blinks during counting the remaining time (remaining day/remaining time/remaining minute/remaining second) & the CU blinks counting a lapse of time (passed day/passed time/passed minute/passed second).
How to set the target date
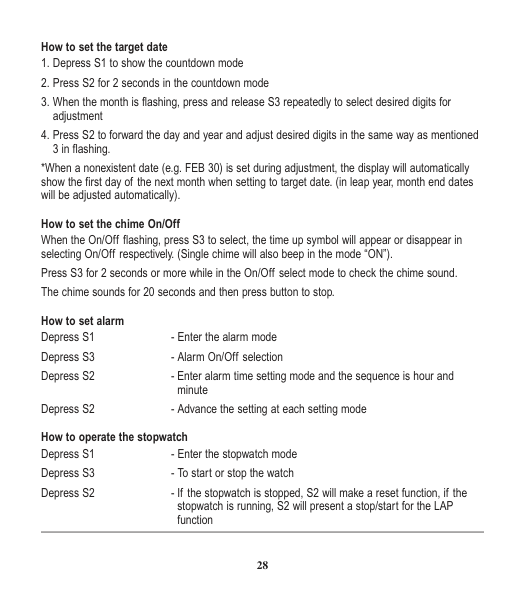
*When a nonexistent date (e.g. FEB 30) is set during adjustment, the display will automatically show the first day of the next month when setting to target date. (in leap year, month end dates will be adjusted automatically). How to set the chime On/Off When the On/Off flashing, press S3 to select, the time up symbol will appear or disappear in selecting On/Off respectively. (Single chime will also beep in the mode “ON”).
Depress S3 - Alarm On/Off selection
Depress S3 - To start or stop the watch
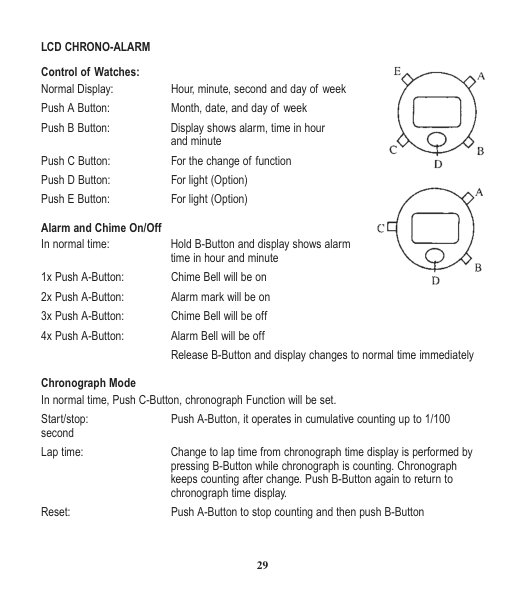
LCD CHRONO-ALARM Control of Watches: Normal Display: Hour, minute, second and day of week


Alarm and Chime On/Off In normal time: Hold B-Button and display shows alarm
time in hour and minute
Chronograph Mode In normal time, Push C-Button, chronograph Function will be set. Start/stop: Push A-Button, it operates in cumulative counting up to 1/100 second Lap time: Change to lap time from chronograph time display is performed by
pressing B-Button while chronograph is counting. Chronograph keeps counting after change. Push B-Button again to return to chronograph time display.
Reset: Push A-Button to stop counting and then push B-Button
Alarm Time Setting In normal time, hold C-Button about three seconds. Monday flag + Hour digits will flash which is advanced through depression of B-Button.
Normal Time Setting In normal time, hold C-Button three seconds and then Push C-Button once. Tuesday flag + Second digits will flash. Push B-Button and Second will be reset to zero.
1x Push A-Button: Minute digits flash and advance by depression of B-Button 2x Push A-Button: Hour digits flash and advance as above 3x Push A-Button: Month digits flash depending on position and advance as above 4x Push A-Button: Date digits flash depending on position and advance as above 5x Push A-Button: Flag of weekday flash and advance as above Push A-Button and second will start for setting again. Push C-Button during any changing time, Normal time will appear.
12/24 Hours Reversal Option In normal time, hold B-Button and then Push C-Button, the A.M or P.M mark will appear or disappear, 12 Hours mode (A.M or P.M) will be preset on the display.
Alarm Test In normal time, hold B-Button and then hold A-Button together Alarm will beep and Alarm sounded.
Alarm Sound Off For “Beep, Beep” Alarm, Push B-Button For Melody Alarm, Push C-Button (Option) Month/Date Position Interchange In Normal time mode, Hold A-Button and then push B-Button once
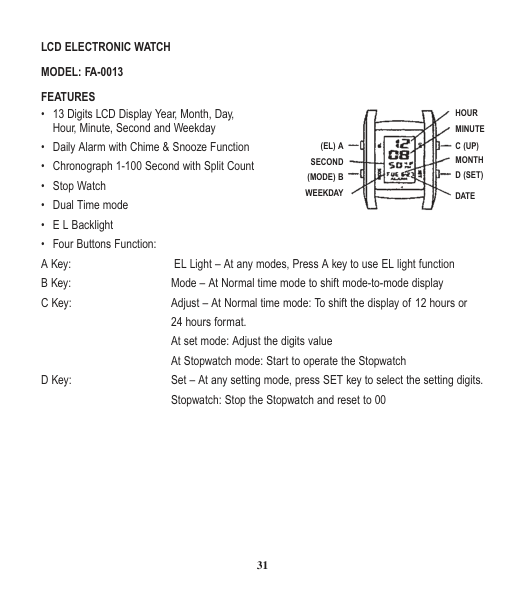
LCD ELECTRONIC WATCH MODEL: FA-0013 FEATURES

HOUR MINUTE
C (UP) MONTH D (SET)
(EL) A SECOND
(MODE) B WEEKDAY
DATE
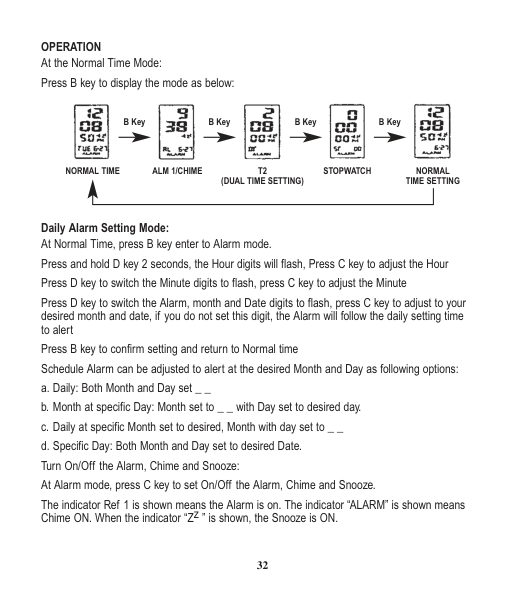
OPERATION At the Normal Time Mode:

B Key B Key B Key B Key
NORMAL TIME ALM 1/CHIME T2 (DUAL TIME SETTING)
STOPWATCH NORMAL TIME SETTING
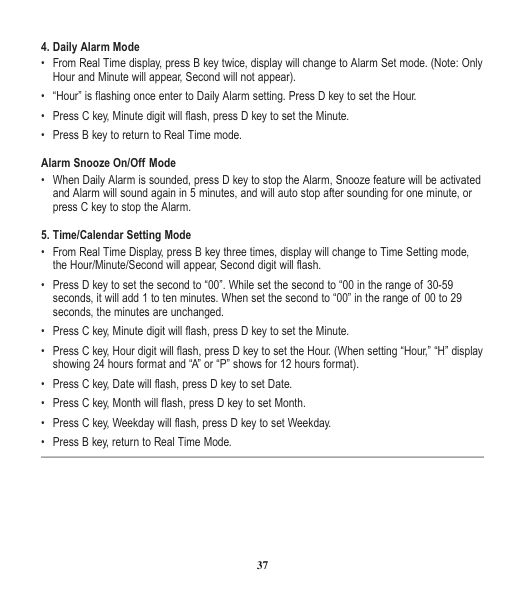
Daily Alarm Setting Mode: At Normal Time, press B key enter to Alarm mode. Press and hold D key 2 seconds, the Hour digits will flash, Press C key to adjust the Hour Press D key to switch the Minute digits to flash, press C key to adjust the Minute
Press D key to switch the Alarm, month and Date digits to flash, press C key to adjust to your desired month and date, if you do not set this digit, the Alarm will follow the daily setting time to alert
The indicator Ref 1 is shown means the Alarm is on. The indicator “ALARM” is shown means Chime ON. When the indicator “Zz ” is shown, the Snooze is ON.
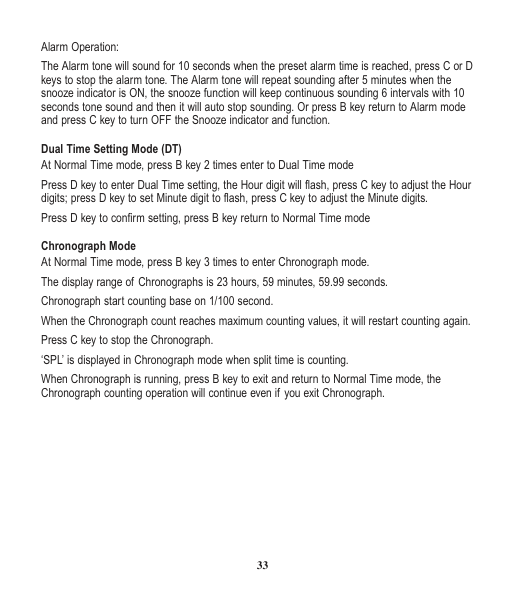
Alarm Operation: The Alarm tone will sound for 10 seconds when the preset alarm time is reached, press C or D keys to stop the alarm tone. The Alarm tone will repeat sounding after 5 minutes when the snooze indicator is ON, the snooze function will keep continuous sounding 6 intervals with 10 seconds tone sound and then it will auto stop sounding. Or press B key return to Alarm mode and press C key to turn OFF the Snooze indicator and function.
Dual Time Setting Mode (DT)
Press D key to enter Dual Time setting, the Hour digit will flash, press C key to adjust the Hour digits; press D key to set Minute digit to flash, press C key to adjust the Minute digits.
Press D key to confirm setting, press B key return to Normal Time mode Chronograph Mode
When Chronograph is running, press B key to exit and return to Normal Time mode, the Chronograph counting operation will continue even if you exit Chronograph.
To measure time with Chronograph: Elapsed Time:
PRESS:
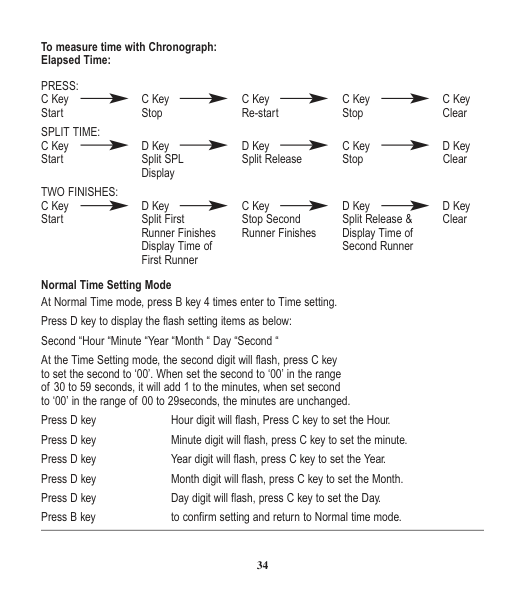
Display TWO FINISHES:
Runner Finishes Runner Finishes Display Time of Display Time of Second Runner First Runner
Normal Time Setting Mode
At the Time Setting mode, the second digit will flash, press C key to set the second to ‘00’. When set the second to ‘00’ in the range of 30 to 59 seconds, it will add 1 to the minutes, when set second to ‘00’ in the range of 00 to 29seconds, the minutes are unchanged.
Press D key Hour digit will flash, Press C key to set the Hour. Press D key Minute digit will flash, press C key to set the minute. Press D key Year digit will flash, press C key to set the Year. Press D key Month digit will flash, press C key to set the Month. Press D key Day digit will flash, press C key to set the Day.
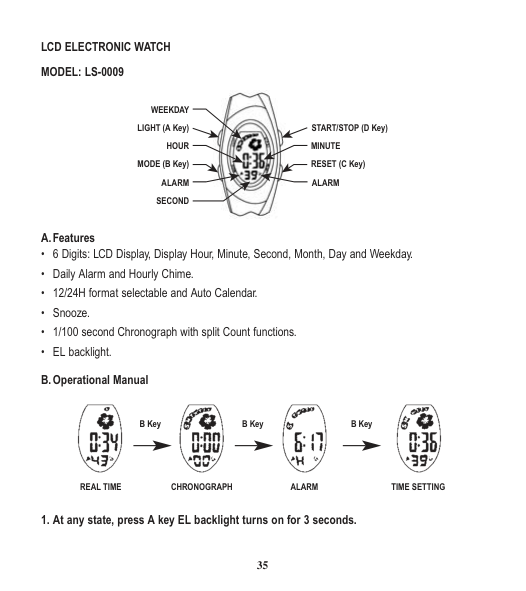
LCD ELECTRONIC WATCH MODEL: LS-0009

WEEKDAY START/STOP (D Key)LIGHT (A Key) MINUTEHOUR
RESET (C Key)MODE (B Key) ALARM ALARM SECOND

B Key B Key B Key
REAL TIME
CHRONOGRAPH ALARM TIME SETTING
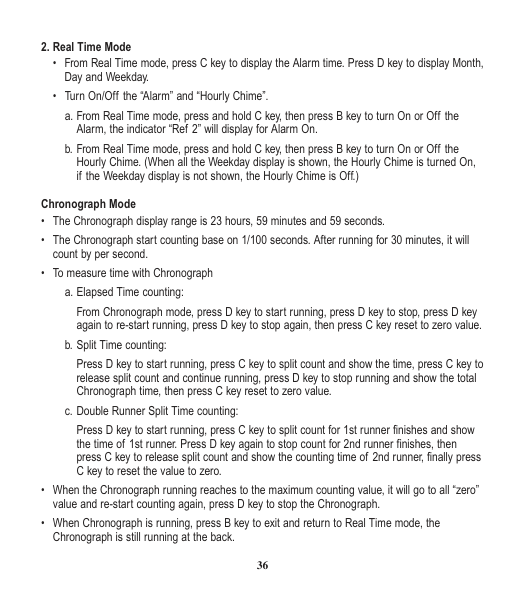
2. Real Time Mode
Chronograph Mode
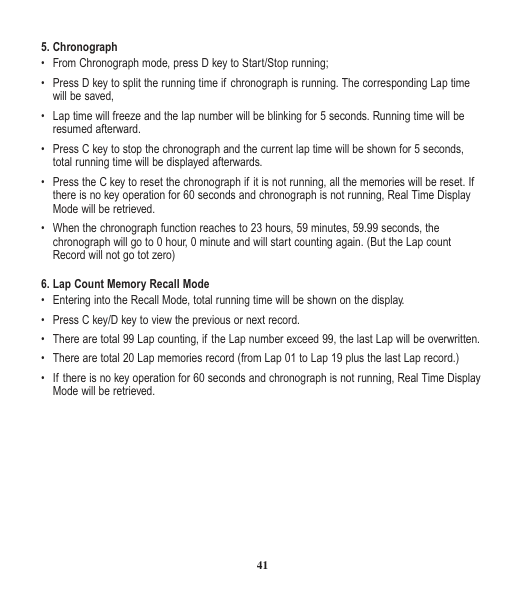
From Chronograph mode, press D key to start running, press D key to stop, press D key again to re-start running, press D key to stop again, then press C key reset to zero value.
Press D key to start running, press C key to split count and show the time, press C key to release split count and continue running, press D key to stop running and show the total Chronograph time, then press C key reset to zero value.
Press D key to start running, press C key to split count for 1st runner finishes and show the time of 1st runner. Press D key again to stop count for 2nd runner finishes, then press C key to release split count and show the counting time of 2nd runner, finally press C key to reset the value to zero.
4. Daily Alarm Mode
5. Time/Calendar Setting Mode

WEEKDAYCHIME ALARM
YEAR (D Key) START/STOP DAY (C Key) RESET
LIGHT/SET (A Key)
MONTH MODE (B Key)
12 HOUR
SECOND MINUTEHOUR
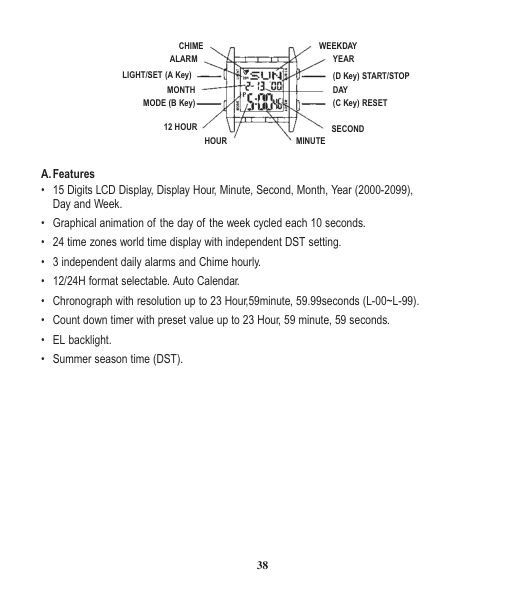
A.Features

B Key
B Key
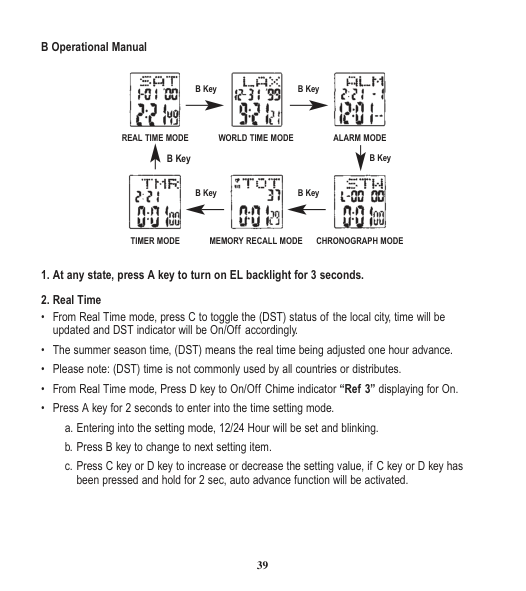
WORLD TIME MODE ALARM MODE
REAL TIME MODE
B KeyB Key
B Key B Key
TIMER MODE MEMORY RECALL MODE CHRONOGRAPH MODE
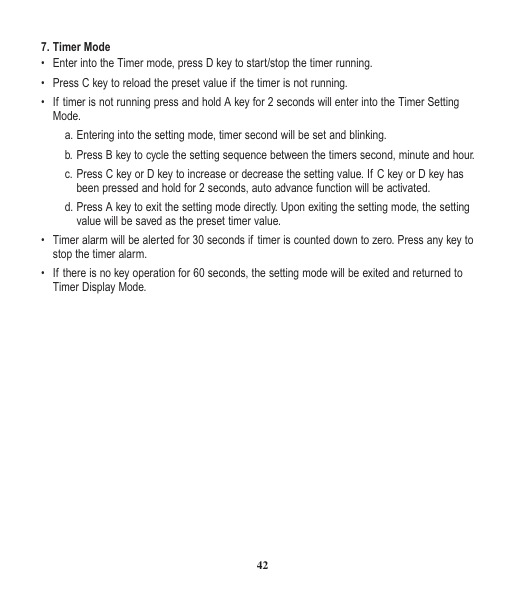
c. Press C key or D key to increase or decrease the setting value, if C key or D key has been pressed and hold for 2 sec, auto advance function will be activated.
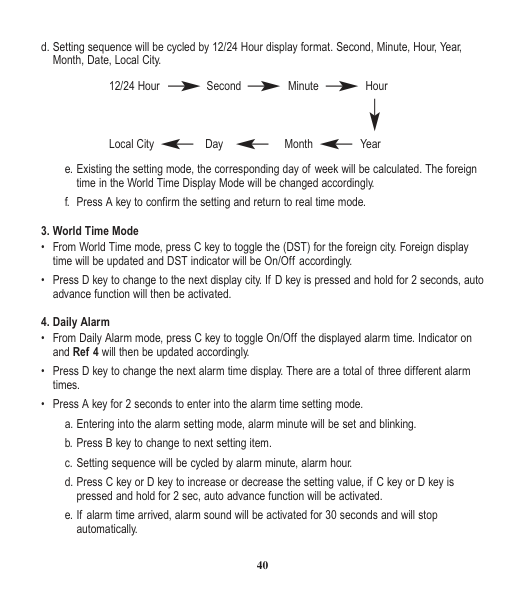
d. Setting sequence will be cycled by 12/24 Hour display format. Second, Minute, Hour, Year, Month, Date, Local City.
12/24 Hour Second Minute Hour
Local City Day Month Year e. Existing the setting mode, the corresponding day of week will be calculated. The foreign
time in the World Time Display Mode will be changed accordingly. f. Press A key to confirm the setting and return to real time mode.
3. World Time Mode
4. Daily Alarm
5. Chronograph
6. Lap Count Memory Recall Mode
7. Timer Mode
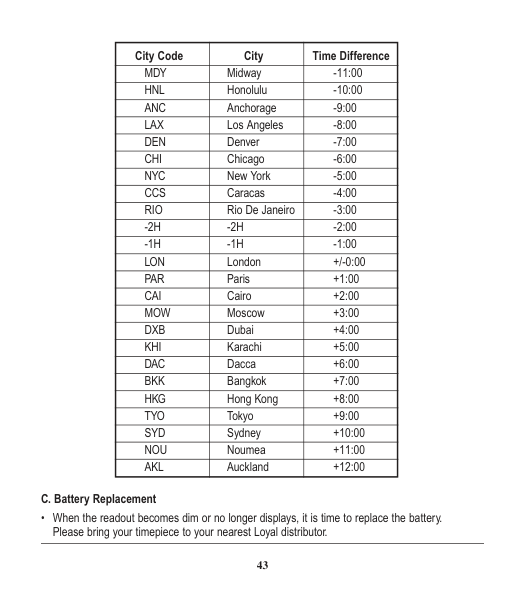
|City Code|City|Time Difference| |---|---|---| |MDY|Midway|-11:00| |HNL|Honolulu|-10:00| |ANC|Anchorage|-9:00|
|LAX|Los Angeles|-8:00| |DEN|Denver|-7:00| |CHI|Chicago|-6:00| |NYC|New York|-5:00| |CCS|Caracas|-4:00| |RIO|Rio De Janeiro|-3:00| |-2H|-2H|-2:00| |-1H|-1H|-1:00| |LON|London|+/-0:00| |PAR|Paris|+1:00| |CAI|Cairo|+2:00| |MOW|Moscow|+3:00| |DXB|Dubai|+4:00| |KHI|Karachi|+5:00| |DAC|Dacca|+6:00| |BKK|Bangkok|+7:00| |HKG|Hong Kong|+8:00| |TYO|Tokyo|+9:00| |SYD|Sydney|+10:00| |NOU|Noumea|+11:00| |AKL|Auckland|+12:00|
C. Battery Replacement
• When the readout becomes dim or no longer displays, it is time to replace the battery. Please bring your timepiece to your nearest Loyal distributor.

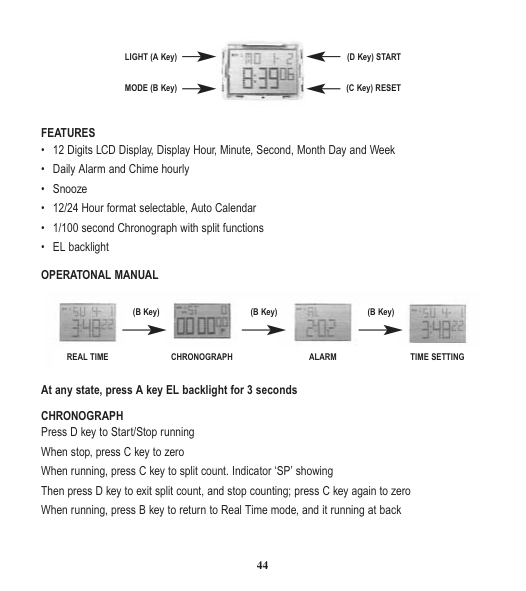
LIGHT (A Key)
(D Key) START
(C Key) RESETMODE (B Key)
FEATURES

(B Key) (B Key) (B Key)
REAL TIME CHRONOGRAPH ALARM TIME SETTING
At any state, press A key EL backlight for 3 seconds CHRONOGRAPH Press D key to Start/Stop running When stop, press C key to zero When running, press C key to split count. Indicator ‘SP’ showing Then press D key to exit split count, and stop counting; press C key again to zero When running, press B key to return to Real Time mode, and it running at back
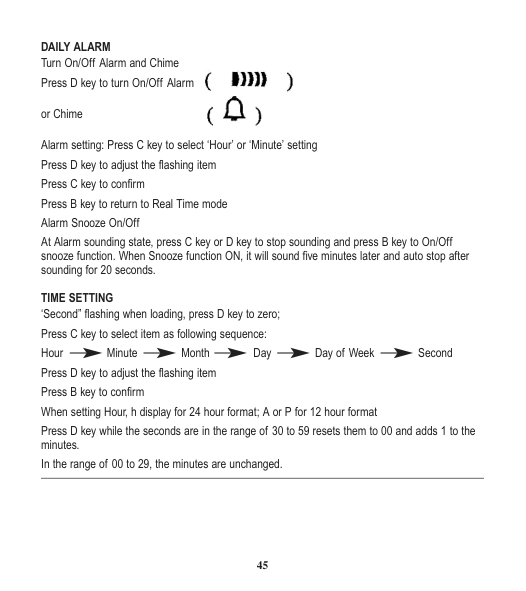
DAILY ALARM Turn On/Off Alarm and Chime Press D key to turn On/Off Alarm


or Chime
Alarm setting: Press C key to select ‘Hour’ or ‘Minute’ setting Press D key to adjust the flashing item
At Alarm sounding state, press C key or D key to stop sounding and press B key to On/Off snooze function. When Snooze function ON, it will sound five minutes later and auto stop after sounding for 20 seconds.
TIME SETTING ‘Second” flashing when loading, press D key to zero;
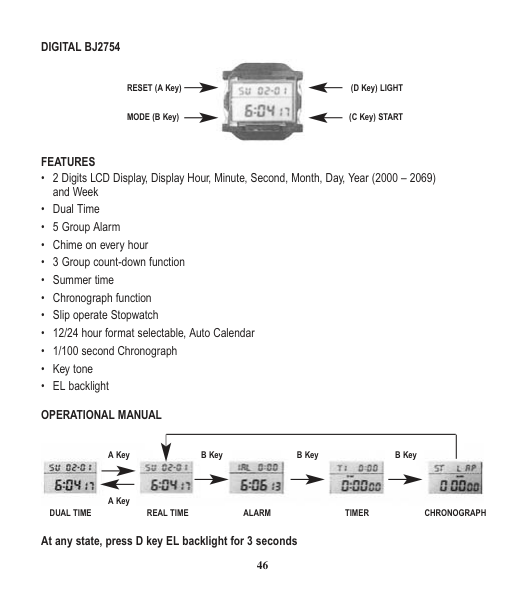
DIGITAL BJ2754

RESET (A Key)
(D Key) LIGHT
(C Key) STARTMODE (B Key)
FEATURES

A Key
B Key B Key B Key
A Key DUAL TIME REAL TIME ALARM TIMER CHRONOGRAPH
At any state, press D key EL backlight for 3 seconds
TIME SETTING At normal mode, press C key over 3 seconds, “second” flash, then press A key to zero resume.

SELECTABLE 12 / 24 FORMAT In process of step one adjusting “hour”, press B or A key until H appears on LCD, this means 24 format. If A or P appears on LCD, this means 12 format; AM means morning; PM means afternoon.
SUMMER TIME SETTING At time setting mode, press C key for more than 3 Seconds entering summer time setting mode when minute flash. Press C key On/Off summer time, then Press C key to return. NOTE: Normal time will auto faster an hour at AM 2.00 on the last Sunday in Mar. of Gregorian calendar and lower an hour at AM 2.00 on the last Sunday in Oct. of Gregorian calendar when ON summer time. If off, the function of above mentioned will be cancelled.
DOUBLE TIME SETTING At normal mode, press A key entering the second time state (T2 showing at the down corner of the LCD), press C key for more than 3 seconds and “hour” flash, then press B or A setting, (B key for forwards, A key for backwards) Press C key for more than 3 seconds to return.
DAILY ALARM CHIME SETTING Alarm and Chime On/Off At alarm mode, press C key for more than 3 seconds, “AL” will flash,
Press A key On/Off Alarm will display when alarm on


or Chime will display when chime on
ALARM SETTING At alarm mode, press C key for more than 3 seconds, “AL” will flash, than press C key again to alternative hour or minute set, press B or A key setting ( B key for forwards, A key for backwards)
ALARM SELECT 5-group alarm can be set at the same time by entering alarm mode. Press a key to select from AL 1 to AL 5. The alarm setting is same as above, and ringing 23 seconds for every group.
COUNTDOWN TIME FUNCTION
At countdown time mode, press C key for more than 3 seconds and hour, minute flash, press B or A key setting (B key for forwards, A key for backwards) Press C key for more than 3 seconds to complete/ Press C key again to start or pause countdown time.
COUNTDOWN SELECT
Press a key to select from T 1 to T 3 (the max countdown time: T1=90 Minutes, T2=24 Hours, T3=1825 Days) the method of setting is same as above. When countdown has finished, the hint sounds will click for 3 seconds then return to setting state. Press C key again to turn on countdown circle.
NOTE: The method of T2: The actual countdown time is the result of setting time subtract current time. The account method of T3: The actual countdown days is the result of setting date subtract current date.
CHRONOGRAPH FUNCTION At chronograph mode, press A key to alternate circle chronograph (SPL) or slip chronograph (LAP) mode.
Press C key to start chronograph, press again to pause, and again to continue. Press A key to zero resume when stop. Press A key to record current time when in process.
Note: At SPL slip chronograph, press C key to start and record the first person’s time. At one time press A key to record the second person’s time and display on the half of the LCD. Press A key again showing the third person’s time on the half of the LCD.