
Ask AI
— answers from the official manualAnswers from the official manual.
Common questions
Common Questions
8 totalWhat should I do before winterizing the Hmax Sand Filter?
Backwash the sand filter, drain pool according to instructions, unscrew drain valve cap and release water; disconnect hoses, remove sand, dry components thoroughly (Page 5).
What should I do if sand is flowing back to the pool?
Ensure the Control Valve is not set between two functions and check that it stops at one function. Move the control valve from Backwash to Filter function without stopping the sand filter, as this can cause issues. (Page 14)
How do I assemble and place the Hmax Sand Filter?
Place the sand filter on solid, level ground, not buried or damaged by lawn mowers, hedge trimmers, etc. Ensure proper electrical safety measures are in place and access is available for maintenance and drainage. (Page 6)
What parts should I use when replacing sand?
Only special pool-grade filter sand (#20 silica sand, 0.45-0.85 mm) as recommended; limestone or clay-free sand must be used to avoid reducing performance and damage (Page 7).
How do I start the filter for the first time?
Before starting, perform a backwash for 3-5 minutes until water runs clear. Follow with rinse function for 1 minute to circulate and drain water out Port D (Page 8).
What are some common safety instructions for using the Hmax Sand Filter?
The filter must be installed with an isolating transformer or RCD having a rated residual operating current not exceeding 30 mA. Use earthed power supply and do not bury cords exposed to damage (Page 2).
Full Manual
16 pages
303021216270_58497AU_14x21cm_1500gal 澳规砂滤器说明书-封面 303021216270
Sand Filter
Owner’S Manual
bestwaycorp.com/support Visit Bestway YouTube channel 58497 Hmax 1.5 mTo The Store
Questions? Problems?
Missing Parts?
For FAQ, Manuals, Videos Or Spare Parts, Please Visit bestwaycorp.com/support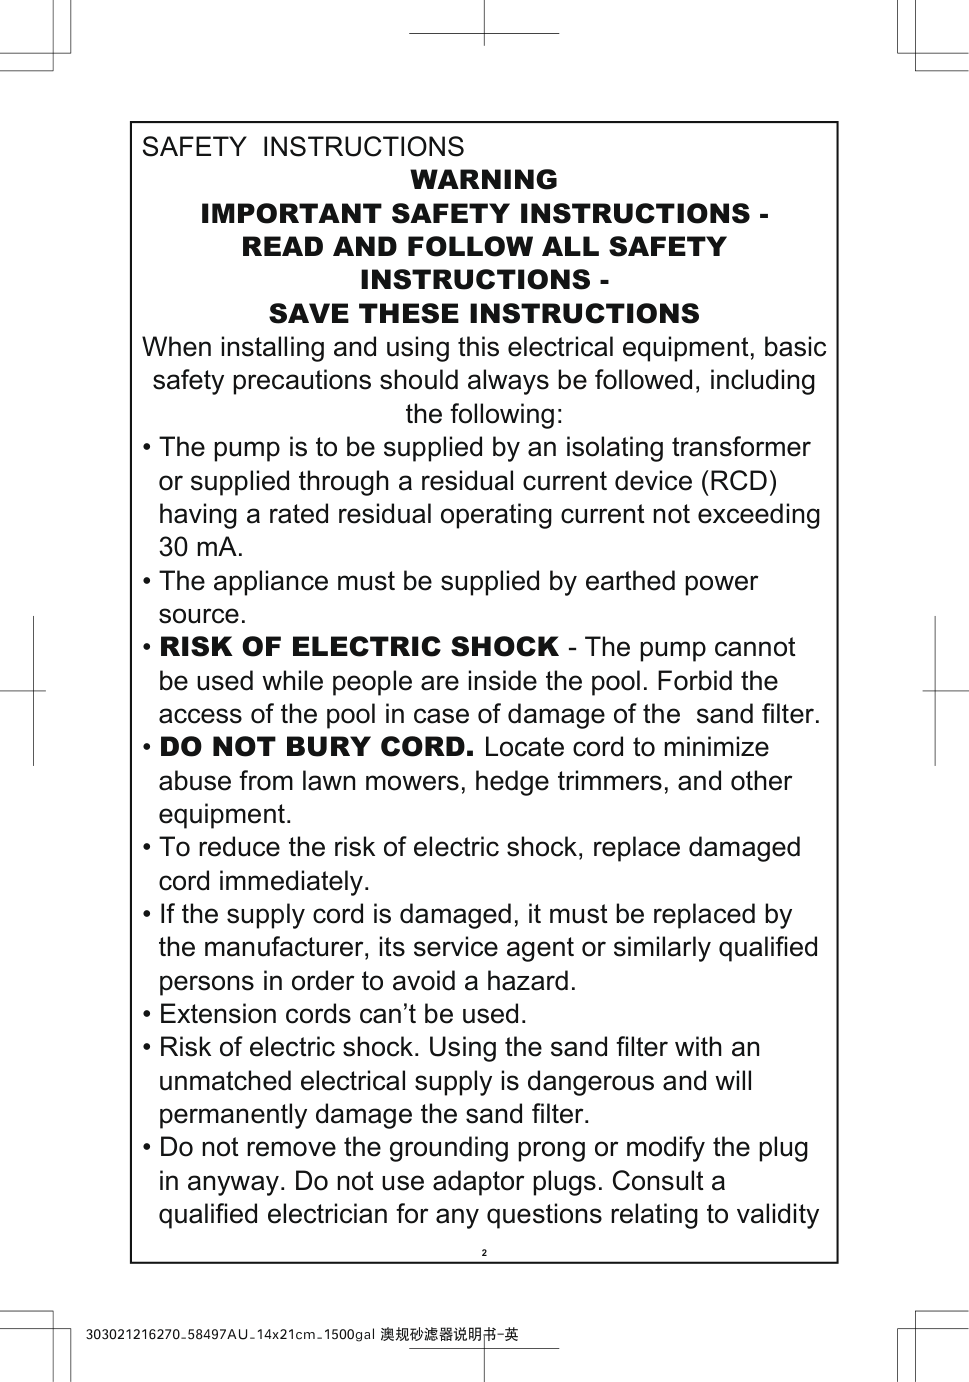
303021216270_58497AU_14x21cm_1500gal 澳规砂滤器说明书-英 2
Safety Instructions
Warning
Important Safety Instructions -
Read And Follow All Safety
Instructions -
Save These Instructions
When installing and using this electrical equipment, basic safety precautions should always be followed, including the following: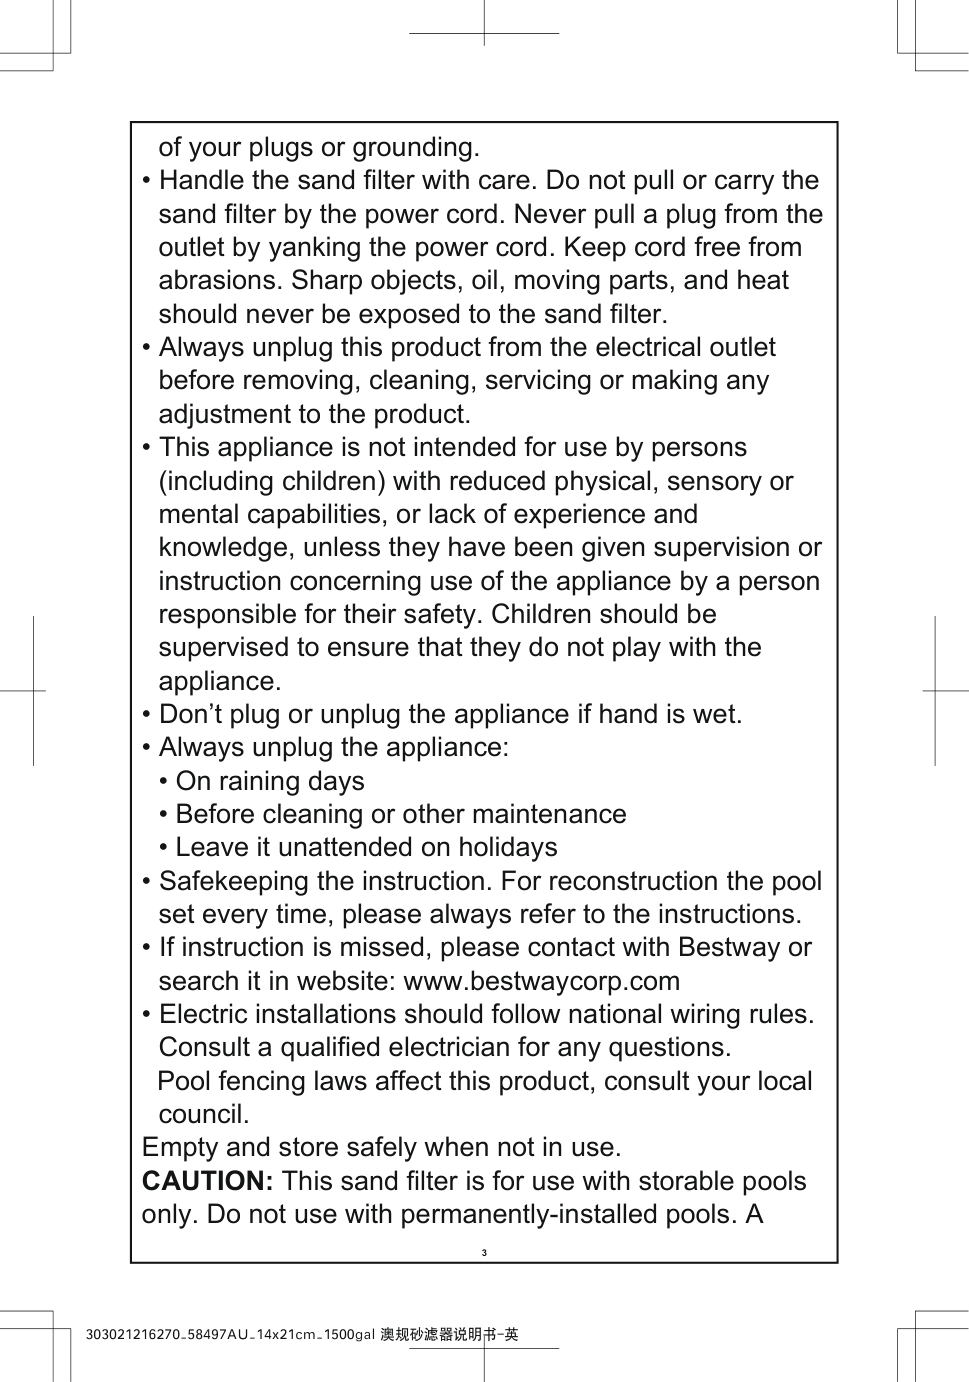
3 303021216270_58497AU_14x21cm_1500gal 澳规砂滤器说明书-英 of your plugs or grounding.
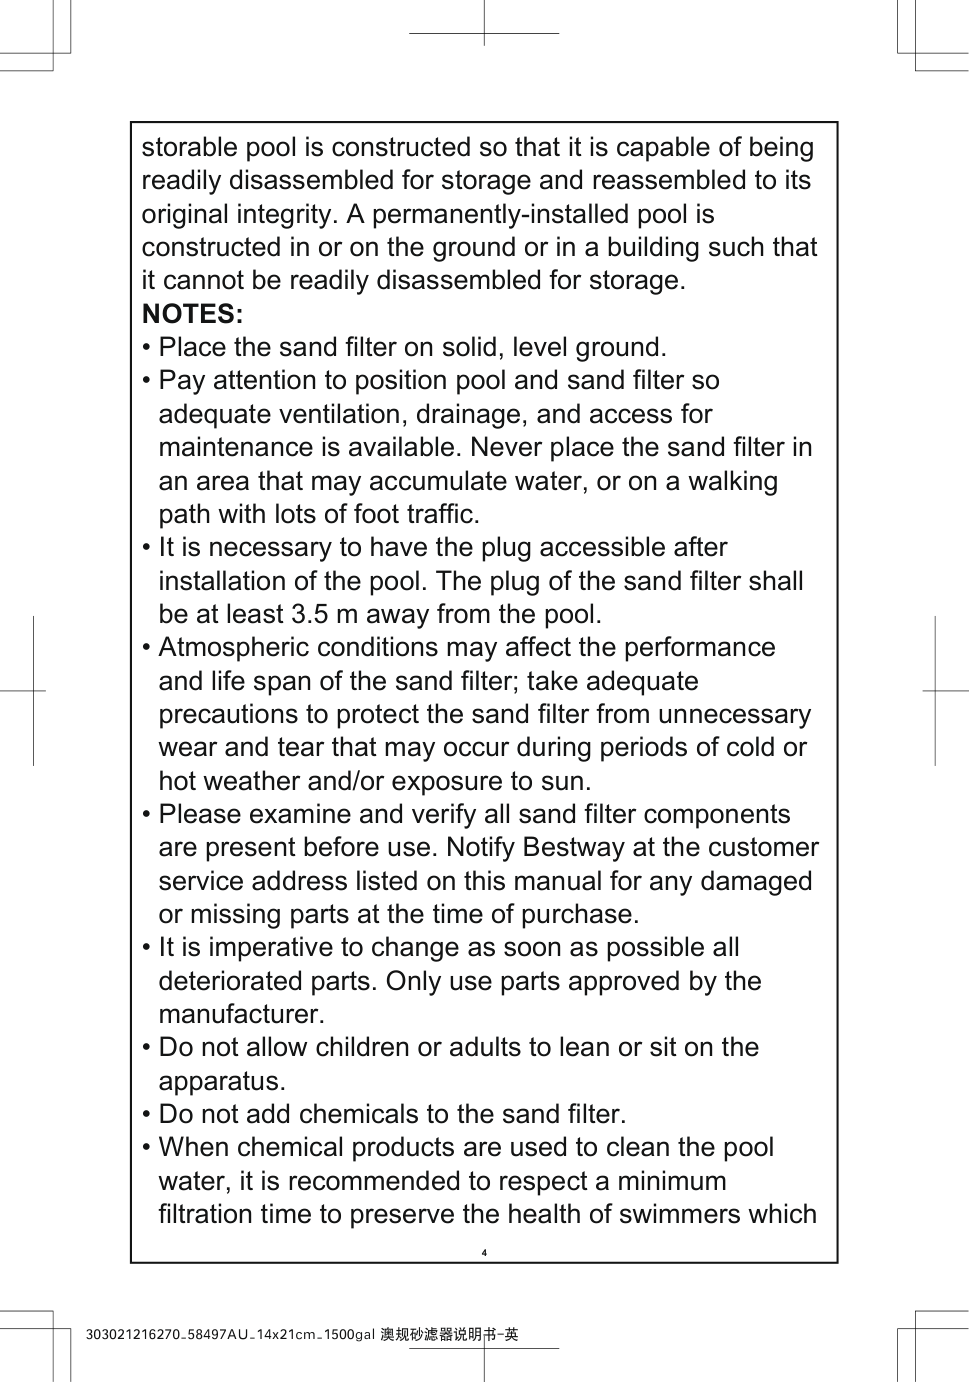
4 303021216270_58497AU_14x21cm_1500gal 澳规砂滤器说明书-英 storable pool is constructed so that it is capable of being readily disassembled for storage and reassembled to its original integrity. A permanently-installed pool is constructed in or on the ground or in a building such that it cannot be readily disassembled for storage.
Notes:
5 303021216270_58497AU_14x21cm_1500gal 澳规砂滤器说明书-英 depends on compliance of health regulation.
Save These Instructions
6 303021216270_58497AU_14x21cm_1500gal 澳规砂滤器说明书-英
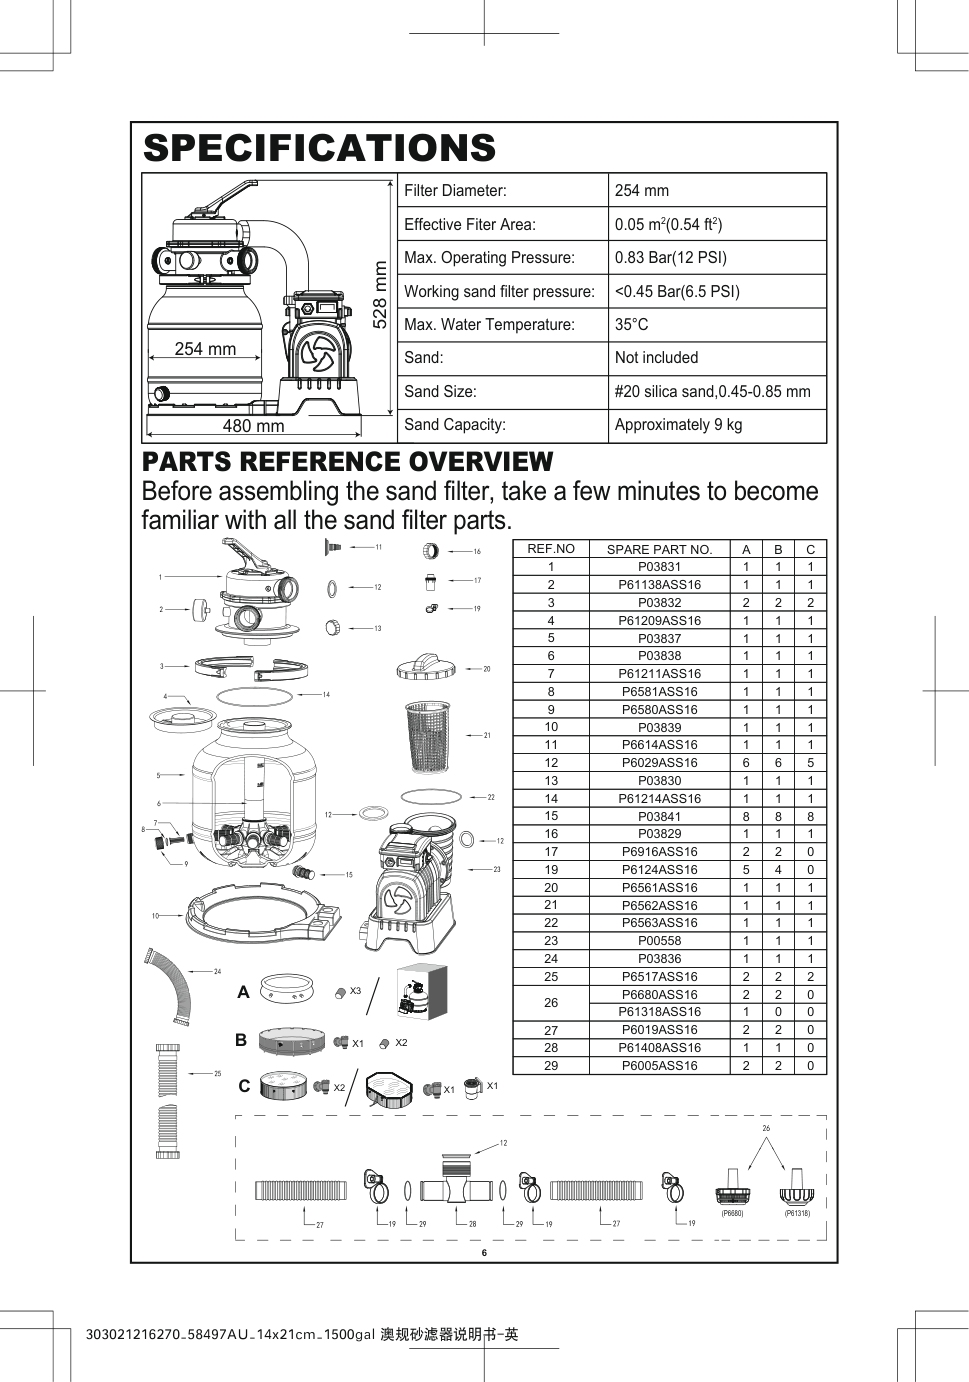
Specifications
528 mm 480 mm 254 mm Filter Diameter: Effective Fiter Area: Max. Operating Pressure: Working sand filter pressure: Max. Water Temperature: Sand: Sand Size: Sand Capacity: 254 mm 0.05 m2(0.54 ft2) 0.83 Bar(12 PSI) <0.45 Bar(6.5 PSI)35°C
Not included #20 silica sand,0.45-0.85 mm Approximately 9 kgParts Reference Overview
Before assembling the sand filter, take a few minutes to become familiar with all the sand filter parts.Ref.No
1 2 3 4 5 6 7 8 9 10 11 12 13 14 15 16 17 19 20 21 22 23 24 25 26 27 28 29Spare Part No.
P03831
P61138Ass16
P03832
P61209Ass16
P03837
P03838
P61211Ass16
P6581Ass16
P6580Ass16
P03839
P6614Ass16
P6029Ass16
P03830
P61214Ass16
P03841
P03829
P6916Ass16
P6124Ass16
P6561Ass16
P6562Ass16
P6563Ass16
P00558
P03836
P6517Ass16
P6680Ass16
P61318Ass16
P6019Ass16
P61408Ass16
P6005Ass16
A
1 1 2 1 1 1 1 1 1 1 1 6 1 1 8 1 2 5 1 1 1 1 1 2 2 1 2 1 2B
1 1 2 1 1 1 1 1 1 1 1 6 1 1 8 1 2 4 1 1 1 1 1 2 2 0 2 1 2C
1 1 2 1 1 1 1 1 1 1 1 5 1 1 8 1 0 0 1 1 1 1 1 2 0 0 0 0 0X3
A
B
X1
X1
X2
C
X2
X1
A
B
B
(P6680)
(P61318)
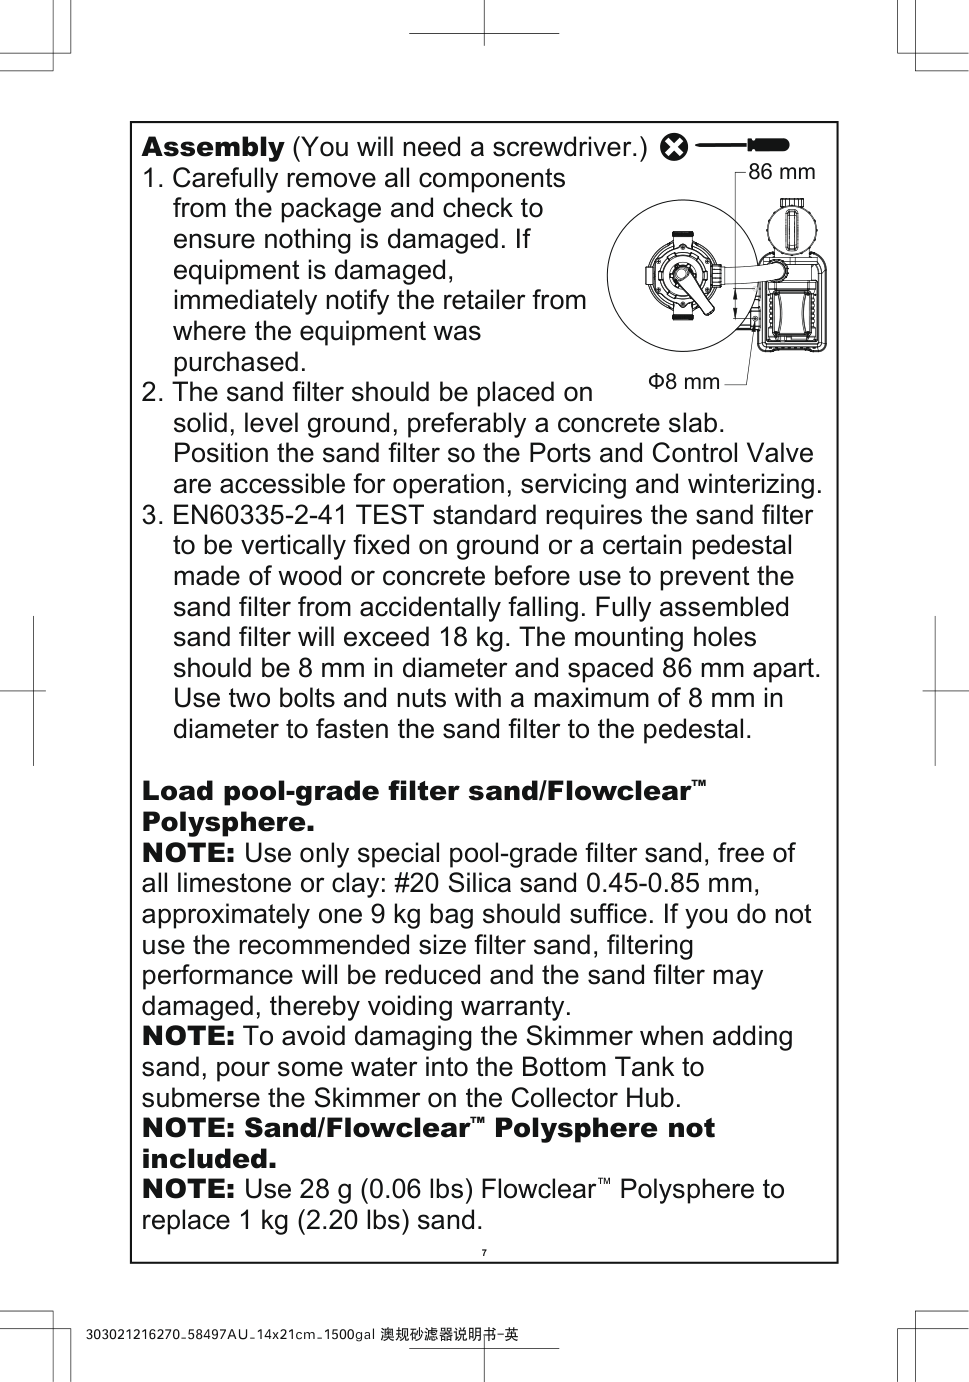
7 303021216270_58497AU_14x21cm_1500gal 澳规砂滤器说明书-英 Load pool-grade filter sand/Flowclear™ Polysphere. NOTE: Use only special pool-grade filter sand, free of all limestone or clay: #20 Silica sand 0.45-0.85 mm, approximately one 9 kg bag should suffice. If you do not use the recommended size filter sand, filtering performance will be reduced and the sand filter may damaged, thereby voiding warranty. NOTE: To avoid damaging the Skimmer when adding sand, pour some water into the Bottom Tank to submerse the Skimmer on the Collector Hub. NOTE: Sand/Flowclear™ Polysphere not included. NOTE: Use 28 g (0.06 lbs) Flowclear™ Polysphere to replace 1 kg (2.20 lbs) sand. Assembly (You will need a screwdriver.)
8 303021216270_58497AU_14x21cm_1500gal 澳规砂滤器说明书-英
C
C
C
Max.
Min .
#20 0.45-0.85 mm 4Max
Min
1A
A
B
B
B
A
B
A
B
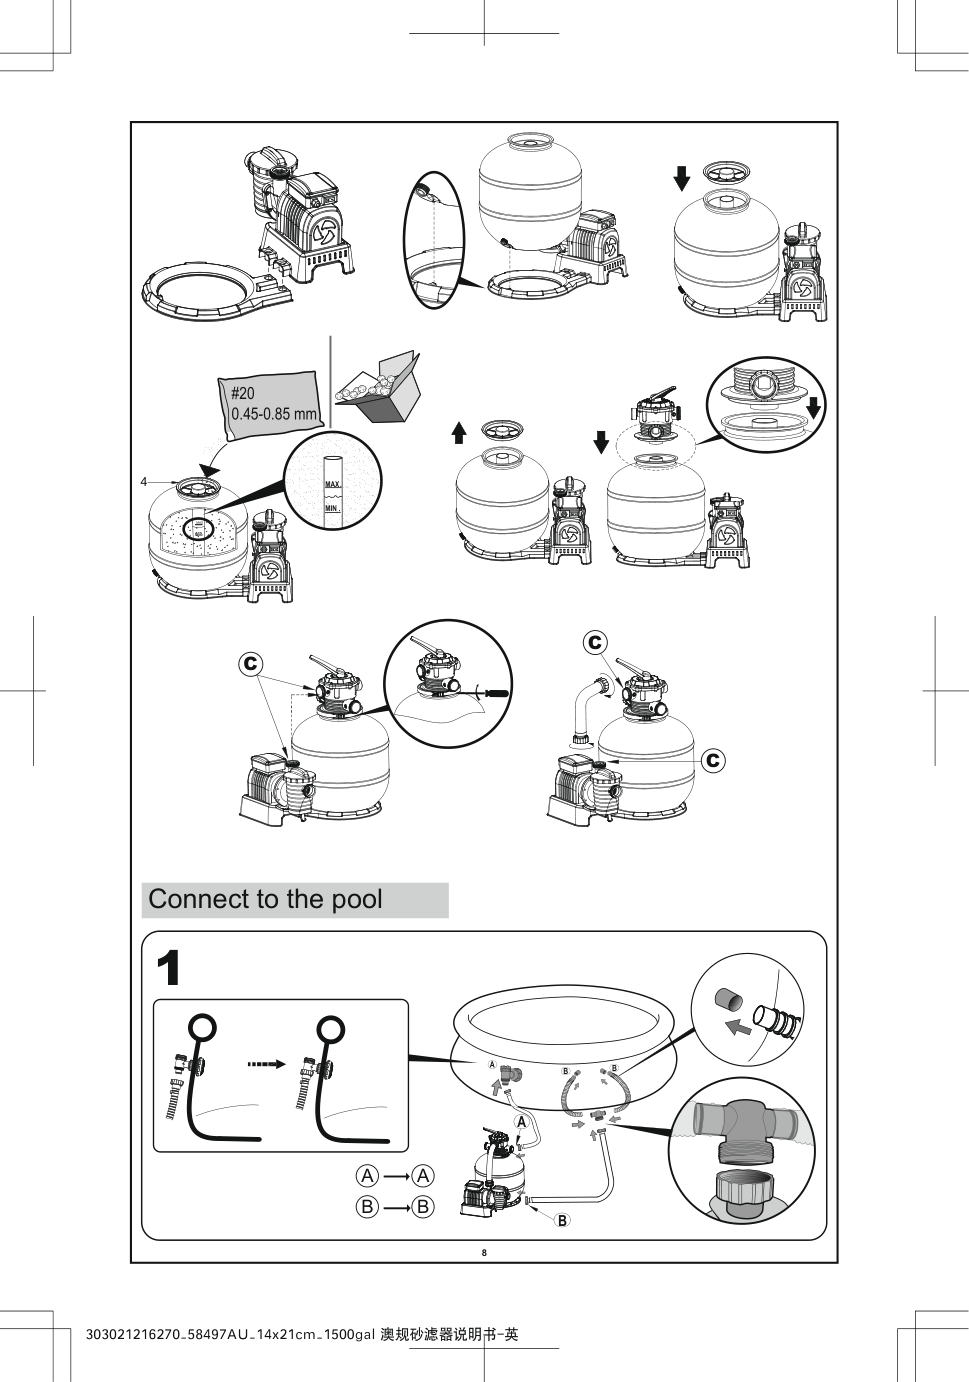
Connect to the pool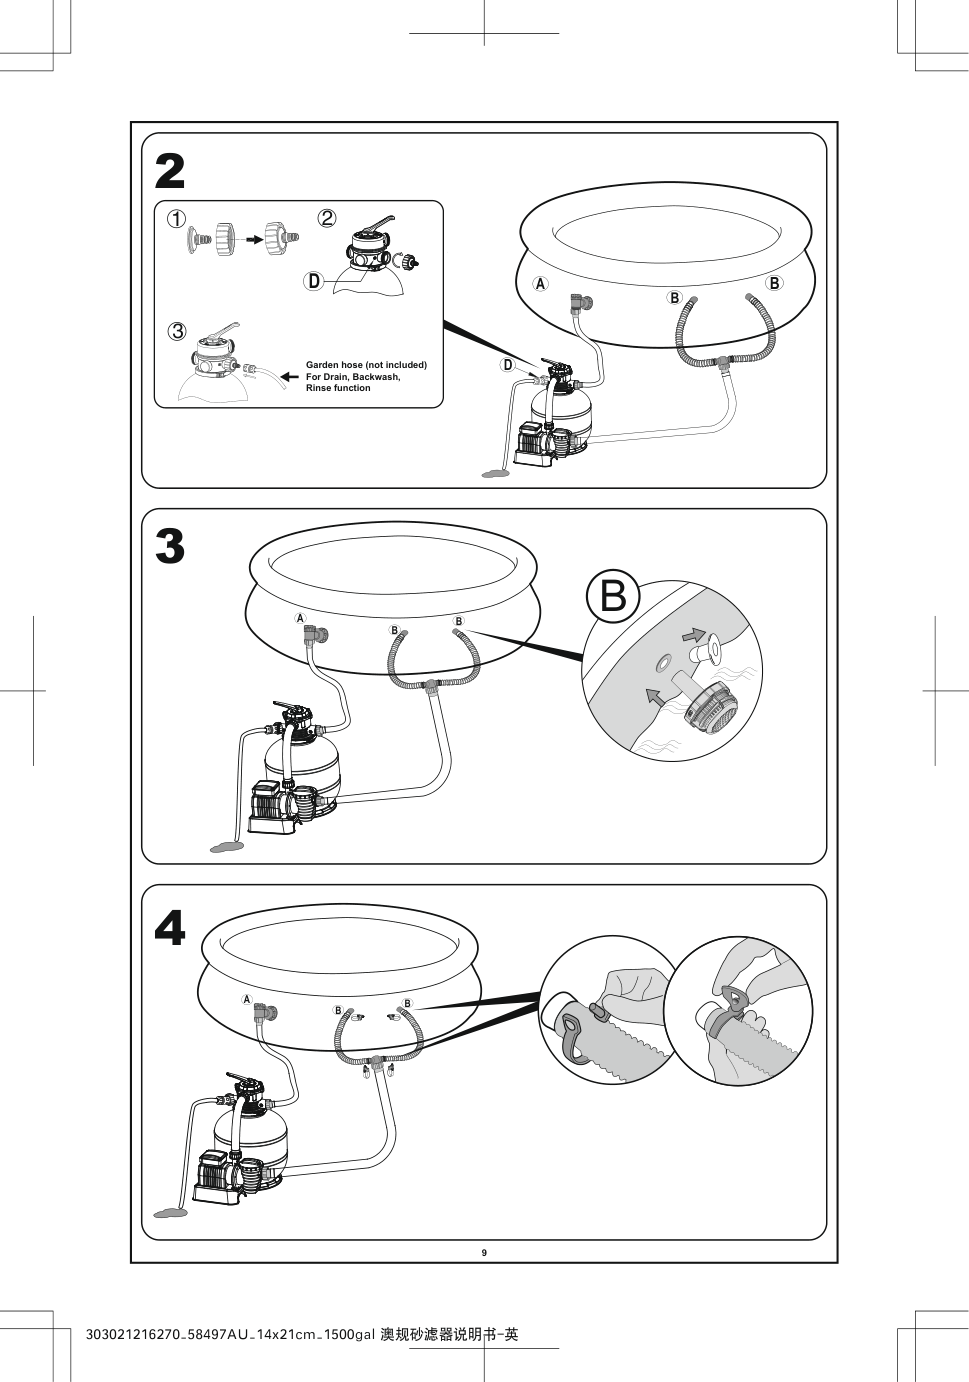
9 303021216270_58497AU_14x21cm_1500gal 澳规砂滤器说明书-英 2 3 4
D
A
B
B
2 3 1D
Garden hose (not included) For Drain, Backwash, Rinse functionA
B
B
A
B
B
B
10 303021216270_58497AU_14x21cm_1500gal 澳规砂滤器说明书-英
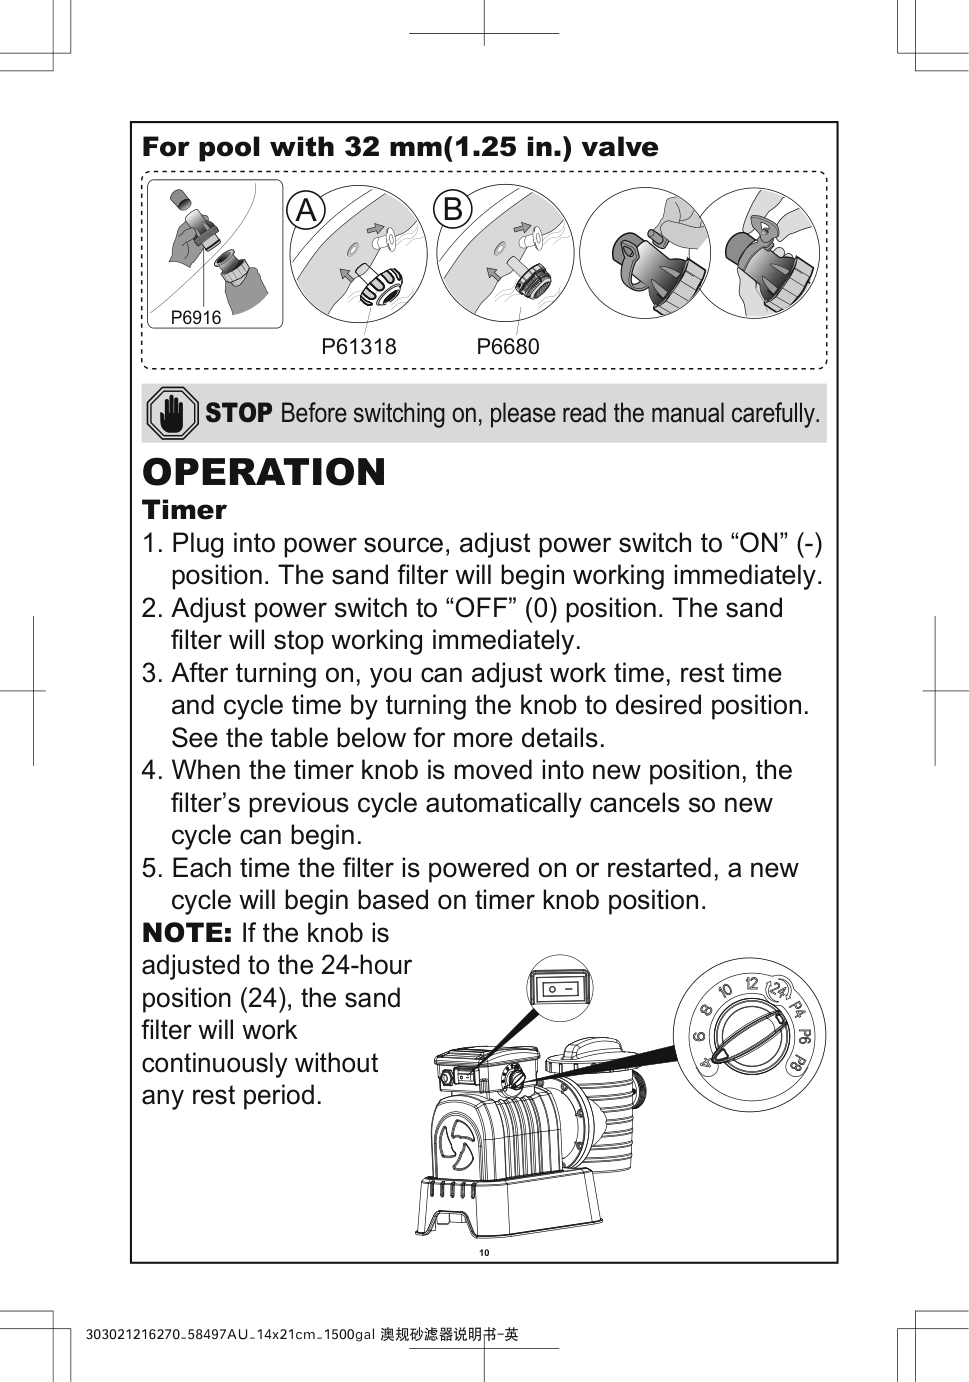
Operation
TimerP61318
A
P6916
P6680
B
STOP Before switching on, please read the manual carefully.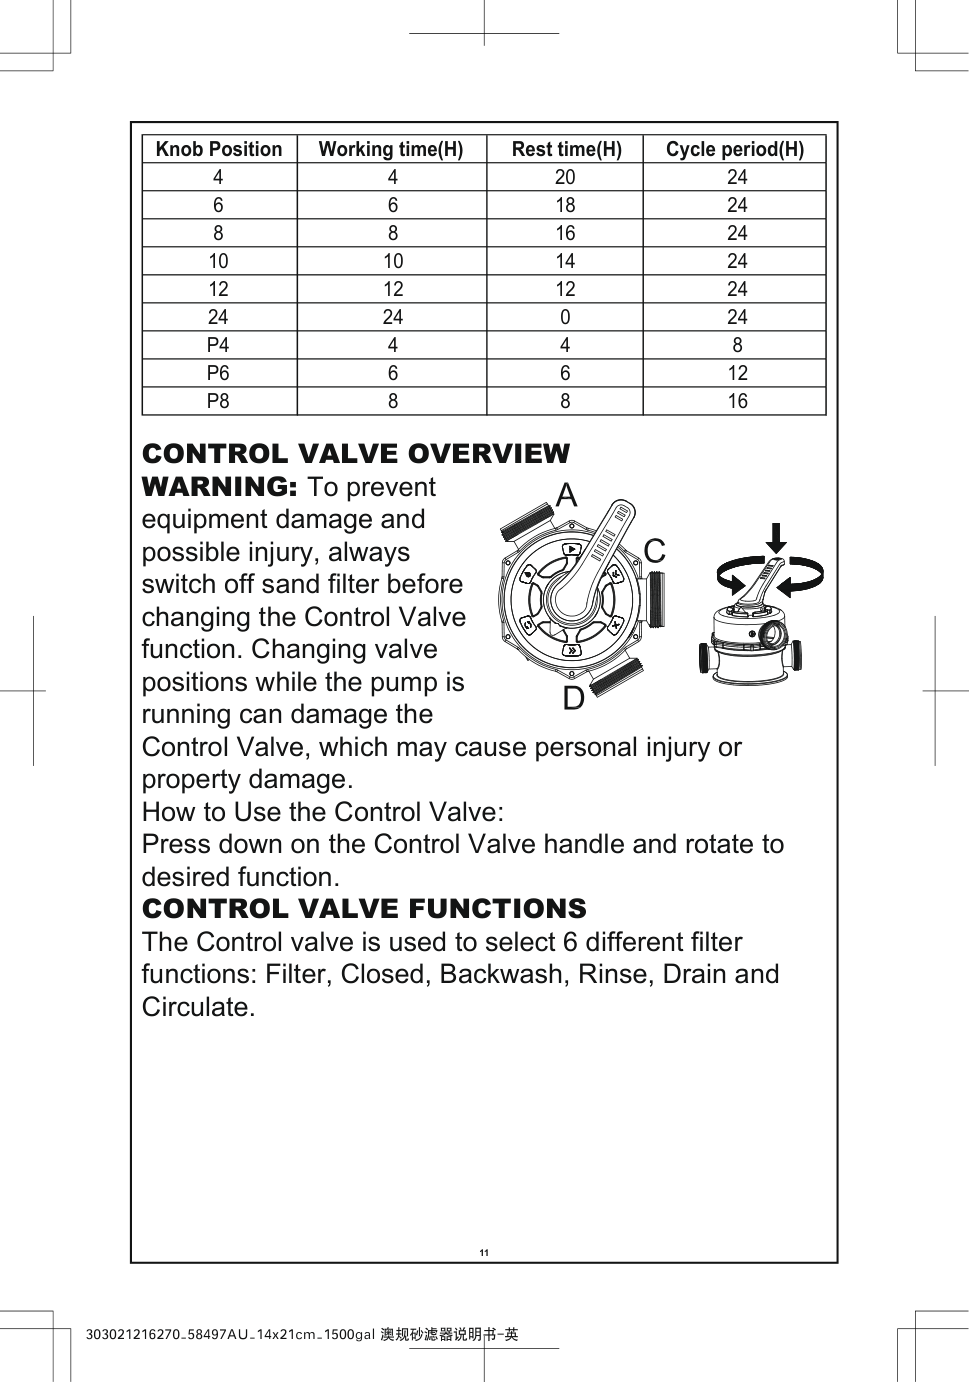
11 303021216270_58497AU_14x21cm_1500gal 澳规砂滤器说明书-英
Control Valve Overview
WARNING: To prevent equipment damage and possible injury, always switch off sand filter before changing the Control Valve function. Changing valve positions while the pump is running can damage the Control Valve, which may cause personal injury or property damage. How to Use the Control Valve: Press down on the Control Valve handle and rotate to desired function.Control Valve Functions
The Control valve is used to select 6 different filter functions: Filter, Closed, Backwash, Rinse, Drain and Circulate. Knob Position Working time(H) Rest time(H) Cycle period(H) 4 4 20 24 6 6 18 24 8 8 16 24 10 10 14 24 12 12 12 24 24 24 0 24P4
4 4 8P6
6 6 12P8
8 8 16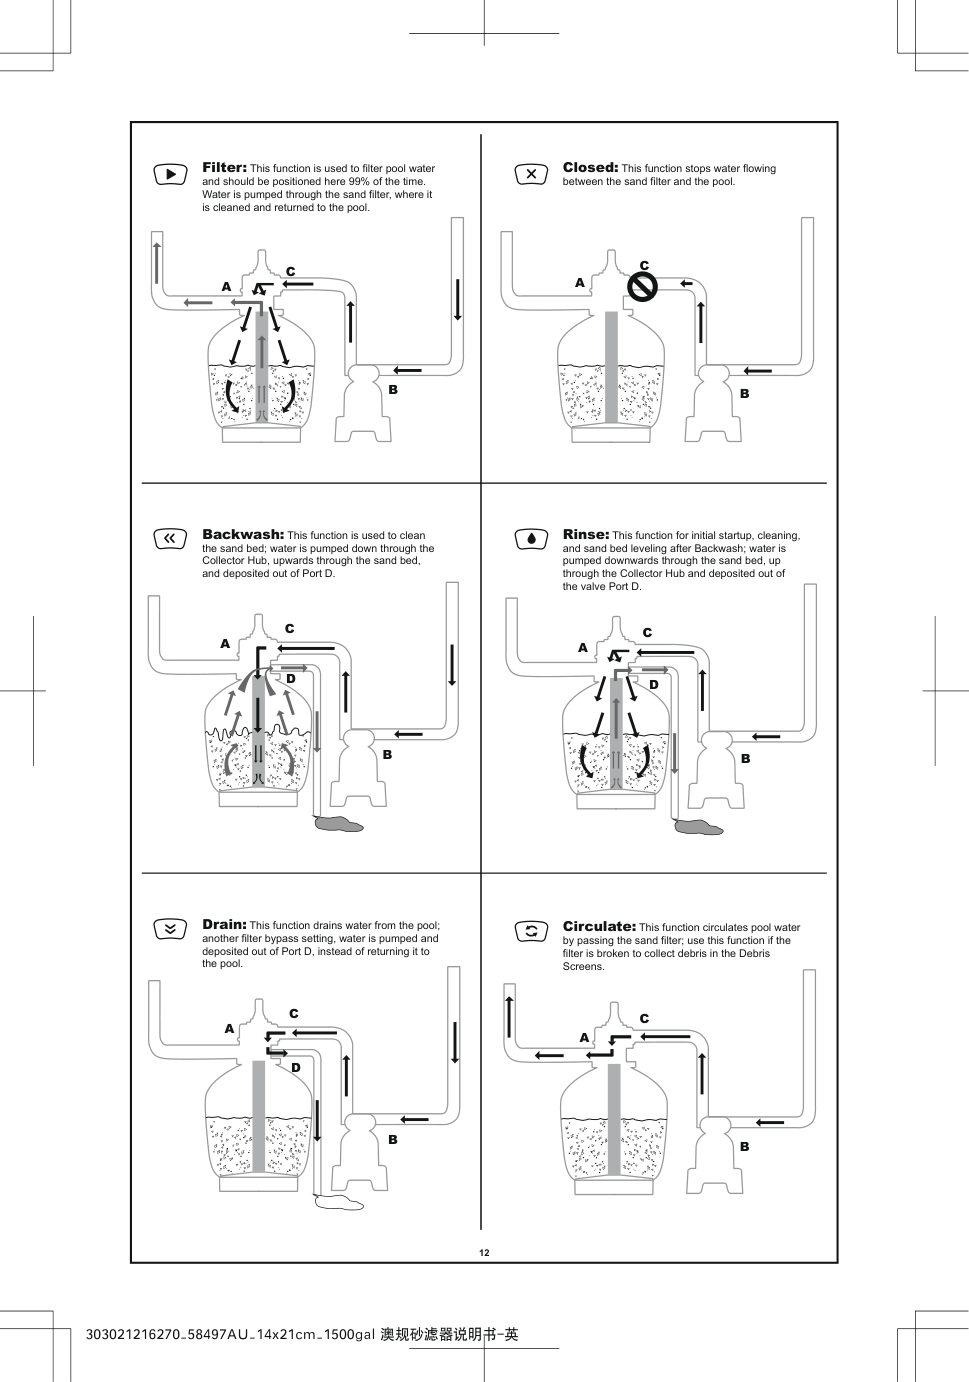
12 303021216270_58497AU_14x21cm_1500gal 澳规砂滤器说明书-英 Filter: This function is used to filter pool water and should be positioned here 99% of the time. Water is pumped through the sand filter, where it is cleaned and returned to the pool.
B
C
A
C
B
A
Closed: This function stops water flowing between the sand filter and the pool.C
B
A
D
Backwash: This function is used to clean the sand bed; water is pumped down through the Collector Hub, upwards through the sand bed, and deposited out of Port D.C
B
D
A
Rinse: This function for initial startup, cleaning, and sand bed leveling after Backwash; water is pumped downwards through the sand bed, up through the Collector Hub and deposited out of the valve Port D.C
B
D
A
Drain: This function drains water from the pool; another filter bypass setting, water is pumped and deposited out of Port D, instead of returning it to the pool.C
B
A
Circulate: This function circulates pool water by passing the sand filter; use this function if the filter is broken to collect debris in the Debris Screens.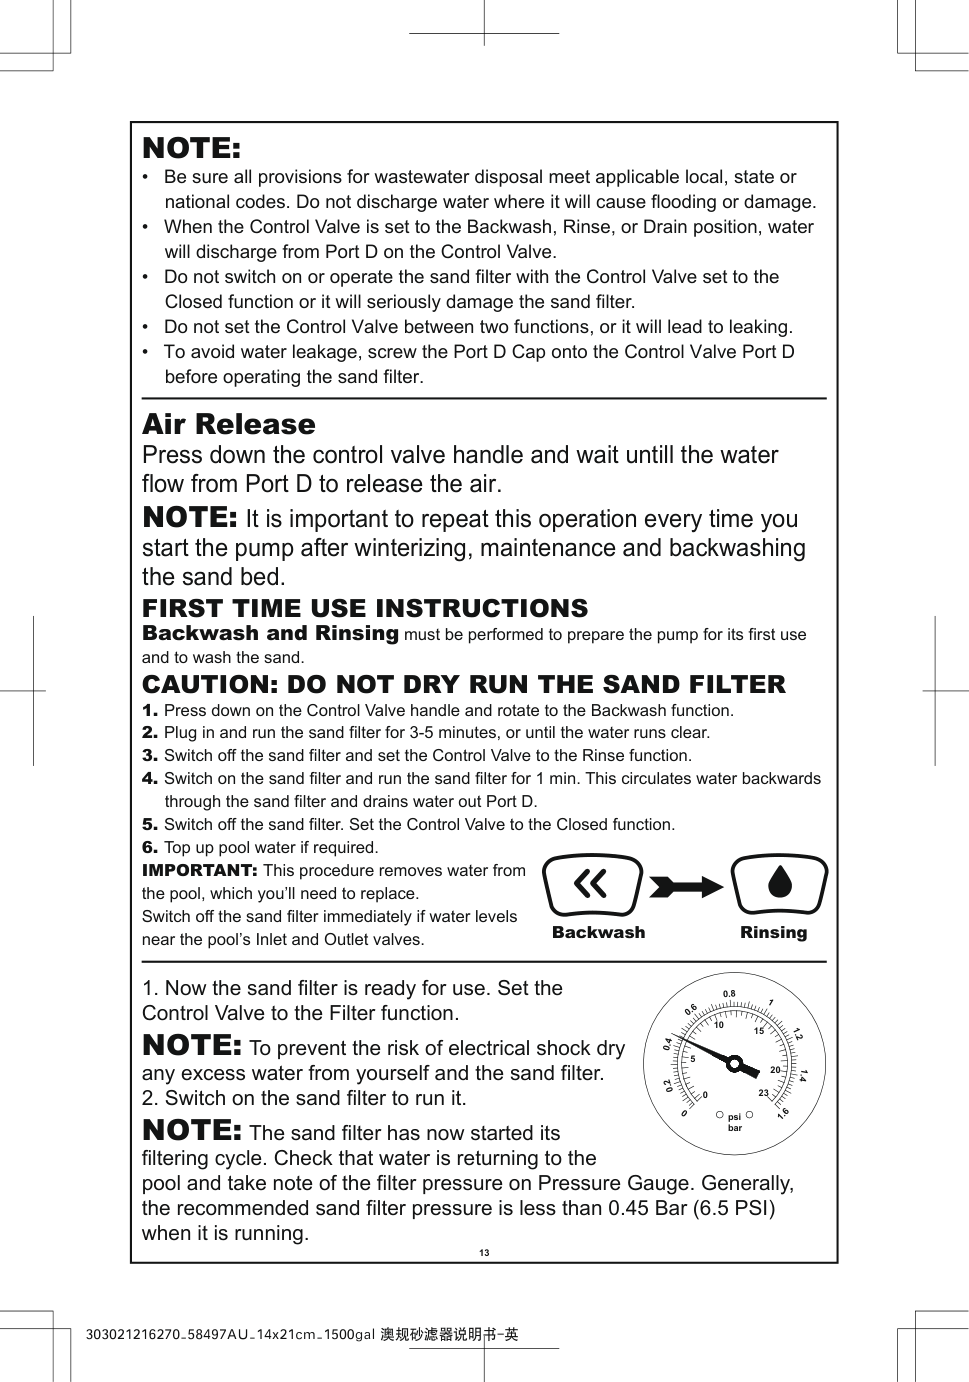
13 303021216270_58497AU_14x21cm_1500gal 澳规砂滤器说明书-英
First Time Use Instructions
Backwash and Rinsing must be performed to prepare the pump for its first use and to wash the sand.Caution: Do Not Dry Run The Sand Filter
Note:
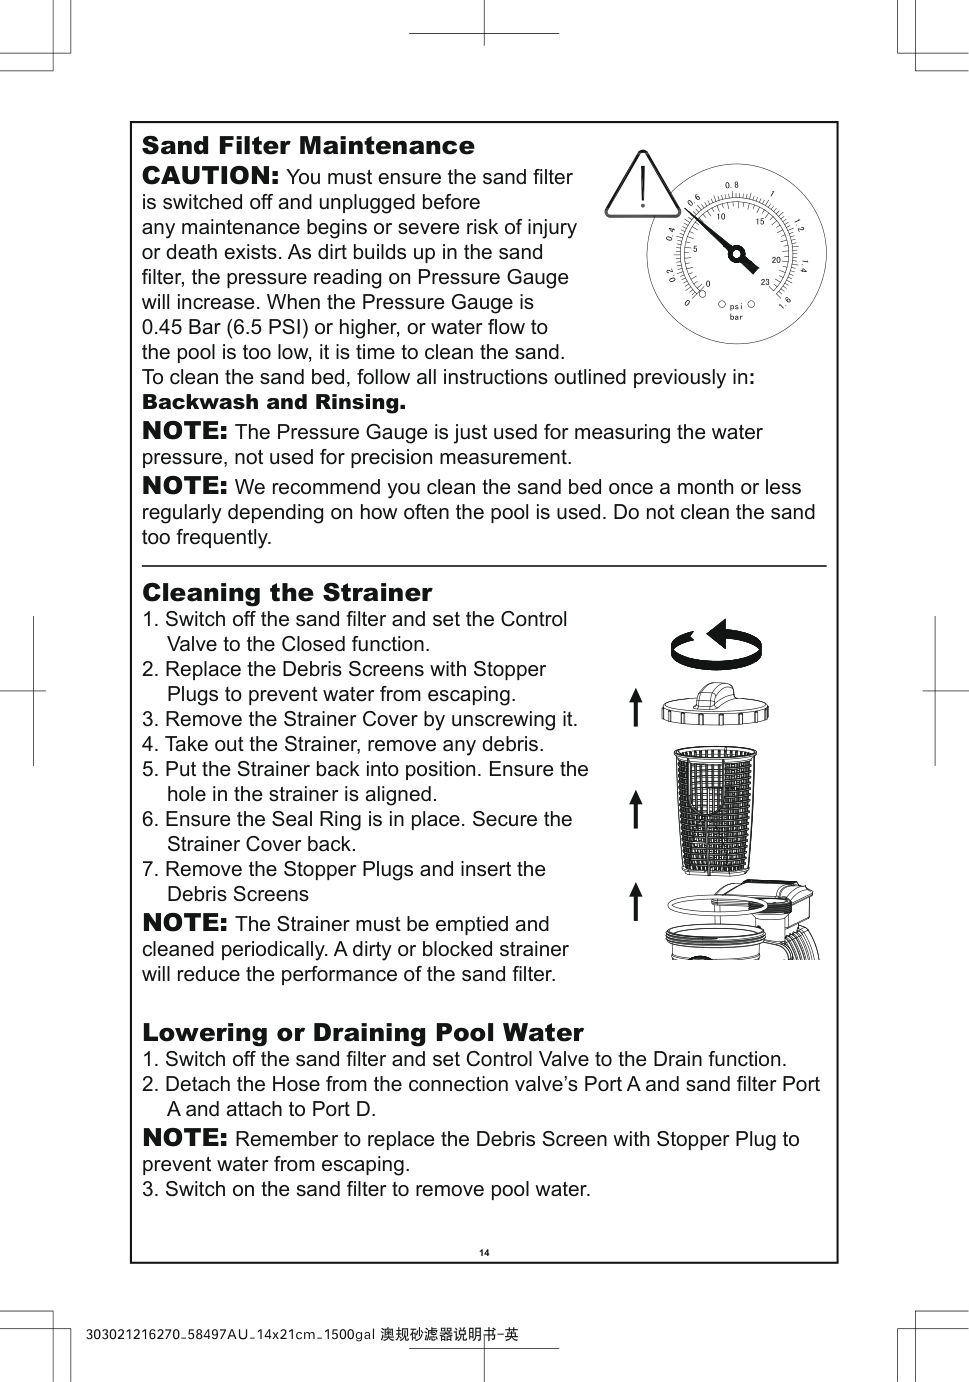
14 303021216270_58497AU_14x21cm_1500gal 澳规砂滤器说明书-英 Sand Filter Maintenance CAUTION: You must ensure the sand filter is switched off and unplugged before any maintenance begins or severe risk of injury or death exists. As dirt builds up in the sand filter, the pressure reading on Pressure Gauge will increase. When the Pressure Gauge is 0.45 Bar (6.5 PSI) or higher, or water flow to the pool is too low, it is time to clean the sand. To clean the sand bed, follow all instructions outlined previously in: Backwash and Rinsing. NOTE: The Pressure Gauge is just used for measuring the water pressure, not used for precision measurement. NOTE: We recommend you clean the sand bed once a month or less regularly depending on how often the pool is used. Do not clean the sand too frequently. Cleaning the Strainer
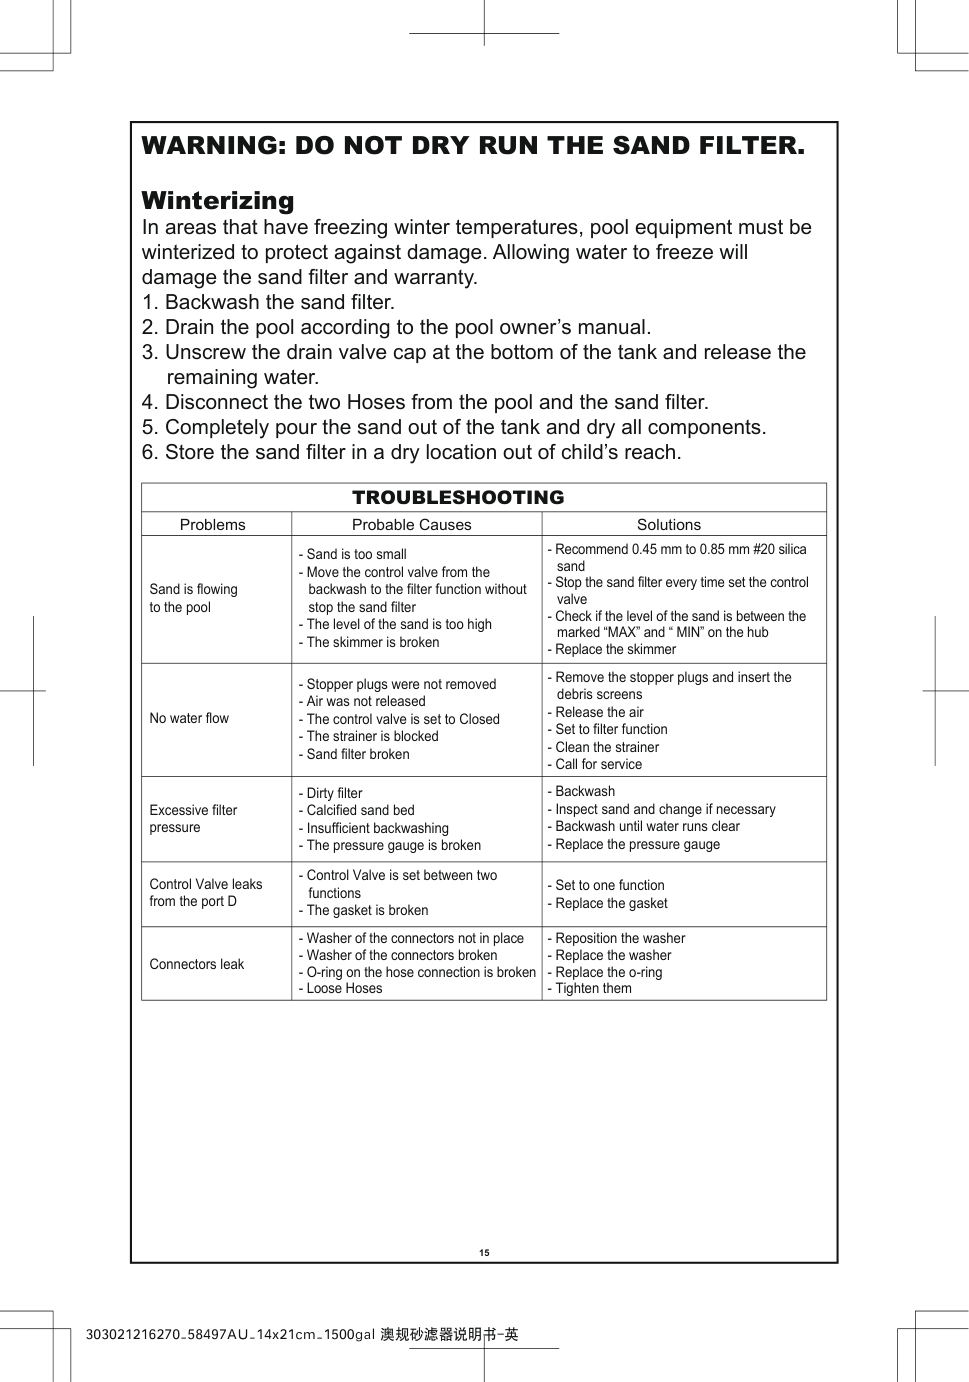
15 303021216270_58497AU_14x21cm_1500gal 澳规砂滤器说明书-英 Problems Probable Causes Solutions Sand is flowing to the pool No water flow Excessive filter pressure Control Valve leaks from the port D Connectors leak
Troubleshooting
Warning: Do Not Dry Run The Sand Filter.
Winterizing In areas that have freezing winter temperatures, pool equipment must be winterized to protect against damage. Allowing water to freeze will damage the sand filter and warranty.
303021216270_58497AU_14x21cm_1500gal 澳规砂滤器说明书-英 For support please visit us at: bestwaycorp.com/support ©2019 Bestway Inflatables & Material Corp. All rights reserved/Tous droits réservés/Todos los derechos reservados/Alle Rechte vorbehalten/Tutti i diritti riservati ®™ Trademarks used in some countries under license to/ Marques ®™ utilisées dans certains pays sous la licence de/ Marcas comerciales ®™ utilizadas en algunos países bajo la licencia de/ ®™ Die Warenzeichen werden in einigen Ländern verwendet unter Lizenz der/ ®™ Marchi utilizzati in alcuni paesi concessi in licenza a Bestway Inflatables & Material Corp., No.3065 Cao An Road, Shanghai, 201812, China. Manufactured,distributed and represented in the European Union by/ Fabriqués, distribués et représentés dans l’Union Européenne par/Fabricado, distribuido y representado en la Unión Europea por/ Hergestellt, vertrieben und in der Europäischen Union vertreten von/Prodotto, distribuito e rappresentato nell'Unione Europea da Bestway (Europe) S.r.l., Via Resistenza, 5, 20098 San Giuliano Milanese (Milano), Italy Distributed in North America by/Distribués en Amérique du Nord par/Distribuido en Norteamérica por Bestway (USA) Inc., 3411 E. Harbour Drive, Phoenix, Arizona 85034, United States of America Tel: +86 21 69135588 (For U.S. and Canada) Distributed in Latin America by/Distribué en Amérique latine par/Distribuido en Latinoamérica por/Distribuído na América Latina por Bestway Central & South America Ltda, Salar Ascotan 1282, Parque Enea, Pudahuel, Santiago, Chile Distributed in Australia & New Zealand by Bestway Australia Pty Ltd, 98-104 Carnarvon Street, Silverwater, NSW 2128, Australia Tel: Australia: (+61) 29 0371 388; New Zealand: 0800 142 101 Exported by/Exporté par/Exportado por/Exportiert von/Esportato da Bestway (Hong Kong) International Ltd./Bestway Enterprise Company Limited Suite 713, 7/Floor, East Wing, Tsim Sha Tsui Centre, 66 Mody Road, Kowloon, Hong Kong www.bestwaycorp.com Made in China/Fabriqué en Chine/Fabricado en China/Hergestellt in China/Prodotto in Cina